If you are using Zabbix to monitor your infrastructure you might want to receive email alerts from your local domain somewhere on a public internet domain, even if you don’t own a valid registered internet domain name with a mail server which you can configure on your own.
This tutorial will briefly discuss how to set up a Zabbix server to send mail reports to a Gmail address by using the SSMTP program, without the need to install and configure any local MTA daemon, such as Postfix, Exim, etc.
Requirements
Step 1: Install and Configure SSMTP
1. SSMTP is a small software, which does not fulfill any of the functionality of a mail server, but only delivers emails from a local machine to an external email address on a mailhub.
To install the SSMTP program alongside with mailutils package that you will use to send mails, issue the following command on your RedHat-based distros and Debian like server:
# yum install msmtp mailx               [On RHEL/CentOS]
$ sudo apt-get install ssmtp mailutils       [On Debian/Ubuntu]
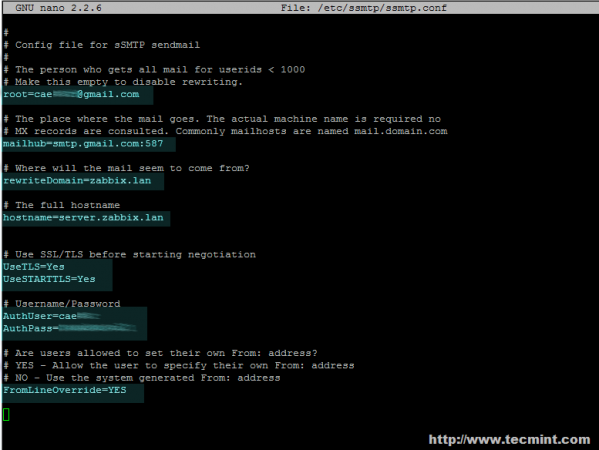
2. After the packages are installed on the system, configure the SSMTP program to send local emails to your Gmail account by opening the main configuration file for editing with your favorite text editor and root privileges and use the following parameter settings:
# vi /etc/msmtprc                       [On RHEL/CentOS]
$ sudo nano /etc/ssmtp/ssmtp.conf            [On Debian/Ubuntu]
MSMTP settings for GMAIL account.
#set default values for all following accounts.
defaults
auth           on
tls            on
tls_trust_file    /etc/pki/tls/certs/ca-bundle.crt
logfile        ~/.msmtp.log
# Gmail
account        gmail
host           smtp.gmail.com
port           587
from           [email protected]
user           [email protected]
password       gmailpassword

# Set a default account
account default : gmail
SSMTP settings for GMAIL account.
[email protected]
mailhub=smtp.gmail.com:587
rewriteDomain=your_local_domain
hostname=your_local_FQDN
UseTLS=Yes
UseSTARTTLS=Yes
AuthUser=Gmail_username
AuthPass=Gmail_password
FromLineOverride=YES
Step 2: Gmail Tests for Zabbix Email Alerts
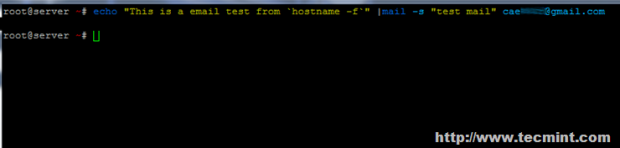
3. On the next step it’s time to send a locally generated email to a Gmail account by issuing the below command.
# echo "Body test email from 'hostname -f' "| mail -s "subject here" [email protected]
4. Normally, Gmail prevents different types of authentications to their servers from your account, so, in case you get the error “mail: cannot send a message: Process exited with non-zero status”, then login to your Gmail account from the browser and navigate to the following link https://www.google.com/settings/security/lesssecureapps in order to allow access for less secure apps as in the following screen.

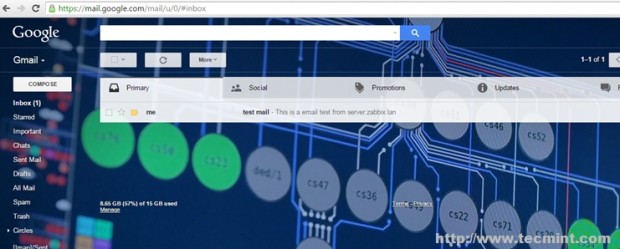
5. After you have turned on the Less Secure Apps feature on your Gmail account, run the above mail command again and verify your Inbox after a few seconds to check if the locally generated email has been successfully delivered – you should normally see the email has incoming from Gmail.
Step 3: Configure Zabbix Sendmail Script
6. Further, based on the $(which mail) command creates the following Bash script to Zabbix alertscripts directory with the following content and gives it execute permissions:
# vi /usr/local/share/zabbix/alertscripts/zabbix-sendmail            [On RHEL/CentOS]
$ sudo nano /usr/local/share/zabbix/alertscripts/zabbix-sendmail     [On Debian/Ubuntu]
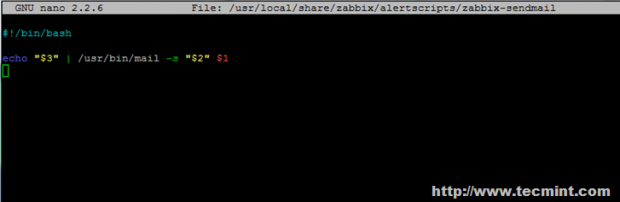
Script content:
#!/bin/bash
echo "$3" | /usr/bin/mail -s "$2" $1
Next, set the execute permission on the script file.
# chmod +x /usr/local/share/zabbix/alertscripts/zabbix-sendmail
7. Next, as previously, test the script functionality by sending a local email to a Gmail account. The way to run the script with positional parameters is explained above:
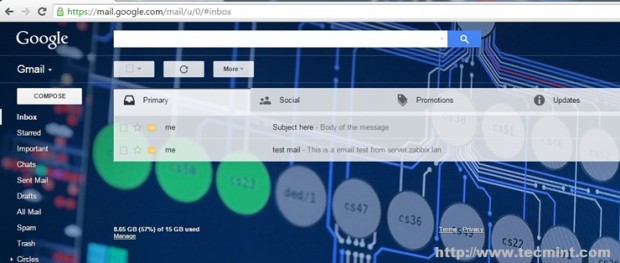
# /usr/local/share/zabbix/alertscripts/zabbix-sendmail [email protected] "Subject here" "Body of the message here"

Afterward, verify Gmail Inbox and check if the new local message has arrived.
Step 4: Configure Zabbix to Send Alerts to Gmail
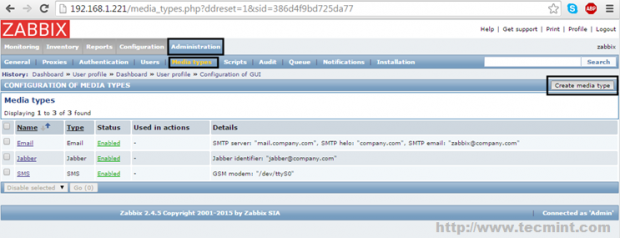
8. If the tests so far we’re successful, then you can move to the next step and set up Zabbix to send generated email alerts to Gmail. First, log in to the Zabbix web interface and navigate to the following menu: Administration -> Media types -> Create media type.
9. On the next screen enter an arbitrary Name to uniquely identify the script in the Zabbix configurations (in this example Send-Email-Script is used), choose Script as Type from the list and enter the name of the Bash script created earlier (zabbix-sendmail used in this tutorial) to send email from the command line (don’t use the path for the script, only the script name). When you’re done, hit the Add button below to reflect changes.

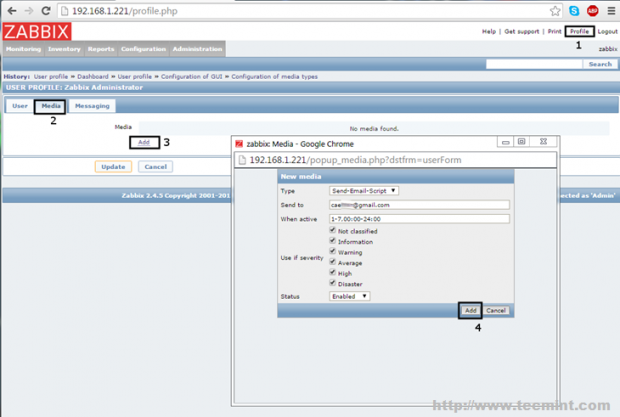
10. Further, let’s configure an email address to which you will send Zabbix alerts. Go to Profile -> Media -> Add and a new pop-up window should appear.
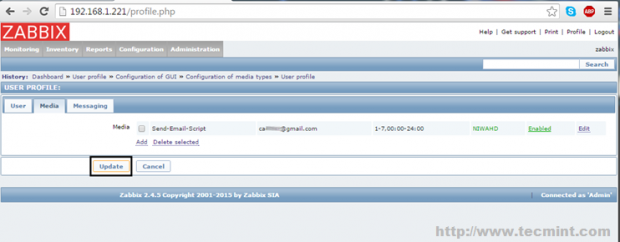
Here, select the name of the script that you have earlier named (in this example Send-Email-Script is used) for Type, enter the Gmail address to which you will send emails, choose the time period (week, hours) when email reports should be active for sending, choose the severity of the messages that you want to receive on your Gmail address, select Enabled as Status and hit the Add button to add the media. Finally hit the Update button to apply the configuration.
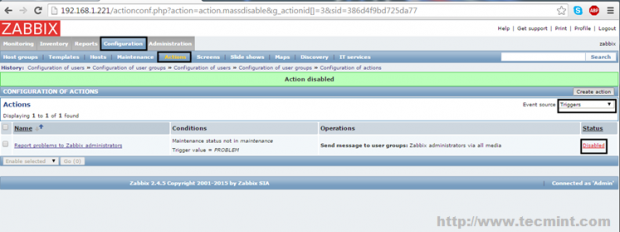
11. On the next step, enable the default Zabbix alerts by navigating to Configuration -> Actions, select as the Event Source – > Triggers from the right menu, and hit on Disabled Status in order to enable it. Repeat the step for Event Source – > Internal or other custom-created Actions and you’re done.

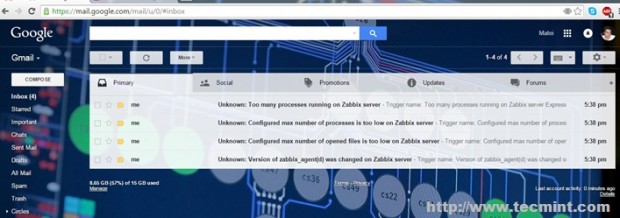
Wait for a while for Zabbix to start to gather information and generate some reports, then verify your Gmail Inbox and you should see some Zabbix alerts submitted so far.
That’s all! Although this guide was mainly focused on sending Zabbix alerts to a Gmail account using Gmail SMTP server as a mailhub, using the same configuration you can, also, push Zabbix email alerts further to other valid internet email accounts by relying on Gmail to route your emails through SMTP servers.