Step 2: Prepare ISCSI Storage for RHEV Environment
Lets switch to storage node to configure ISCSI storage.
6. First you need to install some needed packages to configure ISCSI target.
[root@storage ~]# yum install scsi-target-utils
7. For this tutorial we use sdb as our backing device, so we should add the below section to the configuration file targets.conf.
[root@storage ~]# vim /etc/tgt/targets.conf
Add the following lines to this file, save and close it.
<target iqn.2015-07.org.mydomain:server.target1>
    backing-store /dev/sdb
</target>
Important: Make sure that sdb is a raw device.
8. Start tgtd service and make up with system booting.
[root@storage ~]# service tgtd start
[root@storage ~]# chkconfig tgtd on
Important: Make sure that ports 860 and 3260 are opened in firewall or flush it (Not recommended).
Fore more details about ISCSI configuration and deployment, check tecmint’s iscsi series.
Step 3: Add ISCSI storage Node to RHEV Environment
The Red Hat Enterprise Virtualization platform enables you to assign and manage storage using the Administration Portal’s Storage tab. The Storage results list displays all the storage domains, and the details pane shows general information about the domain.
9. Select Data-Center1 from Left tree, then select storage tab as shown.

10. Click on New Domain to add new storage domain for our data-center1 then fill the wizard as shown.
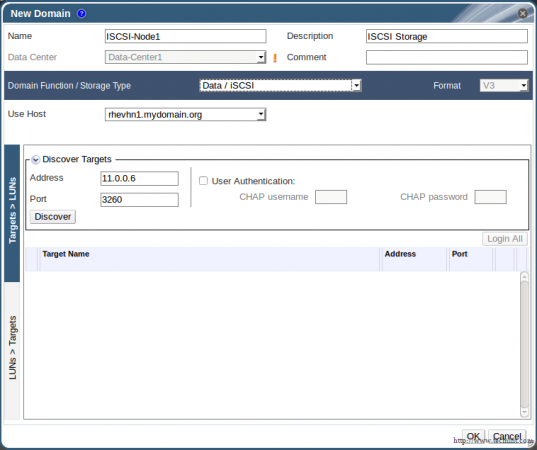
Important: Make sure you select Storage Type “iSCSI” in the type list.
11. Then click Discover, here you will find the target name of our storage node. Click the arrow button to go on.

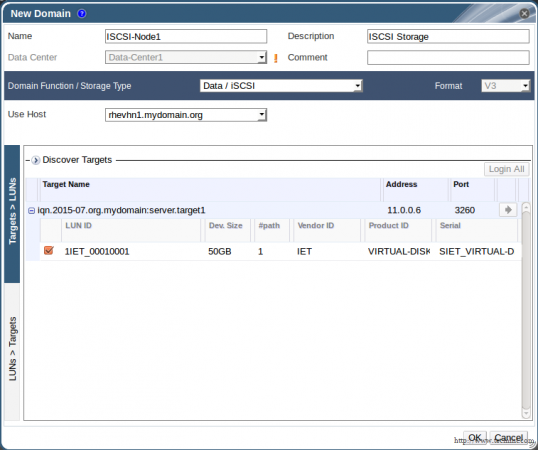
12. You will find our storage is discovered. Check it then Click OK as shown, then wait a while and check our new storage domain under Storage tab.
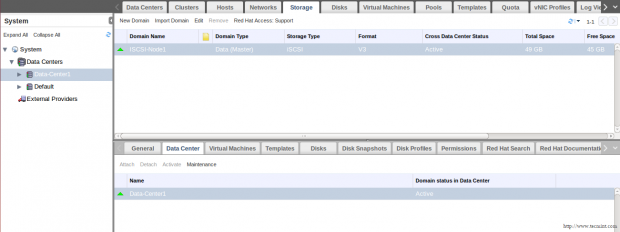
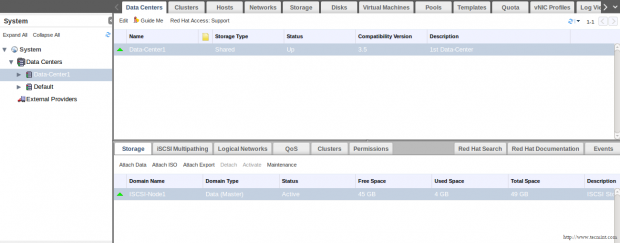
13. Review and check size, Status and attaching Data Center.
Conclusion
Now, our RHEV environment has active Data Center with one cluster which contains two active and ready nodes with active ISCSI shared storage. So, we are ready to deploy server and desktop virtual machines with visualization features such as HA, Snapshots , Pools, etc. that will be discussed in next articles…
References: RHEV Storage Administration Guide
Don’t Miss:
- Install RedHat Enterprise Virtualization (RHEV) 3.5 – Part 1
- Deploy RedHat Enterprise Virtualization Hypervisor (RHEV-H) – Part 2


No info on basic configuration of storage node.
Am I missing somewhere?
Hello!
I right understand – RHEV is a proprietary system of red hat, and need buy it ?
@Nick,
You absolutely correct, you need to buy the RedHat RHEV subscription in order use..