Apache Hadoop is an Open Source framework build for distributed Big Data storage and processing data across computer clusters. The project is based on the following components:
- Hadoop Common – it contains the Java libraries and utilities needed by other Hadoop modules.
- HDFS – Hadoop Distributed File System – A Java based scalable file system distributed across multiple nodes.
- MapReduce – YARN framework for parallel big data processing.
- Hadoop YARN: A framework for cluster resource management.

This article will guide you on how you can install Apache Hadoop on a single node cluster in CentOS 7 (also works for RHEL 7 and Fedora 23+ versions). This type of configuration is also referenced as Hadoop Pseudo-Distributed Mode.
Step 1: Install Java on CentOS 7
1. Before proceeding with Java installation, first login with root user or a user with root privileges setup your machine hostname with the following command.
# hostnamectl set-hostname master
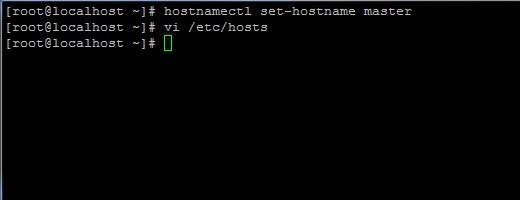
Also, add a new record in hosts file with your own machine FQDN to point to your system IP Address.
# vi /etc/hosts
Add the below line:
192.168.1.41 master.hadoop.lan
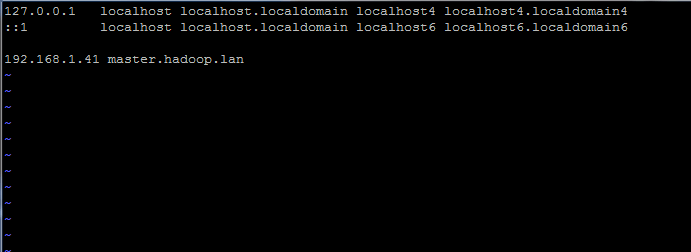
Replace the above hostname and FQDN records with your own settings.
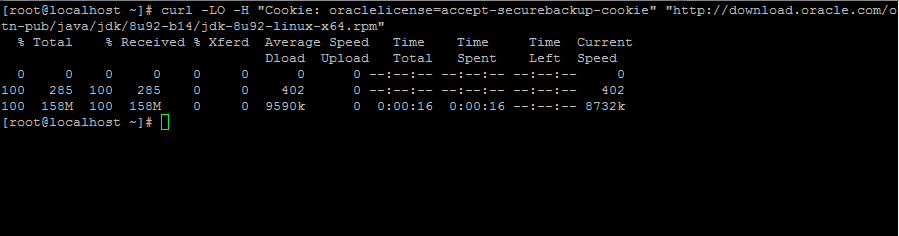
2. Next, go to Oracle Java download page and grab the latest version of Java SE Development Kit 8 on your system with the help of curl command:
# curl -LO -H "Cookie: oraclelicense=accept-securebackup-cookie" “http://download.oracle.com/otn-pub/java/jdk/8u92-b14/jdk-8u92-linux-x64.rpm”
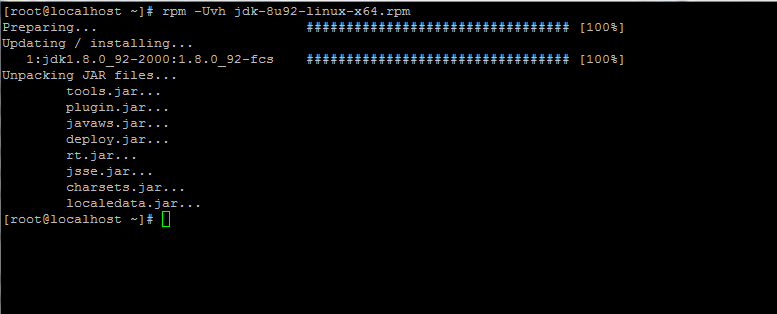
3. After the Java binary download finishes, install the package by issuing the below command:
# rpm -Uvh jdk-8u92-linux-x64.rpm
Step 2: Install Hadoop Framework in CentOS 7
4. Next, create a new user account on your system without root powers which we’ll use it for Hadoop installation path and working environment. The new account home directory will reside in /opt/hadoop directory.
# useradd -d /opt/hadoop hadoop
# passwd hadoop
5. On the next step visit Apache Hadoop page in order to get the link for the latest stable version and download the archive on your system.
# curl -O http://apache.javapipe.com/hadoop/common/hadoop-2.7.2/hadoop-2.7.2.tar.gz

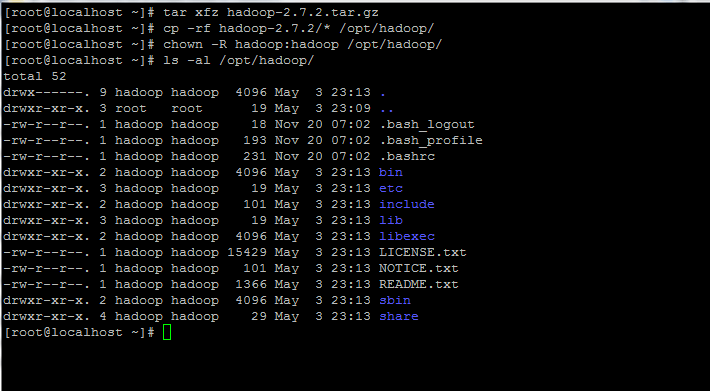
6. Extract the archive the copy the directory content to hadoop account home path. Also, make sure you change the copied files permissions accordingly.
#  tar xfz hadoop-2.7.2.tar.gz
# cp -rf hadoop-2.7.2/* /opt/hadoop/
# chown -R hadoop:hadoop /opt/hadoop/
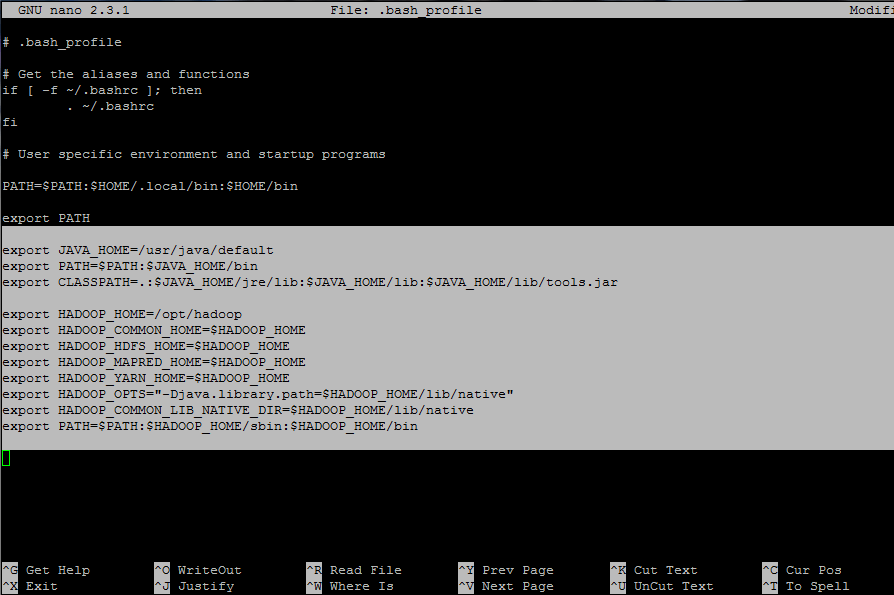
7. Next, login with hadoop user and configure Hadoop and Java Environment Variables on your system by editing the .bash_profile file.
# su - hadoop
$ vi .bash_profile
Append the following lines at the end of the file:
## JAVA env variables
export JAVA_HOME=/usr/java/default
export PATH=$PATH:$JAVA_HOME/bin
export CLASSPATH=.:$JAVA_HOME/jre/lib:$JAVA_HOME/lib:$JAVA_HOME/lib/tools.jar

## HADOOP env variables
export HADOOP_HOME=/opt/hadoop
export HADOOP_COMMON_HOME=$HADOOP_HOME
export HADOOP_HDFS_HOME=$HADOOP_HOME
export HADOOP_MAPRED_HOME=$HADOOP_HOME
export HADOOP_YARN_HOME=$HADOOP_HOME
export HADOOP_OPTS="-Djava.library.path=$HADOOP_HOME/lib/native"
export HADOOP_COMMON_LIB_NATIVE_DIR=$HADOOP_HOME/lib/native
export PATH=$PATH:$HADOOP_HOME/sbin:$HADOOP_HOME/bin
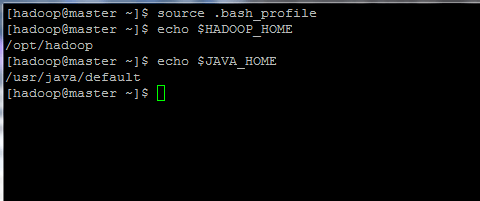
8. Now, initialize the environment variables and check their status by issuing the below commands:
$ source .bash_profile
$ echo $HADOOP_HOME
$ echo $JAVA_HOME
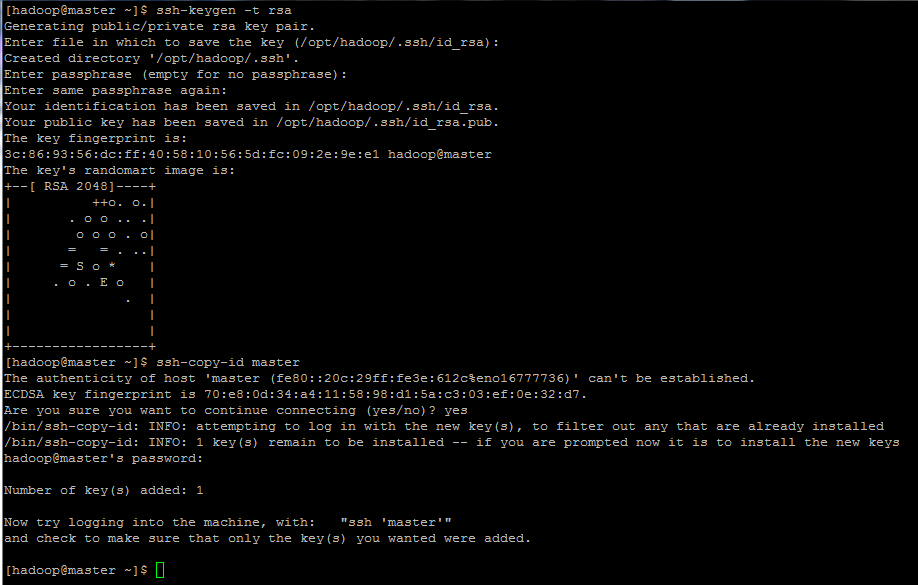
9. Finally, configure ssh key based authentication for hadoop account by running the below commands (replace the hostname or FQDN against the ssh-copy-id command accordingly).
Also, leave the passphrase filed blank in order to automatically login via ssh.
$ ssh-keygen -t rsa
$ ssh-copy-id master.hadoop.lan