Malware, or malicious software, is the designation given to any program that aims at disrupting the normal operation of a computing system. Although the most well-known forms of malware are viruses, spyware, and adware, the harm that they intend to cause may range from stealing private information to deleting personal data, and everything in between, while another classic use of malware is to control the system in order to use it to launch botnets in a (D)DoS attack.
In other words, you can’t afford to think, “I don’t need to secure my system(s) against malware since I’m not storing any sensitive or important data”, because those are not the only targets of malware.
For that reason, in this article, we will explain how to install and configure Linux Malware Detect (aka MalDet or LMD for short) along with ClamAV (Antivirus Engine) in RHEL 8/7/6 (where x is the version number), CentOS 8/7/6 and Fedora 30-32 (same instructions also works on Ubuntu and Debian systems).
A malware scanner released under the GPL v2 license, specially designed for hosting environments. However, you will quickly realize that you will benefit from MalDet no matter what kind of environment you’re working on.
Installing LMD on RHEL/CentOS and Fedora
LMD is not available from online repositories but is distributed as a tarball from the project’s web site. The tarball containing the source code of the latest version is always available at the following link, where it can be downloaded with wget command:
# wget http://www.rfxn.com/downloads/maldetect-current.tar.gz
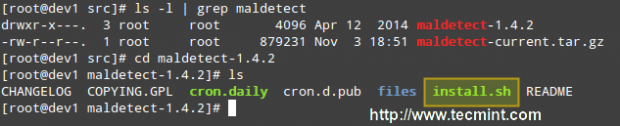
Then we need to unpack the tarball and enter the directory where its contents were extracted. Since the current version is 1.6.4, the directory is maldetect-1.6.4. There we will find the installation script, install.sh.
# tar -xvf maldetect-current.tar.gz
# ls -l | grep maldetect
# cd maldetect-1.6.4/
# ls
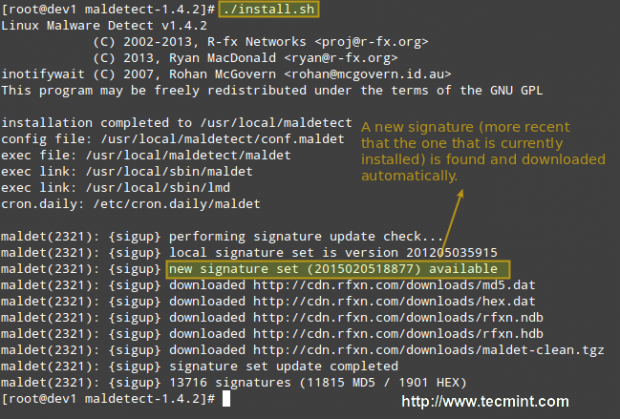
If we inspect the installation script, which is only 75 lines long (including comments), we will see that it not only installs the tool but also performs a pre-check to see if the default installation directory (/usr/local/maldetect) exists. If not, the script creates the installation directory before proceeding.
Finally, after the installation is completed, a daily execution via cron is scheduled by placing the cron.daily script (refer to the image above) in /etc/cron.daily. This helper script will, among other things, clear old temporary data, check for new LMD releases, and scan the default Apache and web control panels (i.e., CPanel, DirectAdmin, to name a few) default data directories.
That being said, run the installation script as usual:
# ./install.sh
Configuring Linux Malware Detect
The configuration of LMD is handled through /usr/local/maldetect/conf.maldet and all options are well commented to make configuration a rather easy task. In case you get stuck, you can also refer to /maldetect-1.6.4/README for further instructions.
In the configuration file you will find the following sections, enclosed inside square brackets:
- EMAIL ALERTS
- QUARANTINE OPTIONS
- SCAN OPTIONS
- STATISTICAL ANALYSIS
- MONITORING OPTIONS
Each of these sections contains several variables that indicate how LMD will behave and what features are available.
- Set email_alert=1 if you want to receive email notifications of malware inspection results. For the sake of brevity, we will only relay mail to local system users, but you can explore other options such as sending mail alerts to the outside as well.
- Set email_subj=”Your subject here” and email_addr=username@localhost if you have previously set email_alert=1.
- With quar_hits, the default quarantine action for malware hits (0 = alert only, 1 = move to quarantine & alert) you will tell LMD what to do when malware is detected.
- quar_clean will let you decide whether you want to clean string-based malware injections. Keep in mind that a string signature is, by definition, “a contiguous byte sequence that potentially can match many variants of a malware family”.
- quar_susp, the default suspend action for users with hits, will allow you to disable an account whose owned files have been identified as hits.
- clamav_scan=1 will tell LMD to attempt to detect the presence of ClamAV binary and use as default scanner engine. This yields an up to four times faster scan performance and superior hex analysis. This option only uses ClamAV as the scanner engine, and LMD signatures are still the basis for detecting threats.
Summing up, the lines with these variables should look as follows in /usr/local/maldetect/conf.maldet:
email_alert=1
email_addr=gacanepa@localhost
email_subj="Malware alerts for $HOSTNAME - $(date +%Y-%m-%d)"
quar_hits=1
quar_clean=1
quar_susp=1
clam_av=1
Installing ClamAV on RHEL/CentOS and Fedora
To install ClamAV in order to take advantage of the clamav_scan setting, follow these steps:
Enable EPEL repository.
# yum install epel-release
Then do:
# yum update && yum install clamd
# apt update && apt-get install clamav clamav-daemon  [Ubuntu/Debian]
Note: That these are only the basic instructions to install ClamAV in order to integrate it with LMD. We will not go into detail as far as ClamAV settings are concerned since as we said earlier, LMD signatures are still the basis for detecting and cleaning threats.
Testing Linux Malware Detect
Now it’s time to test our recent LMD / ClamAV installation. Instead of using real malware, we will use the EICAR test files, which are available for download from the EICAR web site.
# cd /var/www/html
# wget http://www.eicar.org/download/eicar.com
# wget http://www.eicar.org/download/eicar.com.txt
# wget http://www.eicar.org/download/eicar_com.zip
# wget http://www.eicar.org/download/eicarcom2.zip
At this point, you can either wait for the next cron job to run or execute maldet manually yourself. We’ll go with the second option:
# maldet --scan-all /var/www/
LMD also accepts wildcards, so if you want to scan only a certain type of file, (i.e. zip files, for example), you can do so:
# maldet --scan-all /var/www/*.zip
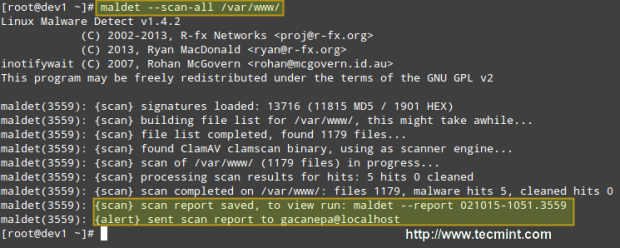
When the scanning is complete, you can either check the email that was sent by LMD or view the report with:
# maldet --report 021015-1051.3559

Where 021015-1051.3559 is the SCANID (the SCANID will be slightly different in your case).
Important: Please note that LMD found 5 hits since the eicar.com file was downloaded twice (thus resulting in eicar.com and eicar.com.1).
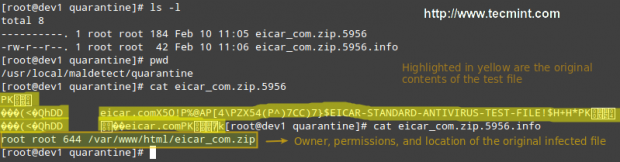
If you check the quarantine folder (I just left one of the files and deleted the rest), we will see the following:
# ls -l
You can then remove all quarantined files with:
# rm -rf /usr/local/maldetect/quarantine/*
In case that,
# maldet --clean SCANID
Doesn’t get the job done for some reason. You may refer to the following screencast for a step-by-step explanation of the above process:
Final Considerations
Since maldet needs to be integrated with cron, you need to set the following variables in root’s crontab (type crontab -e as root and hit the Enter key) in case that you notice that LMD is not running correctly on a daily basis:
PATH=/sbin:/bin:/usr/sbin:/usr/bin
MAILTO=root
HOME=/
SHELL=/bin/bash
This will help provide the necessary debugging information.
Conclusion
In this article, we have discussed how to install and configure Linux Malware Detect, along with ClamAV, a powerful ally. With the help of these 2 tools, detecting malware should be a rather easy task.
However, do yourself a favor and become familiar with the README file as explained earlier, and you’ll be able to rest assured that your system is being well accounted for and well managed.
Do not hesitate to leave your comments or questions, if any, using the form below.