The long awaited moment of Linux Mint 17 ‘Qiana‘ Cinnamon and Mate final releases has come, Linux Mint developers proudly announced on Saturday, May 31st, 2014 on their official Linux Mint webpage the newly Linux Mint releases with long term support until 2019.
Clement Lefebvre: “It comes with updated software and brings refinements and many new features to make your desktop even more comfortable to use. The Update manager has been hugely improved. It shows more information, it looks better, it feels faster, and it gets less in your way. It no longer needs to reload itself in root mode when you click on it. It no longer checks for an Internet connection or waits for the network manager and it no longer locks the APT cache at session startup. The UI has been improved, the icons were modified a bit and the changelog retrieval is now much faster and more reliable.”
Linux Mint 17 Features
Some of this release features are:
- A improved new Update Manager version.
- Without internet connection ‘Driver Manager’ can install drivers.
- MDM 1.6 Login Screen now support HiDPI and recovery mode.
- A new Language Settings tool.
- An enhanced Software Sources configuration utility.
- A light redesigned Welcome Screen.
- Better settings for Cinnamon 2.2.
- Improved MATE 1.8.
- Few system improvements.
- A nice collection of backgrounds.
- Linux Kernel 3.13.
- EFI and Bluetooth support.
- PAE Kernel for x32bit versions.
- Booting with non-PAE CPUs
- Solving freezes with some NVIDIA GeForce GPUs
- No support for Nvidia Optimus graphics chipsets yet (minimal support is provided by nvidia-prime package).
For more information and download mirrors please visit official Linux Mint webpage.
- Linux Mint 17 Qiana Mate: http://blog.linuxmint.com/?p=2627
- Linux Mint 17 Qiana Cinnamon: http://blog.linuxmint.com/?p=2626
This tutorial will focus on performing a single-boot fresh installation of Linux Mint 17 Qiana Mate on GPT disks (only for 64-bit OS versions) but the settings can be applied on Cinnamon version also. Be aware that dual-boot with a Windows OS will not work using GPT partition scheme on computers with BIOSes (Microsoft Windows will boot in EFI mode if it detects a GPT partition label) so use GPT partitions with dual-boot only on computers with Extensible Firmware Interface –EFI or Unified EFI -UEFI firmware else use only Linux Mint single boot on non-EFI computers with GPT scheme or dual-boot with Windows OS on BIOSes (Grub Legacy) with MBR partition scheme.
If you already have a previous version of Linux Mint installed on your computer and you want to upgrade to Qiana follow use the instructions from my former tutorial on Upgrade Linux Mint 16 (Petra) to Linux Mint 17 (Qiana).
Step 1: Create GPT Partition Layout
1. Download on of the Linux Mint 17 versions from the above mirrors and burn it to a DVD or create a USB bootable drive.
2. Place your USB stick or DVD in your computer drive and select your appropriate boot medium from BIOS/UEFI menu.
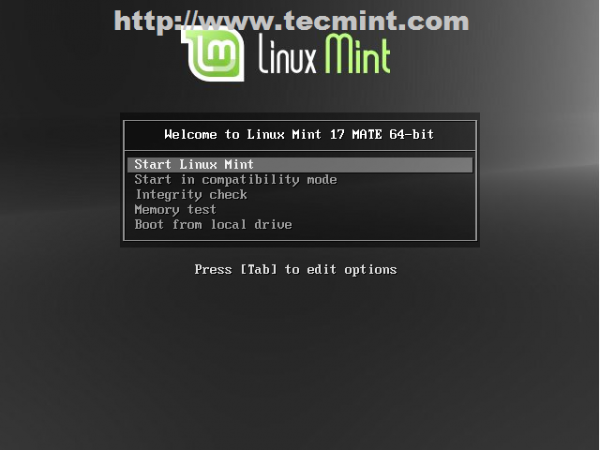
3. When the first Linux Mint screen appears press [Enter] key, choose Start Linux Mint and wait for the system to completely load.

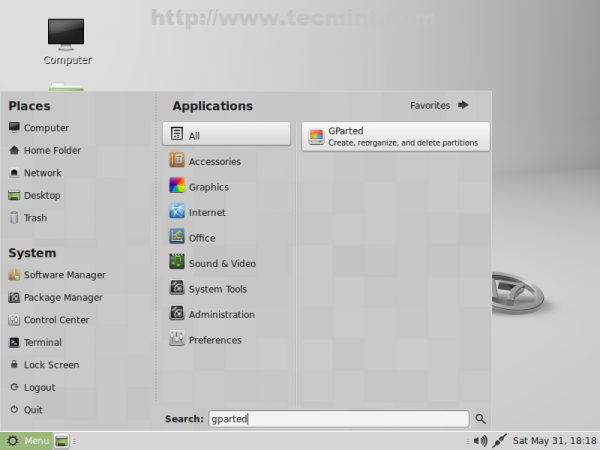
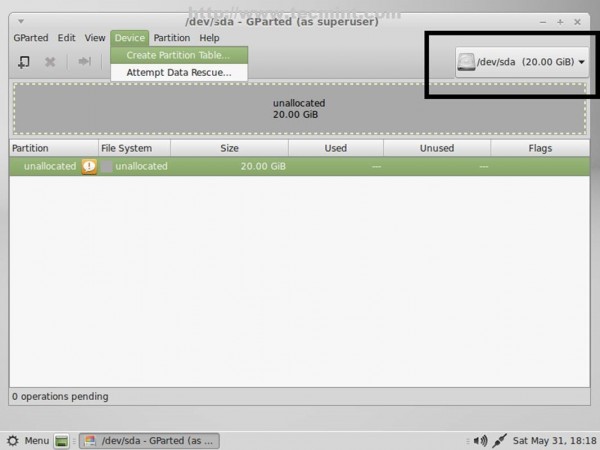
4. After Linux Mint completely loads into a Live state go to Menu, type gparted on Search field and start GParted disk partitioner.
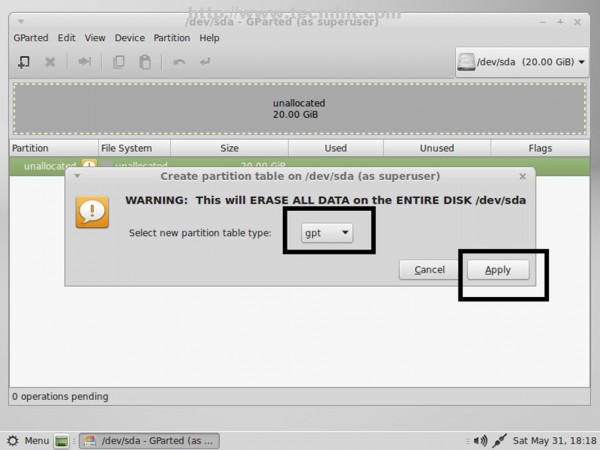
5. On GParted select your first hard-disk from right tab then go to GParted Menu -> Device -> Create Partition Table, choose GPT on Warning window, then click on Apply.
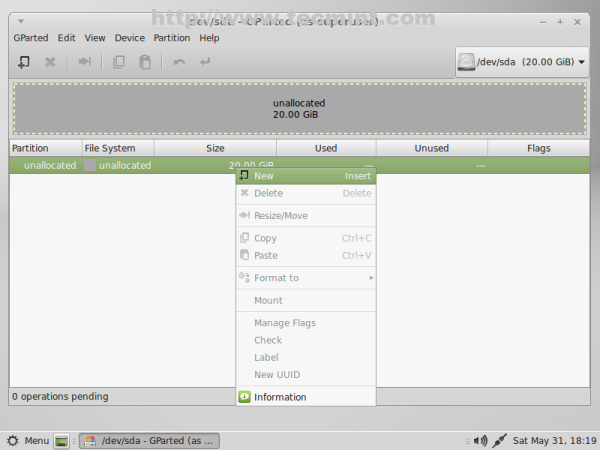
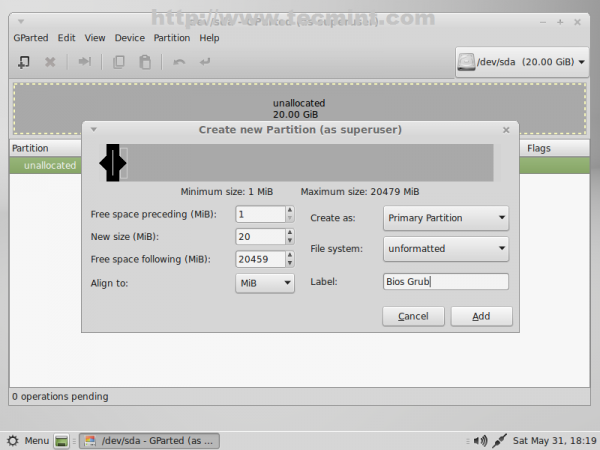
6. Then left click on unallocated space, select New and enter the following settings for this partition then click on Add.
- New size = 20 Mib
- File system = Unformatted
- Label = Bios Grub
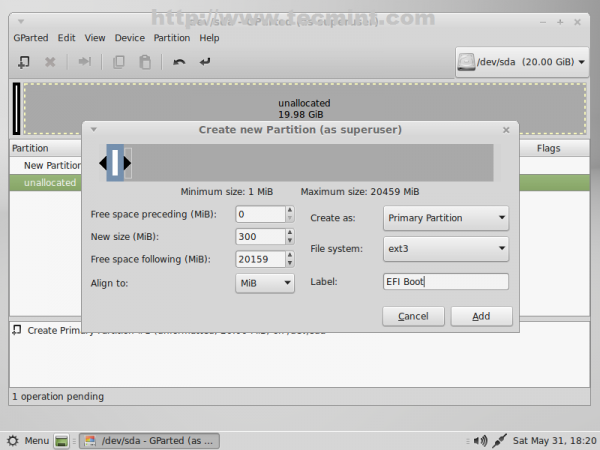
7. The next partition will hold the Boot Grub. Again select unallocated space -> New and use the following settings for this partition.
- New size = ~300 MB
- File system = ext2/ext3/ext4 (choose whatever file system you like)
- Label = EFI Boot
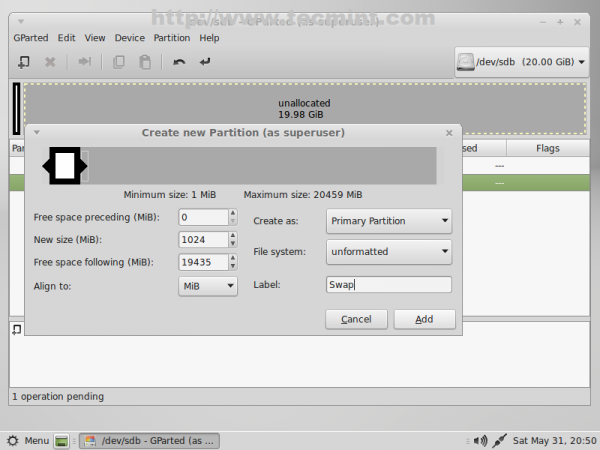
8. The next partition will be for Linux Swap. Again select unallocated space -> New and use the following settings for this partition.
- New size = RAMx2 MB
- File system = Unformatted
- Label = Swap
9. Next partition should be for ROOT. Same steps as previous partitions with following settings.
- New size = min 20000 MB (20Gb)
- File system = ext4
- Label = root

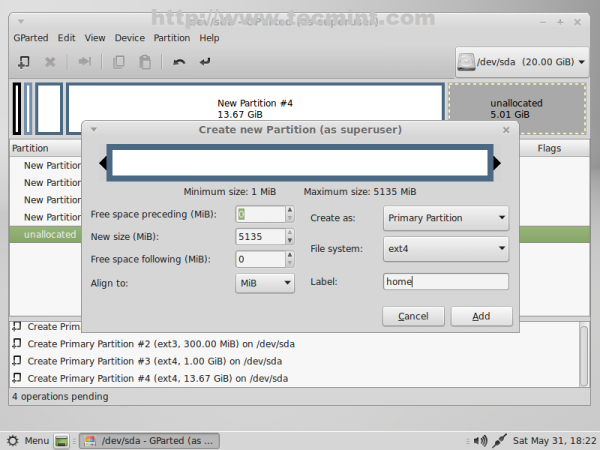
10. The last partition will be for users $HOME. Again select the remaining unallocated space -> New and use the following settings for this partition.
- New size = default value (this will be the rest of free space in case you don’t want to create other partitions)
- File system = ext4
- Label = home
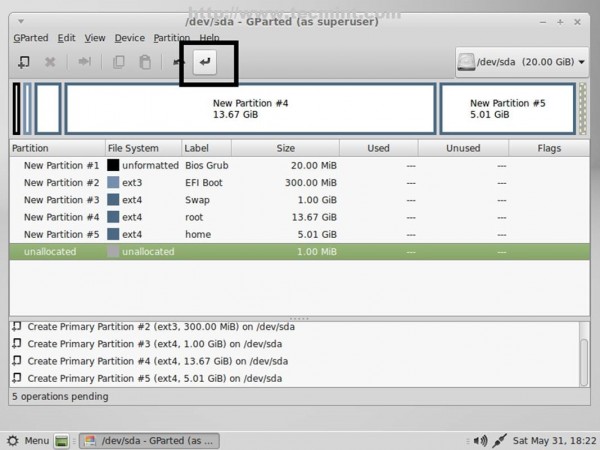
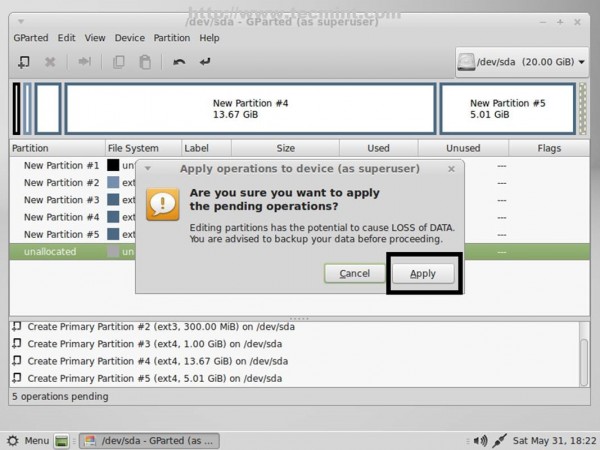
11. After you have finished partition creation process press [Ctrl]+[Enter] keys and hit on Apply pop-up window button to write your newly partition table on hard-disk.

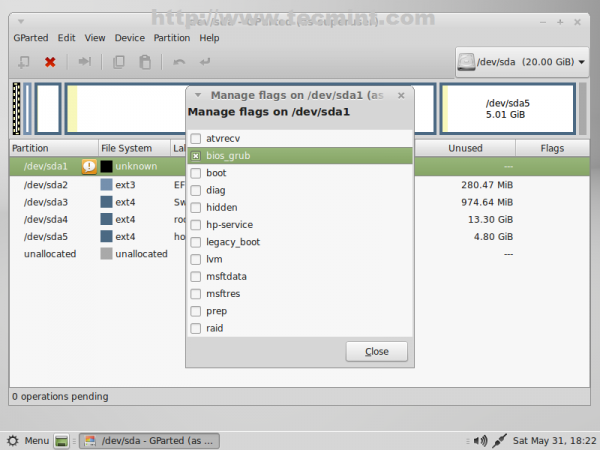
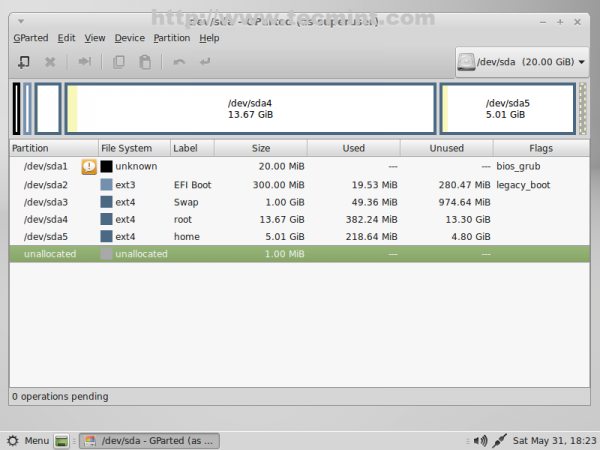
12. After the partition table was successfully written close the window and navigate on your first partition (/dev/sda1), right click on it, go to Manage Flags, select bios_grub then close the window.

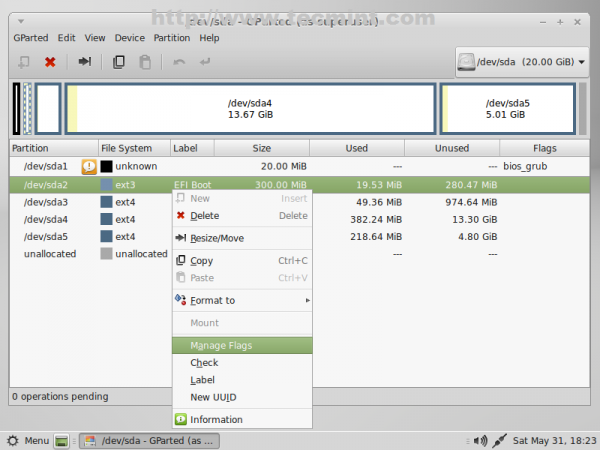
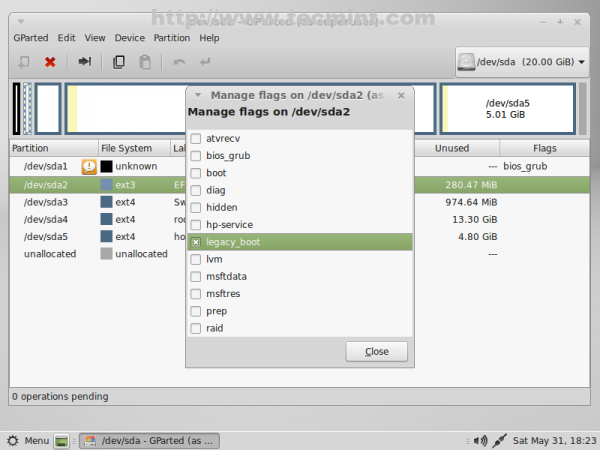
13. Again, do the same thing with EFI Boot partition (/dev/sda2) but this time select legacy_boot partition Flag.
Step 2: Install Linux Mint 17 [Mate]
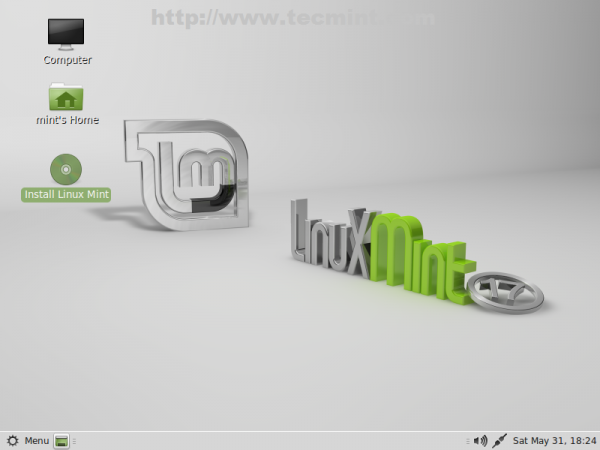
14. After you are done setting the disk partition layout, close Gparted and hit Install Linux Mint icon from desktop.
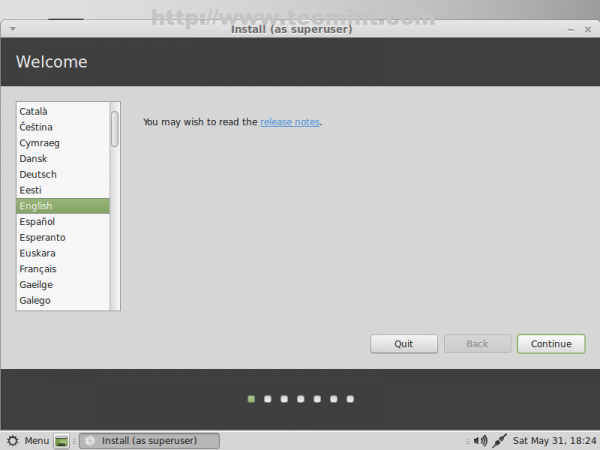
15. Select your system Language and click Continue.
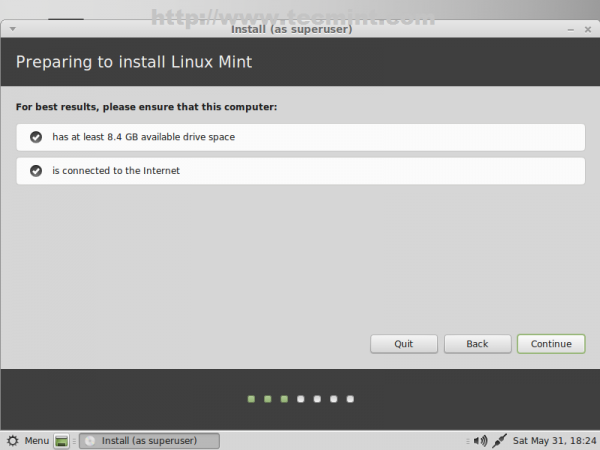
16. The next screen will verify your system available free space and internet connection to ensure that the system meats the minimal requirements for disk space for an optimal installation. If you have no internet connection shouldn’t be a problem so shoot Continue.
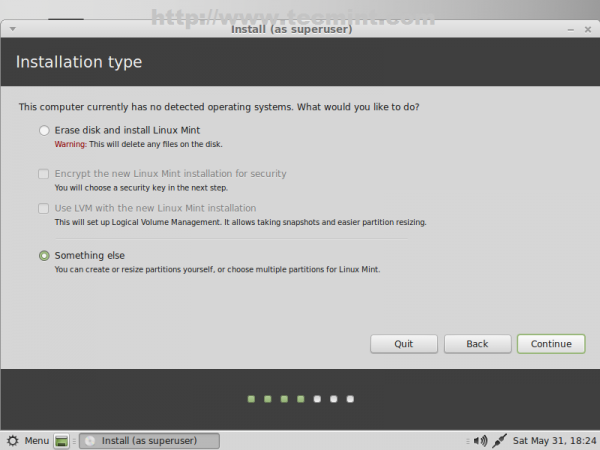
17. Because we previously created system hard-disk partition layout, on the next screen choose Something else and click on Continue.
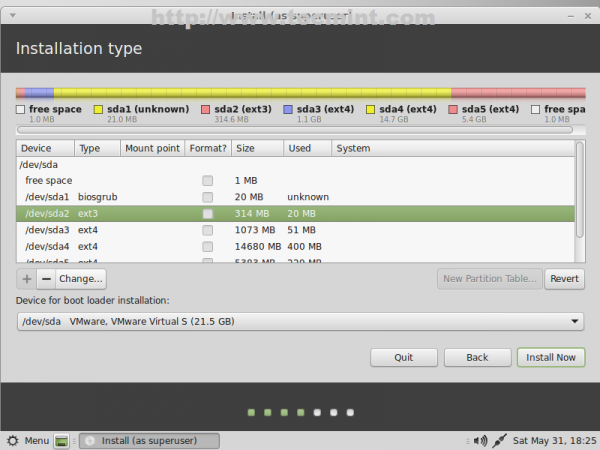
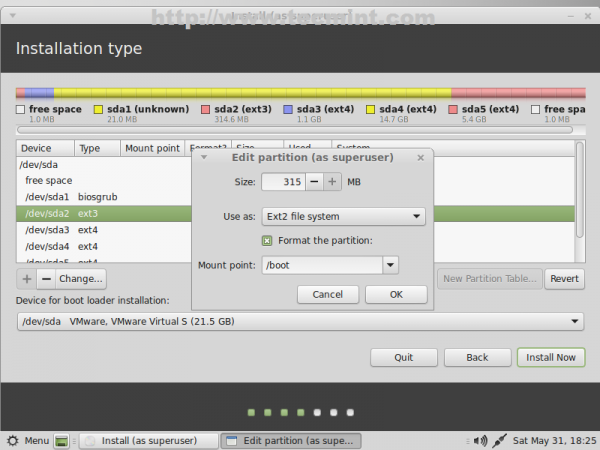
18. Now it’s time to tell installer how to use system partition table, created earlier. First choose the boot partition (/dev/sda2) and make the following settings (/dev/sda1 leave it untouched).
- Size = leave it unchanged
- Use as = Ext2/Ext3/Ext4 filesystem (ext4 is faster while ext2 is more suitable for small partitions due to its lack of journalize)
- Check Format the partition
- Mount point = /boot
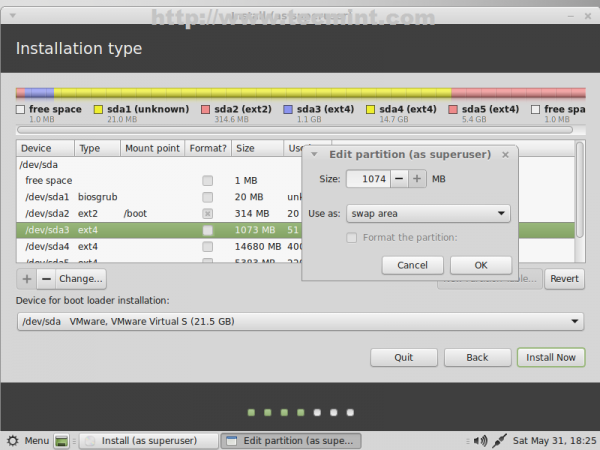
19. Next setup Linux Swap (/dev/sda3) using default chosen size and Use as swap area.
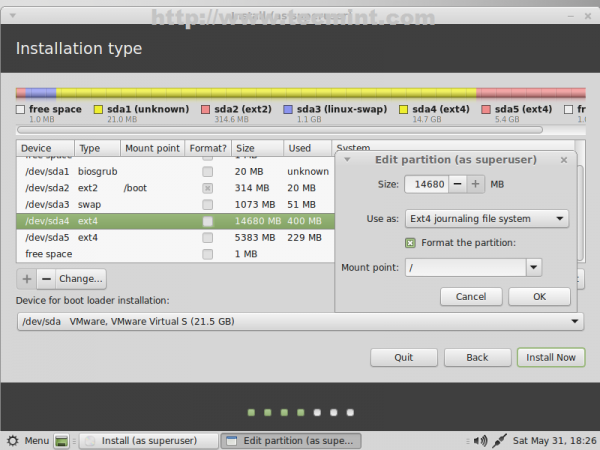
20. Configure root partition (/dev/sda4) with the following options.
- Size = leave it untouched
- Use as = Ext4 journaling file system
- Check Format the partition
- Mount point = /
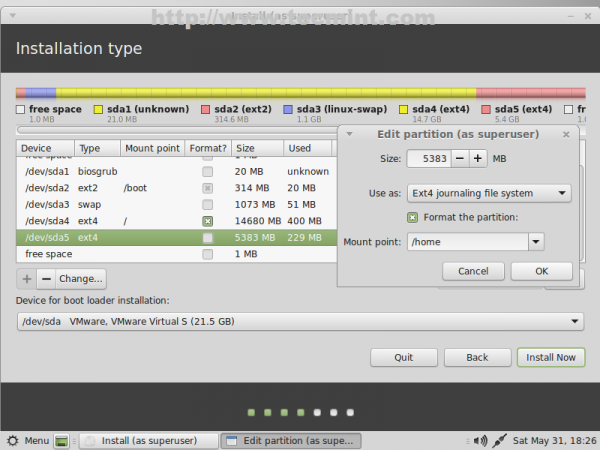
21. Finally configure HOME partition with the following settings.
- Size = leave it untouched
- Use as = Ext4 journaling file system
- Check Format the partition
- Mount point = /home
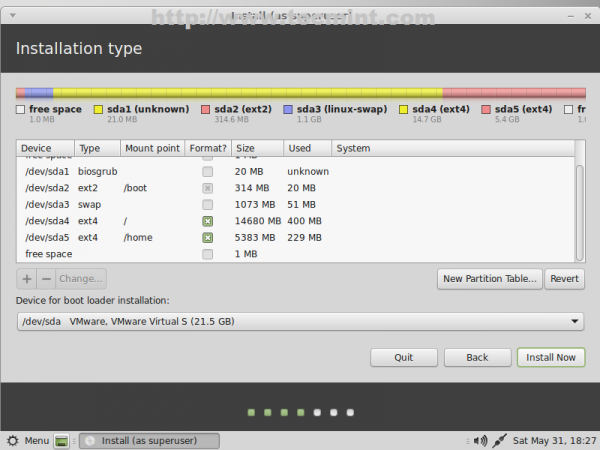
22. The final partition table should look like in the screenshots below. After you verify it again and make sure it suits your needs hit on Install Now button.

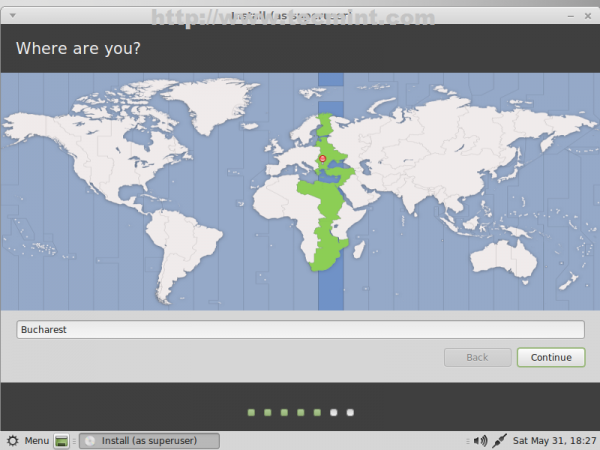
23. If your computer has Internet connection the installer will automatically detect your location else choose your real location using the provided map and hit on Continue.
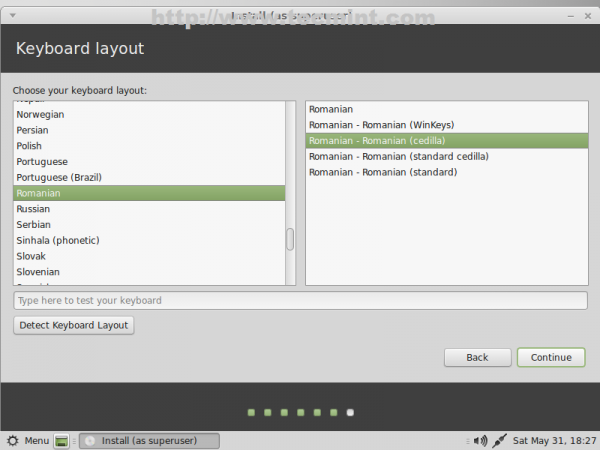
24. On the next screen choose your Keyboard layout then click on Continue.
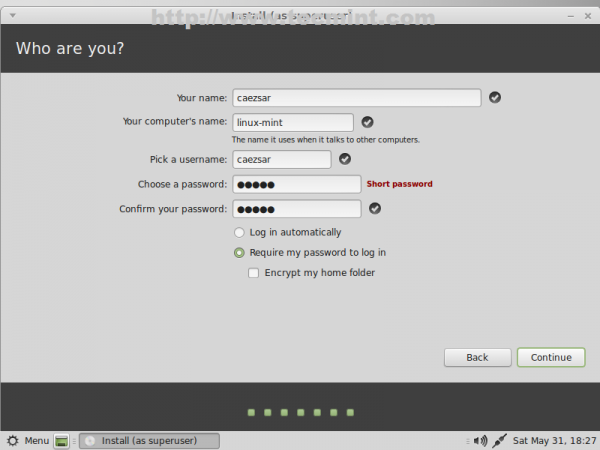
25. For the final settings of your system pick a username and a password for your computer and choose an appropriate name for Computer then Continue.
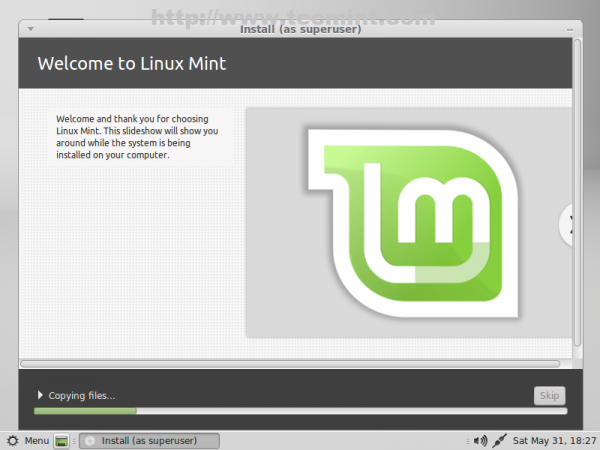
26. After the installer successfully finishes its job remove the installer media and reboot your computer.
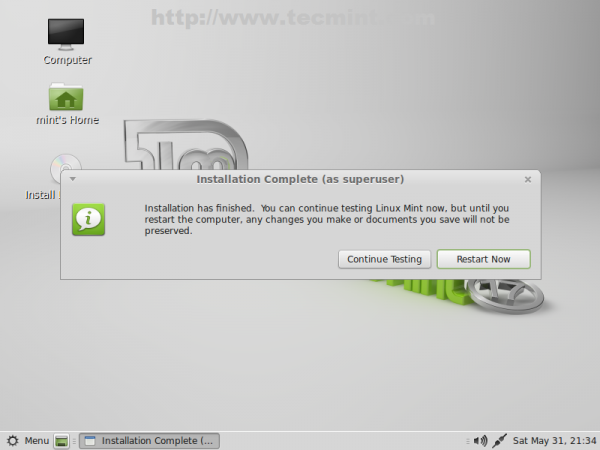
Congratulations! Now you have Linux Mint 17 Qiana with Mate desktop environment installed on your computer using GPT partition layout.
Note down that depending on your computer EFI/UEFI the system might not boot properly and this settings may not work for you, so should dig the subject as a starting point using this pages.
- EFI Bootloaders Principles
- UEFI Community
- Install Linux Mint on UEFI Supported Device
Although this experiment was done as a single boot under a virtualized environment with no UEFI and using a small disk in size the partition table scheme should be valid for most of EFI/BIOS computers with the remark that you can’t use GPT disk layout in dual-boot on BIOS computers and some UEFI/EFI systems can impose problems on booting from GPT disks (disabling Secure Boot might help in some cases), so if you plan on using disks smaller than 2GB in size you should stick to MBR partition layout.