This tutorial will guide you on how to install and configure a complete mail server with Postfix in Debian 9 release. It will also cover how to configure accounts mailboxes using Dovecot in order to retrieve and compose mails via IMAP protocol. The users will use Rainloop Webmail interface as the mail user agent to handle mail.
Requirements
- Debian 9 Minimal Installation
- A static IP address configured for the network interface
- A local or a public registered domain name.
In this tutorial we’ll use a private domain account for mail server setup configured via /etc/hosts file only, without any DNS server involved in handling DNS resolution.
Step 1: Initial Configurations for Postfix Mail Server on Debian
1. In the first step, login to your machine with an account with root privileges or directly with the root user and make sure your Debian system is up to date with the latest security patches and software and packages releases, by issuing the following command.
# apt-get update
# apt-get upgrade
2. On the next step install the following software packages that will be used for system administration, by issuing the following command.
# apt-get install curl net-tools bash-completion wget lsof nano
3. Next, open /etc/host.conf file for editing with your favorite text editor and add the following line at the beginning of the file in order for DNS resolution to read the hosts file first.
order hosts,bind
multi on
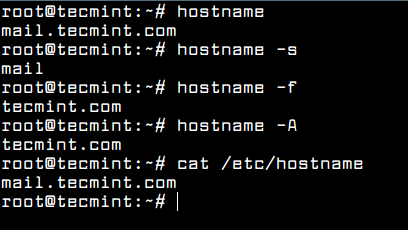
4. Next, setup your machine FQDN and add your domain name and your system FQDN to /etc/hosts file. Use your system IP address to resolve the name of the domain and FQDN as illustrated in the below screenshot.
Replace IP address and domain accordingly. Afterwards, reboot the machine in order to apply the hostname properly.
# hostnamectl set-hostname mail.tecmint.com
# echo "192.168.0.102 tecmint.com mail.tecmint.com" >> /etc/hosts
# init 6

5. After reboot, verify if the hostname has been correctly configured by issuing the following series of commands. The domain name, the FQDN, the hostname and the IP address of the system should be returned by hostname command.
# hostname
# hostname -s
# hostname -f
# hostname -A
# hostname -i
# cat /etc/hostname
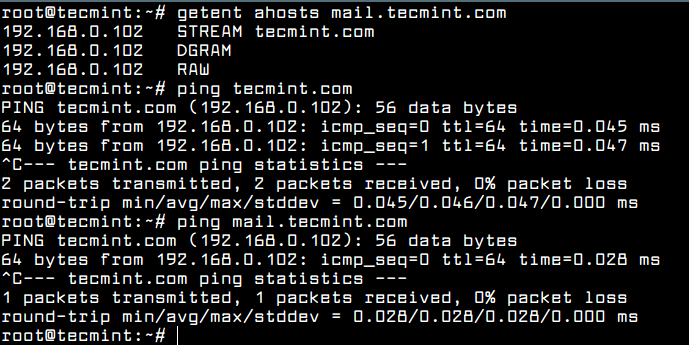
6. Also, test if the domain correctly replies to local queries by issuing the below commands. Be aware that the domain won’t replay to remote queries issued by other systems in your network, because we’re not using a DNS server.
However, the domain should reply from other systems if you manually add the domain name to each of their /etc/hosts file. Also, be aware that the DNS resolution for a domain added to /etc/hosts file won’t work via host, nslookup or dig commands.
# getent ahosts mail.tecmint.com
# ping tecmint.com
# ping mail.tecmint.com
Step 2: Install Postfix Mail Server on Debian
7. The most important piece of software required for a mail server to function properly is the MTA agent. The MTA is a software built in a server-client architecture, which is responsible for mail transfer between mail servers.
In this guide we’ll use Postfix as the mail transfer agent. To install postfix in Debian from official repositories execute the following command.
# apt-get install postfix
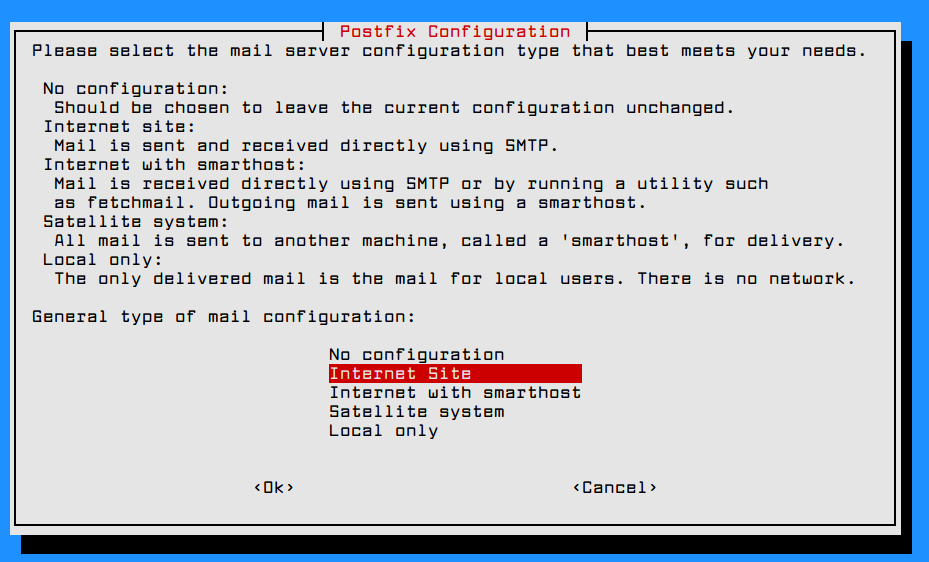
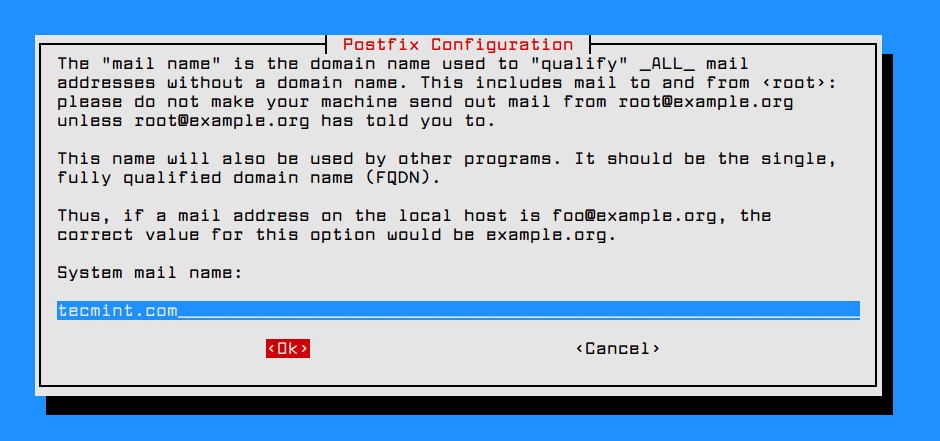
8. During the installation process of Postfix you will be asked a series of questions. On the first prompt, select Internet Site option as the general type for Postfix configuration and press [enter] key to continue and then add your domain name to system mail name, as illustrated in the following screenshots.
Step 3: Configure Postfix Mail Server on Debian
9. Next, backup Postfix main configuration file and configure Postfix for your domain by using the following commands.
# cp /etc/postfix/main.cf{,.backup}
# nano /etc/postfix/main.cf
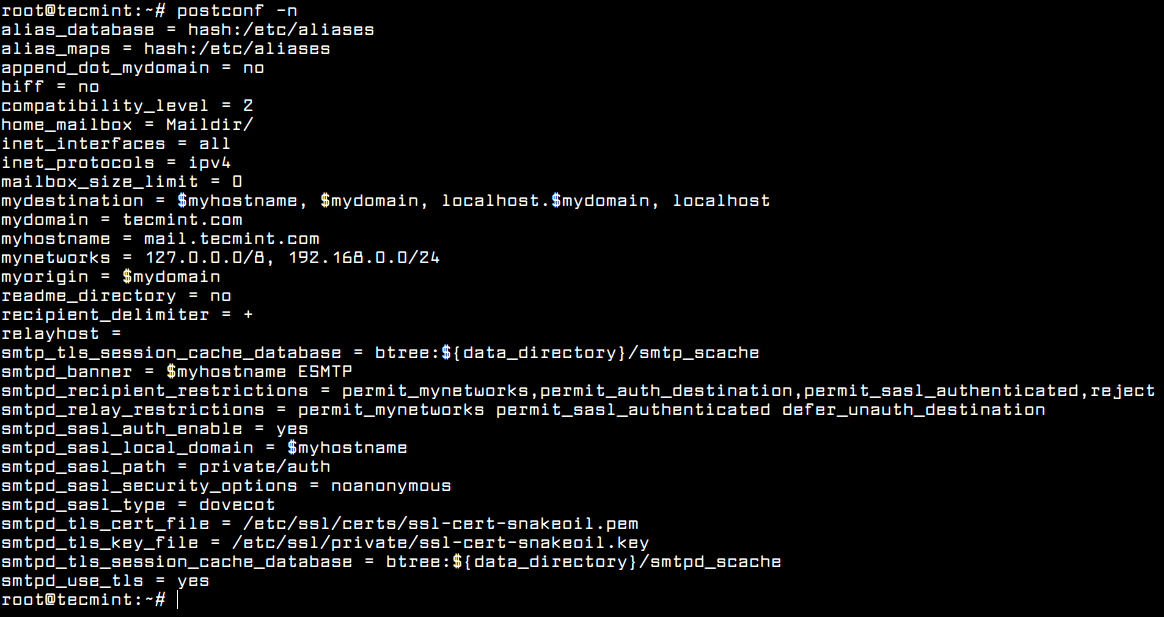
Now configure Postfix configuration in the main.cf file as shown.
# See /usr/share/postfix/main.cf.dist for a commented, more complete version

smtpd_banner = $myhostname ESMTP
biff = no
# appending .domain is the MUA's job.
append_dot_mydomain = no
readme_directory = no

# See http://www.postfix.org/COMPATIBILITY_README.html -- default to 2 on
# fresh installs.
compatibility_level = 2

# TLS parameters
smtpd_tls_cert_file=/etc/ssl/certs/ssl-cert-snakeoil.pem
smtpd_tls_key_file=/etc/ssl/private/ssl-cert-snakeoil.key
smtpd_use_tls=yes
smtpd_tls_session_cache_database = btree:${data_directory}/smtpd_scache
smtp_tls_session_cache_database = btree:${data_directory}/smtp_scache

# See /usr/share/doc/postfix/TLS_README.gz in the postfix-doc package for
# information on enabling SSL in the smtp client.

smtpd_relay_restrictions = permit_mynetworks permit_sasl_authenticated defer_unauth_destination
myhostname = mail.debian.lan

mydomain = debian.lan

alias_maps = hash:/etc/aliases
alias_database = hash:/etc/aliases

#myorigin = /etc/mailname
myorigin = $mydomain

mydestination = $myhostname, $mydomain, localhost.$mydomain, localhost
relayhost =
mynetworks = 127.0.0.0/8, 192.168.1.0/24
mailbox_size_limit = 0
recipient_delimiter = +
inet_interfaces = all
#inet_protocols = all
inet_protocols = ipv4

home_mailbox = Maildir/

# SMTP-Auth settings
smtpd_sasl_type = dovecot
smtpd_sasl_path = private/auth
smtpd_sasl_auth_enable = yes
smtpd_sasl_security_options = noanonymous
smtpd_sasl_local_domain = $myhostname
smtpd_recipient_restrictions = permit_mynetworks,permit_auth_destination,permit_sasl_authenticated,reject
Replace the myhostname, mydomain and mynetworks variables to match your own configurations.
You can run postconf -n command in order to dump Postfix main configuration file and check eventual errors, as shown in the below screenshot.
# postconf -n
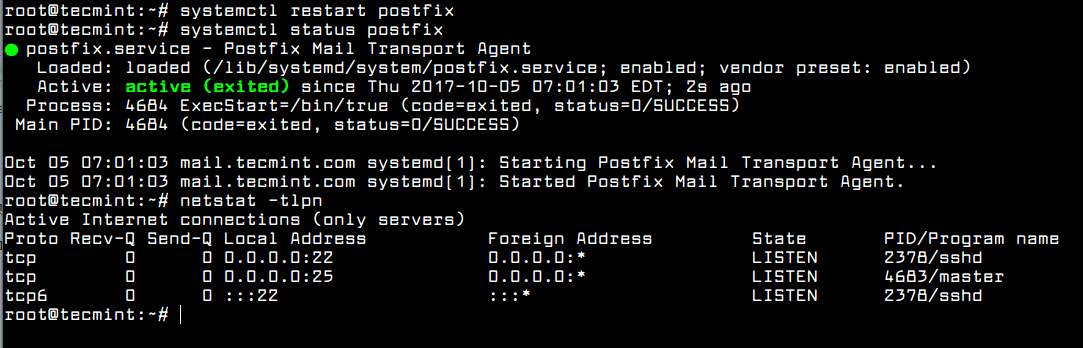
10. After all configurations are in place, restart Postfix daemon to apply changes and verify if the service is running by inspecting if Postfix master service is binding on port 25 by running netstat command.
# systemctl restart postfix
# systemctl status postfix
# netstat -tlpn
Step 3: Test Postfix Mail Server on Debian
11. In order to test if postfix can handle mail transfer, first install mailutils package by running the following command.
# apt-get install mailutils
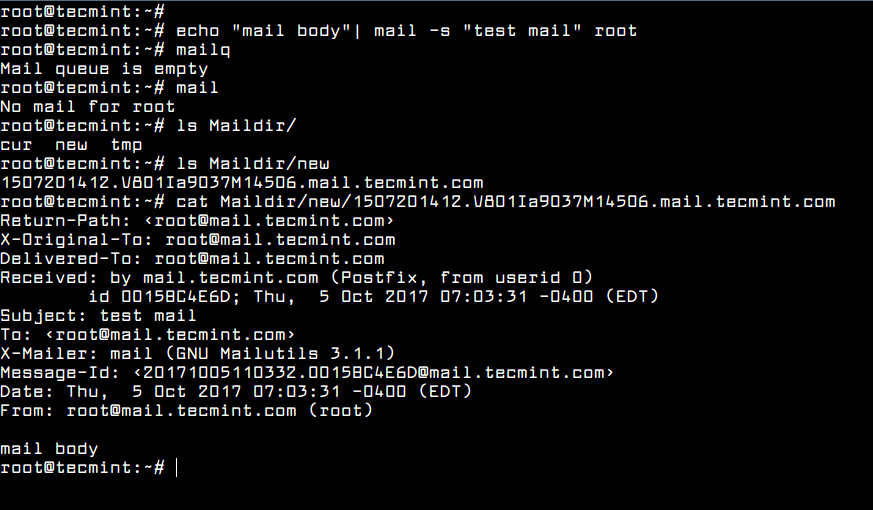
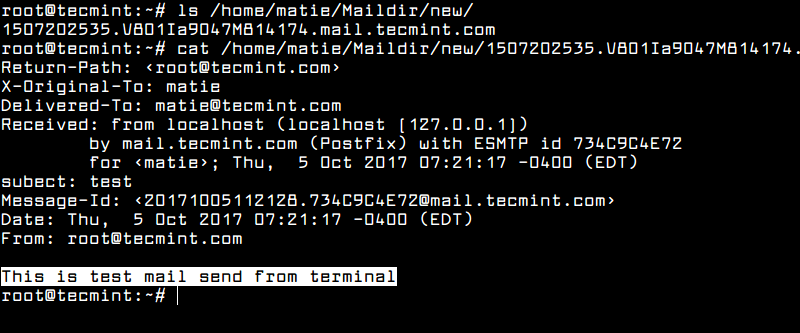
12. Next, using mail command line utility, send a mail to the root account and check if the mail was successfully transmitted by issuing the below command in order to check mail queue and listing the content of the root’s home Maildir directory.
# echo "mail body"| mail -s "test mail" root
# mailq
# mail
# ls Maildir/
# ls Maildir/new/
# cat Maildir/new/[TAB]
13. You can also verify in what manner the mail was handled by postfix service by inspecting the content of the mail log file by issuing the following command.
# tailf /var/log/mail.log
Step 4: Install and Configure Dovecot IMAP on Debian
14. The mail delivery agent that we’ll be using in this guide to deliver e-mail messages to a local recipient’s mailboxes is Dovecot IMAP. IMAP is a protocol which runs on 143 and 993 (SSL) ports, which is responsible reading, deleting or moving mails across multiple email clients.
The IMAP protocol also uses synchronization in order to assure that a copy of each message is saved on the server and allows users to create multiple directories on the server and move mails to this directories in order to sort the e-mails.
This is not the case with POP3 protocol. POP3 protocol won’t allow users to create multiple directories on the server to sort your mail. You only have the inbox folder to manage mail.
To install Dovecot core server and Dovecot IMAP package on Debian execute the following command.
# apt install dovecot-core dovecot-imapd
15. After Dovecot has been installed in your system, open the below dovecot files for editing and make the following changes. First, open /etc/dovecot/dovecot.conf file, search and uncomment the following line:
listen = *, ::

16. Next, open /etc/dovecot/conf.d/10-auth.conf for editing and locate and change the below lines to look like in the below excerpt.
disable_plaintext_auth = no
auth_mechanisms = plain login
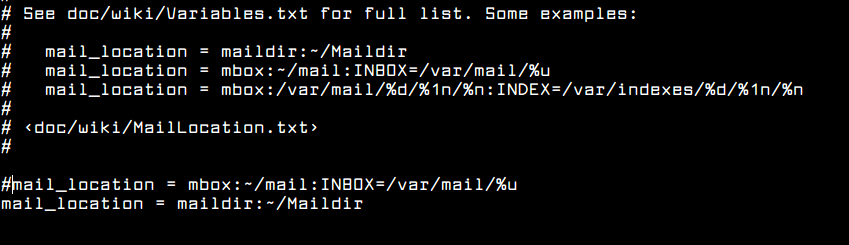
17. Open /etc/dovecot/conf.d/10-mail.conf file and add the following line to use Maildir location instead of Mbox format to store emails.
mail_location = maildir:~/Maildir
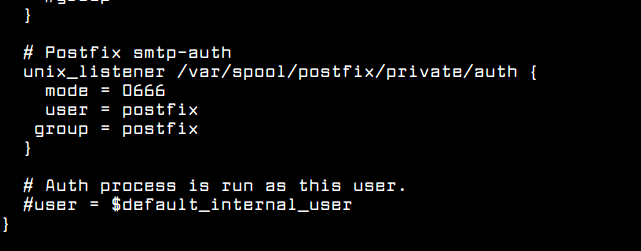
18. The last file to edit is /etc/dovecot/conf.d/10-master.conf. Here search for Postfix smtp-auth block and make the following change:
# Postfix smtp-auth
unix_listener /var/spool/postfix/private/auth {
  mode = 0666
  user = postfix
  group = postfix
 }
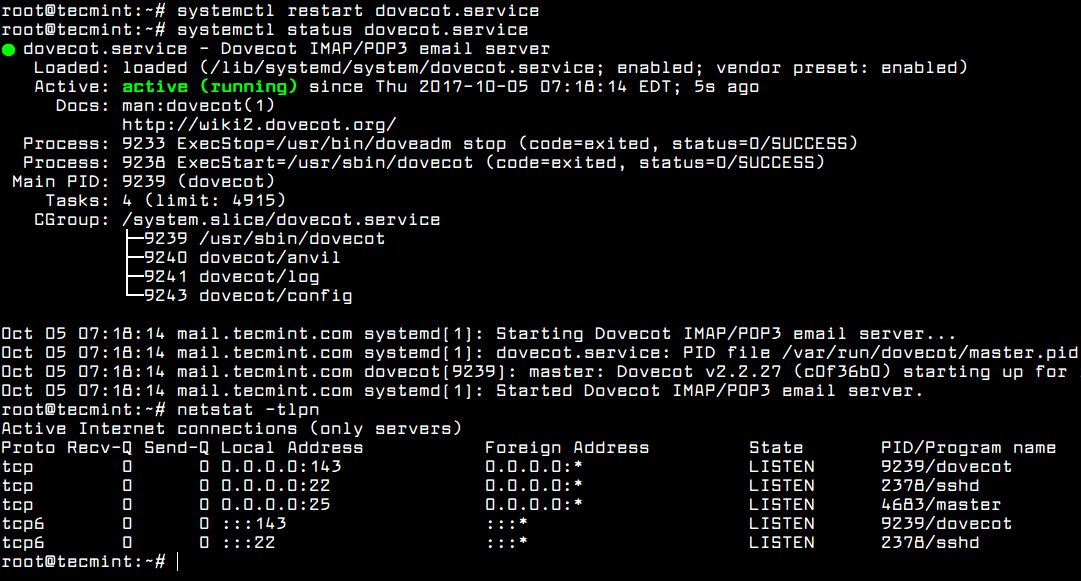
19. After you’ve made all the above changes, restart Dovecot daemon to reflect changes, check its status and verify if Dovecot is binding on port 143, by issuing the below commands.
# systemctl restart dovecot.service
# systemctl status dovecot.service
# netstat -tlpn
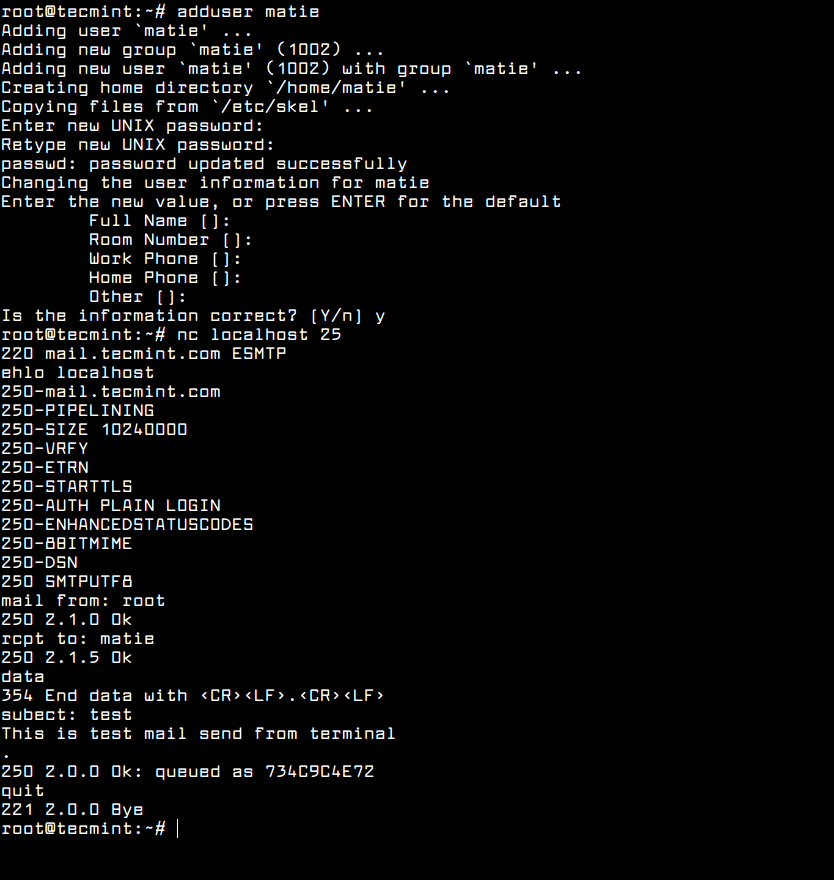
20. Test if the mail server is running properly by adding a new user account to the system and use telnet or netcat command to connect to the SMTP server and send a new mail to the new added user, as illustrated in the below excerpts.
# adduser matie
# nc localhost 25
# ehlo localhost
mail from: root
rcpt to: matie
data
subject: test
Mail body
.
quit
21. Check if the mail has arrived to the new user mailbox by listing the content of user’s home directory as shown in the below screenshot.
# ls /home/test_mail/Maildir/new/
22. Also, you can connect to user’s mailbox from command line via IMAP protocol, as shown in the below excerpt. The new mail should be listed in user’s Inbox.
# nc localhost 143
x1 LOGIN matie user_password
x2 LIST "" "*"
x3 SELECT Inbox
x4 LOGOUT
Step 5: Install and Configure Webmail in Debian
23. Users will manage their emails via Rainloop Webmail client. Before installing Rainloop mail user agent, first install Apache HTTP server and the following PHP modules required by Rainloop, by issuing the following command.
# apt install apache2 php7.0 libapache2-mod-php7.0 php7.0-curl php7.0-xml
24. After Apache web server has been installed, change directory path to /var/www/html/ directory, remove the index.html file and issue the following command in order to install Rainloop Webmail.
# cd /var/www/html/
# rm index.html
# curl -sL https://repository.rainloop.net/installer.php | php
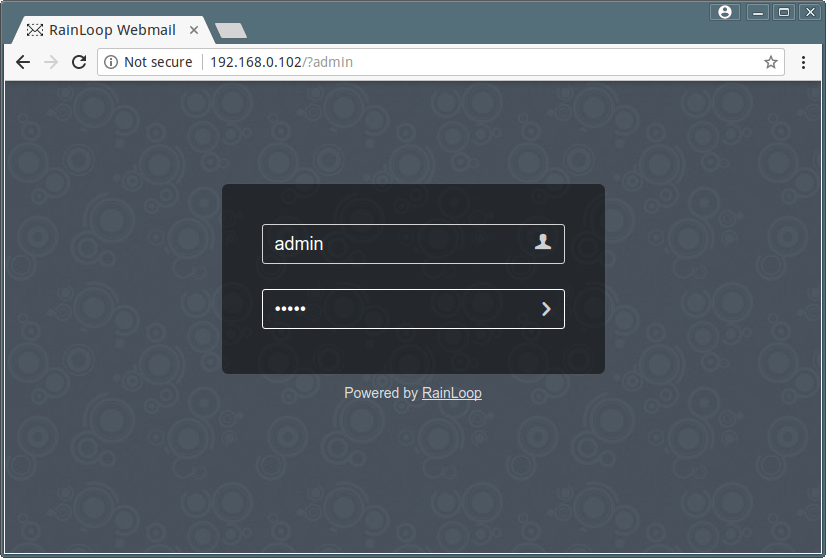
25. After Rainloop Webmail client has been installed in the system, navigate to your domain IP address and login to Rainloop admin web interface with the following default credentials:
http://192.168.0.102/?admin
User: admin
Password: 12345
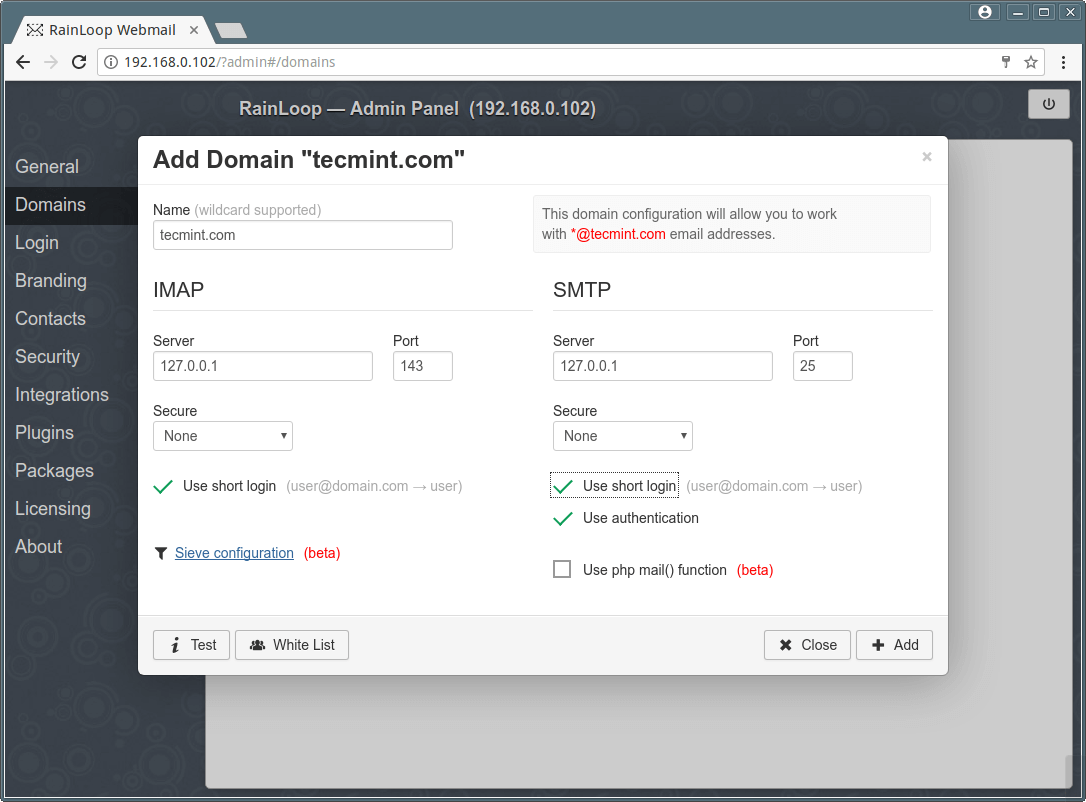
26. Navigate to Domains menu, hit on Add Domain button and add your domain name settings as shown in the below screenshot.
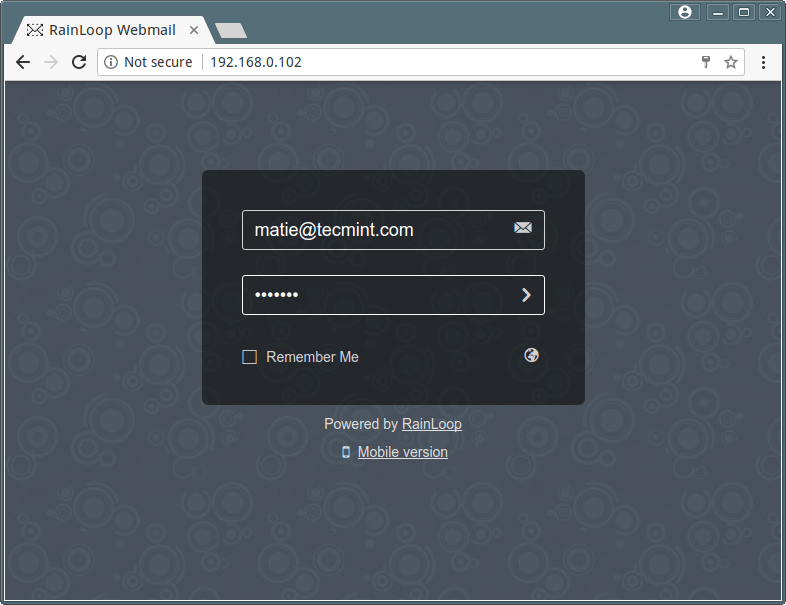
27. After you’ve finished adding your domain settings, log out from Ranloop admin interface and point the browser to your IP address in order to log in to webmail client with an e-mail account.
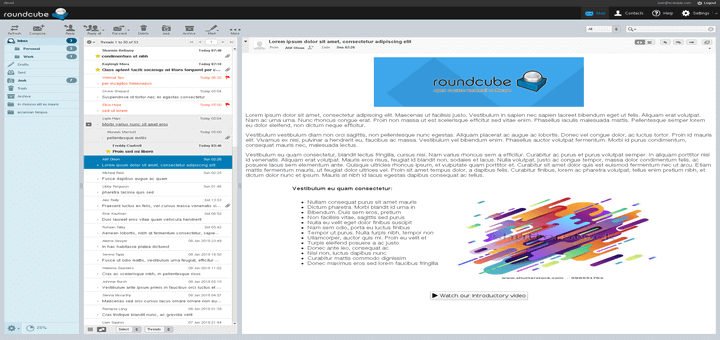
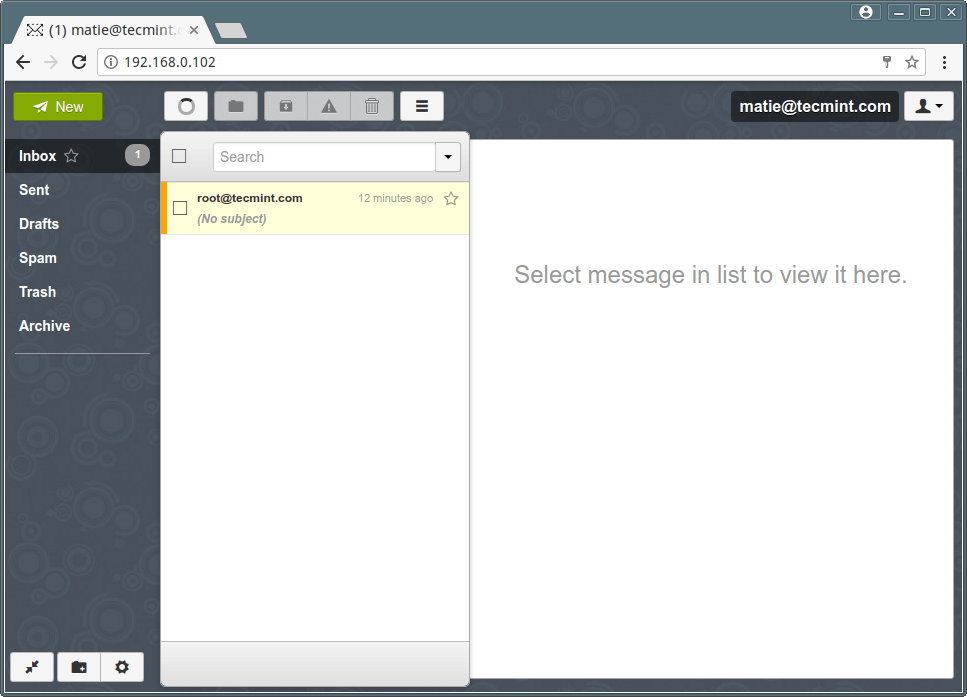
After you’ve successfully logged in to Rainloop webmail you should see the email sent earlier from command line into your Inbox folder.
http://192.168.0.102
User: [email protected]
Pass: the matie password
27. To add a new user issue useradd command with -m flag in order to create the user home directory. But, first make sure you configure the Maildir path variable for every user with the following command.
# echo 'export MAIL=$HOME/Maildir' >> /etc/profile
# useradd -m user3
# passwd user3
28. If you want to redirect all root’s email to a specific local mail account from the system, run the below commands. All mails redirected or destined to root account will be forwarded to your mail user as shown in the below image.
# echo "root: test_mail" >> /etc/aliases
# newaliases
That’s all! You have successfully installed and configured a mail server at your premises in order for local users to communicate via e-mails. However, this type of mail configuration is not secured in any way and it’s advisable to be deployed only for small setups in systems and networks under your full control.