Seafile is an open-source, high-performance, secure and enterprise-ready file synchronization and sharing solution built using Python. It features simple data organization using libraries, fast, reliable and efficient synchronization between devices.
It comes with built-in encryption where a library is encrypted by a password chosen by you and files are encrypted before syncing to the server. Additional security is implemented through Two-factor authentication, virus scan for files, and remote wipe.
Recommended Read: How to Install Seafile on CentOS 7
It also supports backups and data recovery, file sharing and permission control (you can share libraries and directories to users or groups, with read-only or read-write permissions). Seafile also supports file histories (or versioning) and library snapshots which allow you to easily restore any file or directory/folder in the history.
Besides the Seafile Drive client lets you extend the local disk space with the massive storage capacity on the Seafile server by simply mapping storage space on the Seafile server as a virtual drive on the local machine.
This article shows how to easily deploy Seafile as a private cloud storage server with Nginx as the reverse proxy service and MariaDB database server on CentOS 8.
System Requirements:
- A fresh CentOS 8 installation server with 2 Cores, 2GB or more RAM, 1GB SWAP or more and 100GB+ storage space for Seafile data.
Installing Seafile File-Hosting Software on CentOS 8
1. If you are deploying the Seafile for the first time, we recommend that you use an automatic installation script to easily deploy Seafile service on the server using the following commands.
# cd /root
# wget --no-check-certificate https://raw.githubusercontent.com/haiwen/seafile-server-installer/master/seafile-7.1_centos
# bash seafile-7.1_centos 7.1.0
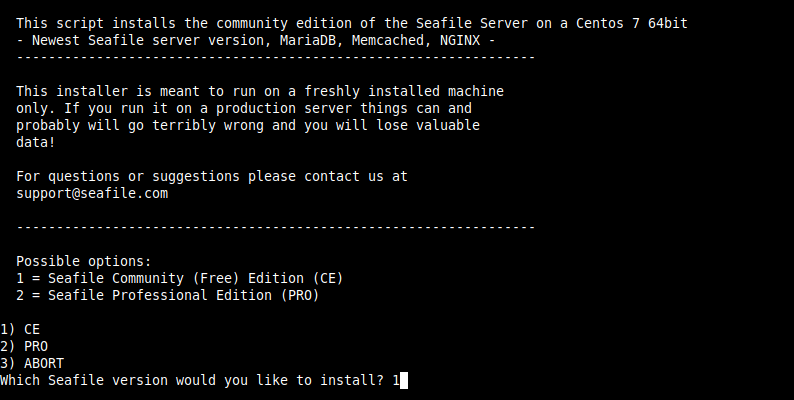
After invoking the script, you will be prompted to choose the edition of Seafile to install, select 1 for Community Edition(CE) and hit Enter.
2. Once the installation is complete, you will see the message in the following screenshot, showing the installation details/parameters.
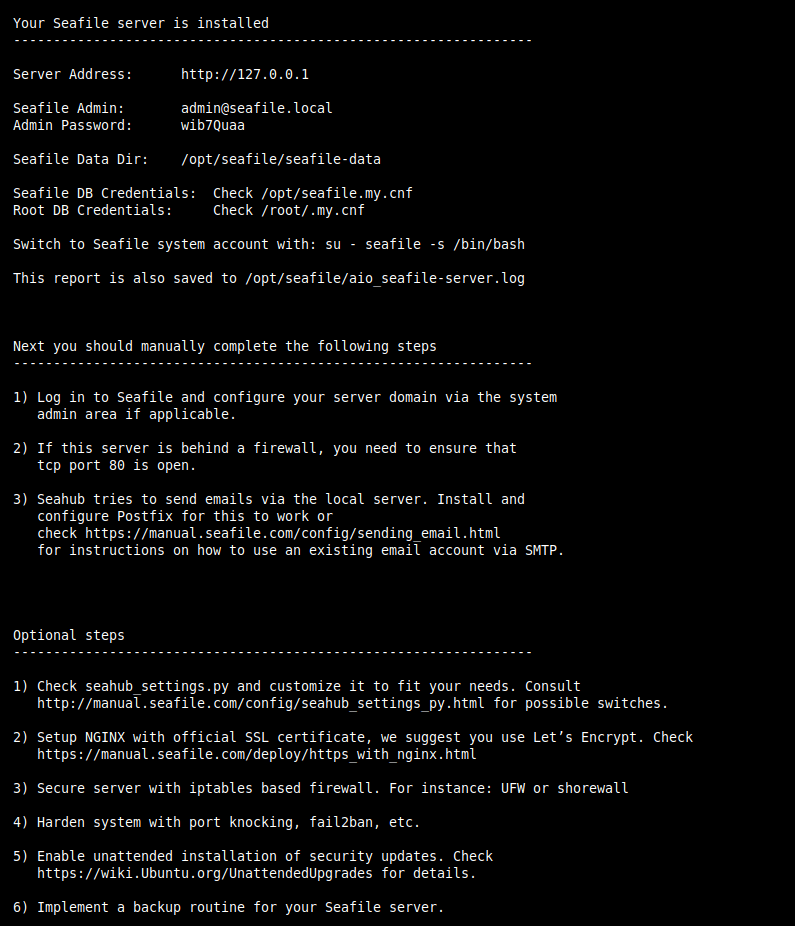
The Seafile server package is made up of the following components:
- Seafile server (seaf-server) – the main data service daemon for handling raw file upload, download and sync. It listens on port 8082 by default.
- Ccnet server (ccnet-server) – the RPC (remote procedure call) service daemon which enables communication among multiple internal components.
- Seahub – the Django web front-end; it is powered by a light-weight Python HTTP server gunicorn (by default, Seahub runs as an application within gunicorn).
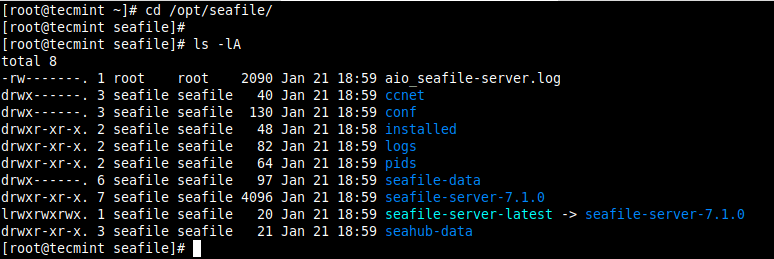
3. The Seafile root installation directory is /opt/seafile, you can view its contents using the ls command.
# cd /opt/seafile/
# ls -lA
4. Also, during the installation, the installer starts the Nginx, MariaDB, Seafile, Seahub services, and other required services for now, and enables them to automatically start after a system reboot.
To view the status of each service, run these commands (replace status with stop, start, restart, is-enabled, etc. to perform the corresponding action on a service).
# systemctl status nginx
# systemctl status mariadb
# systemctl status seafile
# systemctl status seahub
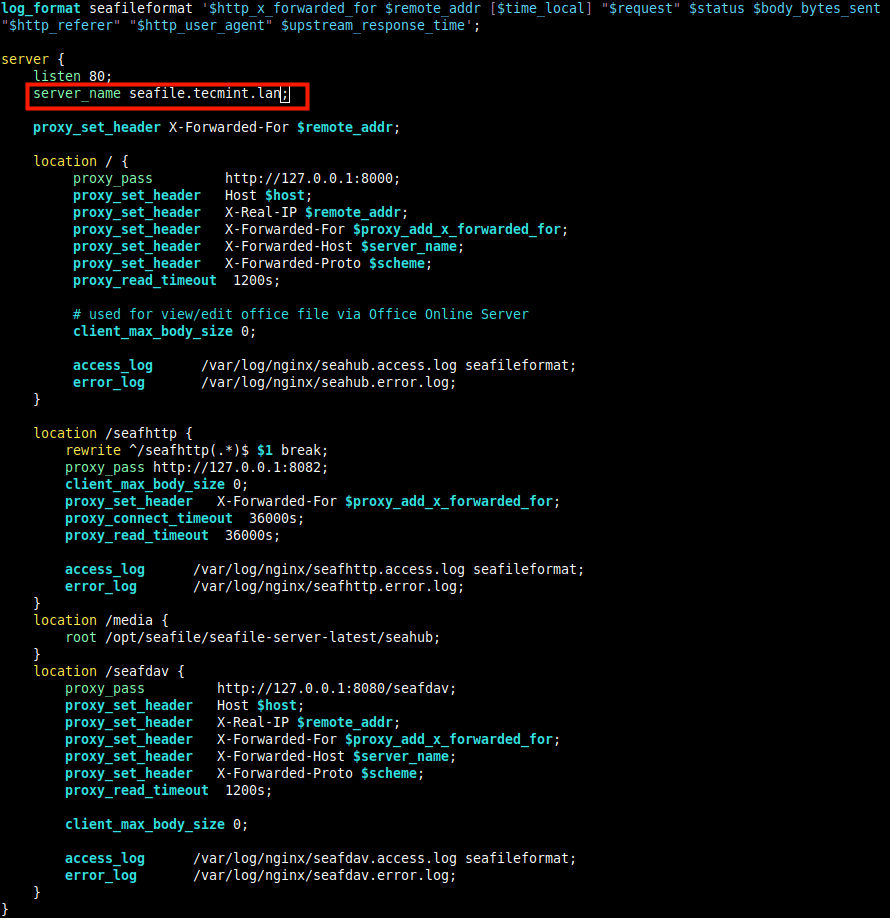
5. By default, you can access seahub using the address seafile.example.com. The Seafile configuration file for Nginx is /etc/nginx/conf.d/seafile.conf and here you can set your domain name as shown.
# vi /etc/nginx/conf.d/seafile.conf
Change the line:
server_name seafile.tecmint.lan;
to
server_name seafile.yourdomain.com;
6. Next, restart the Nginx service to effect the latest changes.
# systemctl restart nginx
7. If you have the firewalld service running, open the HTTP and HTTPS protocols in the firewall to allow requests to the Nginx server on port 80 and 443 respectively.
# firewall-cmd --zone=public --permanent –add-service=http
# firewall-cmd --zone=public --permanent –add-service=https
# firewall-cmd --reload
8. After setting up the all Seafile services, to access Seahub, open a web browser and point it to address (replace the domain name to what you set in the Nginx configuration file for Seafile).
http://seafile.tecmint.lan/
9. Wait for the seahub login interface to load. Then login with the admin user’s credentials created by the installer (run cat /opt/seafile/aio_seafile-server.log to view the installation log file and get the login credentials).
# cat /opt/seafile/aio_seafile-server.log
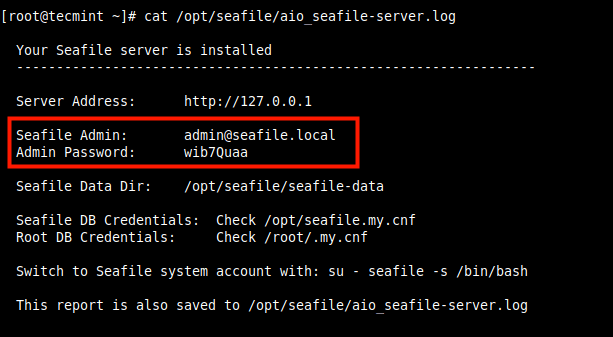
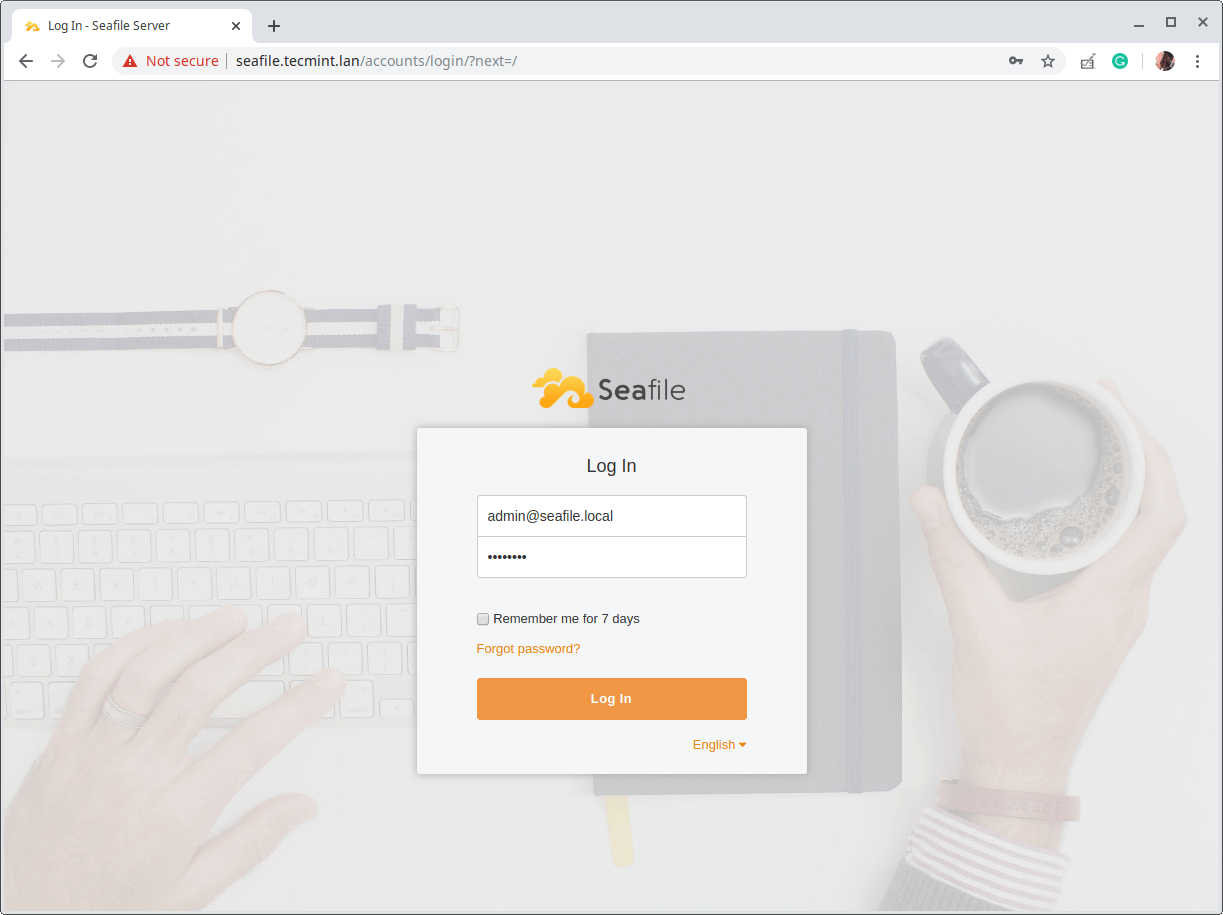
10. Enter your the seafile admin email and password in the following login interface.
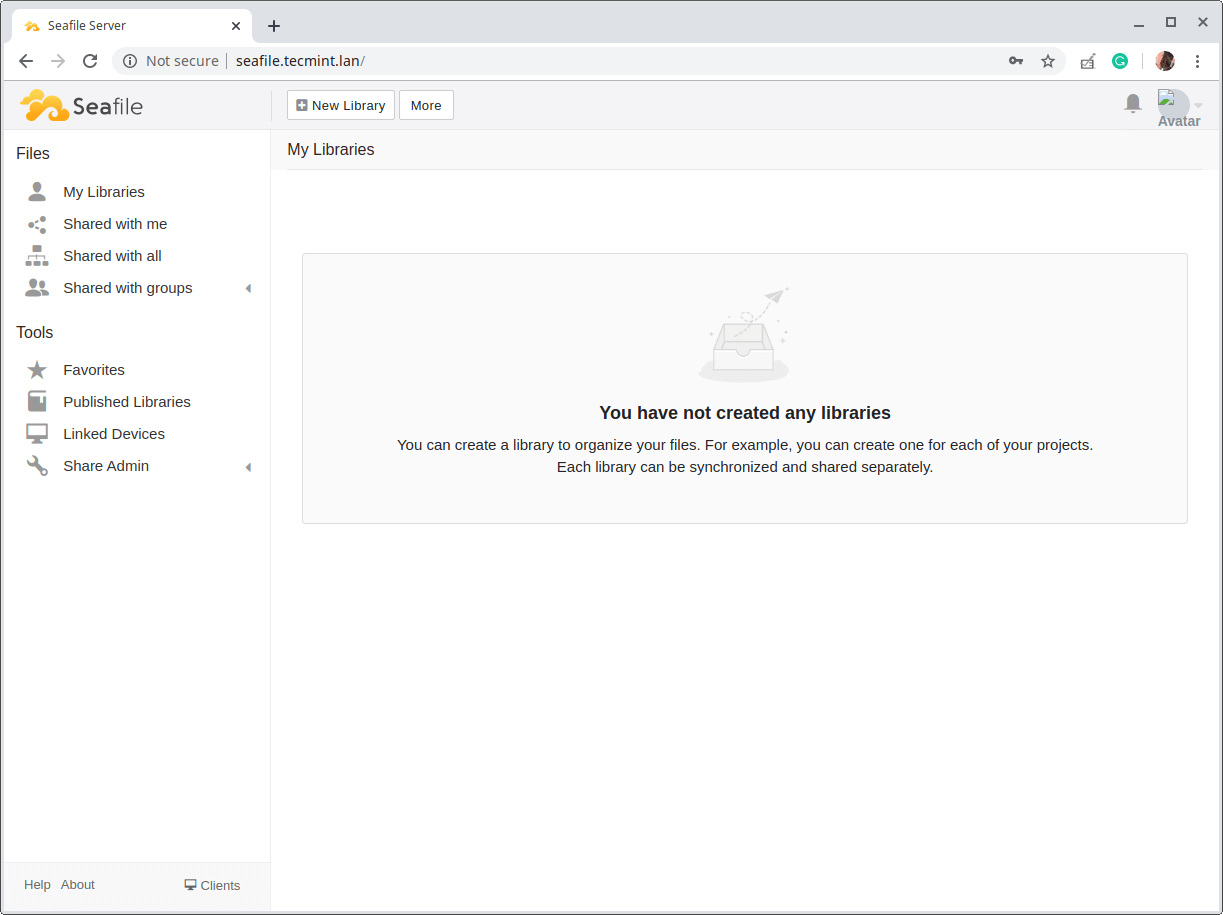
11. Once logged in, you will see the Seahub admin user’s main administration interface. You can use it to edit settings; create, encrypt and share libraries, and more.
To enable HTTPS for Nginx, see this guide: How to Secure Nginx with Let’s Encrypt on CentOS 8
For more information, read the Seafile official documentation. And also remember to share your thoughts about Seafile with us via the feedback form below.


Thanks for writing about seafile. It’s great software but I feel is a bit underappreciated. It’s truly reliable and has a very fast client.
@aca
True, Seafile is a great piece of software. Thanks for the useful feedback.