Working remotely is not a new thing for Linux Administrators. Especially when he/she is not in front of the server. Generally, the GUI is not installed by default on Linux servers. But there may some Linux Administrators who choose to install GUI on Linux servers.
When your server has a GUI, you may want to remote the server with full desktop experience. To do that you may install VNC Server on that server. In this article, we will cover about NoMachine as an alternate Remote Desktop Tool.
What is NoMachine
NoMachine is a remote desktop tool. Just like VNC. So what is the difference between NoMachine with the other? The most important factor is speed. The NX protocol provides near local speed responsiveness over high latency and low bandwidth links. So it feels like you were directly in front of your computer.
Features
NoMachine version 4.0 has many key features. When you connected to NoMachine-enabled computer, you can work with any content such as documents, music, videos, as if you were in front of your computer. You can also have the same desktop environment from where ever you are connected.
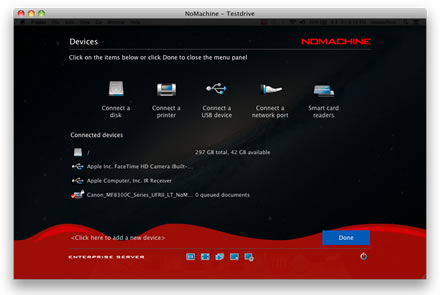
If you want to print files or documents on the remote computer, you can print them in the local computer. If you put your USB flash disk into your local computer, you can also put the files into the remote computer.
For more detail features, you can visit NoMachine website.
Scenario’s
Since the advantage of NX protocol is speed, you may see these scenario’s works. Working remotely for mobile workers with full desktop experience Implement thin-client scenario to reduce PC procurement cost. Users can work with a low – spec PC but gain full desktop experience.
Installing NoMachine Remote Desktop Tool
For those who ever used version 3.5, they will find that version 4.0 provide only a single file. It simplifies installation process since you only need to download one single file. NoMachine supports Linux, Windows, Mac OS X and even Android.
For Linux, NoMachine is available in RPM, DEB format and TAR.GZ . Both in 32-bit and 64-bit. NoMachine DEB format can be downloaded from it’s download page. On Debian, Ubuntu and Linux Mint you may install it using dpkg command.
On 32-Bit Systems
$ sudo wget http://web04.nomachine.com/download/4.0/Linux/nomachine_4.0.352_1_i386.deb
$ sudo dpkg -i nomachine_4.0.352_1_i386.deb
On 64-Bit Systems
$ sudo wget http://web04.nomachine.com/download/4.0/Linux/nomachine_4.0.352_1_amd64.deb
$ sudo dpkg -i nomachine_4.0.352_1_amd64.deb
On RHEL, CentOS and Fedora, you may install it using the RPM command.
On 32-Bit Systems
# wget http://web04.nomachine.com/download/4.0/Linux/nomachine_4.0.352_1_i686.rpm
# rpm -ivh nomachine_4.0.352_1_i686.rpm
On 64-Bit Systems
# wget http://web04.nomachine.com/download/4.0/Linux/nomachine_4.0.352_1_x86_64.rpm
# rpm -ivh nomachine_4.0.352_1_x86_64.rpm
Running NoMachine
Once NoMachine installed, you will find it in your Start Menu. Or you may check it via CLI using command.
/usr/NX/bin/nxplayer
When you run NoMachine for the first time, there is a wizard to help you configure your first connection. Here are the steps:
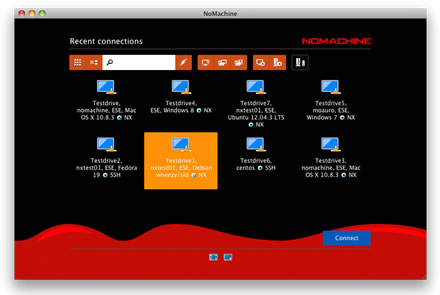
Create a Connection
You will be asked to create a connection. It will include Name (connection), Host (destination), Protocol and Port. By default, NX protocol will work on port 4000. But you can switch to SSH protocol if you want.

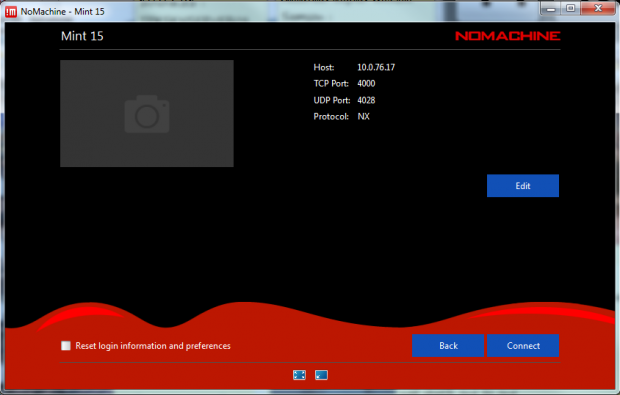
Then a confirmation screen will appear. You can press Connect button to run the connection.
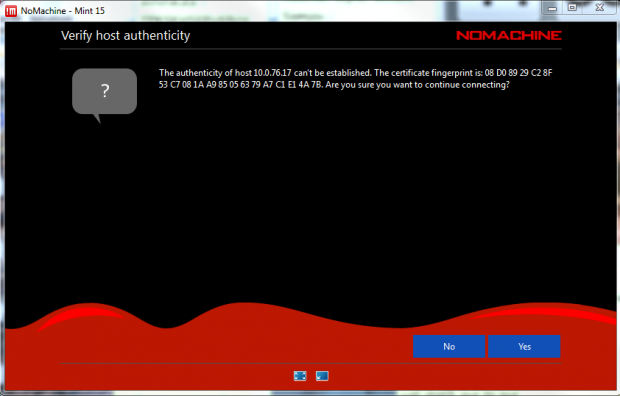
Verify Host Authenticity
When you run NoMachine for the first time, NoMachine will ask you to verify the destination host authenticity.
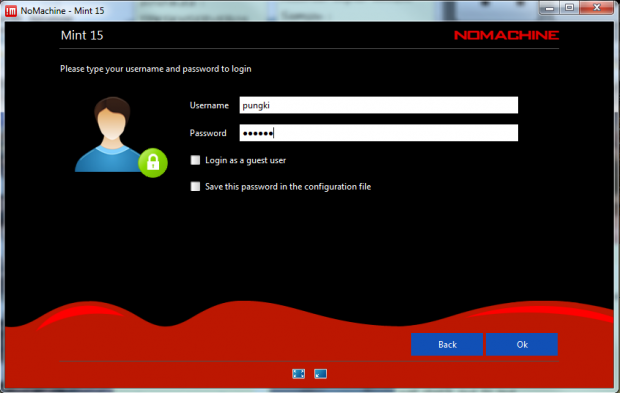
Provide User Credential to Login
Now you will be asked to provide user credential to login to the destination host. If the destination host allows Guest login, you may click “Login as a guest user” parameter. You can save the user password in the configuration file if you want. Just click “Save this password in the configuration file parameter”. Next time, you will not need to enter password again to connect.
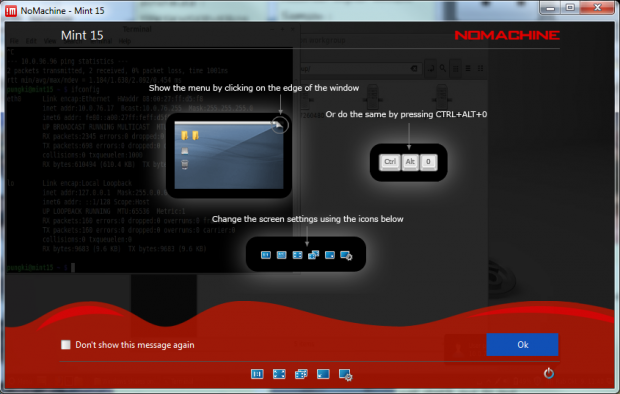
Connecting to Destination Host
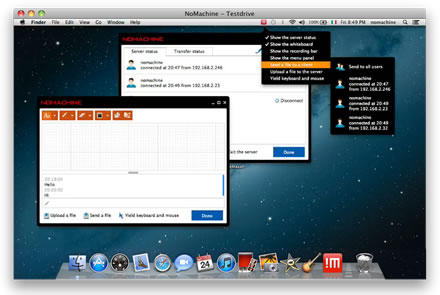
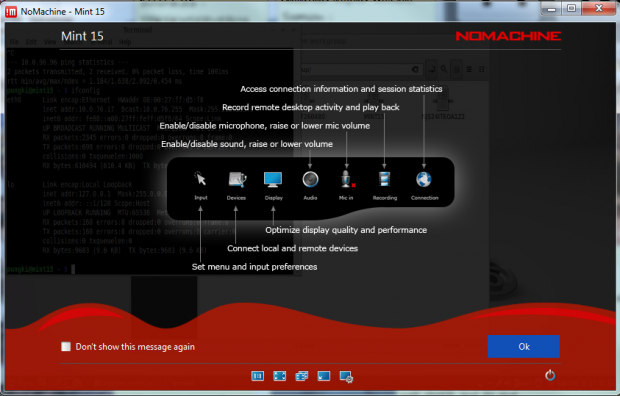
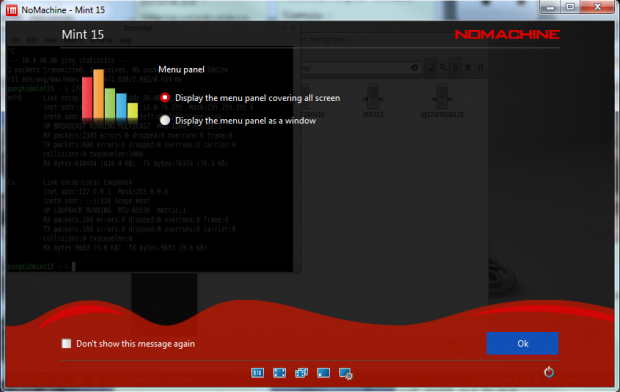
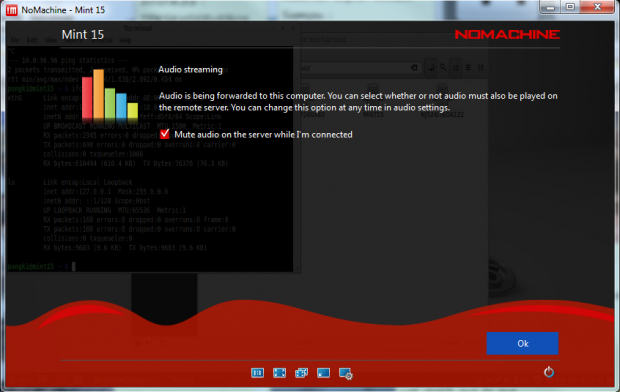
After providing user credential, NX will show you a first guide to use NoMachine. There are a lot of icons that you can click on it. It covers the screen, input, devices, display, audio, mic, recording and connection.
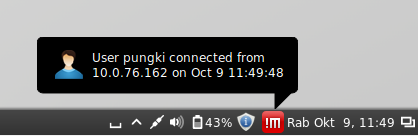
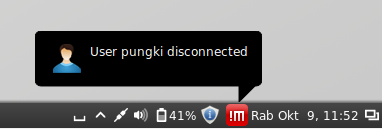
After you finish with the guide, then you will see your destination host appear with full desktop capacity. On the destination host, a notification will show if a user is connected or disconnected.
Although NoMachine is basically free, Free Edition has a limit of 2 concurrent connections only. If you need to have more concurrent connections, you may use the Enterprise Edition. And before you choose what solution you need, you should look at NoMachine feature comparison.


Additionally, you can also use tools like logmein, R-HUB remote support servers teamviewer etc. for remotely accessing computers from anywhere anytime. They work well.
New NX Free 4.0 version Free, non create RDP (Terminal Service) Session? is only VNC client ?
“Free Edition has a limit of 2 concurrent connections only” – that’s not correct. Version 4 free edition allows only one connection. Next person gets “Error: Reached the maximum number of concurrent sessions on this server”
https://www.nomachine.com/AR10K00703
You are right.
Thank you for your correction :)
Red hat and Ubuntu should license nomachine as their default and throw away vnc. It’s old and slow. Then they can finally finish unity and gnome. I think the only reason vnc still exists is because linux ui’s are unfinished.
I don’t think it is fair to compare NoMachine to x2go. NoMachine connects you to Linux, Window and Mac computers. x2go only lets you connect to Linux. There’s hardly any comparison. x2go is open source which could be a plus for those who actually care.
Ehm ehm… A x2go user (developer?) trashing NoMachine. Don’t forget that this is the company which built the software x2go predates. At NoMachine must be all morons if they spent 6 years (not 3) developing a new version of something that was so good. But I can understand your discontent. I’m sure it won’t be easy to keep staying on the shoulders of the giants now that the giants are gone.
NoMachine clients/servers are NOT reliable in working with each other, at least across platforms. Yeah, giants.
Are you sure they are not reliable? Windows to Linux, Linux to Mac, Mac to Mac, Windows to Windows, Mac to Windows, have I forgotten one? Get your facts reliable before posting fud.
NX4 is a regression. Not just because it’s closed source, but because it’s riddled with new and improved bugs (default user permissions, for one), has higher latency and worse screen quality. You have the choice of terrible visual artifacts or irritating and slow screen refreshes with multi-pass encoding (which only seems to make a difference or work at all in the highest quality.) All our LAN users complain that bleeding and ghosting text is exhausting their eyes, and it is especially pronounced using bright text on white (coding highlighting) or dark colors on black (terminal filetype highlighting.) Unless you need to run the server on a platform other than Linux, save yourself a few days of headache and just use x2go. The only reason I could endorse NX4 is if the vglserver will work for OpenGL apps, but I expect to lose a day of my life debugging that too; I bet it could also work on x2go anyhow. Amazing it took 3+ yrs of development to release this buggy VP8/264 wrapper that could benefit users of remote video or remote virtual PCs while causing headache and productivity loss to everyone else.
Well, a slave is a slave. NoMachine quite works. Is it luck? Is it my stubbornness? Is it my skill (just joking about skills I might have) I do not know, but my experience shows that NoMachine is quite a solution?
I definitely had my troubles with it, but I have managed to make it work properly.
There are alternatives based on this and another software called xpra
Comparison of VNC, NX, xpra-
http://winswitch.org/documentation/protocols/choose.html
The open source version of NX, with session suspension-
http://wiki.x2go.org/doku.php
I use Winswitch, has lot of nice features.
http://winswitch.org/about/
new url
wget http://web12.nomachine.com/download/4.0/Linux/nomachine_4.0.360_2_amd64.deb
is correct.
Thank you. But I tried the link is not active. I got 404 error
Hi,
we are unable to use No Machine between the Ubuntu and windows Machine.
As we have installed the No machine server at the both machine.On windows machine log getting following error:-
No Display found .
Please provide any update on that.
Hi,
As we are trying to remotely access the windows machine from the ubuntu machine using the No Machine .We have installed the No machine server on both the machines.But when we trying to connect from Ubuntu machine to windows machine then getting the following error on the windows machine in the No Machine server log :-
No display available.
Server side error:-
Cannot connect to the requested display.
But between the two Ubuntu machines its working fine .
Please provide an update on this.
NoMachine is having the same core features as Cendio’s ThinLinc, where I, just like Scott, have found the (automatic) suspend a session feature extremely useful when moving around to different locations.
But what would be interesting is a head-to-head comparison between NoMachine and ThinLinc. How does local printing, USB-sticks and local drives, server-cluster configurations, server side generated graphic animations, mixed operating systems and so on work? L M Ericsson is the only ones I know that have done extensive comparative testing like this, but they haven’t written a public article about it of course.
Xrdp is easier, better. I am a Linux/Windows admin too. Works like a charm on RHEL and CentOS. Two packages installation, access from any Win PC through Remote Desktop. That’s it.
NoMachine NX code is available. See the FreeNX product.
I have used NoMachine NX and FreeNx for nearly 10 years, for both local connections and connections to the opposite side of the planet, i.e low and high latency. It has always been fast stable, and effective tool. When I need to remotely connect it is my go to tool. VNC, and most others are way to slow for my work which is graphics intensive.
The ability to suspend a session and then pick it up from another machine is very handy. The other really nice thing about the suspend feature is on unstable networks. If the network becomes unavailable, you don’t lose your work, just reconnect and your right where you were. I also really like that it opens a separate session, and a person on the console is undisturbed.
In a corporate setting I highly recommend purchasing a license. This is an excellent company and the income is needed for them to continue to provide development and support.
This is a closed source product. In the current days not being able to audit the code is a huge drawback
There are open source versions available. NoMachines is a trustworthy company and while you won’t be able to see the commercial code, I don’t think there is much to worry about. Besides, the NSA has got ya covered….
I completely agree to this.
Could not connect to the server.
Error is 107: Connection refused
Please check the port is opened on firewall? It’s something related to blocking the port.
iptable is off
Compared to the previous version (3.5) I think this is a step back as a Linux client because they removed the virtual sessions. Version 4 now works more like VNC. If you need the virtual sessions they have a different payed product. I also found that connecting to a remote system with multiple displays is not well thought especially when local resolution is smaller than the remote one. Versions 3.5 and 4 clients cannot coexist on the same computer.
Can you please clarify “When you connected to NoMachine-enabled computer”?
What is a NoMachine-enabled computer? Does that means a machine on the cloud managed by MoMachine or does that mean another machine where you must also install NoMachine? The guide above describes only one machine (the one which initiates the Remote Control). Is there anything to do on the remote machine?
NoMachine-enabled computer means another machine that also installed NoMachine software. On the remote site, I also installed NoMachine software. That’s why I can remote-control the computer on the remote site.
Very Nice Program, but in my case the connection is very slow.