Parrot Security operating system is a Debian-based Linux distribution built by Frozenbox Network for cloud oriented penetration testing. It is a comprehensive, portable security lab that you can use for cloud pentesting, computer forensics, reverse engineering, hacking, cryptography and privacy/anonymity.
Don’t Miss: 5 Best Linux Security-Oriented Distributions of 2016
It is a rolling release upgrade line and comes with some impressive penetration testing operating system features and tools.
Parrot OS Features
- System Specifications: based on Debian 9, runs on a custom hardened Linux 4.5 kernel, uses MATE desktop and Lightdm display manager.
- Digital Forensics: supports “Forensic” boot option to shun boot automounts plus many more.
- Anonymity: supports Anonsurf including anonymization of entire OS, TOR and I2P anonymous networks and beyond.
- Cryptography: comes with custom built Anti Forensic tools, interfaces for GPG and cryptsetup. Additionally, it also supports encryption tools such as LUKS, Truecrypt and VeraCrypt.
- Programming: braces FALCON (1.0) programming language, multiple compilers and debuggers and beyond.
- Full support for Qt5 and .net/mono framework.
- It also supports development frameworks for embedded systems and many other amazing features.
You can read a full features and notable tools list from the Parrot Security OS features and tools page.
Importantly, here is a changelog of Parrot Security OS from 3.0 to 3.1, you can look-over the list to find more about some of the few improvements and new features.
System Requirements
Before you hurry to download and test it, the following are the system requirements:
- CPU: At least 1GHz Dual Core CPU
- ARCHITECTURE: 32-bit, 64-bit and ARMHF
- GPU: No graphic acceleration
- RAM: 256MB – 512MB
- HDD Standard: 6GB – 8GB
- HDD Full: 8GB – 16GB
- BOOT: Legacy BIOS or UEFI (testing)
Next, we shall dive into the installation process but before we move any further, you need to download the Live ISO image from the link below:
Installing Parrot Security OS
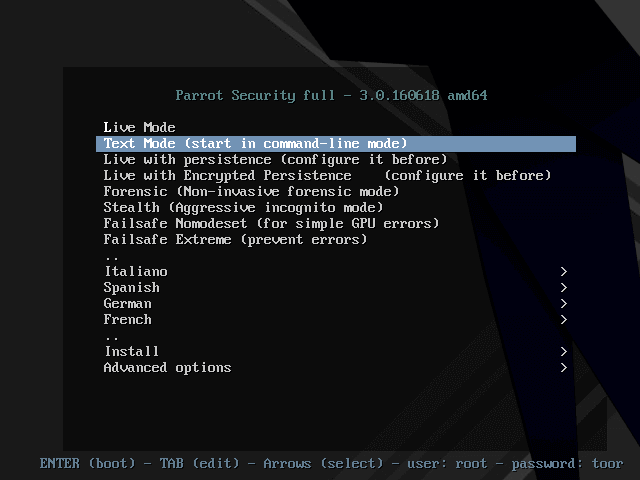
1. After downloading the ISO image, make a bootable media (DVD/USB flash), when you have successfully created a bootable media, insert it into a functioning DVD-drive or USB-port, then boot into it. You should be able to view the screen below.
Using the Down Arrow, scroll down to the “Install” option and hit Enter:
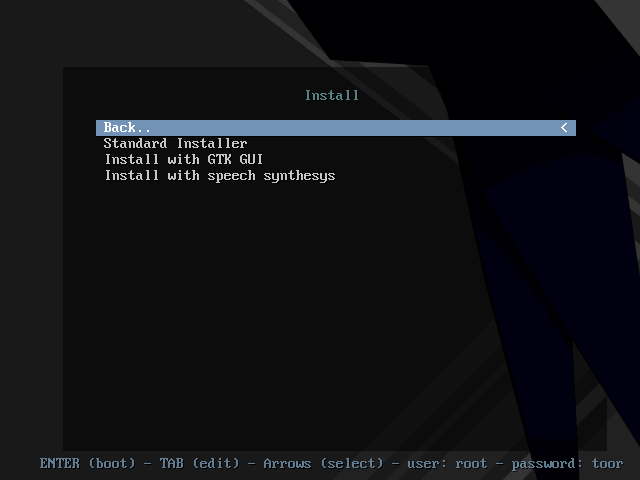
2. You should be at the screen below, where you can choose the type of installer to use. In this case, we shall use the “Standard Installer”, therefore, scroll down to it and hit Enter.
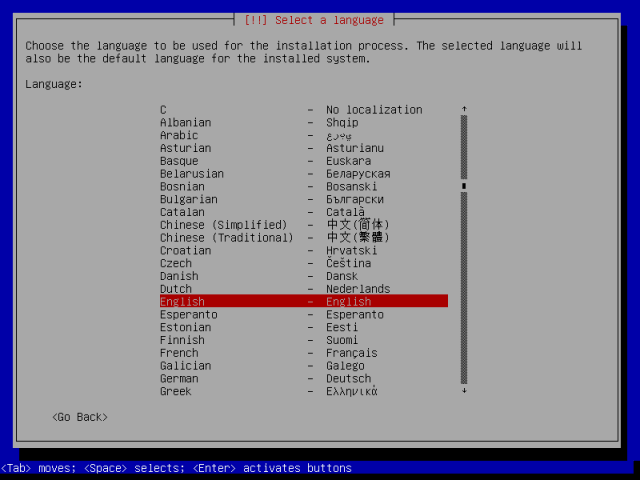
3. Then, select the language you will use for the installation from the next screen and press Enter.
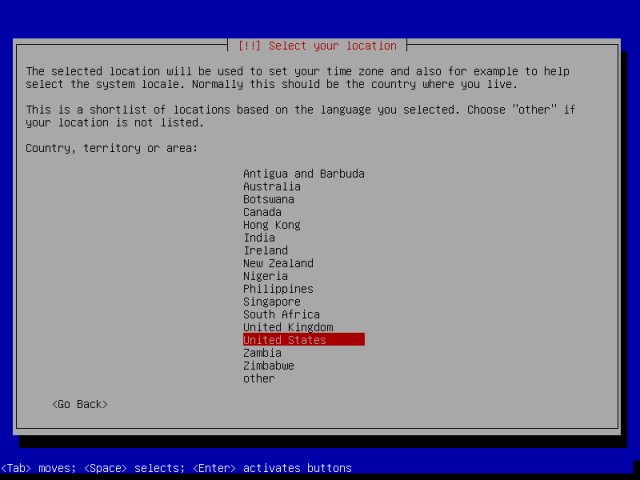
4. In the interface below, you are required to select your current location, simply scroll down and choose your country from the list.
In case you do not see it, move to “other”, you will then view all the continents in the world. Select the appropriate continent and followed by your country, press Enter.
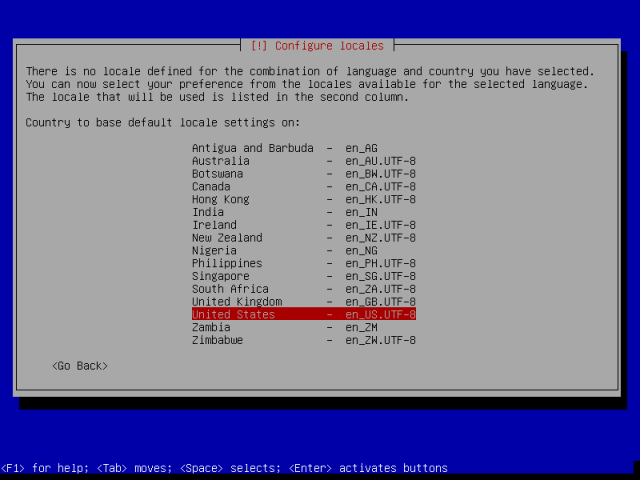
5. Then, configure the system locales, that is in case the country and language combination you selected have no defined locales. Do that in the following screen and hit Enter.
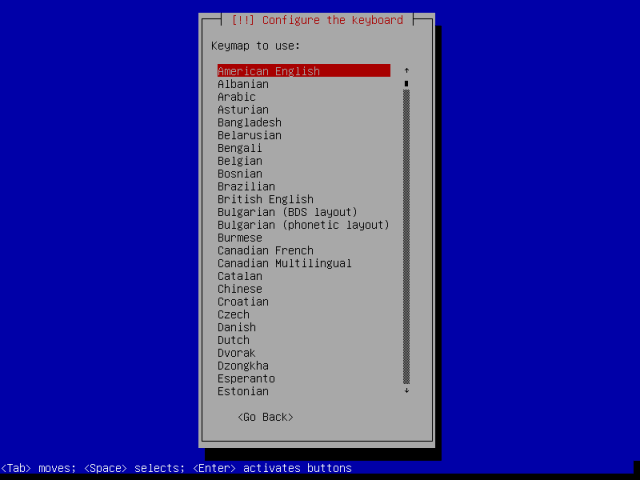
6. Thereafter, configure the keyboard by choosing the keymap to use and press Enter.
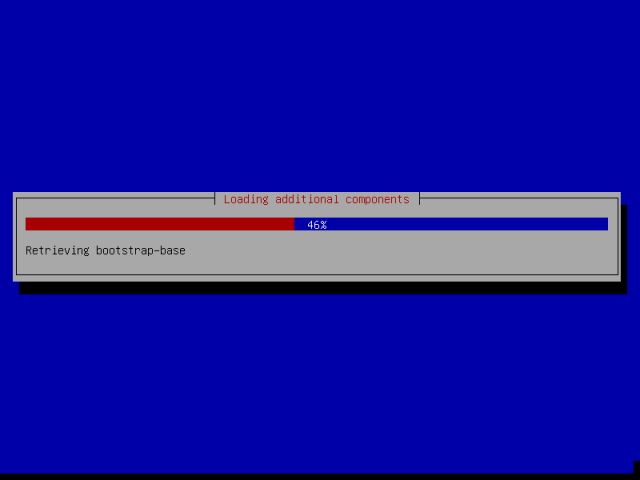
7. You will see the screen below, which indicates additional components are being loaded.
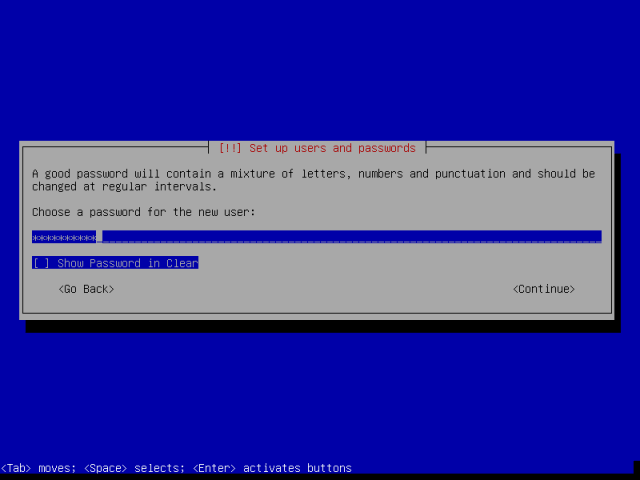
8. On the next screen, setup user and password. From the interface below, enter a root use password and hit Enter.
9. Next, setup a user account. Firstly, enter the full name for the user in the screen below and subsequently, set the username and password as well in the next screens, then press Enter to advance.

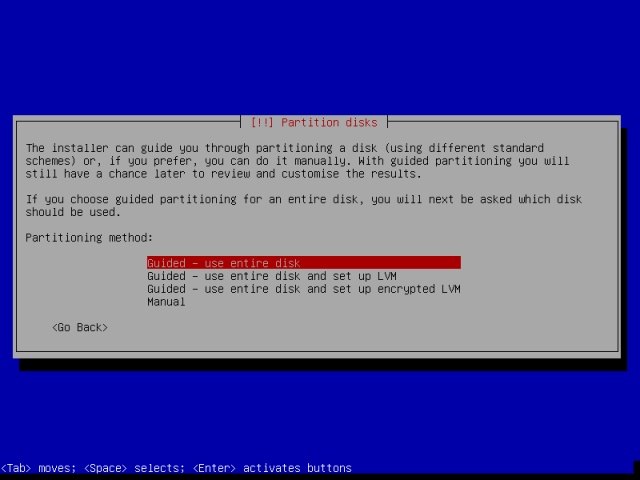
10. After setting username and password, at this point, you should be at the “Partition disks” screen below. From here, move down to the “Manual” option and hit Enter to advance.
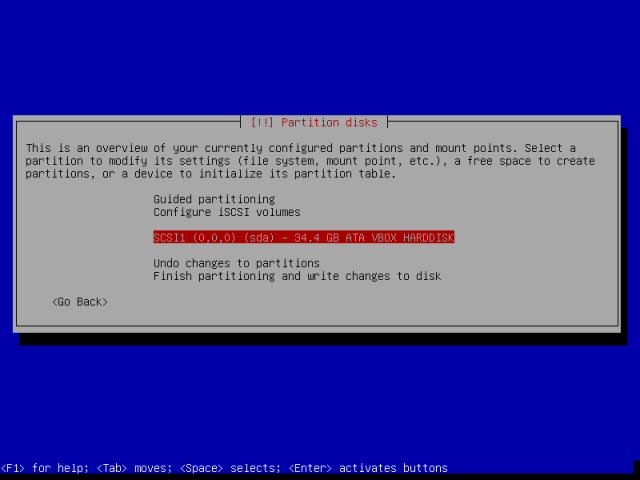
11. Next, you will view a list of the current disk partitions on your harddisk from the interface below. Select the disk partition, which in my case is the 34.4 GB ATA VBOX HARDDISK, by scrolling to highlight it and continue by pressing Enter.
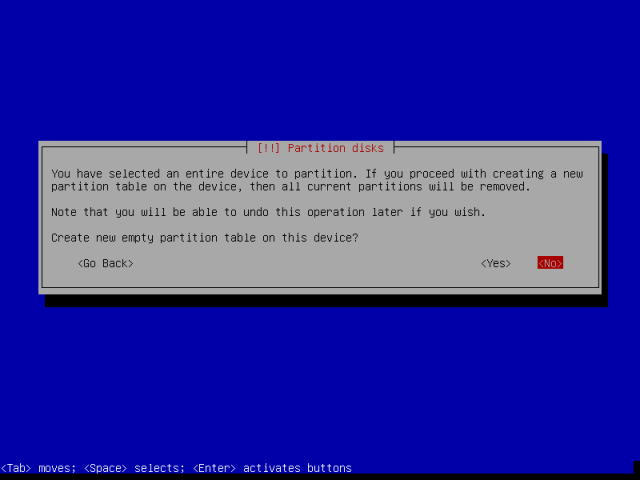
Note: In case you have selected an entire disk to partition, you will be prompted as below, choose <Yes> to create a new empty partition table and continue.
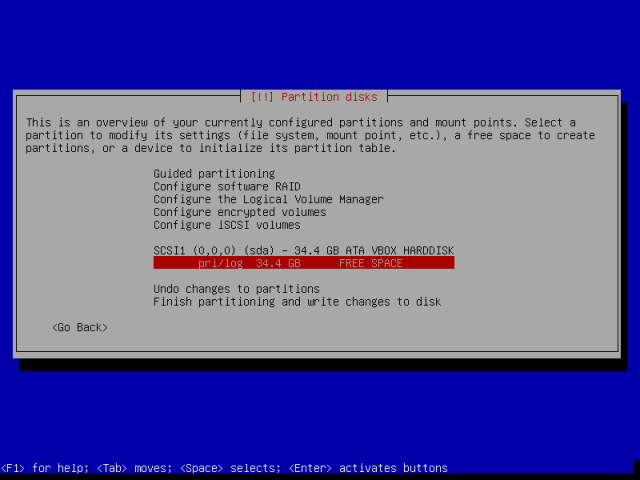
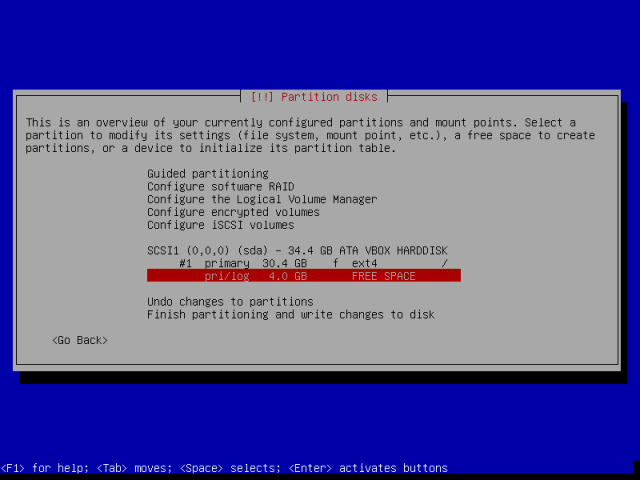
12. Now, select the free space created and advance to further instructions.
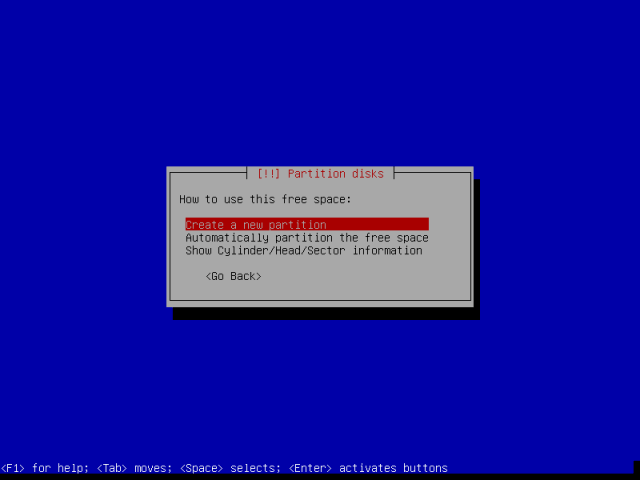
13. Go on to select how to use the new empty space, choose “Create a new partition” and proceed by pressing Enter.
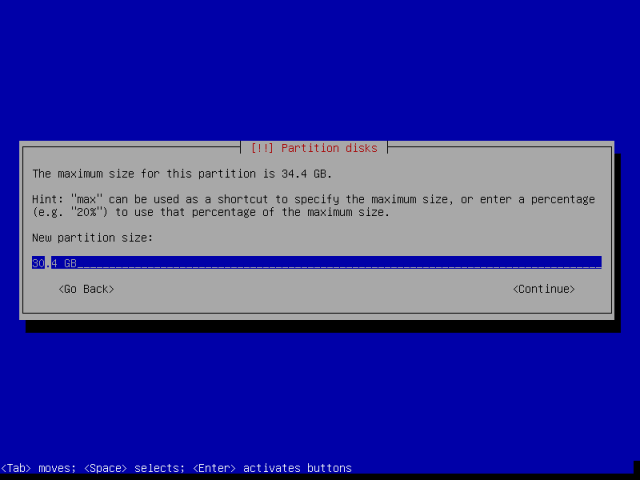
14. Now create a root partition with 30GB size and hit Enter to create it.
Then, make the root partition primary as in the interface below and proceed to the next stage.

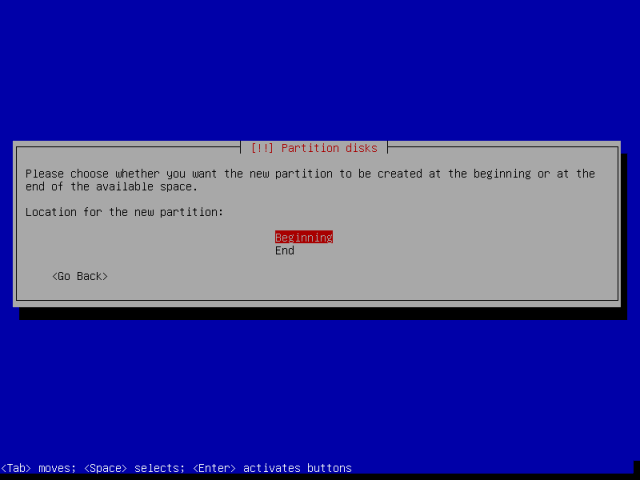
Thereafter, also set the root partition to be created at the beginning of the available free space and press Enter to continue.
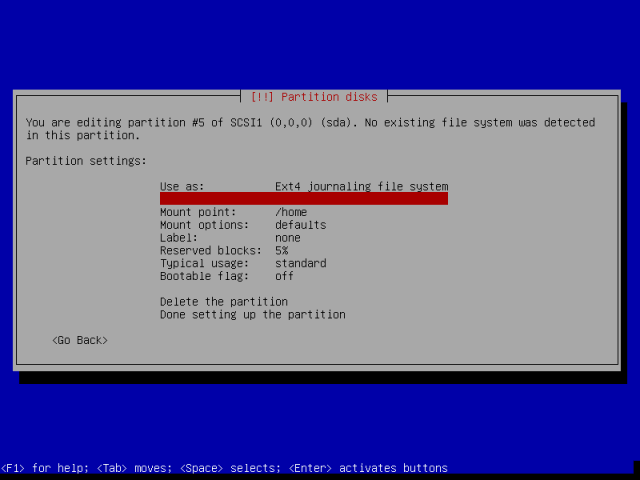
Now you can view the interface below, which displays the root partition settings. Remember that the file system type (Ext4) is selected automatically, to use another file system type, simply hit Enter on “Use as” and select the file system type you want to use for the root partition.
Then scroll down to “Done setting up the partition” and continue by pressing Enter.

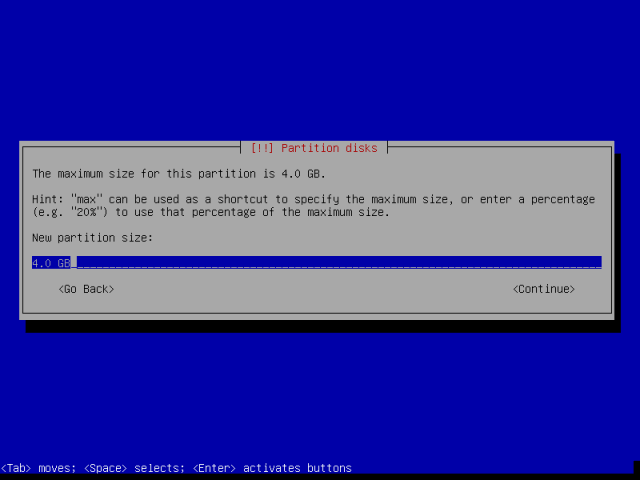
15. Next, you need to create a swap area, it is a portion of the hard disk space which temporarily holds data from the system RAM that is not currently scheduled to be worked on, by the CPU.
You can create a swap area of size twice as your RAM, for my case I will use the free space left. Therefore, move down to highlight the free space/partition and press Enter.
You will view the create a new partition interface, select “Create a new partition” option and proceed by pressing Enter.
Enter the Swap area size, make it a logical partition and proceed to the next step by pressing Enter.
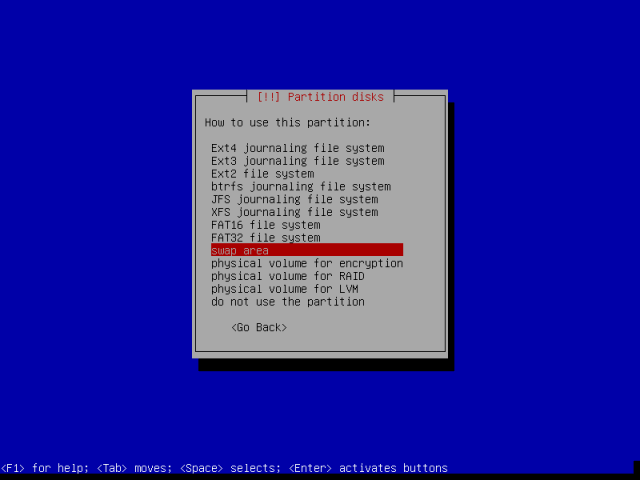
Then select “Use as” and press Enter again.
Choose “Swap area” from the interface below, hit Enter to advance.
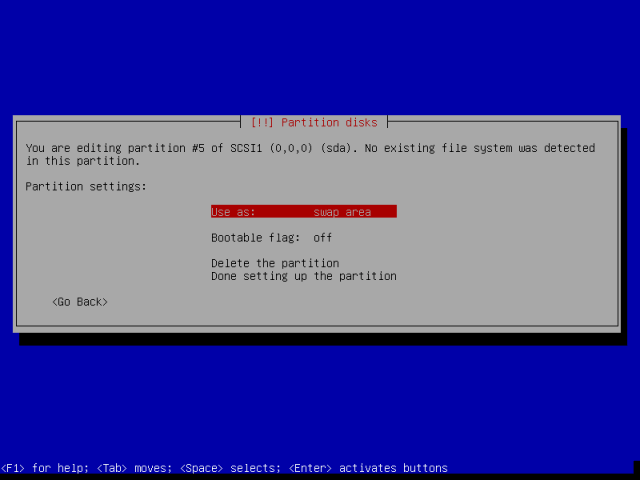
Finish creating the Swap area by scrolling down to “Done setting up the partition” and press Enter.
16. When you have created all the partitions, you will be at the screen below. Move down to “Finish partitioning and write changes to disk”, then hit Enter to proceed.
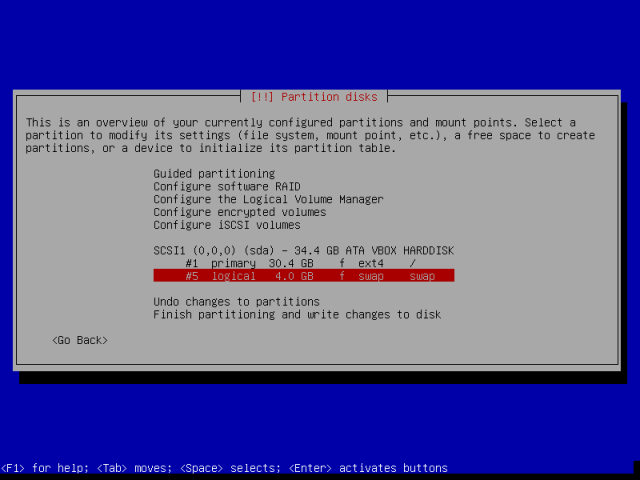
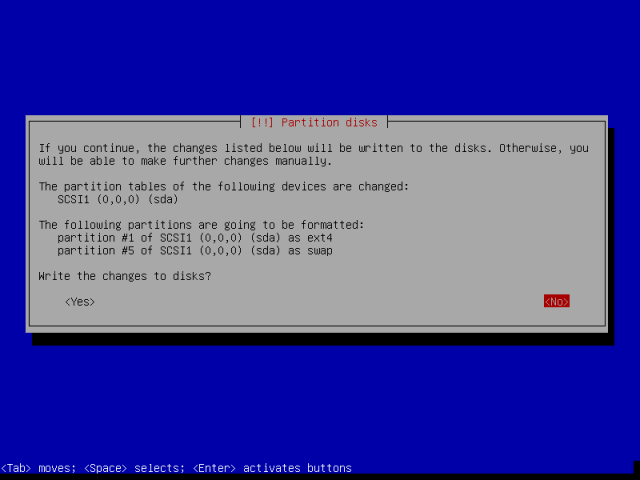
Select <Yes> to accept and write changes to disk and then advance by pressing Enter button.
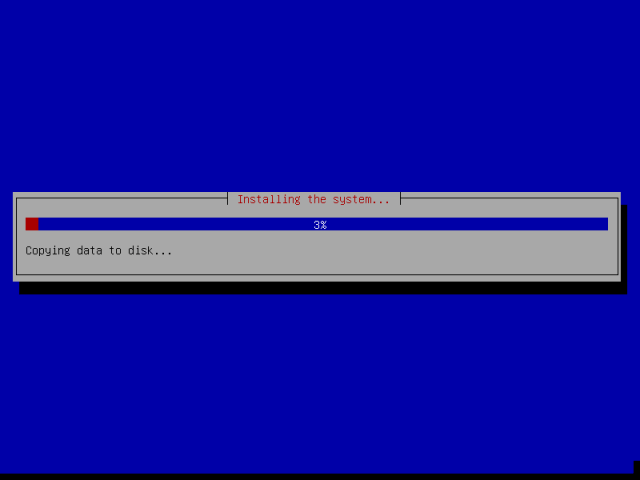
17. At this point, the system files will be copied to disk and installed, depending on your system specifications, it will take a few minutes.
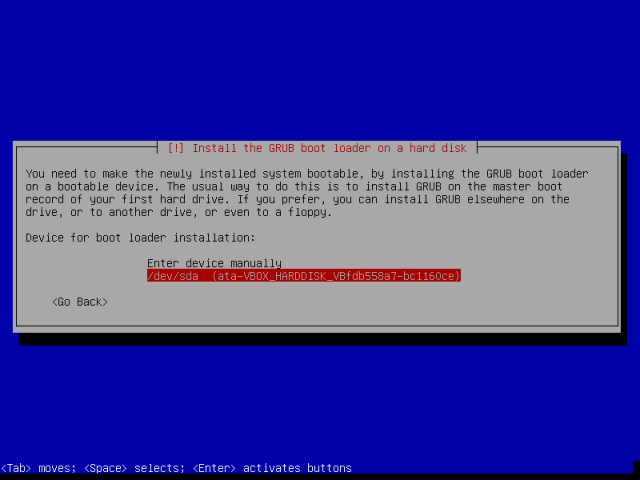
18. At a certain point, you will be asked to choose the disk in which the Grub bootloader will be installed. Select the primary harddisk and press Enter to continue and Yes to confirm on the next screen to finish the installation.
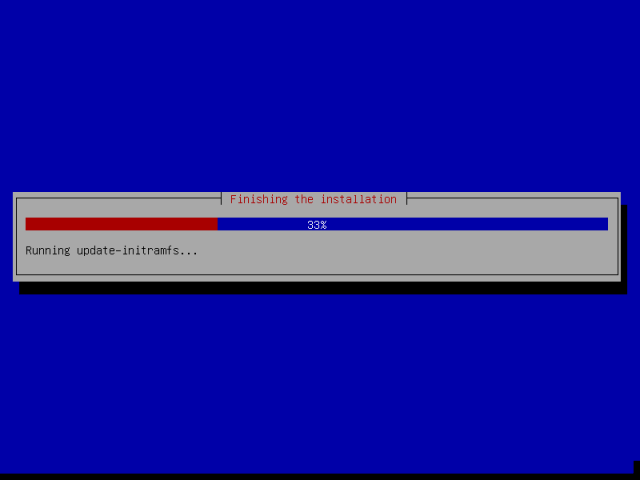
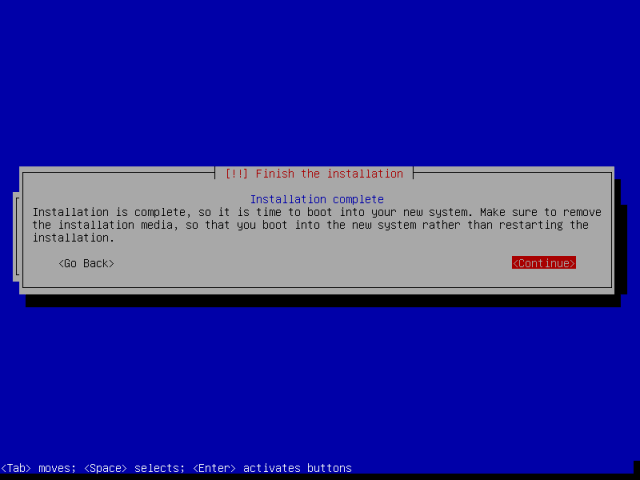
19. In the screen below, hit enter to finish the installation process. But the system will not reboot immediately, some packages will be removed from the disk, until that is done, the system will then reboot, remove the installation media and you will view the Grub boot loader menu.
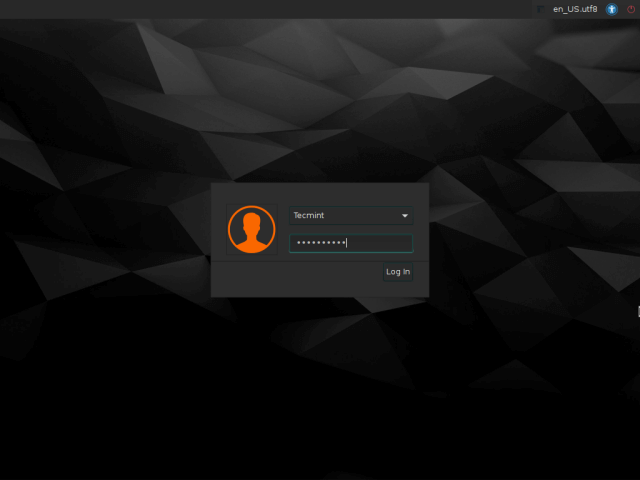
20. At the login prompt, enter your username and password to login.
Conclusion
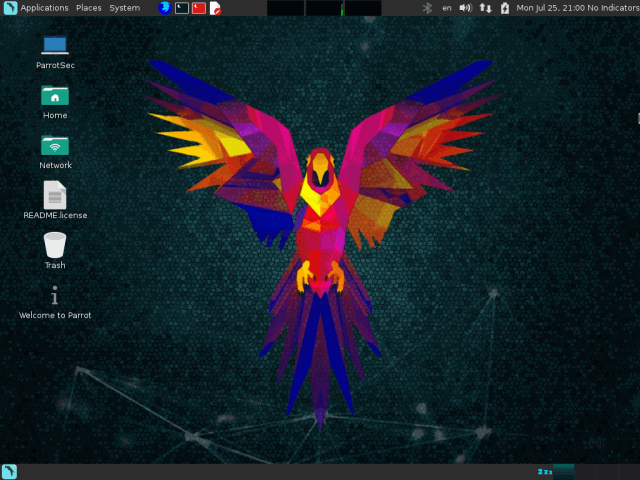
In this installation guide, we walked through the steps you can follow from downloading the ISO image, making a bootable media and installing Parrot security OS on your machine. For any comments, please use the feedback form below. You can now perform cloud based pentesting and much more like a boss.
