We all know the feeling of looking for a file and not finding it, even in the trash. The trauma that comes with file and data loss should end thanks to the TestDisk – is a free, open-source software that was initially designed for recovering memory partitions and making non-bootable disks bootable again. It is useful for recovering data from partitions that are caused by human errors or viruses.
In this article, we will show you how to recover deleted files in Linux using the TestDisk data recovery tool. To use testdisk, you must have TestDisk installed on your Linux system using our article: How to Install and Use TestDisk Data Recovery Tool in Linux.
Once you’ve TestDisk installed on your Linux, you can verify the version of testdisk using the command.
# testdisk --version
Sample Output
TestDisk 7.0, Data Recovery Utility, April 2015
Christophe GRENIER <[email protected]>
http://www.cgsecurity.org

Version: 7.0
Compiler: GCC 7.2
ext2fs lib: 1.44.1, ntfs lib: libntfs-3g, reiserfs lib: none, ewf lib: none, curses lib: ncurses 6.0
OS: Linux, kernel 4.15.0-55-generic (#60-Ubuntu SMP Tue Jul 2 18:22:20 UTC 2019) x86_64
Great! This confirms that we have successfully installed testdisk. Now proceed further to learn how to recover deleted files in Linux.
Step 1: Creating TestDisk Data Log File
To recover deleted files, first you need to create a testdisk.log file, as this log data is essential as it contains useful information for recovering your data later.
# testdisk
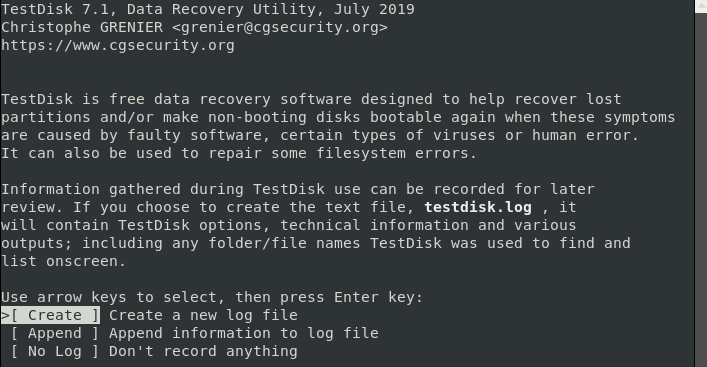
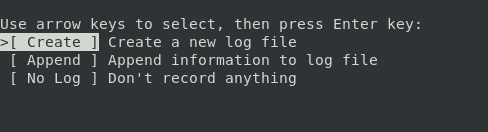
The utility description screen has three options mentioned in detail below:
Create
-
- – the “
create
- ” option allows you to create a new log file.
- Append – the option enables you to add extra information to the report from the previous sessions.
- No log – choose the option when you don’t want to record logs for later use.
Note: The Testdisk utility tool is beginner-friendly; it offers suggestions to the options on each screen. Choose the recommended options (highlighted). Press up and arrow keys to switch between the different options.
Select the ‘Create’ option as we need to create a new log file. Depending on the system security, the computer might prompt for sudo password to proceed with the recovery.
Step 2: Choose Your Recovery Drive
Testdisk will then display the disks attached to your system. The system displays each drive’s total storage space and its free space. Choose the drive where your file is stored then use the right and left arrow keys to navigate and select ‘Proceed‘. Next, press the ENTER button. In this case, the drive is an external flash drive labelled /dev/sdb.
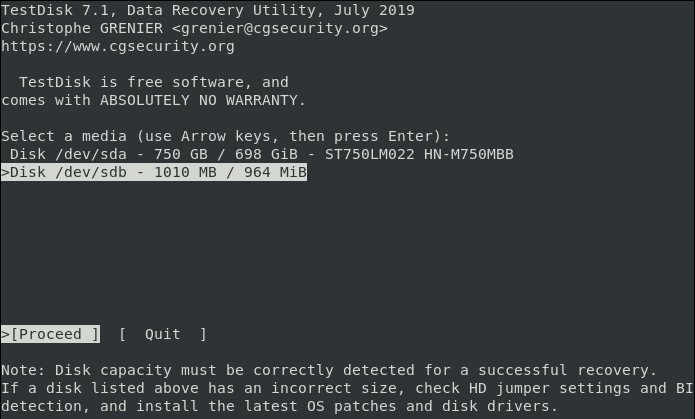
Depending on the security permissions, your system may not display some drives. For such cases, click the “Sudo option”, which is beside the Proceed and Quit options.
Open the Sudo and enter your password. After successful password verification, the system will display all attached drives with their specs.
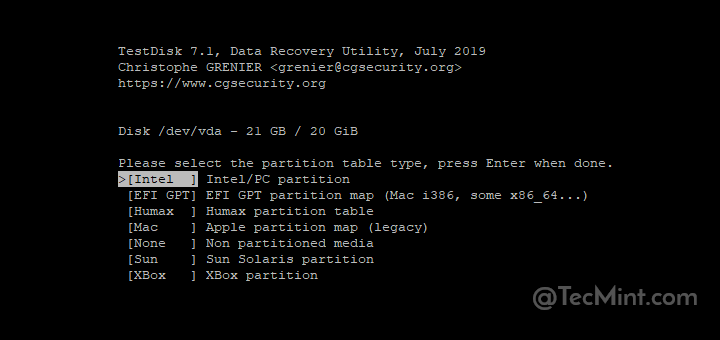
Step 3: Selecting the Partition Table Type
After selecting your drive, the next task is to identify the correct partition table. For beginners, it can be hard to identify the correct partition table type but you need not worry about this. The system will automatically predict and highlight the best choice.
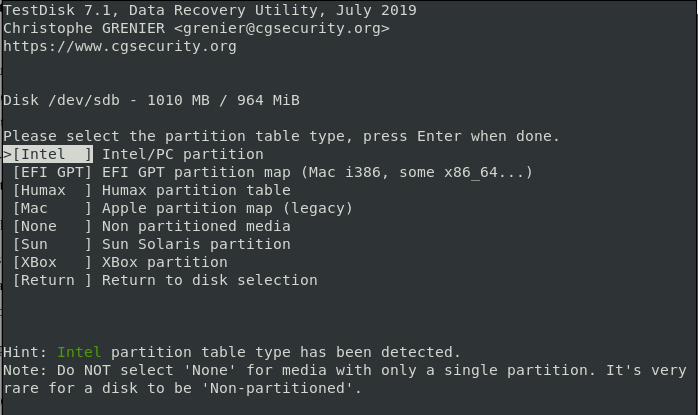
Next, click ‘ENTER‘ to continue.
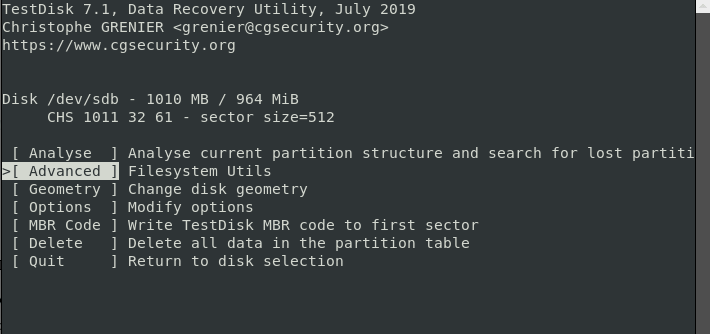
After indicating the correct drive and the partition type, the next screen window displays a list of recovery options. You can select any of the options from the screen depending on your preferences. Because we are recovering a deleted file, we will select the ‘Advanced’ option.
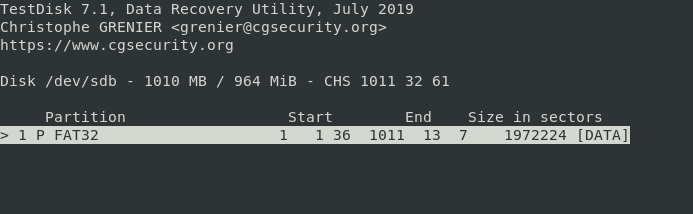
Step 4: Select the Deleted File Source Drive Partition
The screen in our picture allows you to choose the partition if your computer has many. Select your choice and hit ‘ENTER‘ to proceed. In this case, I’m using a removable flash drive with only 1 FAT32 partition.
Step 5: Check the Deleted File Source Directory
After the utility displays the system directories for all partitions, navigate to the specific directory you lost or deleted your file. For instance, if your file was saved in the “Documents” file, navigate to the Documents tab.
Tip: use the “back” arrow to navigate back to where you lost your files.
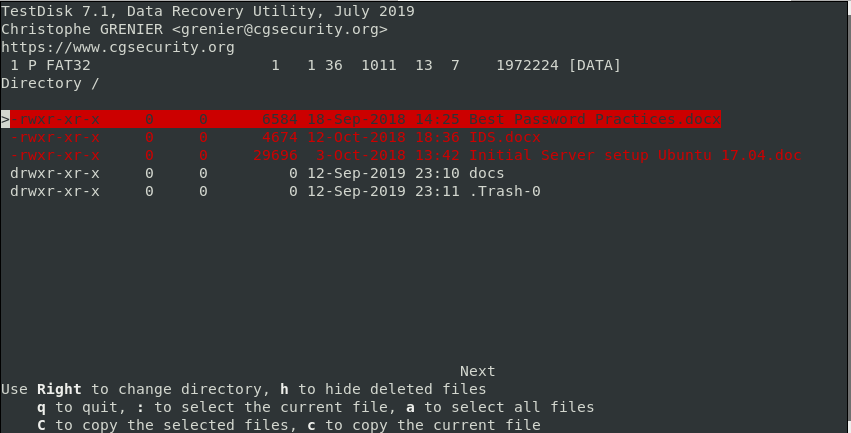
After navigating to the source directory, you will find the deleted files highlighted in red. Browse your file from the drop-down list and highlight or check it.
Step 6: Restore Deleted File in Linux
Copy the file you want to restore by pressing the letter c on your keyboard. In the previous image, the deleted file that I want to restore is called Best Password Practices.docx.
To copy the file, simply press the letter c on the keyboard.
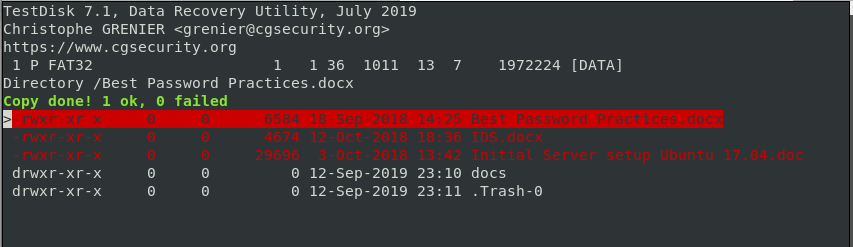
Step 7: Paste the Recovered File to Directory
Testdisk utility will then display a list of locations that you can paste your copied file in order to recover it. Again, select the destination by scrolling and just like before, press C to paste it. In this case, the file is copied into the Public directory.

If all went well, you should get a notification below that the files were successfully copied.
To exit from Testdisk utility, select Quit, and press ENTER. This will take you back to the previous screen. Select Quit and press ENTER. Again, this takes you back and just like before, select Quit and press ENTER to exit completely from TestDisk.
And that’s how you can recover a deleted file in Linux using the testdisk utility tool. If you ever accidentally delete a file on your system, don’t panic, testdisk will come to your rescue.