CentOS is a Industry Standard Linux Distribution which is a derivative of RedHat Enterprise Linux. You may start using the OS as soon as you install it, but to make the most out of your system you need to perform a few updates, install a few packages, configure certain services and application.
This article aims at “30 Things to Do After Installing RHEL/CentOS 7”. The post is written keeping in mind you have installed RHEL/CentOS Minimal Install which is preferred in Enterprise and production environment, if not you can follow below guide that will show you minimal installations of both.
The following are the list of important things, which we’ve covered in this guide based on industry standard requirements. We hoping that, these things will be very helpful in setting up your server.
1. Register and Enable Red Hat Subscription
After minimal RHEL 7 installation, it’s time to register and enable your system to Red Hat Subscription repositories and perform a full system update. This is valid only if you have a valid RedHat Subscription. You need to register your in order to enable official RedHat System repositories and update the OS from time-to-time.
We have already covered a detailed instructions on how to register and active RedHat subscription at the below guide.
Note: This step is only for RedHat Enterprise Linux having a valid subscription. If you are running a CentOS server immediately move to further steps.
2. Configure Network with Static IP Address
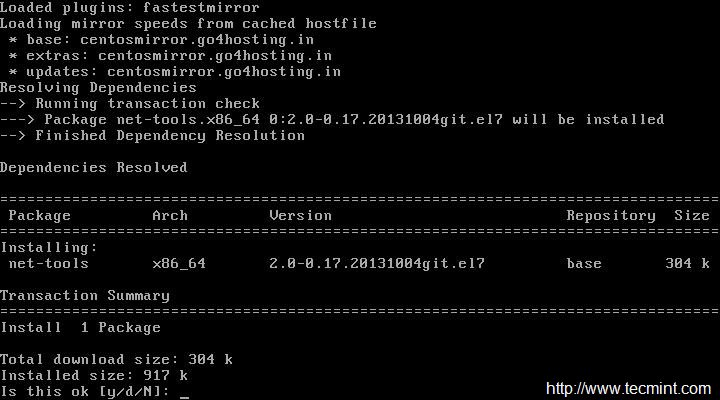
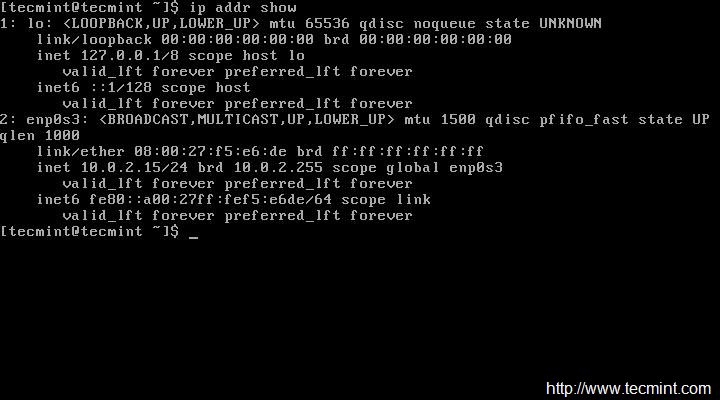
The first thing you need to do is to configure Static IP address, Route and DNS to your CentOS Server. We will be using ip command the replacement of ifconfig command. However, ifconfig command is still available for most of the Linux distributions and can be installed from default repository.
# yum install net-tools [Provides ifconfig utility]
But as I said we will be using ip command to configure static IP address. So, make sure you first check the current IP address.
# ip addr show
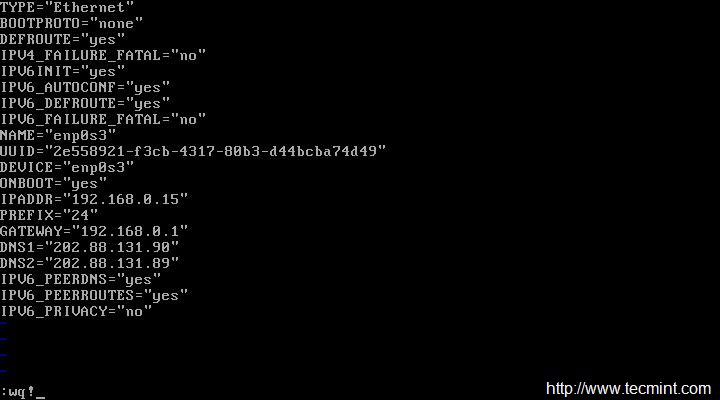
Now open and edit file /etc/sysconfig/network-scripts/ifcfg-enp0s3 using your choice of editor. Here, I’m using Vi editor and make sure you must be root user to make changes…
# vi /etc/sysconfig/network-scripts/ifcfg-enp0s3
Now we will be editing four fields in the file. Note the below four fields and leave everything else untouched. Also leave double quotes as it is and enter your data in between.
IPADDR = “[Enter your static IP here]”
GATEWAY = “[Enter your Default Gateway]”
DNS1 = “[Your Domain Name System 1]”
DNS2 = “[Your Domain Name System 2]”
After making the changes ‘ifcfg-enp0s3‘, looks something like the image below. Notice your IP, GATEWAY and DNS will vary, please confirm it with your ISP. Save and Exit.
Restart service network and check the IP is correct or not, that was assigned. If everything is ok, Ping to see network status…
# service network restart
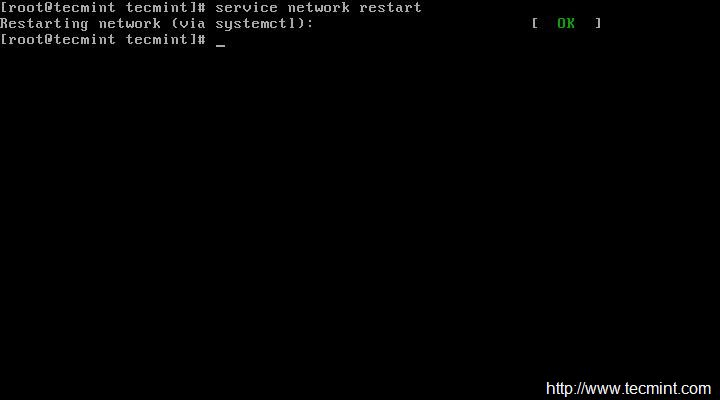
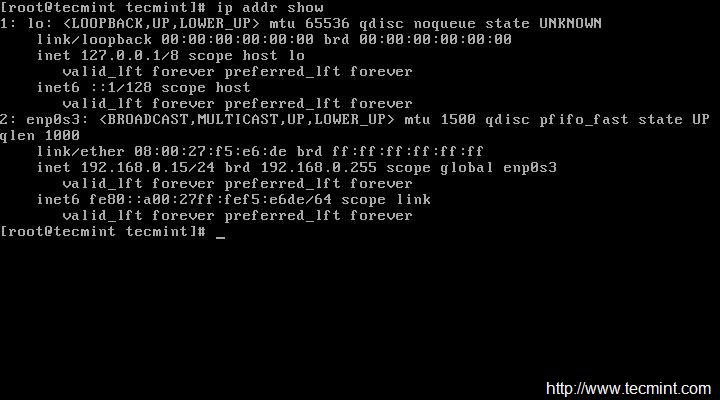
After restarting network, make sure to check the IP address and network status…
# ip addr show
# ping -c4 google.com

3. Set Hostname of Server
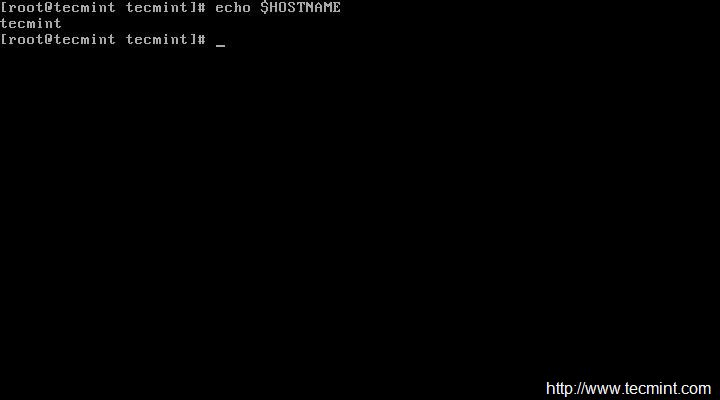
The next thing to do is to change the HOSTNAME of the CentOS sever. Check the currently assigned HOSTNAME.
# echo $HOSTNAME
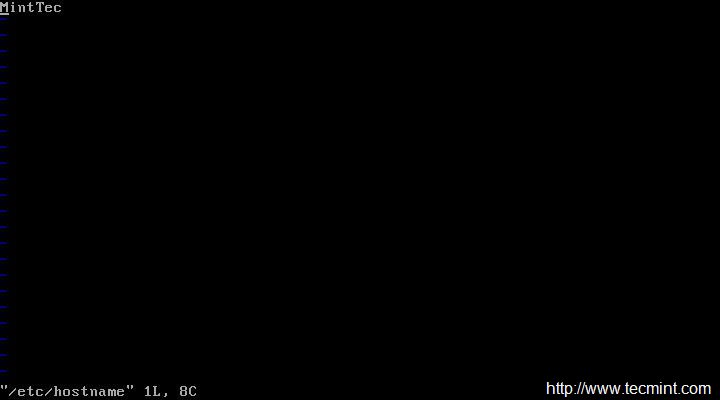
To set new HOSTNAME we need to edit ‘/etc/hostsname‘ and replace old hostname with the desired one.
# vi /etc/hostname
After setting hostname, make sure to confirm hostname by logout and login again. After login check new hostname.
$ echo $HOSTNAME

Alternatively you may use command ‘hostname‘ command to view your current hotsname.
$ hostname
4. Update or Upgrade CentOS Minimal Install
This will not install any new packages other than updating and installing the latest version of installed packages and security updates. Moreover Update and Upgrade are pretty same except the fact that Upgrade = Update + enable obsoletes processing during updates.
# yum update && yum upgrade
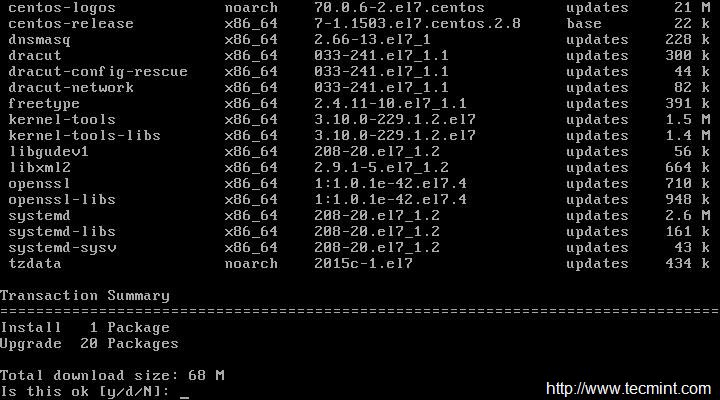
Important: You can also run the below command which will not prompt for the packages update and you do not need to type ‘y‘ for accepting the changes.
However it is always a good idea to review the changes which is going to take place on the sever specially in production. Hence using the below command may automate the update and upgrade for you but it is not recommended.
# yum -y update && yum -y upgrade
5. Install Command Line Web Browser
In most cases, specially in production environment, we usually install CentOS as command line with no GUI, in this situation we must have a commandline browsing tool to check websites via terminal. For this, we going to install a most famous tool called ‘links‘.
# yum install links

For usage and examples to browse web sites u links tool, read our article Command Line Web Browsing with Links Tool
6. Install Apache HTTP Server
No matter for what purpose you will be using the server, in most of the cases you need a HTTP server to run websites, multimedia, client side script and many other things.
# yum install httpd

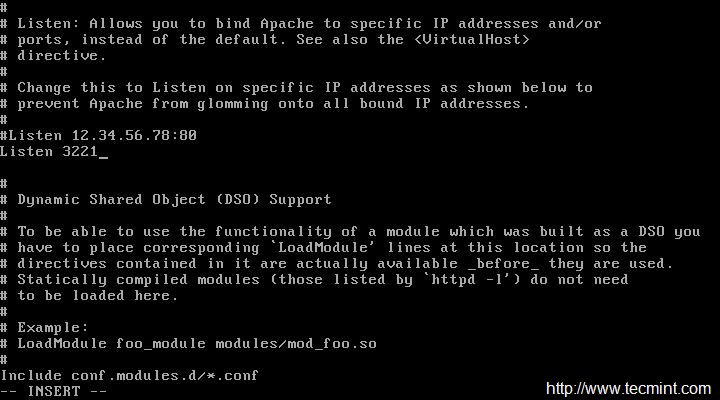
If you would like to change default port (80) of Apache HTTP Server to any other port. You need to edit the configuration file ‘/etc/httpd/conf/httpd.conf‘ and search for the line that starts typically like:
LISTEN 80
Change port number ‘80‘ to any other port (say 3221), save and exit.
Add the port you just opened for Apache through the firewall and then reload the firewall.
Allow service http through firewall (Permanent).
# firewall-cmd --add-service=http
Allow port 3221 through firewall (Permanent).
# firewall-cmd --permanent --add-port=3221/tcp
Reload firewall.
# firewall-cmd --reload
After making all above things, now it’s time to restart Apache HTTP server, so that the new port number is taken into effect.
# systemctl restart httpd.service
Now add the Apache service to system-wide to start automatically when system boots.
# systemctl start httpd.service
# systemctl enable httpd.service
Now verify the Apache HTTP Server by using links command line tool as shown in the below screen.
# links 127.0.0.1