On Thursday, April 23rd, 2020, Canonical Ltd, the makers of Ubuntu Linux distribution officially released the long-awaited Ubuntu 20.04 version code-named “Focal Fossa”, it is an LTS (Long Term Support) version based on Linux kernel series 5.4, for which maintenance updates will be provided for 5 years until April 2025 and it will reach end-of-life in 2030.
If you are looking for a server installation, then read our article: How to Install Ubuntu 20.04 Server
New Features in the Base System
Ubuntu 20.04 LTS ships with several new features, which includes a selection of the latest and greatest free, open-source applications. Some of the notable applications include new upstream releases of GCC 9.3, Glibc 2.31, OpenJDK 11, Python 3.8.2, PHP 7.4, Ruby 2.7.0, Perl 5.30, Golang 1.13, Rustc 1.41 and comes with built-in support for the WireGuard VPNWireGuard VPN.
New Features in the Desktop Edition
The new desktop features include a new graphical bootsplash (integrates with the system BIOS logo), refreshed Yaru theme, GNOME 3.36, Mesa 20.0 OpenGL stack, BlueZ 5.53, PulseAudio 14.0 (prerelease), Firefox 75.0, Thunderbird 68.7.0, and LibreOffice 6.4. Concerning network configuration, netplan comes with many added features.
Also, in the base system, Python 3.8 is the default version of Python used, ubuntu-software has been replaced by the Snap Store (snap-store), as the default tool for finding and installing packages and snaps. For more information about the new features, see the official release notes.
System Requirements for Ubuntu 20.04
- 2 GHz dual-core processor
- 4 GiB RAM (but 1 GiB can work)
- 25 GB of hard-drive space
- VGA capable of 1024×768 screen resolution
- Either of the two: a CD/DVD drive or a USB port for the installer media
- Optionally, Internet access is helpful
Download Ubuntu 20.04 LTS Desktop ISO
The Ubuntu installation ISO image can be downloaded using the following link for the x64 bit system only.
In this article, you will learn how to Ubuntu 20.04 LTS with screenshots. If you prefer an upgrade, read our guide that shows How To Upgrade to Ubuntu 20.04 from Ubuntu 18.04 & 19.10.
Installation of Ubuntu 20.04 LTS Desktop
1. Once you have obtained the Ubuntu 20.04 desktop image, create a bootable media using Rufus tool or create a bootable USB drive using LiveUSB Creator called Unetbootin.
2. Next, insert the bootable DVD or USB into the appropriate drive on your machine. Then start the computer and instruct the BIOS by pressing a special function key (F2, F8, F9 or F10, F11, F12) to boot-up from the inserted USB/CD drive.
Once the BIOS detects the bootable media, it boots from it. After a successful boot, the installer will check your disk (file system), press Ctrl+C to skip this process.
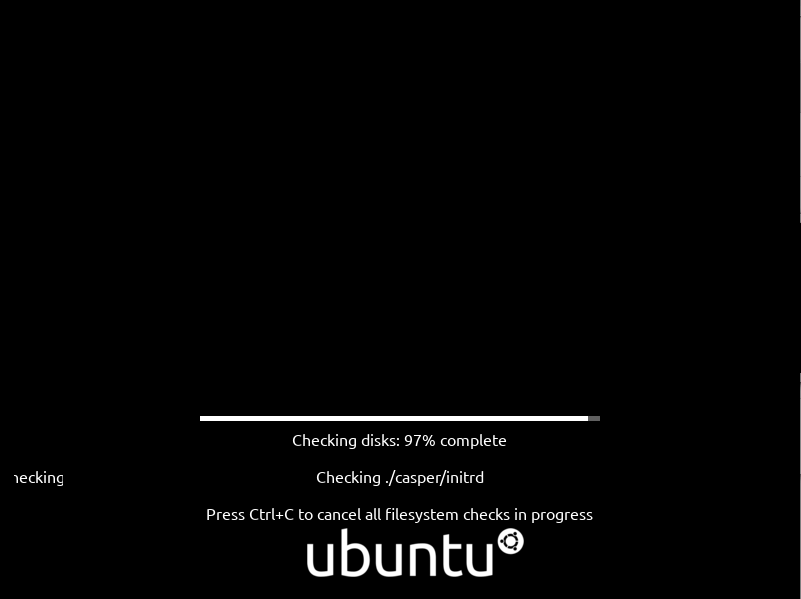
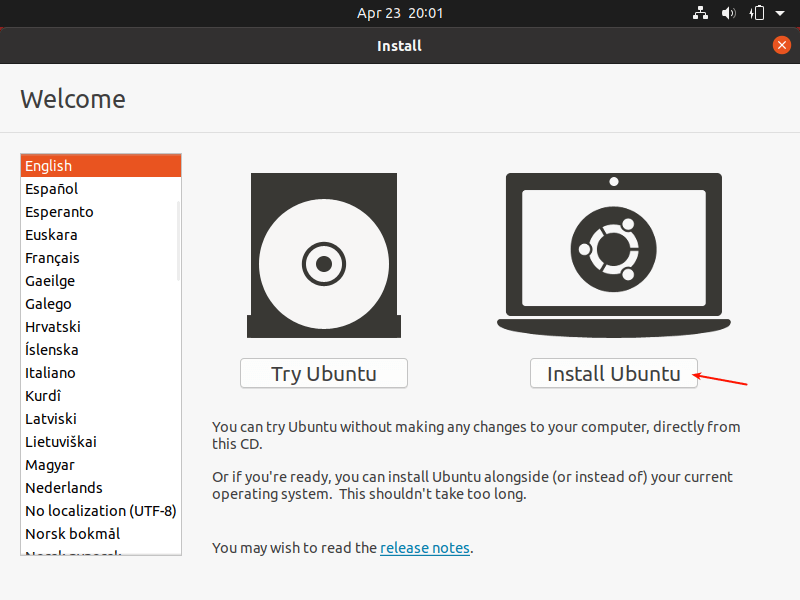
3. When disk checking is complete or if you have canceled it, after a few seconds, you should see the Ubuntu 20.04 welcome page as shown in the following screenshot.
Select Install Ubuntu.
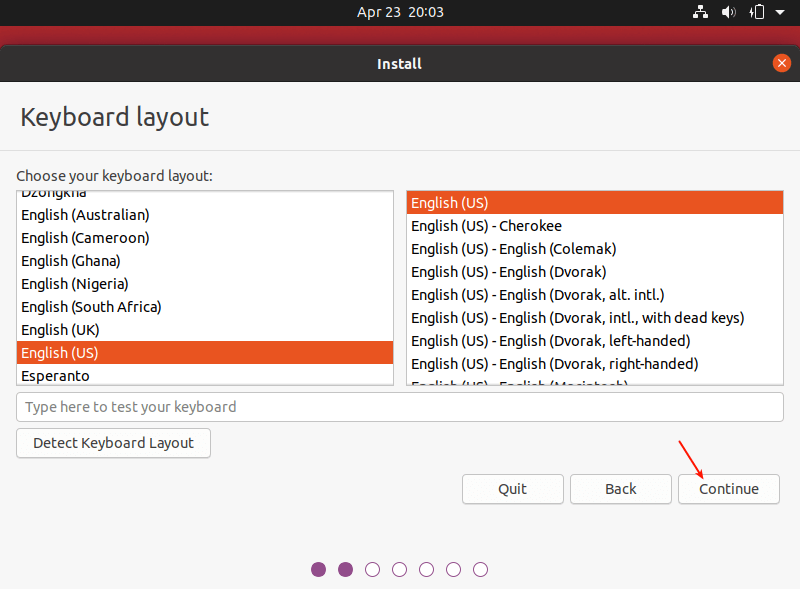
4. Next, choose your keyboard layout and click Continue.
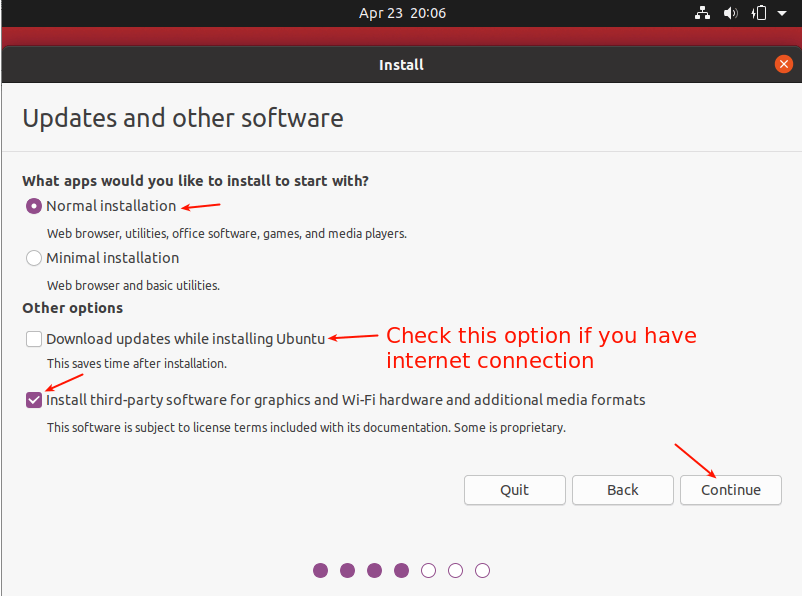
5. After that, choose the apps you want to install based on the installation type (normal or minimal installation). Also, check the option to install updates during the installation process and where to install third-party software.
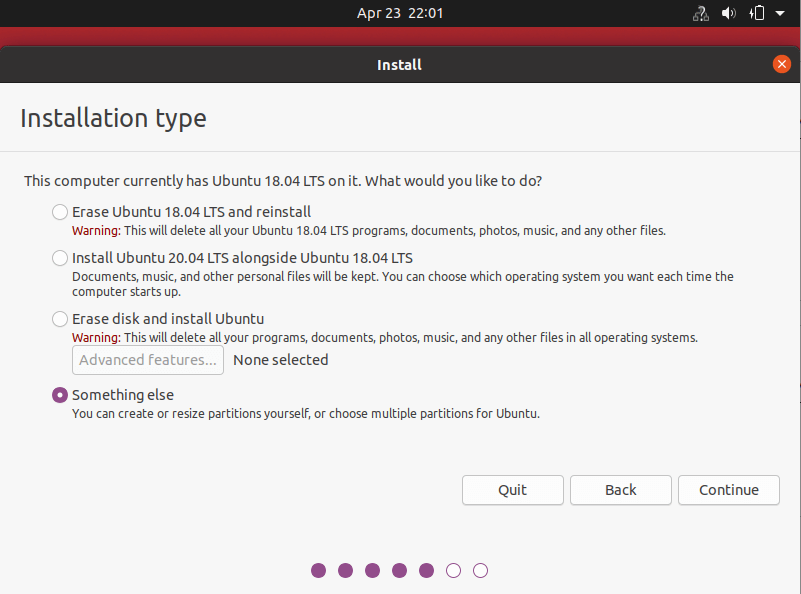
6. Now choose the actual installation type. This is normally the most confusing part, especially for new Linux users. There are two scenarios we will consider here.
First is using an unpartitioned hard drive with no operating system installed. Then secondly, we will also consider how to install on an already partitioned hard drive (with an existing OS e.g Ubuntu 18.04).
Scenario 1: Using an Unpartitioned Harddrive (without an OS installed)
7. For this scenario, you need to set up partitions manually so choose Something else and click Continue.

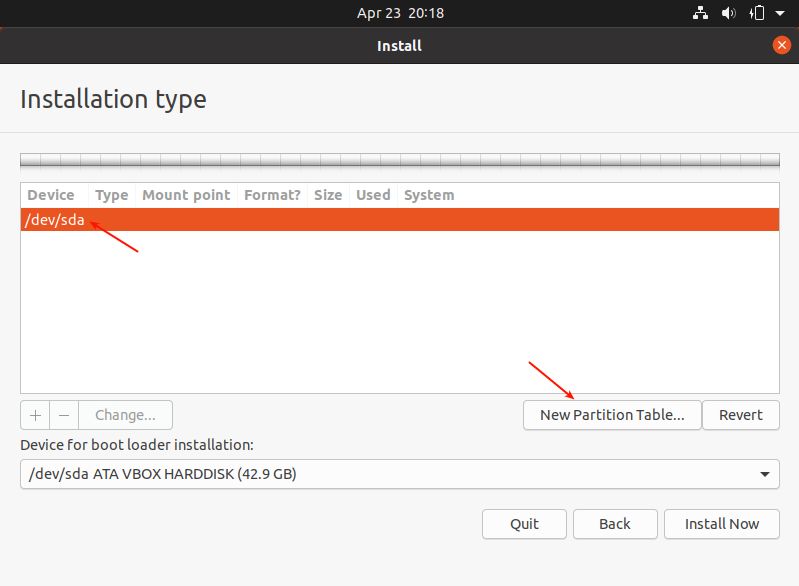
8. Now you need to partition your hard drive for the installation. Simply select/click on the unpartitioned storage device from the list of available storage devices. Then click New Partition Table.
Note that the installer will auto-select the device on which the boot-loader will be installed as shown in the following screenshot.
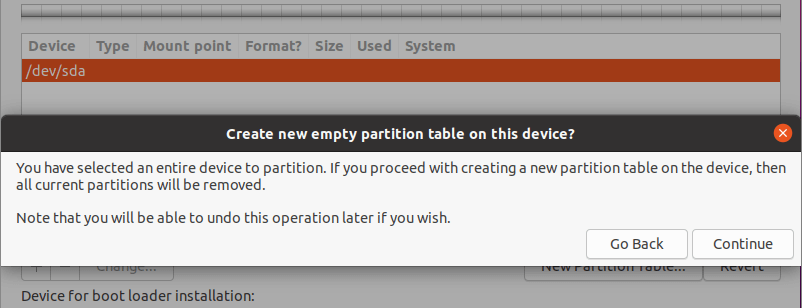
9. Next, click Continue from the pop-up window to create an empty partition table on the device.
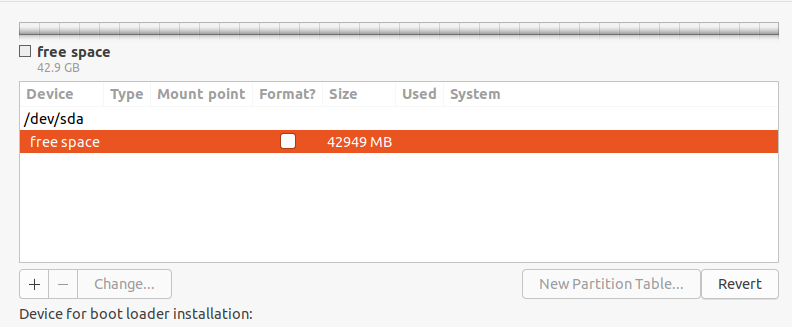
10. Now you should be able to see the free space created equivalent to the capacity of the hard drive. Double click on the free space to create a partition as described next.
11. To create a root(/) partition (where the base system files will be installed), enter the size of the new partition out of the total free space. Then set the file system type to EXT4 and the mount point to / from the drop-down list.

12. Now the new partition should appear in the list of partition as shown in the next screenshot.

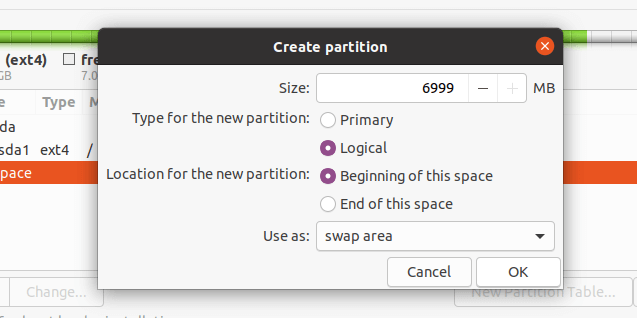
13. Next, you need to create a swap partition/area. Double click on the current free space to create a new partition to be used as swap area. Then enter the swap partition size and set swap area as shown in the following screenshot.
14. At this point, you should see two partitions created, the root partition and the swap partition. Next, click Install Now.
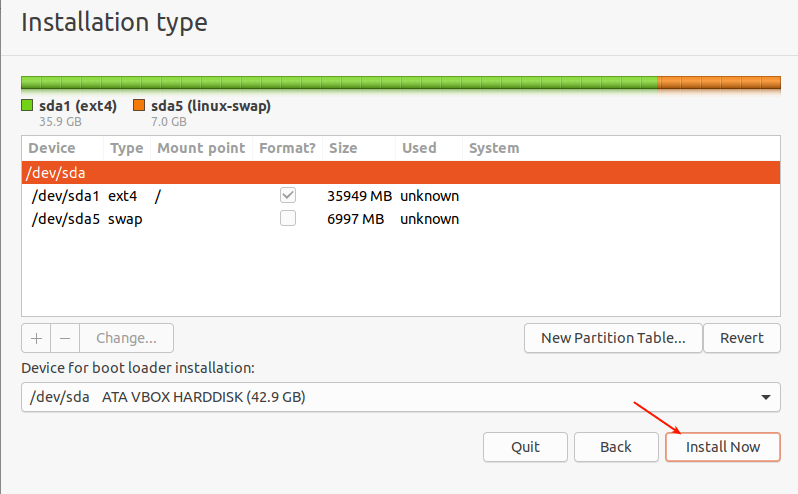
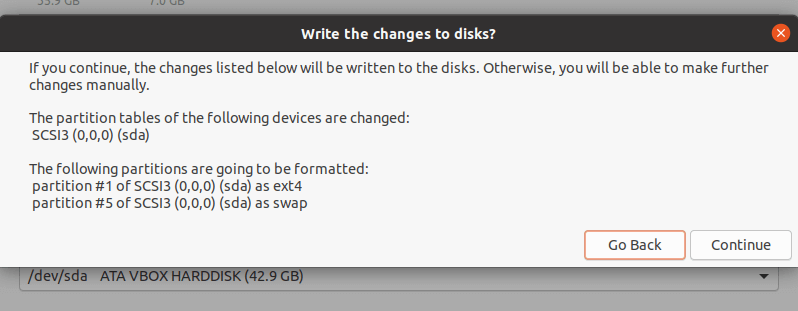
15. You will be prompted to permit the installer to write the recent changes concerning partitioning to disk. Click Continue to proceed.
Scenario 2: Using an Already Partitioned Harddrive (with an existing OS installed)
16. For this scenario, you will use the existing partitions, choose Something else and click Continue.
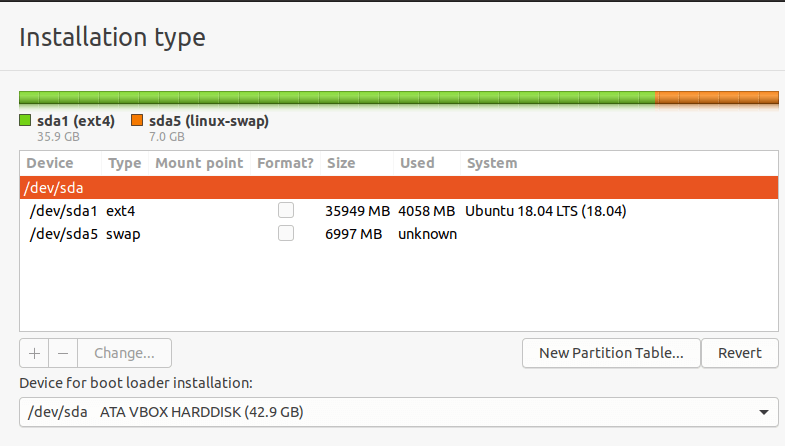
17. Then you should see your existing partitions for example, as shown in the following screenshot. Double click on the partition with the previous OS installation, Ubuntu 18.04 in our case.
18. Next, edit the partition and set the file system size, file system type to Ext4, and then check the format option and set the mount point to root(/).
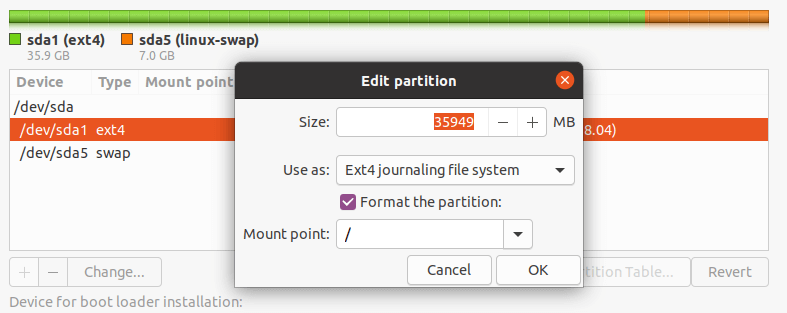
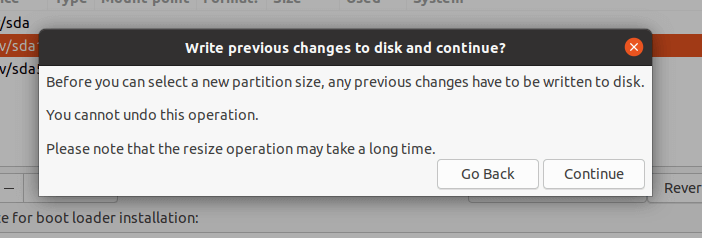
19. Accept the changes in the hard drive partition table, in the next pop-up window by clicking Continue.
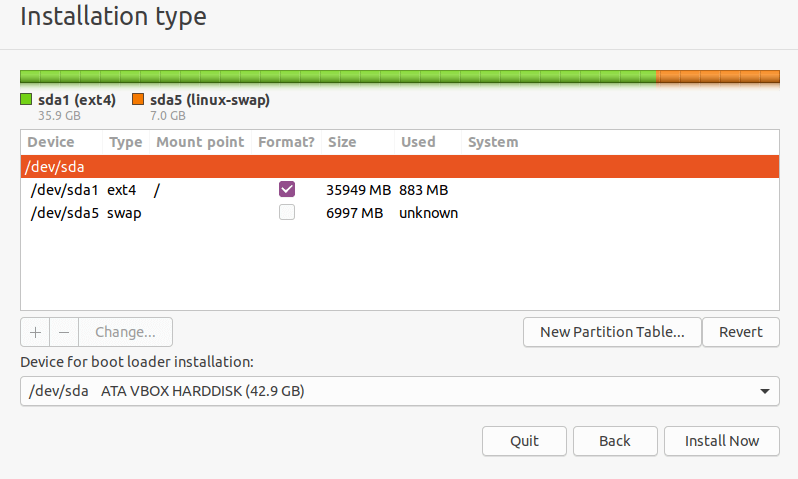
20. Now you should have a root and swap partition as shown in the following screenshot. Note that the swap partition will be auto-detected by the installer. So click Install Now to proceed.
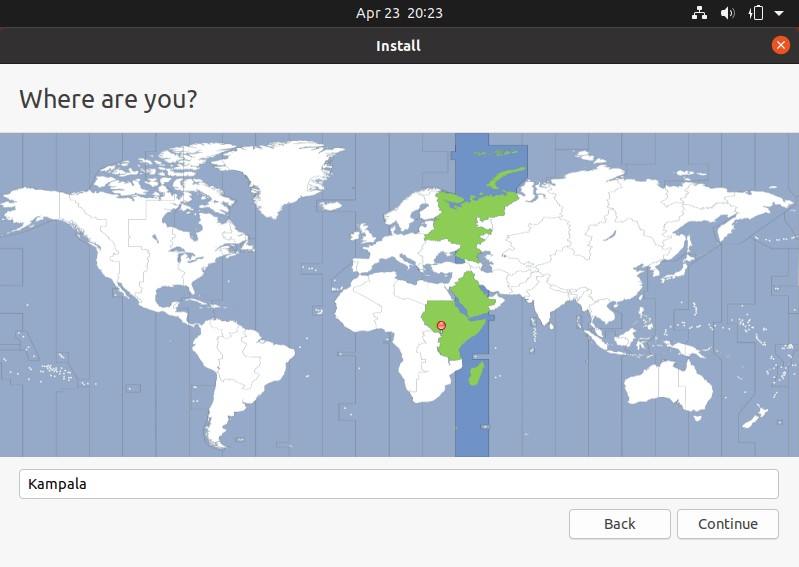
21. Next, select your location and click Continue.
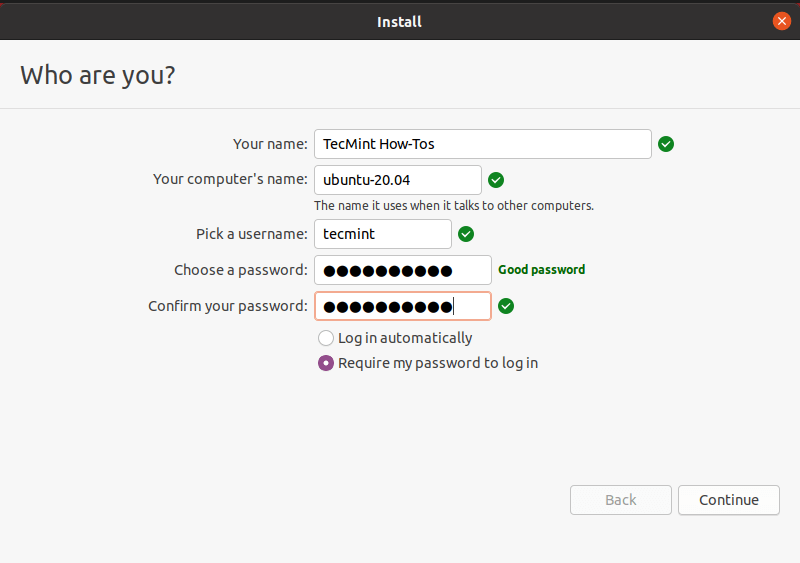
22. Then provide your user details for system account creation. Enter your full name, computer name and username, and a strong, secure password as shown in the following screenshot. Then click Continue.
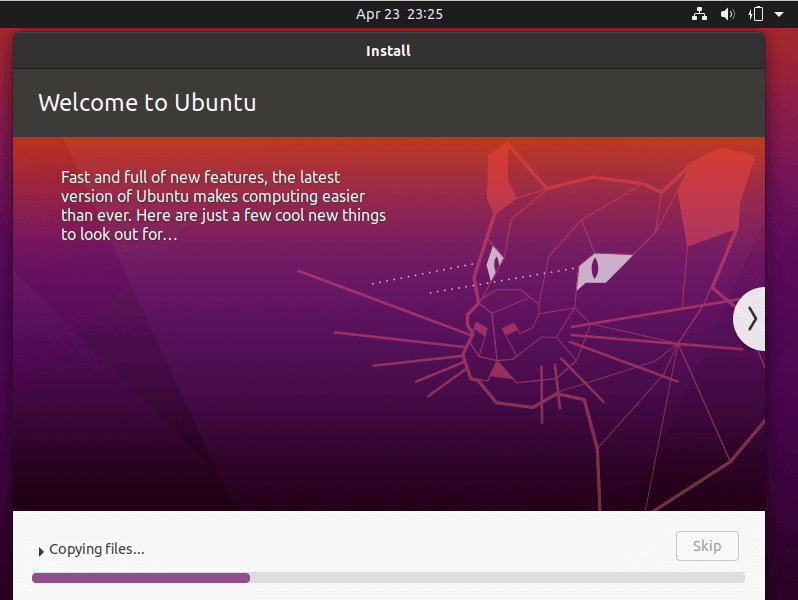
23. Now the actual base system installation will begin as shown in the following screenshot. Wait for it to finish.
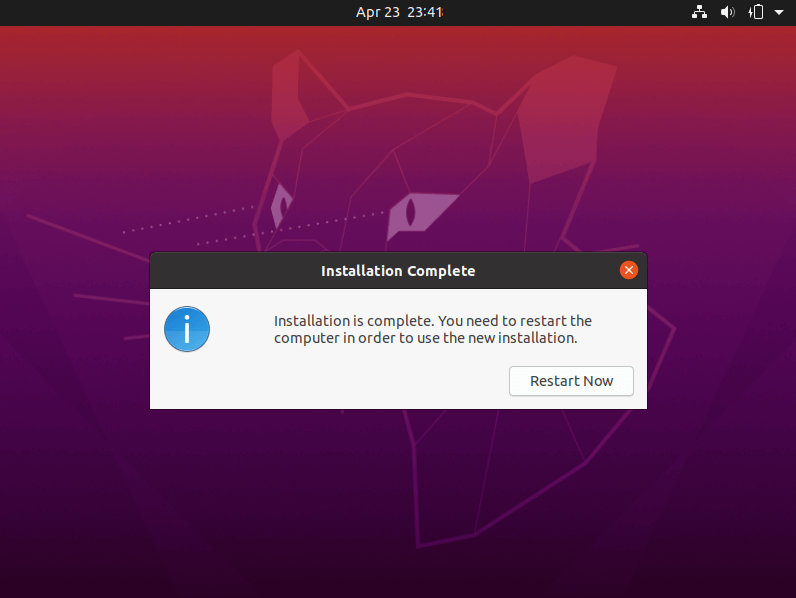
24. Once the system installation is complete, reboot your system by clicking Restart Now. Remember to remove the installation media, otherwise, the system will still boot from it.
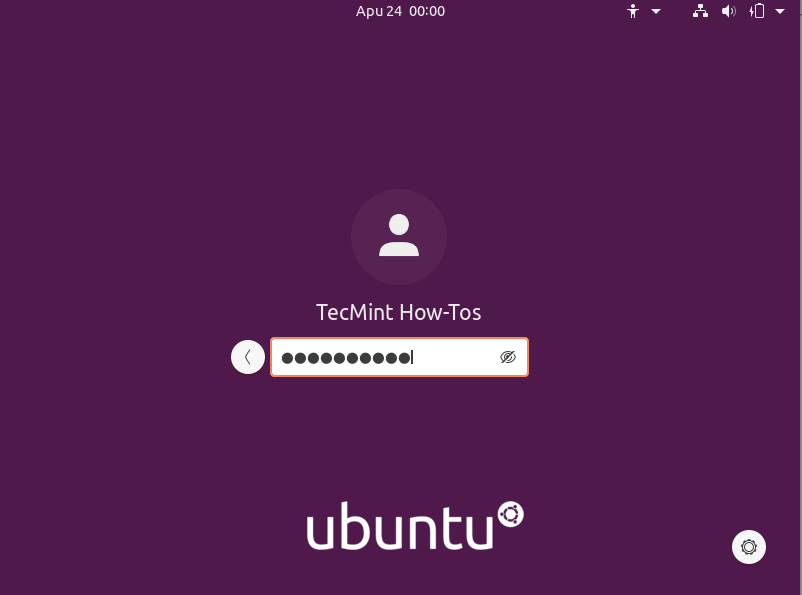
25. After the restart, click on your name from the interface below.
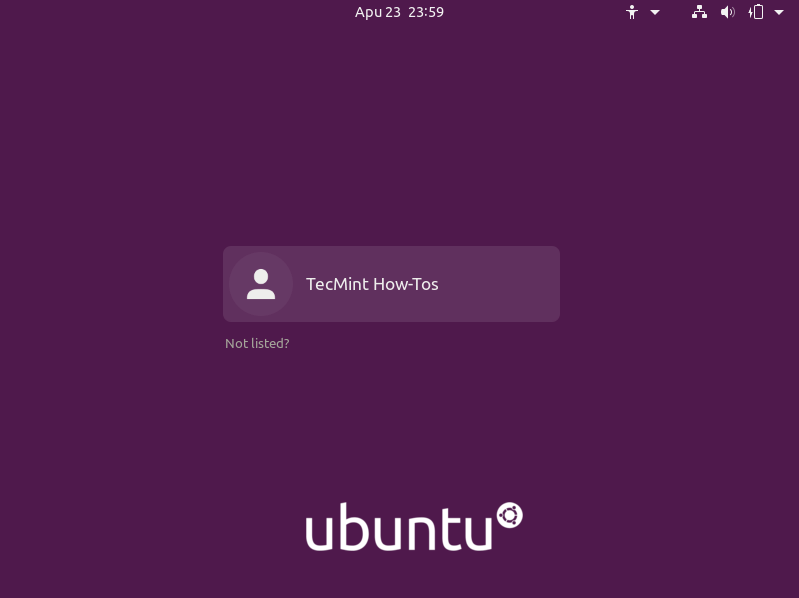
26. Then log into your new Ubuntu 20.04 installation by providing the correct password you entered during the user creation step.
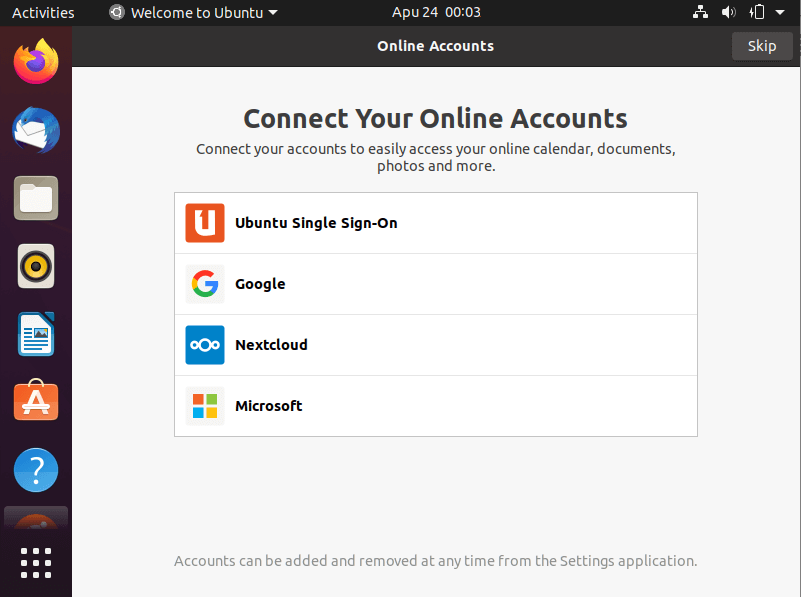
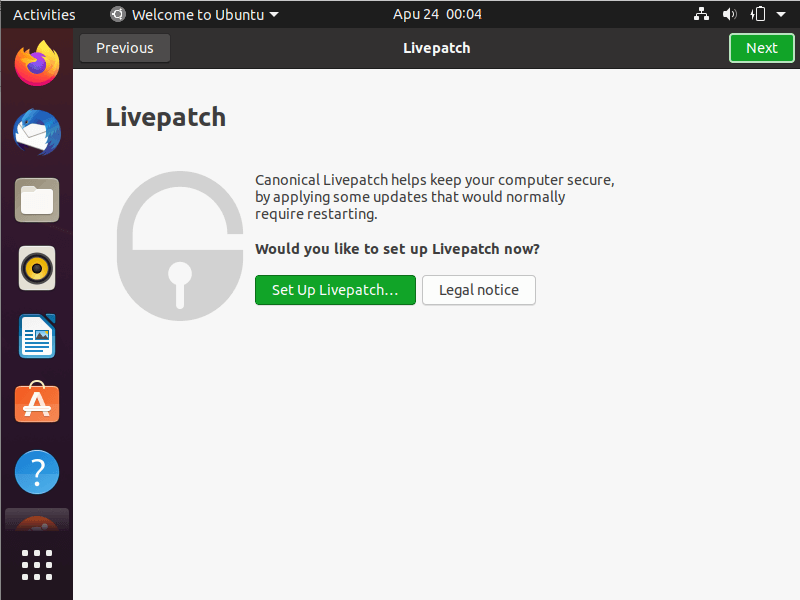
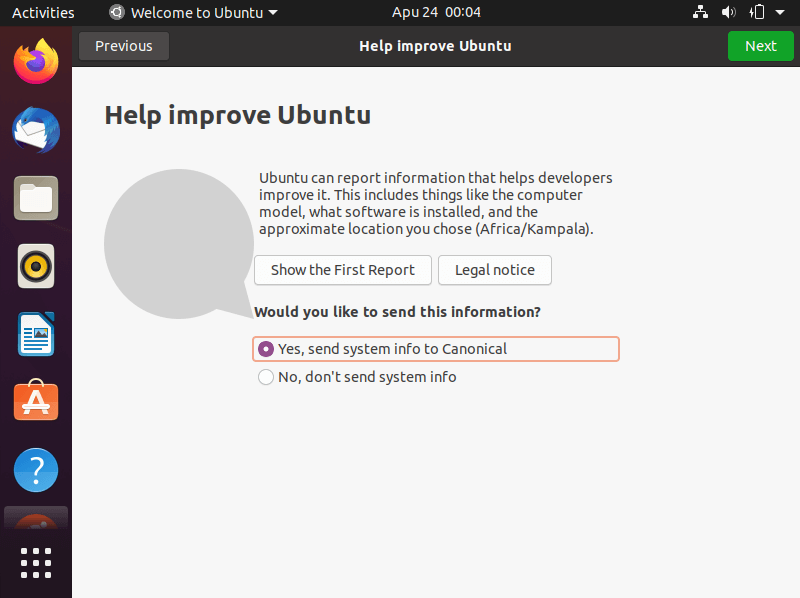
27. After login, follow the on-screen instructions to connect to online accounts (or skip), set up Livepatch (or click Next), accept the option to send usage information to Canonical (or click Next), then one you see Ready to go, click Done to start using your system.
Congratulations! You have just installed Ubuntu 20.04 LTS on your computer. In our next article, we will show how to install the Ubuntu 20.04 LTS server. Drop your comments via the form below.


So, things seemed to be on par with what I did, with the exception being that I booted from a USB in the UEFI shell menu of a Chromebook. I have yet to see any install window open up. I have a picture of a cat, the date/time, speaker volume icon, and battery icon at the top of the screen. Can anyone tell me wtf happened?
Long story, my roommate asked me to make her Chromebook better, and 2 weeks later, I have removed chrome, attempted to install windows, (the SDD was too small to accommodate this), then said screw it and attempted to recover the Chromebook back to normal with the previously flashed image of ChromeOS I put together.
Ya, no. Didn’t work. At all. 3 days solid of trying everything I could think of, and useless google searches lead me to learn I could possibly reinstall ChromeOS using ubuntu. 4 days spent on that, and finally, I gave up and typed exit into the UEFI shell from the boot menu, and then hark, there it is, ubuntu apparently installing on the computer.
Now I have worse than a brick with an uninstallable windows os, I have a desktop with a picture of a line cat, date/time, volume, and battery icons, and nothing more. Is there additional software I need to load onto another USB drive to make this work, or do I spend this week’s pay and swallow my pride? Any help is much appreciated.
Hello Team,
Can we upgrade to Ubuntu 20.04 LTS from Yocto distribution. If yes, how?
Please take a backup of data as the disk is formated whole assigning space for the root directory. If Windows is installed, then use the Windows tool or other software to create a new partition of the disk from the free space of some partition. Then use the new partition for installing ubuntu.
@Shailendra
Many thanks for sharing this useful tip.
Hello,
I did dual boot Ubuntu 20.04 with Ubuntu 18.04 and I have an issue with 20.04. Keyboard not working on Ubuntu 20.04 and on 18.04 is working better, How do I remove 20.04 partition.
Thanks
Doesn’t work, says missing EFI, doesn’t auto-detect swap, and I can’t format either of them to be what they need to be.
Yep same for me – would be nice to know exactly what partitions are required and the minimum sizes so we can alter your instructions to our particular situation.
Help me to dual boot with windows 10 on my dell laptop
@Gagan,
You check the following guide that explains how to dual boot Ubuntu with Windows.
How to Install Ubuntu Alongside With Windows 10 or 8 in Dual-Boot
It isn’t clear to me that these instructions do what I want to do. I have 19.10 and I want to upgrade to 20.04 LTS. I also want to make a few changes as possible.
By way of contrast,
https://linuxconfig.org/how-to-upgrade-ubuntu-to-20-04-lts-focal-fossa#h4-how-to-upgrade-ubuntu-the-debian-wayis not only quite clear about what it does and how it does it but also it does not require making a boot medium.@Jeff
We already have a guide for upgrading from Ubuntu 19.01 to 20.04: https://www.tecmint.com/upgrade-to-ubuntu-20-04/, the link was also included in this article. This article is purposely prepared for those who want a fresh installation on Focal Fossa. Thanks.
I can’t PXE boot live cd, 19.10 works fine.
@Slavko
You can continue using 19.10 but keep in mind it is will reach end of life in July 2020: https://wiki.ubuntu.com/Releases.
Very useful, Ravi.
Thanks for providing these.