Ubuntu 14.04 LTS, codename Trusty Tahr, is now released to public for downloading with five years official support for updates and software packages and can be downloaded from Ubuntu official website mirrors.
Update: Ubuntu 15.10 Released – Installation Guide with Screenshots
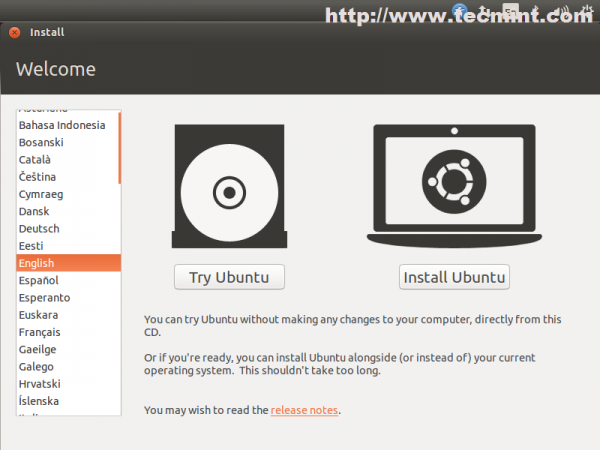
Download Ubuntu 14.04 ISO Images
For a long time, Ubuntu is one of the most known and used Linux system for desktop customers sector but had some ups and downs, especially when it started innovating a new look and feel desktop experience with Unity user interface.

The Distrowatch.com website puts Ubuntu on second place after Linux Mint, among all Linux distributions, which is also a Ubuntu based fork but had some differences involving user interface and went on innovating themselves a new interface Cinnamon, which is also a fresh and spectacular user interface based on Gnome Shell.
What is the most significant think with this new release is, the fact that all of Ubuntu flavours like Edubuntu, Kubuntu, Lubuntu, Mythbuntu, Ubuntu Studio, Xubuntu and others had been released on same time with an official support for three years and this a good thing for end users and companies.
But enough talking about generalities and see what this new release holds for us end users.
Ubuntu 14.04 Features
There are some noticeable changes which are highlighted below.
- Kernel 3.13.x stable version which have lots of updates in many technologies supports more devices, better power management and performance.
- GNOME Version: 3.10.4-0ubuntu5 based on Unity.
- Firefox 28 default web browser.
- LibreOffice 4.2.3.3 for office suite.
- Thunderbird 24.4 for E-mail client.
- Rhythmbox 3.0.2 default music player.
- Option for changing Application Menu.
- Good improvement in high-resolution display.
- Windows have Anti-aliased corner.
- Have new Language Status menu on top menu bar.
- For Guest Session, you will get “Temporary Guest Session” warning message.
The releases notes concerning about Ubuntu 14.04 can be fount at Wiki page: ReleaseNotes.
Ubuntu has one of the most simple and straightforward installers among all Linux distributions which makes the job of installing the system on hardware very easy even for a beginner or an uninitiated Linux or Windows user with just a few clicks .
This tutorial will cover fresh installation of Ubuntu 14.04 OS and with a basic walk through and a few system tweaks and applications.
Step 1: Installing Ubuntu 14.04 Desktop
1. Download the ISO images using above download links or from Ubuntu website, burn it to a CD or a USB stick with the help of USB Linux Installer.
2. After system boot choose your CD/DVD or USB drive displayed on your system BIOS options.
3. The CD/DVD or USB content is loaded into your RAM memory until it reaches the first stage of Installation process.
4. The next step asks you Install it or just give it a try …choose Install Ubuntu. The Try Ubuntu option will load the system into a Linux Live Mode ( Live CD ) for running in a test mode without any changes applied on your machine.
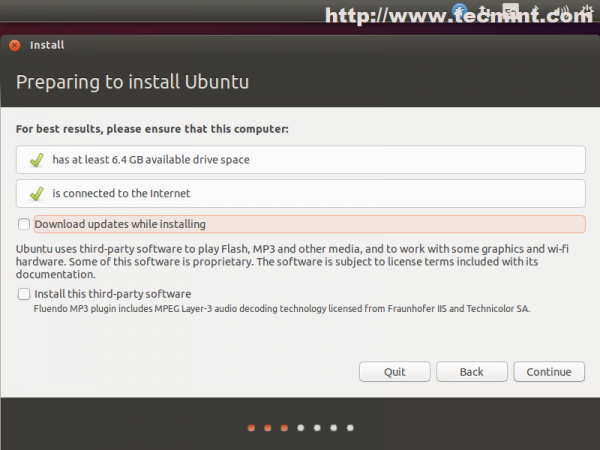
5. The preparation step verifies HDD space and network connection. Leave it as default ( third-party software and updates will be installed later) and choose Continue.
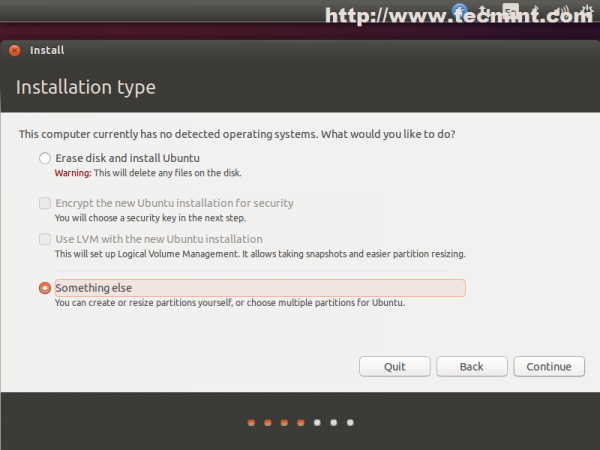
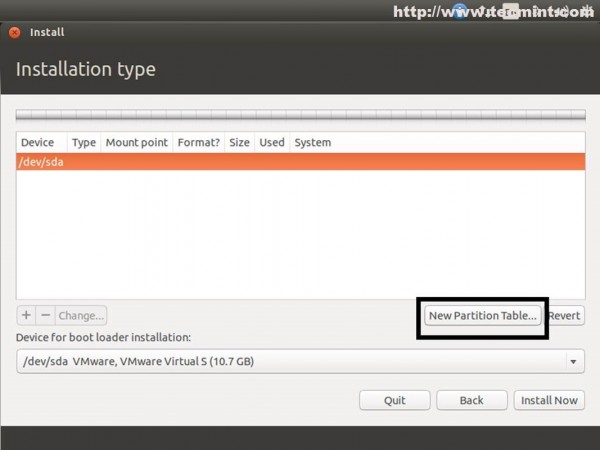
6. The next step is one of the most important steps and has four options.
- Erase disk and install Ubuntu is a customized version of disk partition table made by Ubuntu developers and requires no previous knowledge of file systems and partitions what so ever. Also be advised that choosing this options on machines with previous Operating Systems already installed will erase all your data completely – so a previous important data backup is necessary.
- Encrypt the new Ubuntu installation for security is a option that ensures that all your physical data are encrypted – Laptop users have a benefit in case of a stolen device.
- Use LVM with Ubuntu is a option for advanced users and requires some knowledge of Linux Logical Volume Management and how space is distributed along many hard-disks or physical partitions – choose this if you really know what you’re doing.
- Something else option allows a full user control over partition table – so choose this.
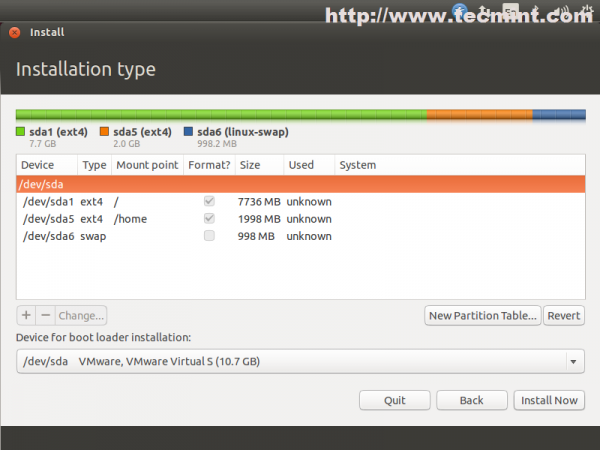
7. For a basic partition table create the following scheme.
- Root partition “/”, ext4 formated with a least 20G disk space.
- Swap partition with 2xRAM size.
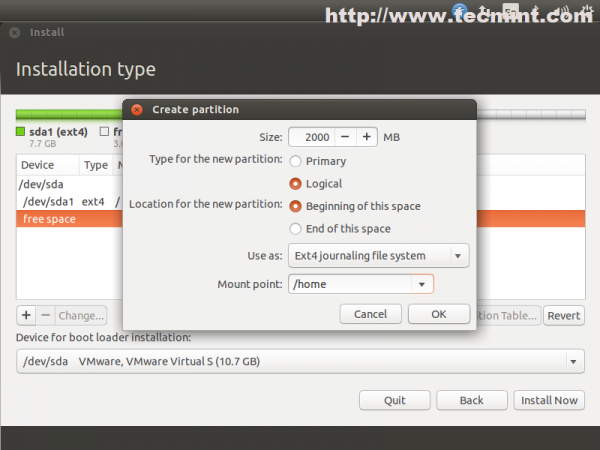
- Home partition “/home“, ext4 formated with the rest of free space designed for Users.
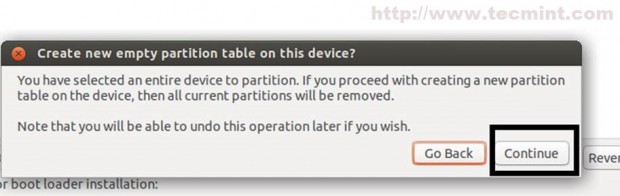
To create partitions choose New Partition Table –> Continue and choose your free space from first hard-disk (/dev/sda) like in the screenshoots below.
Hit the “+” button and on next window prompt choose the following settings for fist partition.
- Partition size in MB – min 20GB
- Partition Type as Primary
- Location at the beginning
- Ext4 journaling file system
- Root as Mount Point “/“
The second partition create it as a Logical Swap Area Space with a value of twice of your RAM.
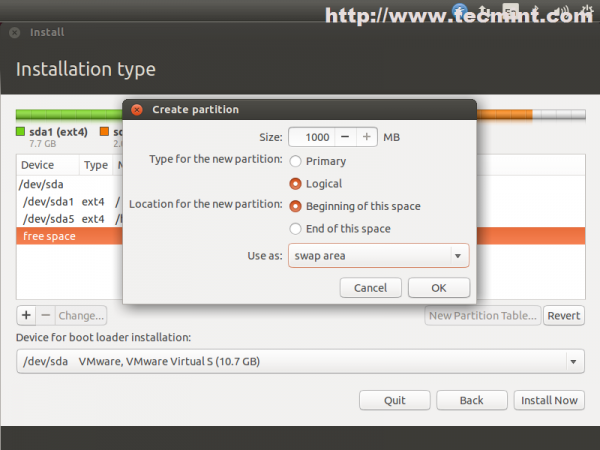
On the Third Partition allocate the hole left free space for Users homes also as Logical. The reason for choosing Logical types is that old HDD’s can hold only three partitions as Primary on MBR, the fourth demanding for an Extended Partition.
The final Partition Table should look something like in the screenshoot below but with different values for Size.
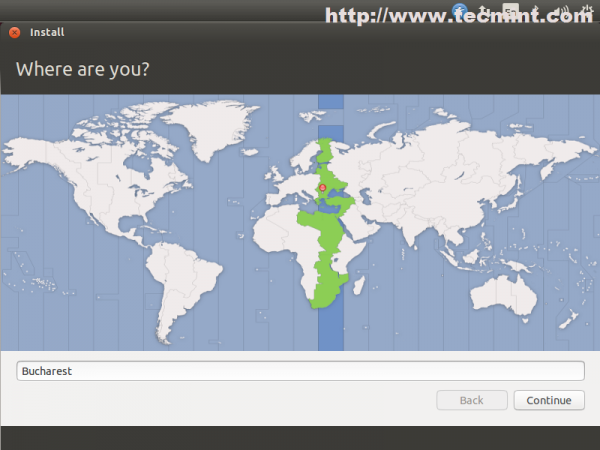
8. After your disk has been sliced hit on Install Now button. On the next stage choose your Location from map – Location will have an impact on your system time also so be advised to choose your true location.
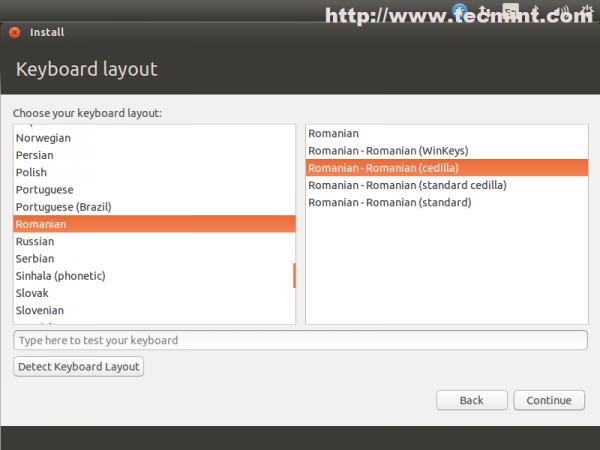
9. Select your Keyboard – On this step you also have the option for Detecting your keyboard by pressing some of the keyboard buttons.
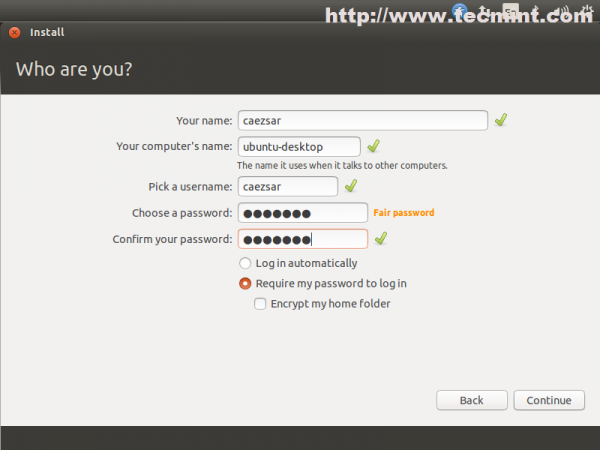
10. The last interactive step of Installation process requires to enter your system administrative name ( user with sudo rights), your System hostname ( you can choose FQDN also ) and your password ( choose a strong one with at least 6 characters ).
For automatically logon without password choose Log in automatically and also you can choose to Encrypt hole home folder for a better security and privacy but this will have an impact on your system speed.
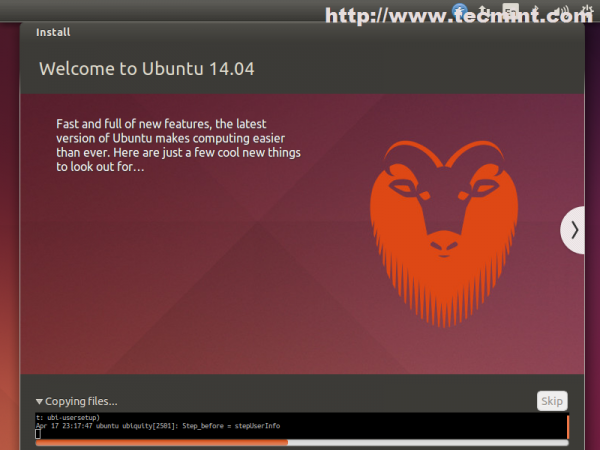
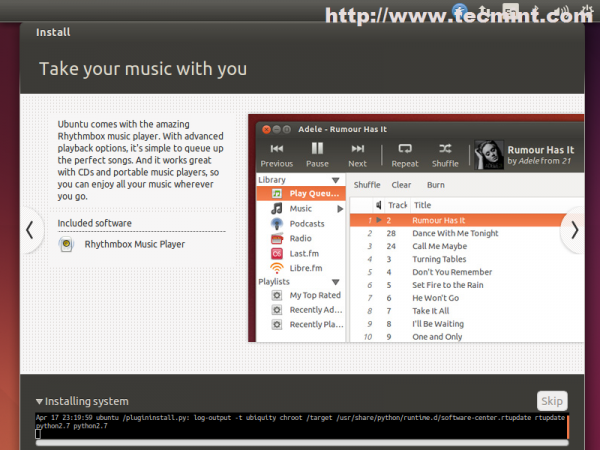
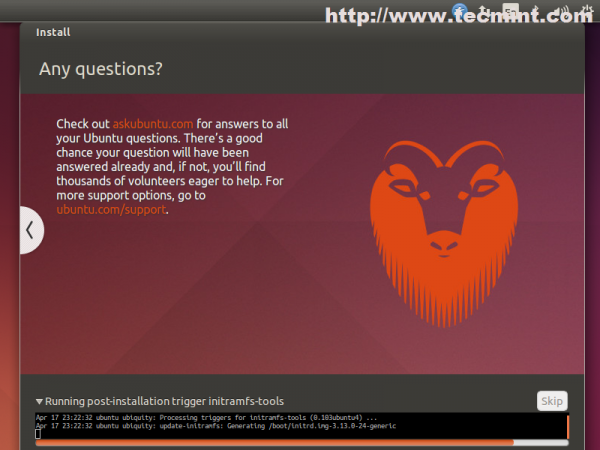
11. That is all for setting your Ubuntu OS. The installer now starts copying system files to your hard drive while it presents you with some information about your brand new Ubuntu LTS for 5 years support system.
Also if you have another Operating System installed and you did not mess with it’s partition during Ubuntu setups, the installer will automatically detect it and present it by Grub Menu on next reboot.
12. After installer finishes his job click on Restart Now prompt and press Enter after a few seconds for your system to reboot.
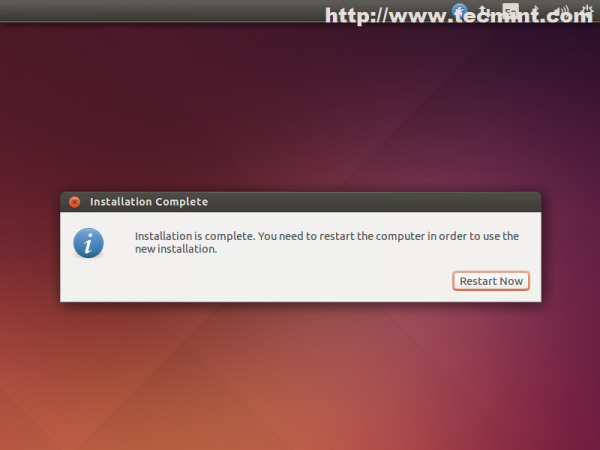
Congratulations!! Ubuntu 14.04 is now installed on your machine and is ready for daily usage.
Step 2: System Update and Basic Software
After first logging into your new system is time to make sure that all Software Repositories are enabled and up to date for security patches.
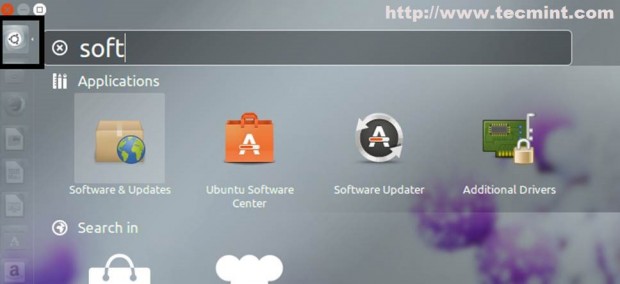
13. Go to Unity Launcher top left Ubuntu icon and on Ubuntu Dash type “software” string.
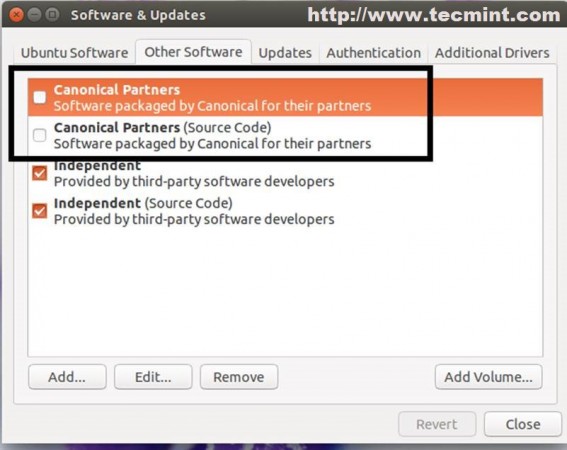
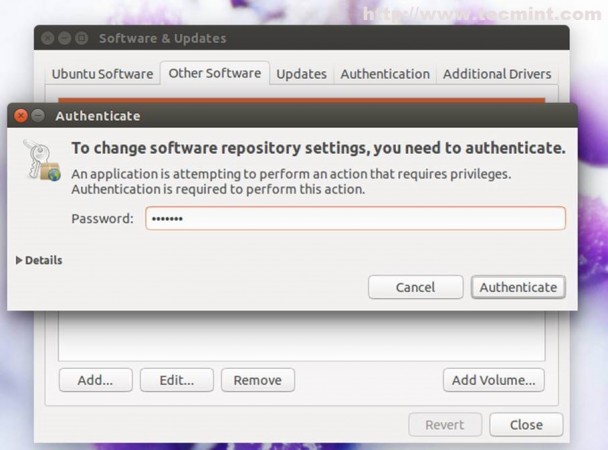
14. From Software and Updates window select Other Software tab, enable both Canonical Partners ( Source Code ), enter your user account root password and hit Close button both times.
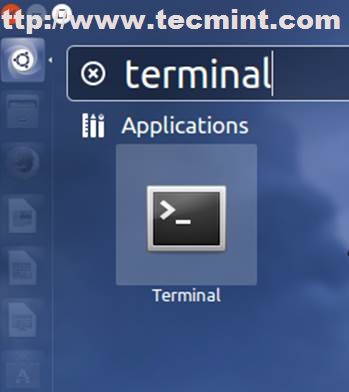
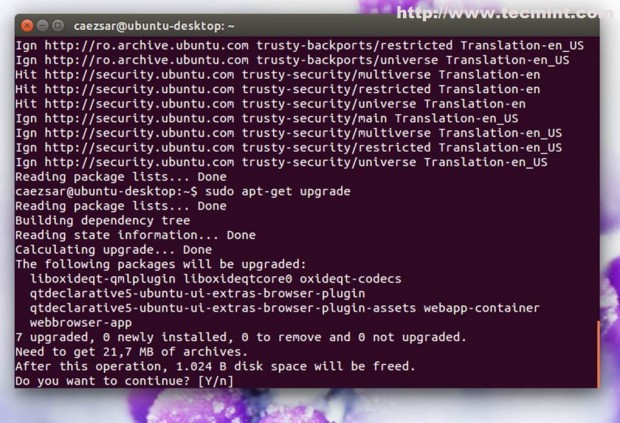
15. Open a Terminal and issue the following commands for system update.
$ sudo apt-get update
$ sudo apt-get upgrade
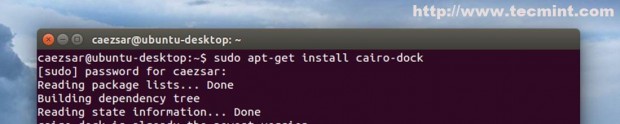
16. After system updates use the following command to install Cairo-Dock package witch has a more intuitive interface for system day to day navigation.

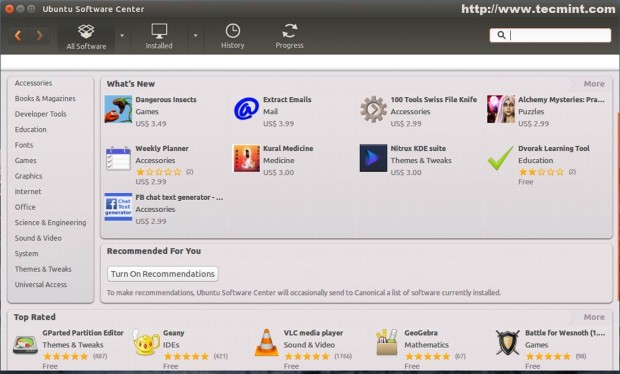
17. For a basic user usage open Ubuntu Software Center, search and install the following packages.
- Ubuntu Restricted Extras
- Pidgin
- ClassicMenu Indicator
- VLC
- Media Player
- Audacious
- System Load Indicator
- Gdebi
That’s all for basic Ubuntu installation and minimal software required for average users to browse the Internet, instant messaging, listen to music, watch movies, youtube clips or writing documents.
Here is a free beginners ebook for the Ubuntu 14.04, that shows you easy-to-follow instructions such as browsing the web, listening to music, watching videos and scanning documents.


Hi,
I’ve installed Ubuntu 14.04 LTS. It successfully installed in my amd64 system. But there is a problem in booting process. When I choose to boot the Ubuntu from GRUB as a normal boot, it can be stucked with a black screen. But when I boot it in recovery mode, it boots properly.
Where may be the problem?
Can you please help me?
Hi
I installed ubuntu 14.04 as per your instructions (something else and three partitions – root, swap, home) but after the restart , it couldnt find my hard drive and kept booting into setup.
So i tried the erase and install ubuntu default option and everything seemed to work fine.
and lsblk in terminal shows
sda1 512mb /boot/efi
sda2 4.7 gb swap
sda3 442 gb /media/temp/5f4a7464-4ce6-4b53-97de-dadb38461b0
sda4 18.1 gb /
my question is does this mean that it requires a boot partition , and how come it isnt mentioned in the guide ?
No,the installation does not require a separate /boot partition, but if you want to create it, just do it! If the /boot partition is not manually created, then it resides inside /(root) partition by default! If you installed using this guide and you could’nt boot then it was surely another issue with the installation or you did not handle partitions according to this guide!
Alright, i did follow the guide as written , its just that i noticed the boot partition needing to be there in your 15.04 installation . Anyways , thanks for your explanation . :)
After a clean install of Ubuntu 14.0.4 from windows 8, I cannot log in. I insert my password but it makes the drum sound and returns to the login screen. Cannot figure out what’s going on since I am a Linux newbie so would appreciate any help. Thanks in advance.
What you describe seems to be a bug with logging on Ubuntu. I can’t help you much with this issue! Anyway try to press ctrl+alt+F1 to enter a terminal session, login with your system sudo credentials and verify /home/$USER permissions to belong to your login user, and, also, install ubuntu-session with sudo apt-get install ubuntu-session command!
HI Chris,
I’ve the same problem here.
Previously, I’ve installed the 32-bit ISO image into the AMD64 based Laptop.
After that, When I installed amd64 ISO image into my laptop. The problem is go away.
I hope, you should follow my instructions to get rid of this problem.
Thank You.
How do you restore an Ubuntu LTS when the archives are no longer available in common nodes? ‘d like to restore Saucy but I’m getting errors that some archives have been removed from saucy-translations & saucy-multiversion. I’ve tried different mirror sites but nothing works.
Looks like the official support for Ubuntu 13.10 (Saucy Salamander) has expired and Canonical had disabled the sources! I don’t think you can do much, but to upgrade to a newer version or a LTS version!
Nice installation guide, I’m having one problem, when i choose encrypt home drive, i cannot log into the encrypted home drive O.o, any ideas?
Hello;
I have upgraded my ubuntu 12.04 to 14.04 (64bits) and now I want to create a separate partition in order to install on it a Windows system but really I don’t know how to do it since I am a beginner on Linux. So I downloaded Gparted to see my partitions and I got 2 partitions and one as unknown :
1st partition : /dev/sda1 which has a file system ext4 and has the largest size on my laptop (924 GiB, and my hard drive’s size is about 1TB) and has a flag “boot”
2nd partition : /dev/sda2 which has a file system “extended” and a size of 7.89 GiB
3rd partition : /dev/sda5 with a “!” concatenated to its name and a file system “unknown” and has the same size of 2nd partition.
So, I want at first to resize my partition (the 1st one) and then to have a standard partition (boot, home and swap) after which I want to create a separate partition for Windows to install an XP or Win7 on it.
Can you please help me?
Hello,
If I understood you correctly, you have two hard drives. If you look at the designations they should show as “sda1” and “sdb1” (minus the quotes).
So lets say that your first hard drive (IDE or SATA) 1 [Master] is windows XP “sda1”.
Your second hard drive (IDE or SATA) 2 [Slave] is where you want to place Ubuntu “sdb1”.
Keep your both drives connected when doing the install.
So during part 6 (six), you want to select “Something else”
Look closely at the drives. There is a possibility that the 1st drive [Master] shows sda1, sda2, sda3 etc… meaning the first drive [master] has three partitions. That’s all fine.
What you will be looking for is “sdb1”, the second drive, that should be all one partition, then you follow the above steps closely for partitioning the drive sdb1.
JUST MAKE SURE that you know what drive XP is on [Master or Slave], you don’t want to overwrite that XP drive.
Again, Master should be “sda1″ Windows XP and Slave sdb1 will then be Ubuntu.
Also on newer Mother Boards there can be both SATA and IDE ports then you will see more then one Master if there is an IDE and SATA installed drive installed.
Don’t worry about this, just Pay Attention to the 120Gb drive that has nothing on it.
Back in the day I have seen the first drive as ‘sda0″ { that is a zero not an letter O } Goofy US ASCII for zero with no slash. That should not be an issue for you though.
With the Master and Slave drives connected and with XP being on your Master drive; Ubuntu should see it and add it to the Grub2 boot menu so you can select from one or the other OS. If not, then someone can chime in here on how to add XP to the Grub2 boot menu. You can Google ” adding windows to grub menu ” again minus the quotes.
I myself have 6 different operating systems on my main computer since I do tech support for a gaming company. XP, Vista, Win7, Win8, Ubuntu 14.04 and Mac. Yep Mac, kernel panics and all. Windows 10 is next, they skipped 9.
Now, if anyone wants to add to or correct anything here I will not be offended.
Good Luck Echha
G
p.s. You can do the install without the XP drive installed but you will have to manually add XP to the Grub2 boot menu. There are some small programs that you can install in XP that will let you edit the Grub boot menu to add or remove what you want, even which one boots as a default and even fancy boot menus. So after the Ubuntu install reconnect the XP drive then install and run the Grub2 editor.
Just a quick comment on the Grub2 Menu. Remember the computer has to find the Grub boot in order for you to be able to boot one or the other OS. It has been a while, but if I remember correctly the Grub edit program will help you find the Grub2 boot and set it so the computer will find it after the Bios Post boot.
Hollo, Linux users
Yesterday I tried to install Ubuntu 14.04 on my computer, the hard drive is 120 Gb IDE hard drive from Samsung, I went to the installation procedure a couple times, but it failed to boot. when it says installation complete, restart computer, when I hit restart, my BIOS is unable to find the operating system, it says Intel boot agent is exiting, … press any key, etc. So after installing Ubuntu on my system my computer refuses to boot.
I tried to install Ubuntu on a hard drive which I was using as a second hard drive for windows XP machine. This hard drive had four partitions. I had already disconnected the primary hard drive on which XP was running.
I am a first time user of Linux. Where may be the problem?
Yes…you’re right …I recommend swap only if you have less then 2GB of RAM. Actually on new systems with more than 8GB of RAM i disable swap completely or just make one swap partition, no more than 2G RAM. The problem changes if you use a SSD disk…you can use it for swap space due to its increased speed ….but still, if your system has min 8GB of RAM use SSD swap no more than 2GB.
Also swap problem is relative ;) it depends on how you intend to use your system…and if it truly needs lot of swap!
Nice guide, but why do you recommend 2xRAM for the swap partition size?
I think is too much for swap, usually this measure it was for old PCs, in the past with PCS having less than 2GB ram memory, may be was a good size.
Present day, we see 8, 16, 32GB ram memory, even more in PCS, laptops etc…
My recommend it’s to use same size of ram memory, and even probably you will never see too much use…
If you are not sure about this, you can check your swap use:
> cat /proc/swaps
> free -m
or
> vmstat
Check how much size and when is your swap used and you will know if you need all of this GB or not.
;)
bye.
@lymus: You can install Ubuntu in dual-boot with Windows with no problem….just create at least two partitions: on one, first, install Windows, and then use the other partition to install Ubuntu.
Wow thats complicated compared to a windows installation. I’m way to scared of losing data. I think they have a bit of work to do on the installation process if they want to attract xp users who like myself have limited knowledge of ubuntu. All this partitiong and mounting means nothing to me and as I said i’m way to scared of losing data, why can’t it install alongside existing data?
Believe me, its very easy as compared to win to use. Its fast to install, boot. So many drivers are already bundled. Its easy to connect via usb, LAN or whatever. U nothing hv to do actually.
@ Josh : “/” means the root which means its the top level of a linux folder structure.If you are creating the swap space you better choose “Use as” Field as swap. then the mount point field will get Dim (No selections). This applies only when you are creating a swap space. Other than that you should go with the “Mount point” as /.
For ex : you can create /Home, /var
Hey,
I have gone through the steps and i would like to know why don’t you create a /boot.
Forget it..
I’ve found that the “home” is not under “device”, it’s under “places”.
And the size is just right.
Thank you for the helpful guide..
This is my first time installing Ubuntu.
Thank you so much for this helpful guide that help a newbie like me installing.
I need to ask something.
I’ve followed the guide and successfully installed ubuntu.
But, there is one thing that is wrong:
I cannot see my partition. There is only one named “Computer” that have the same size as the root partition “/” when I set it up.
But where are the other partition?
Great stuff! Worked like a charm. Thank you.
I’m new to Ubuntu, but I have followed the guide to the letter. Every time I try to create a “swap area” I get a pop-up saying “The mount point you entered is invalid.
Mount points must start with “/”. They cannot contain spaces.” all the guides i’ve seen show the “swap area” without the “/” symbol?
What about on servers?