Ubuntu 18.04 LTS (codenamed “Bionic Beaver”) stable version has been released. It will be supported for 5 years until April 2023.
In this article, we will explain how to upgrade to Ubuntu 18.04 Bionic Beaver from Ubuntu 16.04 LTS or 17.10.
What’s New in Ubuntu 18.04
Before we proceed to the upgrade instructions, let’s look at some of the base system new features and changes in 18.04:
- Ships in with Linux kernel 4.15.
- OpenJDK 10 is the default JRE/JDK.
- Gcc is now set to default to compile applications.
- The default CIFS/SMB protocol version change in CIFS mounts.
- Supports mitigations to protect against Spectre and Meltdown.
- Bolt and thunderbolt-tools have been promoted to main.
- Libteam which is available in the Network manager, offers teaming support.
- Systemd-resolved is the default resolver.
- ifupdown has been deprecated in favor of netplan.io, in new installs.
- networkctl command can be used to view a summary of network devices.
- GPG binary is provided by gnupg2.
- Swap file will be used by default instead of a swap partition, in new installs.
- Python 2 is no longer comes preinstalled, and Python 3 has been updated to 3.6.
- For new installs, the installer no longer offers the encrypted home option using ecryptfs-utils.
- OpenSSH no longer uses RSA keys smaller than 1024 bits and much more under desktop and server versions.
Warning: Start by backing up your existing Ubuntu installation or important files (documents, images and many more), before performing an upgrade. This is recommended because, sometimes, upgrades do not go well as planned.
A backup will ensure that your data remains intact, and you can recover it, in case of any failures during the upgrade process, that could lead to data loss.
Upgrade to Ubuntu 18.04 Desktop
1. First of all, ensure that your existing Ubuntu system is up-to-date, otherwise run the commands below to update the apt package source cache and perform an upgrade of installed packages, to the latest versions.
$ sudo apt update
$ sudo apt upgrade
Then, restart your system to finish installing the updates.
2. Next, launch the “Software & Updates” application from System Settings.
3. Then click on the third Tab “Updates”.
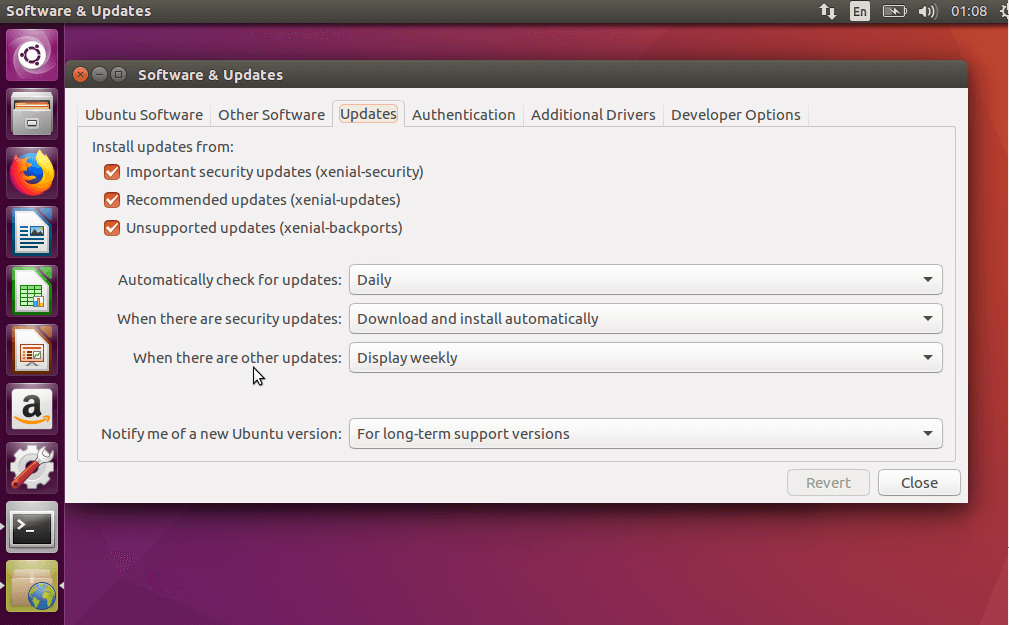
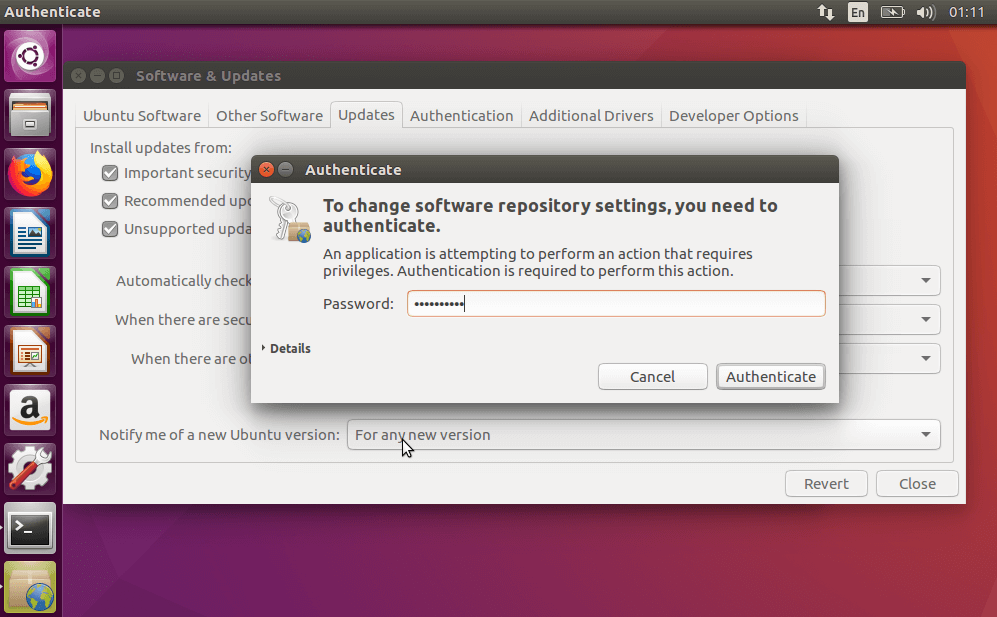
4. Next, On Ubuntu 17.04, set the “Notify me of a new Ubuntu version” dropdown menu to “For any new version”. You will be asked to authenticate, enter your password to continue. On Ubuntu 16.04, leave this setting to “For long-term support versions”.
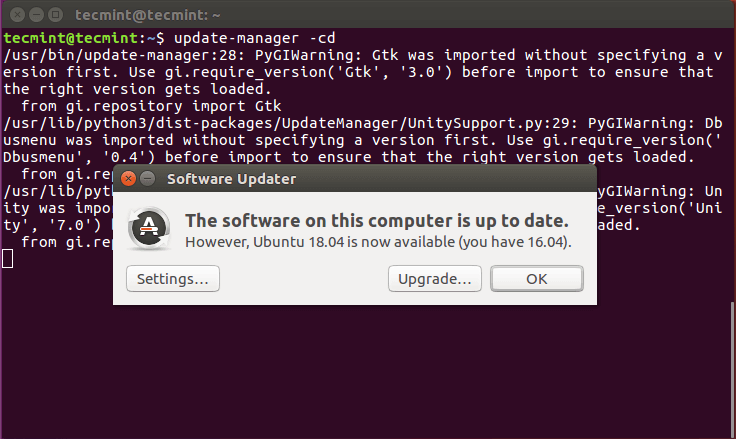
5. Then search for “Software Updater” and launch it or open a terminal and run the update-manager command as shown.
$ update-manager -cd
The update manager should open up and inform you like this: New distribution release ‘18.04’ is available.
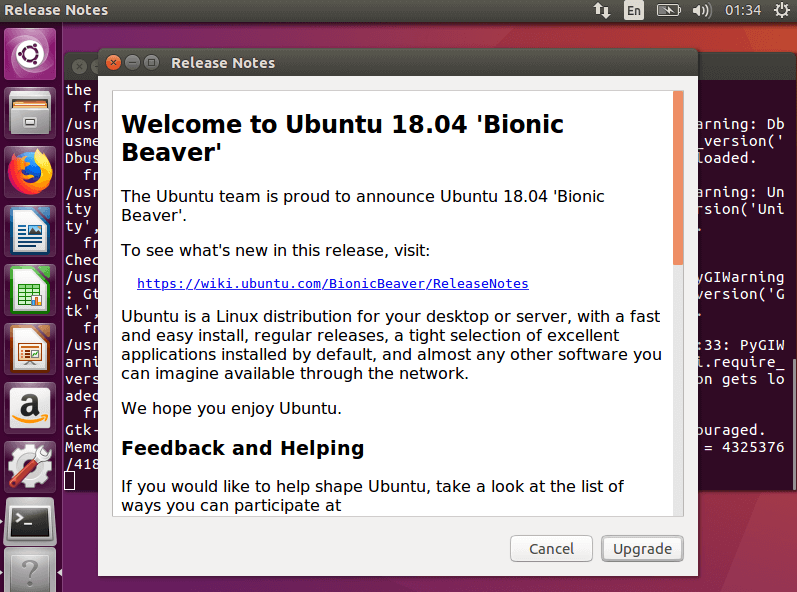
6. Next, click on “Upgrade” and enter your password to continue. Then you will be shown the Ubuntu 18.04 release notes page. Read through it and click Upgrade.
7. Now your upgrade process will start as shown in the following screenshot.
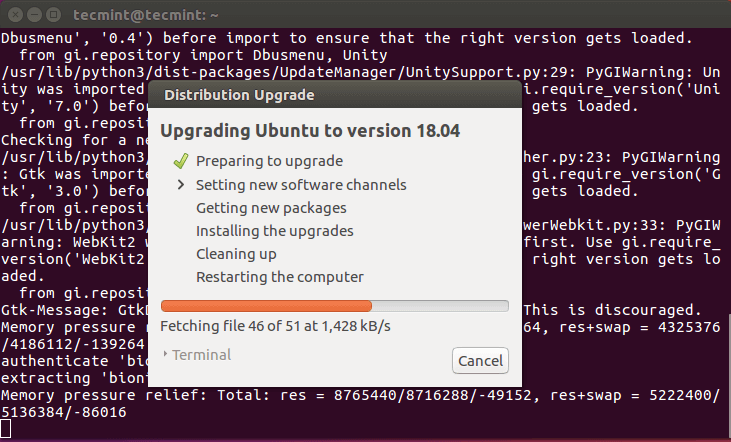
8. Read the details of the upgrade and confirm that you want to upgrade by clicking on “Start Upgrade”.

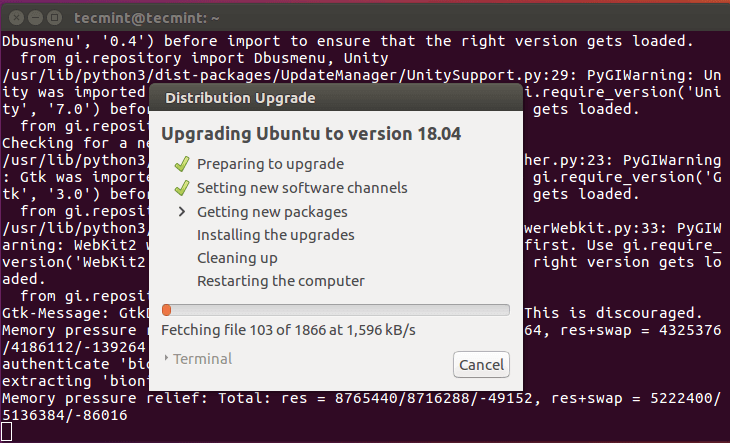
9. Once you have confirmed that you want the upgrade, the update manager will start downloading Ubuntu 18.04 packages as shown in the following screenshot. When all packages have been retrieved, the process can not be canceled. You can click on “Terminal” to see how the upgrade process is unfolding.
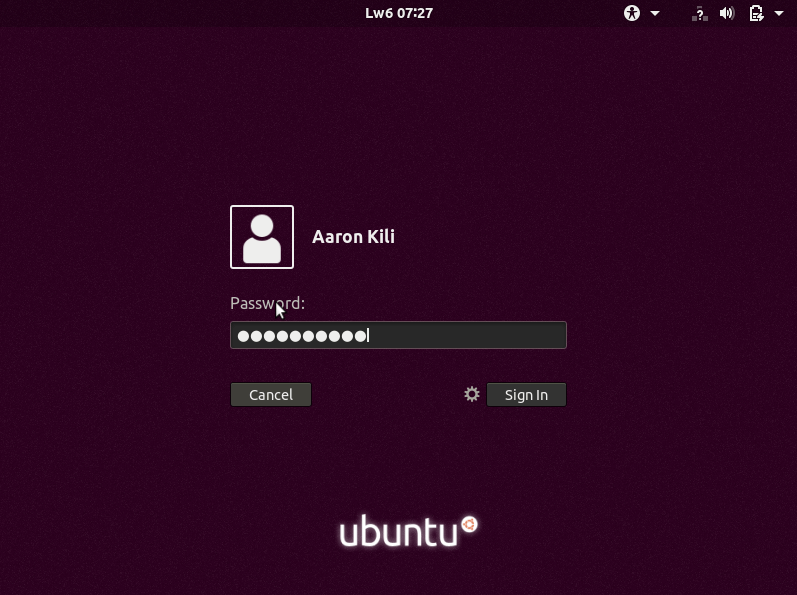
10. Afterwards, all the Ubuntu 18.04 packages will be installed on the system (this will take some time), then you will be asked to either remove or keep obsolete packages. After clean up and restart the system to complete the upgrade.

11. Then, you can login and start using Ubuntu 18.04 LTS.
Upgrade to Ubuntu 18.04 Server
If you do not have physical access to your server, the upgrade can be performed over SSH, though this method has one major limitation; in case of loss of connectivity, it is harder to recover. However, the GNU screen program is used to automatically re-attach in case of dropped connection problems.
1. Begin by installing the update-manager-core package, if it is not already installed as shown.
$ sudo apt install update-manager-core
2. Next, ensure that the prompt line in /etc/update-manager/release-upgrades is set to normal. If that is the case, launch the upgrade tool with the following command.
$ sudo do-release-upgrade
3. Then follow the on-screen instructions to continue.
You can find more information, especially concerning changes in desktop and server releases, from the Ubuntu 18.04 release notes page.
That’s It! In this article, we have explained how to upgrade to Ubuntu 18.04 Bionic Beaver from Ubuntu 16.04 LTS or 17.10. If you have any queries, reach us via the feedback form below.


How long does a restart take after upgrading to Ubuntu 18.04?
@Iyanuoluwa
It should not take long really, unless if an upgrade has not gone well.