WebMail Lite is a web application that can be used to manage and download mails form your own local mail server or from a public mail service, such as Gmail, Yahoo!, Outlook or others. WebMail Lite application acts as an client interface for IMAP and SMTP services, allowing any configured email account to sync and handle inbox messages locally.
Requirements
In this topic we’ll learn how to install and configure the latest version of WebMail Lite PHP application in Debian, Ubuntu and CentOS server.
Step 1: Initial Settings for WebMail Lite
1. Before starting to install WebMail Lite application in your server, first assure that the following PHP modules and extensions are installed and enabled in your LAMP stack, by issuing the following commands.
------------ On CentOS and RHEL ------------
# yum install epel-release
# yum install php-xml php-mcrypt php-mbstring php-curl

------------ On Debian and Ubuntu ------------
# apt install php7.0-xml php7.0-mcrypt php7.0-mbstring php7.0-curl
2. Next, go ahead and install the unzip utility in your system, that we’ll be using it to extract the content of the WebMail Lite zip compressed file archive.
# yum install zip unzip  [On CentOS/RHEL]
# apt install zip unzip  [On Debian/Ubuntu]
3. On the next step, modify PHP default configuration file in order to change following PHP variables. Also, make sure to update PHP timezone setting to reflect your server physical location.
# vi /etc/php.ini                    [On CentOS/RHEL]
# nano /etc/php/7.0/apache2/php.ini  [On Debian/Ubuntu]
Search, edit and update the following variables PHP configuration file.
file_uploads = On
allow_url_fopen = On
upload_max_file_size = 64M
date.timezone = Europe/Bucharest
Replace the PHP time.zone variable accordingly. To get a list of all time zones available in PHP, consult the official PHP Timezone docs.
4. After you’ve finished editing the PHP configuration file according to the settings explained above, restart Apache HTTP daemon to reflect changes by issuing the following commands.
# systemctl restart httpd  [On CentOS/RHEL]
# systemctl restart apache2  [On Debian/Ubuntu]
Step 2: Create WebMail Lite Database
5. The WebMail Lite webmail client application uses a RDBMS database as backend, such as MySQL database, in order to store user configurations, contacts and other required settings.
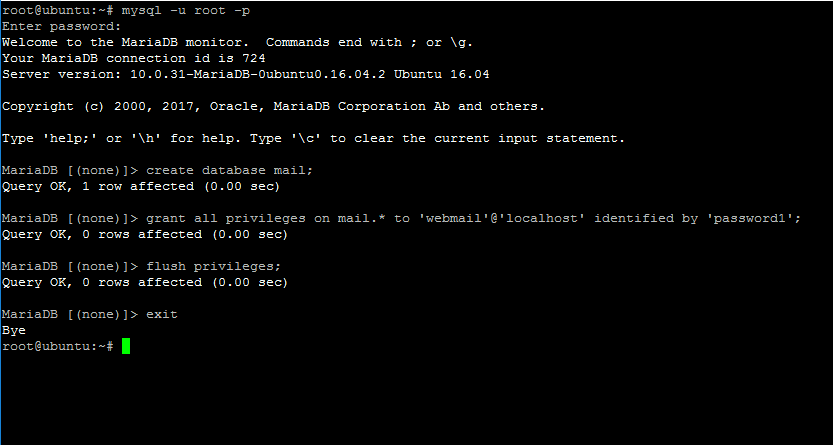
In your installed LAMP stack, log in to MariaDB/MySQL database as execute the below commands to create a new database that will be used by WebMail application. Also, setup a user and a password to manage WebMail Lite database.
# mysql -u root -p

MariaDB [(none)]> create database mail;
MariaDB [(none)]> grant all privileges on mail.* to 'webmail'@'localhost' identified by 'password1';
MariaDB [(none)]> flush privileges;
MariaDB [(none)]> exit
Step 3: Download WebMail Lite
6. In order to install WebMail Lite application, first visit WebMail Lite download web page and grab the latest zip archive by issuing the following command.
# wget https://afterlogic.org/download/webmail_php.zip
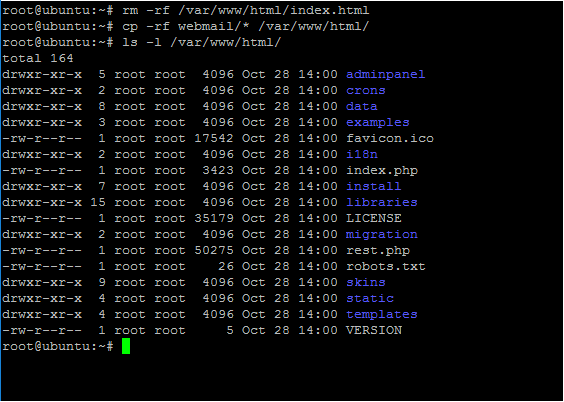
7. Next, extract WebMail Lite zip compressed archive to your current working directory and copy all extracted WebMail Lite files from webmail directory to your web server document root path by issuing the below commands. Also, execute ls command to list all files copied to /var/www/html directory.
# unzip webmail_php.zip
# rm -rf /var/www/html/index.html
# cp -rf webmail/* /var/www/html/
# ls -l /var/www/html/
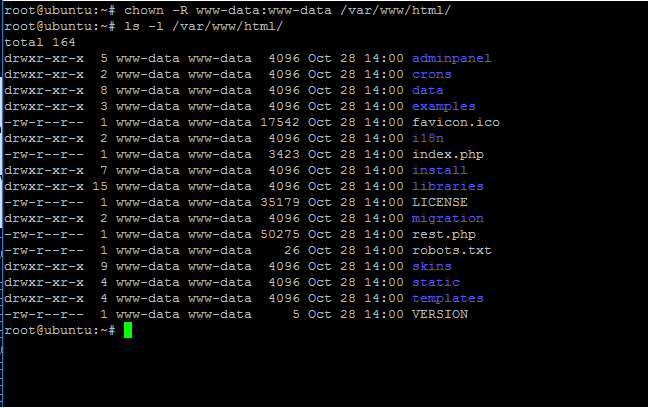
8. Also, make sure you grant Apache runtime user write permissions to the your web server document root path by issuing the below command. Again, run ls command to list permissions in /var/www/html/ directory.
# chown -R apacahe:apache /var/www/html/     [On CentOS/RHEL]
# chown -R www-data:www-data /var/www/html/  [On Debian/Ubuntu]
# ls -al /var/www/html/
Step 4: Install WebMail Lite
9. In order to install WebMail Lite, open a browser and navigate your server’s IP address or domain name via HTTP protocol. Append the /install string after at your URL, as shown in the below example.
http://yourdomain.tld/install
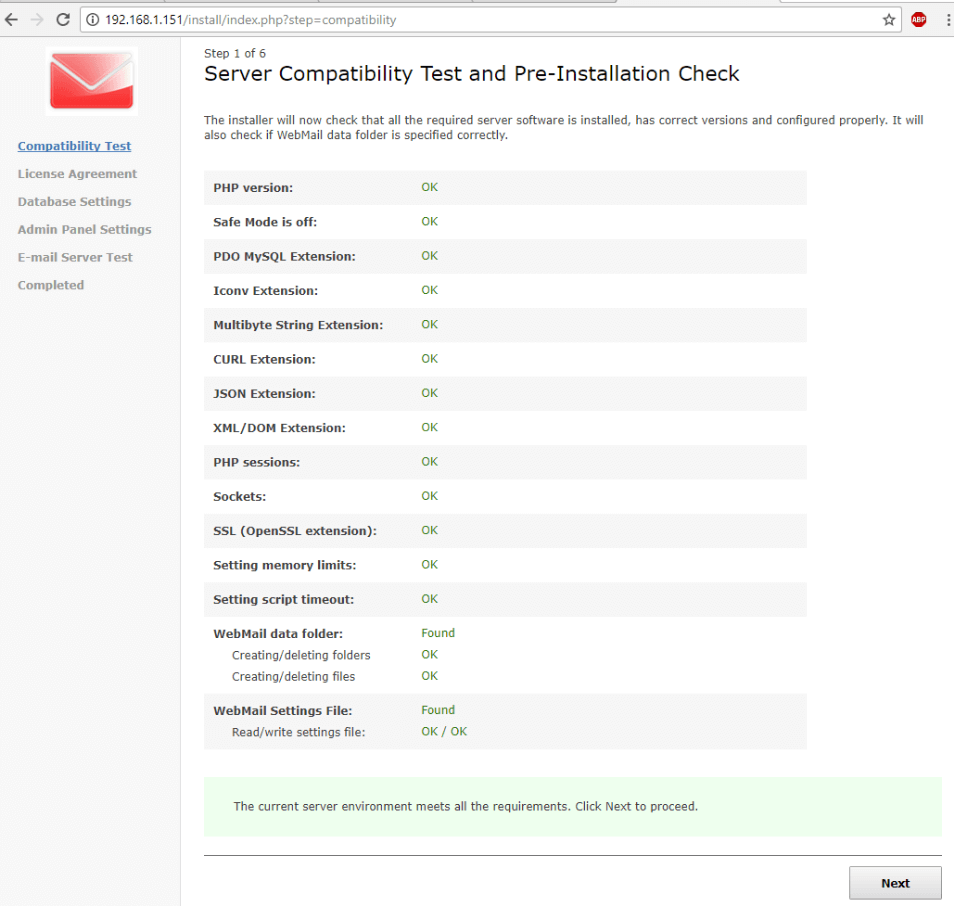
10. At the initial installation screen, a series of server compatibility tests and pre-installation checks will be perform by WebMail Lite installer script in order to detect if all required PHP extensions and settings are installed and properly configured to install WebMail Lite.
It will also check if the web server runtime user can write in webroot data folder and write the configuration file. If all requirements are in order, hit on Next button to continue.
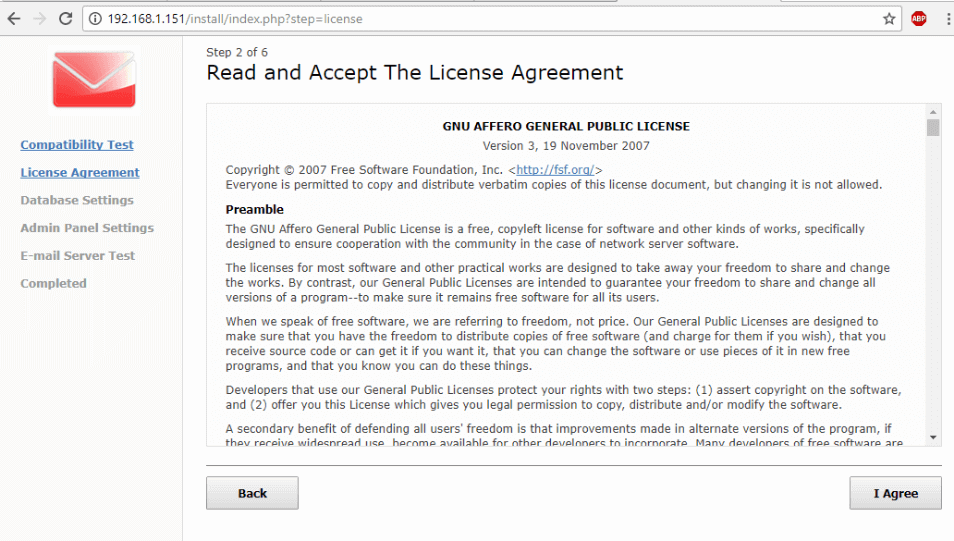
11. On the next screen read and accept the license agreement by hitting on I Agree button.
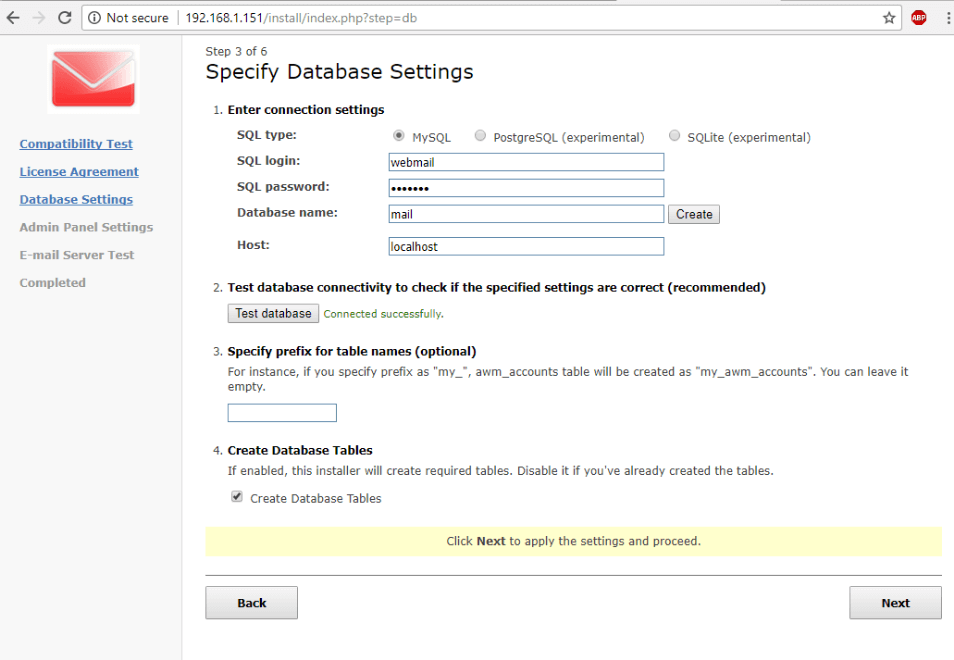
12. Next, add WebMail Lite MySQL database host address and database credentials and hit on Test database button to test database connection. Check Create database Tables and hit on Next button to continue.
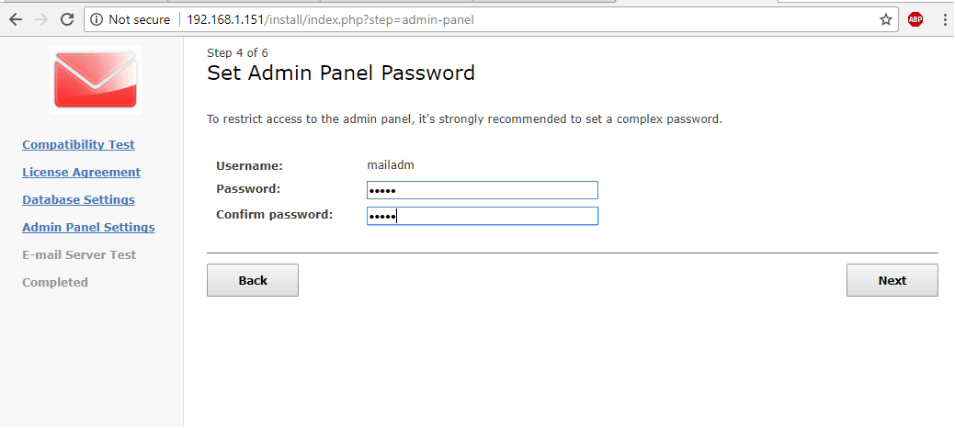
13. Next, write a password for mailadm user and hit on Next button to continue. The mailadmin user is the most privileged account used for administering WebMail Lite application.
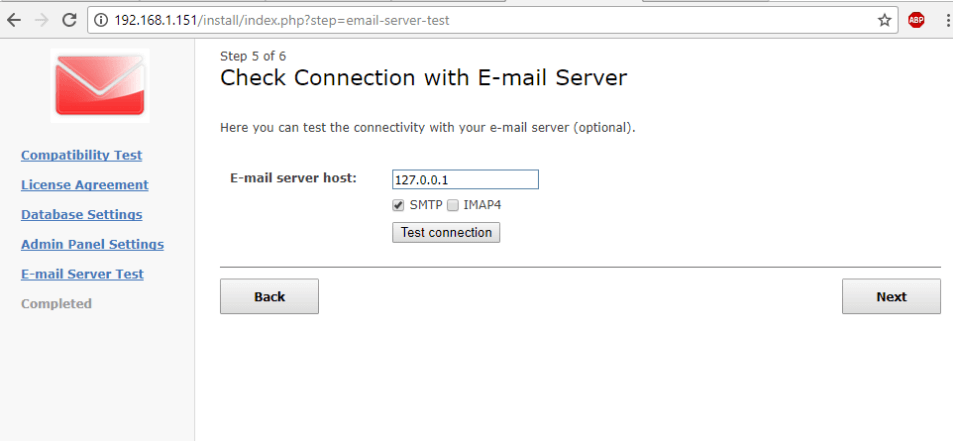
14. In the next screen, you can check the connection to a mail server via IMAP and SMP protocols. In case you’ve already configured a mail server at your premises, enter the IP address of the mail server in server host filed and test SMTP connection.
If the mail server runs locally, use 127.0.0.1 IP address to test the mail server connection. When you finish hit on Next button to continue install the application.
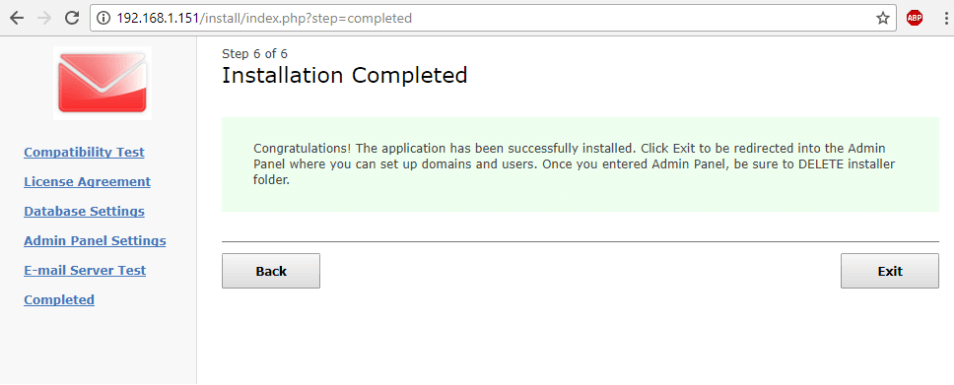
After the installation process of WebMail Lite finishes, hit on Exit button to complete the installation process.
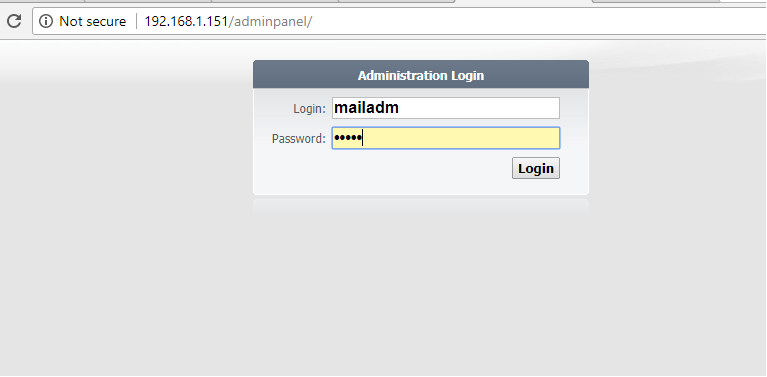
15. Afterwards, navigate to the following address in order to access WebMail Lite Admin Panel and setup your mail server settings.
https://yourdomain.tld/adminpanel
To log in to WebMail Lite admin panel, use the mailadm user and the password configured during the installation process.
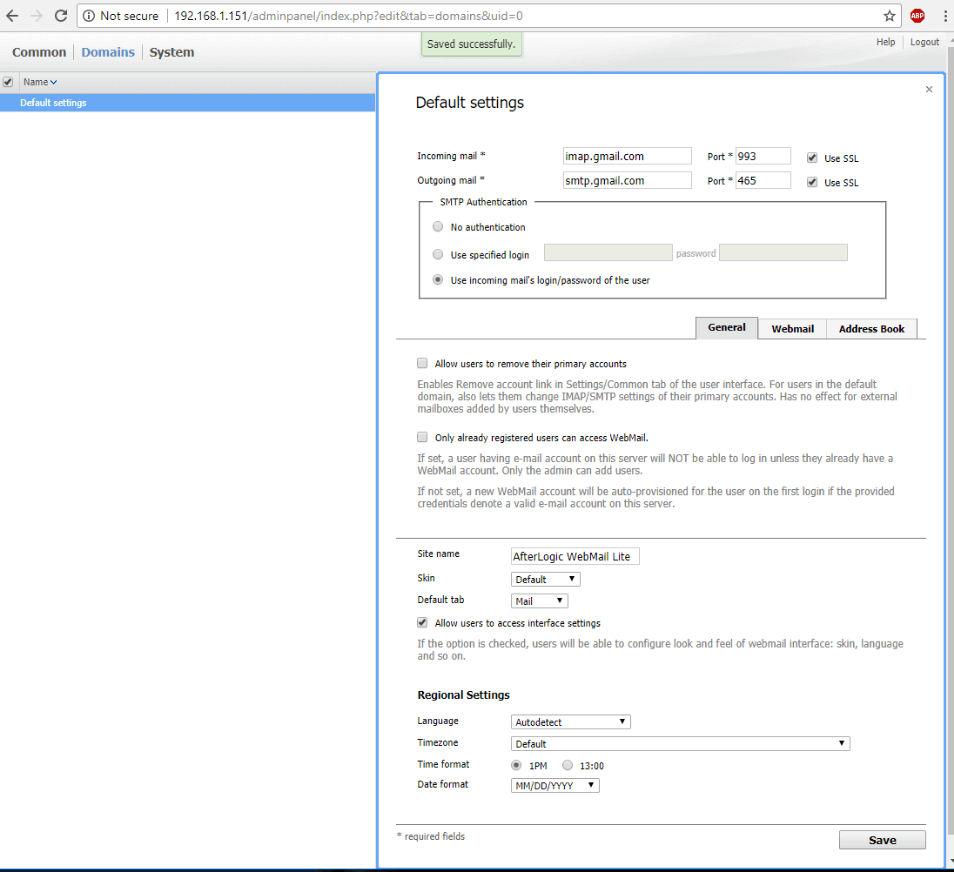
16. In order to configure mail services for your domain, navigate to Domains -> Default settings and add your mail server IP address in incoming mail field and in outgoing mail field.
Also, check use incoming mail’s login/password of the user in order to authenticate to SMTP mail server. Replace the IP addresses and port number according to your own mail server settings. Hit on Save button to apply the new settings.
In case you want to use WebMail Lite application to manage a Gmail account, use the settings as illustrated in the below screenshot.
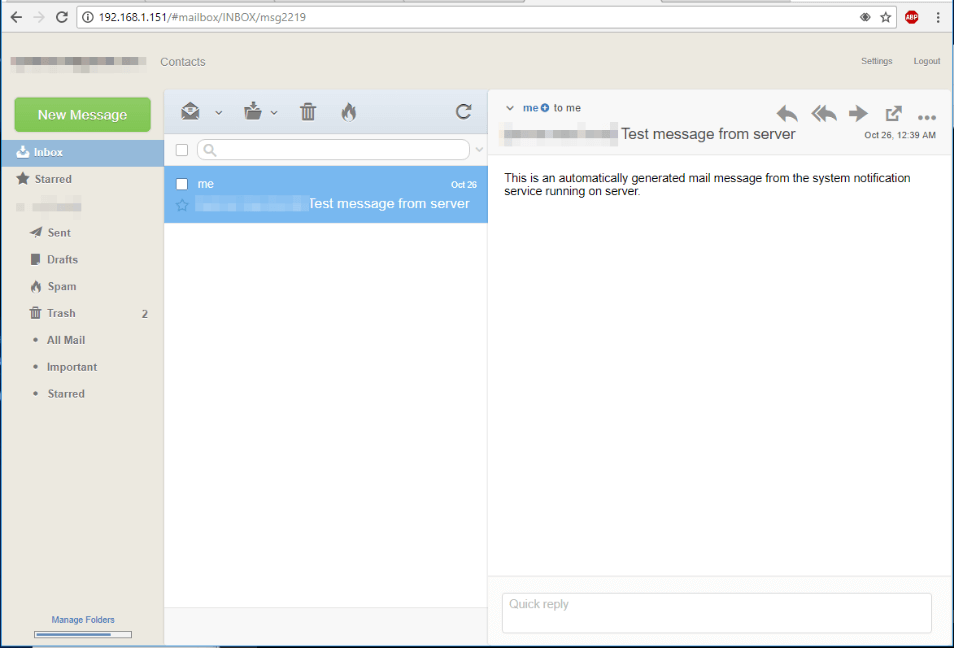
17. In order to log in to WebMail Lite application, navigate to your domain name via HTTP protocol and add your email server log in credentials. In the below screenshot, for demonstration purposes, we’ll log in to WebMail Lite application with a Gmail account.
http://yourdomain.tld

18. After logging in to WebMail Lite you should be able to read all your account mail messages or compose and send new messages, as illustrated in the following screenshot.
Congratulations! You have successfully installed and configured WebMail Lite application at your premises. In order to secure visitors connections to WebMail Lite application, enable Apache HTTP server SSL configuration with a free certificate obtained from Let’s Encrypt CA.