This tutorial will guide you on how to create a shared directory on Samba AD DC system, map this Shared Volume to Windows clients integrated into the domain via GPO and manage share permissions from Windows domain controller perspective.
It will also cover how to access and mount the file share from a Linux machine enrolled into domain using a Samba4 domain account.
Requirements:
Step 1: Create Samba File Share
1. The process of creating a share on Samba AD DC is a very simple task. First create a directory you want to share via SMB protocol and add the below permissions on the filesystem in order to allow a Windows AD DC admin acount to modify the share permissions accordingly to what permissions Windows clients should see.
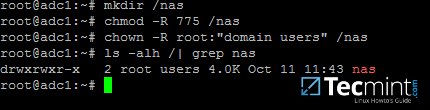
Assuming that the new file share on the AD DC would be the /nas directory, run the below commands to assign the correct permissions.
# mkdir /nas
# chmod -R 775 /nas
# chown -R root:"domain users" /nas
# ls -alh | grep nas
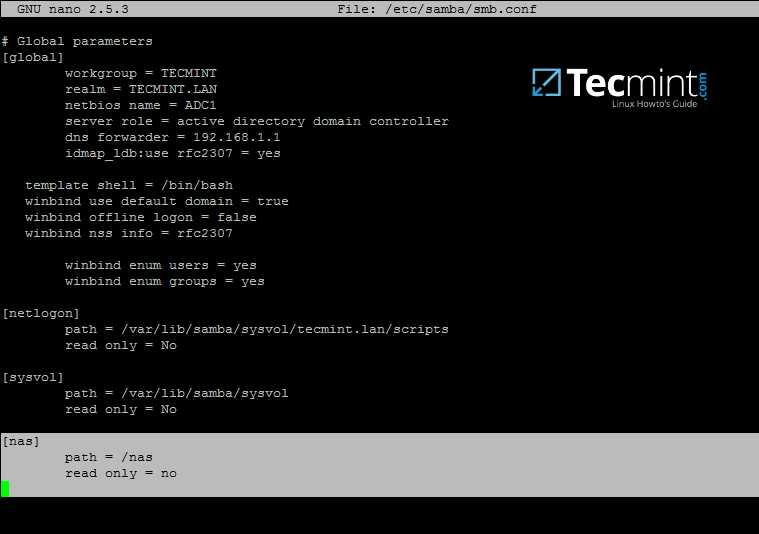
2. After you’ve created the directory that will be exported as a share from Samba4 AD DC, you need to add the following statements to samba configuration file in order to make the share available via SMB protocol.
# nano /etc/samba/smb.conf
Go to the bottom of the file and add the following lines:
[nas]
	path = /nas
	read only = no
3. The last thing you need to do is to restart Samba AD DC daemon in order to apply the changes by issuing the below command:
# systemctl restart samba-ad-dc.service
Step 2: Manage Samba Share Permissions
4. Since we’re accessing this shared volume from Windows, using domain accounts (users and groups) that are created on Samba AD DC (the share is not meant to be accessed by Linux system users).
The process of managing permissions can be done directly from Windows Explorer, in the same way permissions are managed for any folder in Windows Explorer.
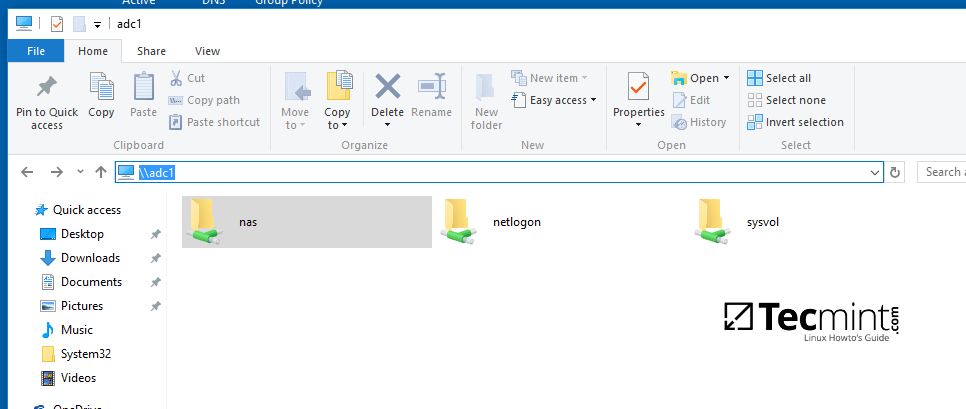
First, log on to Windows machine with a Samba4 AD account with administrative privileges on the domain. In order to access the share from Windows and set the permissions, type the IP address or host name or FQDN of the Samba AD DC machine in Windows Explorer path field, preceded by two back slashes, and the share should be visible.
\\adc1
Or
\2.168.1.254
Or
\\adc1.tecmint.lan
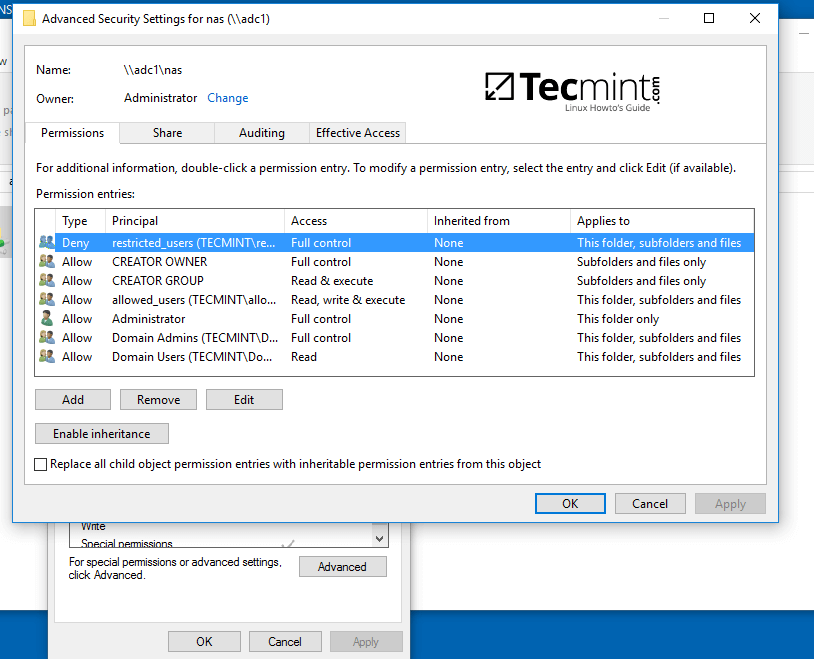
5. To modify permissions just right click on the share and choose Properties. Navigate to Security tab and proceed with altering domain users and group permissions accordingly. Use Advanced button in order to fine tune permissions.
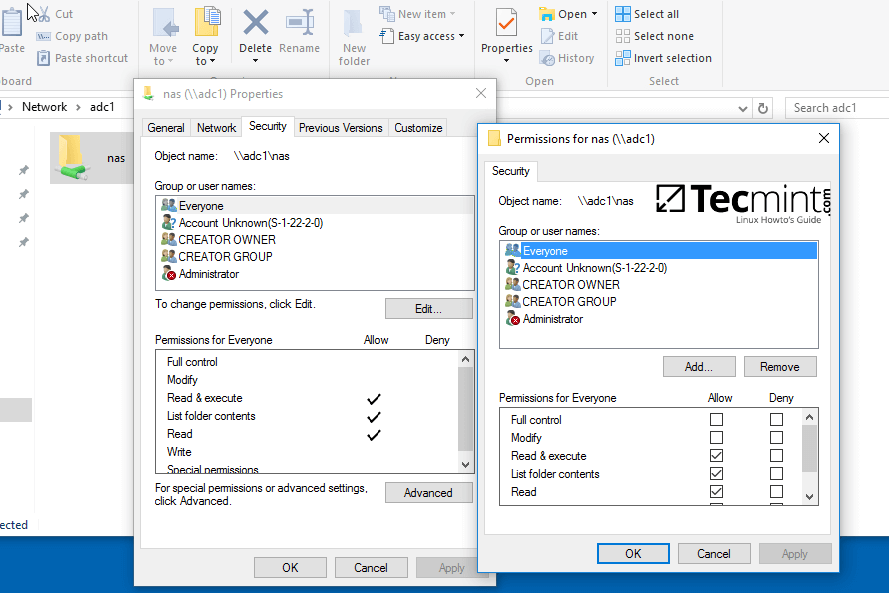
Use the below screenshot as an excerpt on how to tune permissions for specific Samba AD DC authenticated accounts.
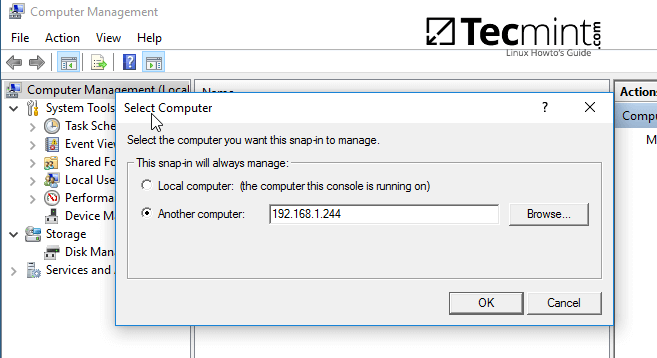
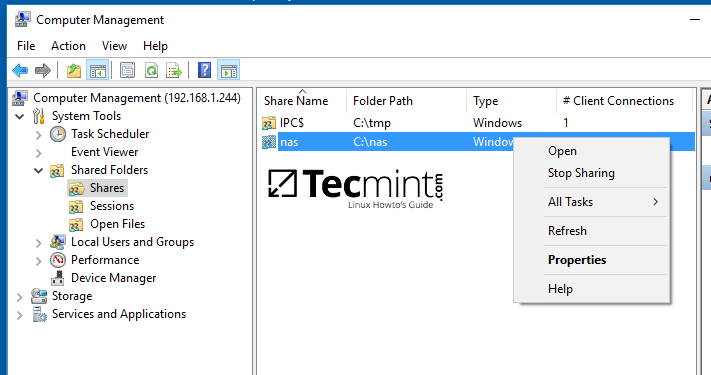
6. Other method you can use to manage the share permissions is from Computer Management -> Connect to another computer.
Navigate to Shares, right click on the share you want to modify permissions, choose Properties and move to Security tab. From here you can alter permissions in any way you want just as presented in the previous method using file share permissions.

Step 3: Map the Samba File Share via GPO
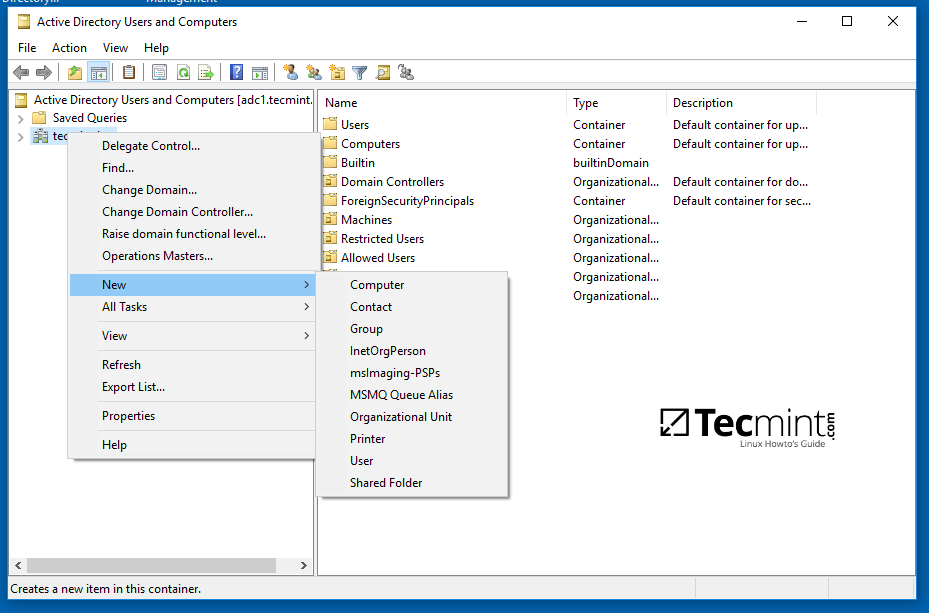
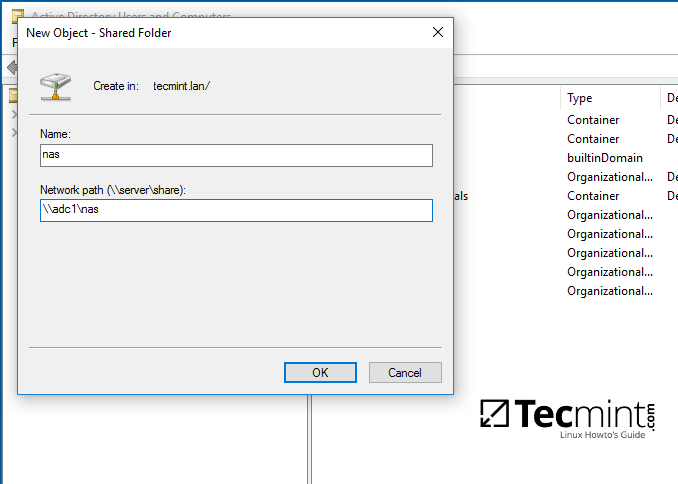
7. To automatically mount the exported samba file share via domain Group Policy, first on a machine with RSAT tools installed, open AD UC utility, right click on your domain name and, then, choose New -> Shared Folder.
8. Add a name for the shared volume and enter the network path where your share is located as illustrated on the below image. Hit OK when you’ve finished and the share should now be visible on the right plane.
9. Next, open Group Policy Management console, expand to your domain Default Domain Policy script and open the file for editing.
On the GPM Editor navigate to User Configuration -> Preferences -> Windows Settings and right click on Drive Maps and choose New -> Mapped Drive.

10. On the new window search and add the network location for the share by pressing the right button with three dots, check Reconnect checkbox, add a label for this share, choose the letter for this drive and hit OK button to save and apply configuration.

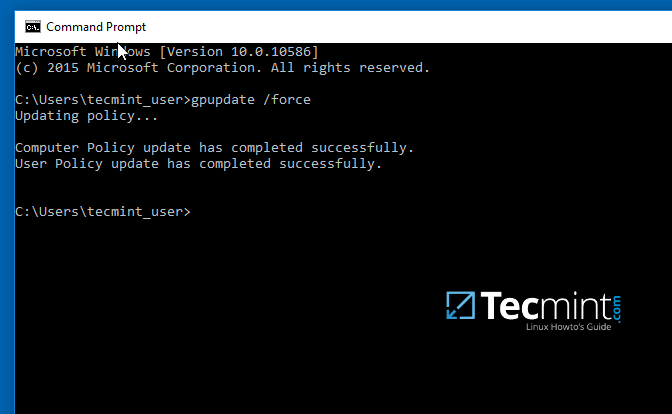
11. Finally, in order to force and apply GPO changes on your local machine without a system restart, open a Command Prompt and run the following command.
gpupdate /force
12. After the policy has been successfully applied on your machine, open Windows Explorer and the shared network volume should be visible and accessible, depending on what permissions you’ve granted for the share on previous steps.
The share will be visible for other clients on your network after they reboot or re-login onto their systems if the group policy will not forced from command line.

Step 4: Access the Samba Shared Volume from Linux Clients
13. Linux users from machines that are enrolled into Samba AD DC can also access or mount the share locally by authenticating into the system with a Samba account.
First, they need to assure that the following samba clients and utilities are installed on their systems by issuing the below command.
$ sudo apt-get install smbclient cifs-utils
14. In order to list the exported shares your domain provides for a specific domain controller machine use the below command:
$ smbclient –L your_domain_controller –U%
or
$ smbclient –L \\adc1 –U%

15. To interactively connect to a samba share from command line with a domain account use the following command:
$ sudo smbclient //adc/share_name -U domain_user
On command line you can list the content of the share, download or upload files to the share or perform other tasks. Use ? to list all available smbclient commands.

16. To mount a samba share on a Linux machine use the below command.
$ sudo mount //adc/share_name /mnt -o username=domain_user
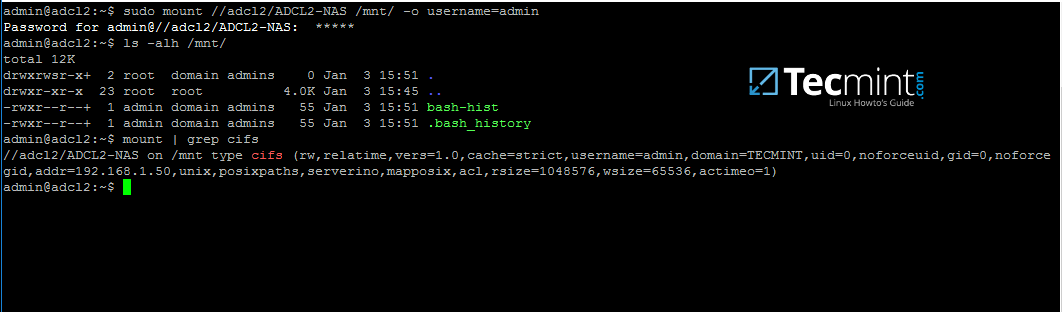
Replace the host, share name, mount point and domain user accordingly. Use mount command piped with grep to filter only by cifs expression.
As some final conclusions, shares configured on a Samba4 AD DC will work only with Windows access control lists (ACL), not POSIX ACLs.
Configure Samba as a Domain member with file shares in order to achieve other capabilities for a network share. Also, on an Additional Domain Controller configure Windbindd daemon – Step Two – before you start exporting network shares.


Hello! I cannot figure out, how to create and map Linux users home directories in samba, what should I do if I need to access my Linux home folder from different computers?
This command didn’t work to me:
Then I edited
/etc/nsswitch.conflike this:I hop1e it helps someone!
@Fausto,
Thanks for sharing the tip, hope it will help other users..
Hi,
Could any one tell me if it is possible to apply the windows acl’s when mounting a cifs share to Linux (centos/rhel), mean we can grant access to more users/groups in addition to uid/gid (owner of the share), so there is any solution to bypass this issue as long as the posix acl (setfacl) are not permitted.
ps: The current cifs-utils package has two binaries, getcifsacl and setcifsacl but unfortunately this work with SID’s (alternative of uid in windows) , so any one have ever tried or test this ?
joining the AD with winbind or sssd could solve this ?
Thanks for this guide, very clear and easy to follow.
Sir, thank you for this guide. I’ve been following your guide from Part 1. And I was so amazed by it, I manage also to use the domain accounts to login like PAM. however, I got stuck with file share I followed exactly from this guide, I can klist, and use smbclient (I am using Ubuntu 16.04 btw); but on windows ( \\lab.mis\ ), when I go to Properties on my shared folder “\\lab.mis\LAB\” , there was no Security TAB. please help.. thanks
Use this guide to add a now machine into the AD https://www.tecmint.com/join-ubuntu-to-active-directory-domain-member-samba-winbind/ Then, create shares as explained here.
This is great but how can I add a Linux fileserver to the AD domain and serve it’s files via samba? Eg. a separate roaming home folder server, a NAS that joins the domain and serves files on it’s own (not via the dc)
Perfectly, good job.
Just only add
mkdir /MBPOS \System
and
/etc/samba/smb.conf
[MBPOS System]
path = /MBPOS System
Nice article! I can’t load PAM module from samba winbind. Using version 4.6.4 from a source I linked pam_winbind, so library to /lib/x86_64-linux-gnu/security/ but pam-auth-update found only unix authentication profile. On the other hand, winbindd is working correctly and i can use domain acl’s in chown actions, so, shares is working good.
Install winbind libpam-winbind libnss-winbind binary packages provided by the distribution repos.
Like other commentators,
I get a chown: invalid group:´root:domain users´
Whereas I get this output.
This because ubuntu can not find ‘domain users’ as Unix group. Now the question is how to import or map these groups as Unix group?
I am also using Ubuntu – Server 16.04.2 LTS
Add “winbind use default domain = no” to samba main configuration file and restart smb daemon. Also, configure Samba local authentication with Active Directory accounts. Use this guide https://www.tecmint.com/manage-samba4-active-directory-linux-command-line/ , read Part 2 mainly.
Is it possible to manage a Directories with spaces on Samba4 AD DC to Windows Clients?
For example: MBE System (Directory)
Hi, Nick. Although I don’t have a solution for the issue I had this problem installing the DC on a virtual Machine using Virtual Box.
I reinstalled on a physical machine and I didn’t have this problem. Everything ran perfectly.
So I assume this is some issue related to it being on a VM.
Unfortunately I didn’t find a solution to the exact problem.
Hi Matei,
I am having a similar issue to Shawn, where it will not let me set up permissions to the file for domain users. When I type:
I get a chown: invalid group:´root:domain users´
The issue is that I can’t get domain users to be accepted as a group. Winbind does not seem to be working, and I can’t seem to change it since this is the primary AD DC. What steps should I take to get groups to authenticate to a share, and allow them access to it?
Also wbinfo -g doesn’t show any output, which leads me to believe that it isn’t resolving any domain groups.
IMO this article shouldn’t be before the one about joining domain members. Hosting file shares and user home directories on a DC is convenient but not good practice from a network design perspective.
The DC should specialize in controlling the domain (directory queries, authentication, serving GPOs) and not be burdened by other things. Better to create a separate Samba or Windows share server which authenticates against the DC.
Did you read the final sentences from this guide? Quotes: “Configure Samba as a Domain member with file shares in order to achieve other capabilities for a network share”
Hi I wanted to firstly say thank you for this tutorial. Excellent!
I am having problems right in the beginning with this:
I get a chown: invalid group:´root:domain users´
I cant seem to get around it?
What’s the ouput of wbinfo command for groups? how are groups displayed? with domain counterpart or alone? What distributin are you using?
Hi Matei,
Running
wbinfo -gshows me a list of groups including domain users. They are shown with my DOMAIN\groupSo in the case for the group looking to chown it is listed as follows: SPT\domain users.
I am using Ubuntu 16.04.2
Linux hosts can be integrated into a samba AD DC and can fully use the authentication mechanism provided by the domain controller. But this is limited mostly on authentication only, other services or features of an AD (group policy for example) won’t apply in any way to Linux systems.
Awesome man I was looking forward to this article. Question are you planing on creating an article to fully integrate Linux workstations into Active Directory authentication and all the other AD features like group policies etc. I know it will be very limited but what I am totally looking for is a centralized authentication mechanism for Windows and Linux.