Askbot is an open source, simple yet powerful, fast and highly-customizable software for creating a question and answer (Q&A) forum. It is inspired by StackOverflow and YahooAnswers, and written in Python on top of the Django web framework.
It allows for efficient question and answer knowledge management, thus organizations such as Fedora’s Q&A forums and LibreOffice’s Q&A Forums are making good use of it. Askbot can work as a standalone application or can be integrated with your existing Django apps or other web platforms.
In this tutorial you will learn how to install AskBot on CentOS 7. In order to complete the tutorial, you will need to have a CentOS 7 server minimal installation with root access.
Step 1: Install Required Dependencies
We will start by installing the required dependencies such as development tools by using the following command in a terminal.
# yum group install 'Development Tools'
After that we will install Epel repository, if it hasn’t already been installed on your system.
# yum install epel-release
Lastly, we will install some of the python dependencies required to later run AskBot.
# yum install python-pip python-devel python-six
In case python-pip is not installed with the above command, you can install it with by using the following command.
# curl "https://bootstrap.pypa.io/get-pip.py" -o "get-pip.py" && python get-pip.py
Step 2: Install PostgreSQL Database
AskBot requires a database where it will store its data. It uses PostgreSQL, so we will need to install it and configure it on our system.
You can use the following command to complete the installation.
# yum -y install postgresql-server postgresql-devel postgresql-contrib
When the installation is complete, initialize PostgreSQL with.
# postgresql-setup initdb
If everything goes normally, you should see the following:
Initializing database ... OK
Our next step is to start PostgreSQL and enable it to start on boot:
# systemctl start postgresql
# systemctl enable postgresql
Now that our database server is up and running, we will login as postgres user to create a database for our AskBot installation.
# su - postgres
Then use to:
$ psql
Now you are the PostgreSQL prompt, ready to create our database, database user and grant the user privileges on the new database. Create the database by using the command below, feel free to change the database name per your preferences:
postgres=# create database askbot_db;
Next create the database user. Replace “password_here” with a strong password:
postgres=# create user askbot_user with password 'password_here';
Grant the user privileges on the askbot_db:
postgres=# grant all privileges on database askbot_db to askbot_user;
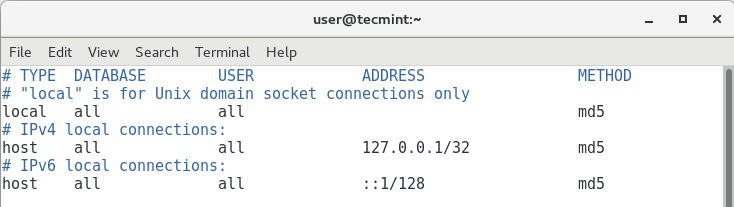
Next we will need to edit the PostgreSQL configuration to change our authentication method to md5. To do this, use your favorite text editor and edit /var/lib/pgsql/data/pg_hba.conf file:
# vim /var/lib/pgsql/data/pg_hba.conf
The configurations should look like this:
Next save the changes and restart PostgreSQL:
# systemctl restart postgresql
Step 3: Install AskBot Forum
Finally we can proceed with the installation of AskBot. Start by creating new user on your system. We will call it askbot:
# useradd -m -s /bin/bash askbot
Setup password for the new user:
# passwd askbot
Next we will need to add the user to the wheel group on the system:
# usermod -a -G wheel askbot
Now we will use pip to install virtualenv package:
# pip install virtualenv six
Now we will log as the askbot user and create new virtual environment:
# su - askbot
$ virtualenv tecmint/
Sample Output
New python executable in /home/askbot/tecmint/python
Installing setuptools, pip, wheel...
done.
Next step is to activate the virtual environment with the following command:
# source tecmint/bin/activate
Now we are ready to install AskBot via pip.
# pip install six askbot psycopg2
The installation may take a couple of minutes. Once it is complete, we can test our installation in a temporary directory. Make sure NOT to name that directory askbot.
# mkdir forum_test && cd forum_test
Next we will initialize a new AskBot project with:
# askbot-setup
You will be asked a few question where you will have to select the installation directory – use “.” (without quotes) to choose the current directory. Next you will need to enter the earlier prepared database name, database user and its password.
Next we will generate the static files for Django with:
# python manage.py collectstatic
Next we generate the database:
# python manage.py syncdb
And finally start the server with:
# python manage.py runserver 127.0.0.1:8080
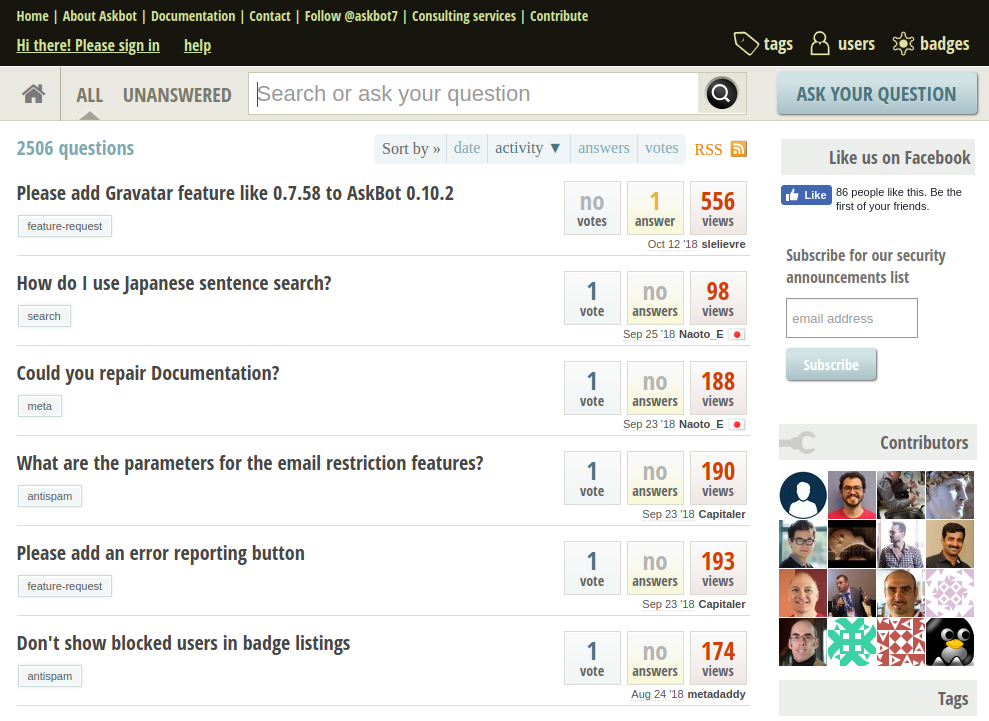
When you go to your browser to http://127.0.0.1:8080 – you should see the askbot interface.
That’s all! Askbot is an open source, simple, fast and highly-customizable question and answer (Q&A) forum software. It supports efficient question and answer knowledge management. If you encountered any errors during the installation or have any other related queries, use the feedback form below to reach us.


Exactly what I was looking for. Thanks, Marin.