From my previous post about integrating Ubuntu 13.10 to Zentyal PDC Active Directory things have changed for some software packages once the release of Ubuntu 14.04, codename Trusty Tahr, and seems like Ubuntu developers had dropped support for “likewise-open” package which did an excellent job of integrating Ubuntu to Windows Active Directory in just a few moves and clicks.
On Ubuntu Launchpad.net the page for likewise-open package displays a warning message saying that there are no source release for the package in Trusty Tahr. So, trying a classic installation from CLI with apt-get install command.
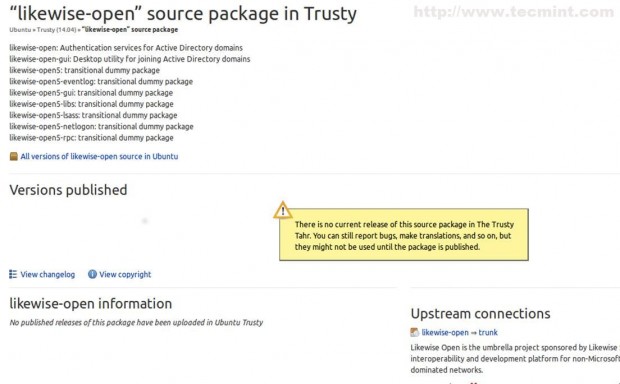
But don’t worry, even if ‘Trusty Tahr‘ has dropped support for ‘likewise‘ packages ( let’s hope that maybe just for a short period ) we can still use the ‘Saucy Salamander‘ repositories, download and manually install the packages needed to join Ubuntu 14.04 on PDC Active Directory.
Step 1: Downloading Dependency Packages
1. For manually downloading the packages go to official ‘Ubuntu 13.10‘ packages page, select your location and download the following packages.
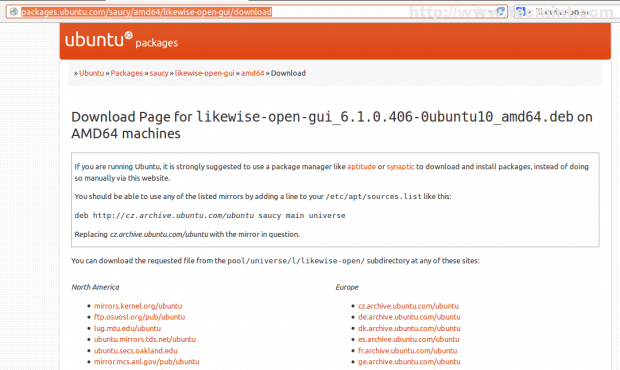
2. After downloading packages, install the packages using a GUI installer like ‘Gdebi‘ or install it from command line. You can also download and install the packages from command line only by opening a Terminal and issue the following commands in this order.
$ wget http://de.archive.ubuntu.com/ubuntu/pool/main/l/likewise-open/likewise-open_6.1.0.406-0ubuntu10_amd64.deb
$ wget http://de.archive.ubuntu.com/ubuntu/pool/main/libg/libglade2/libglade2-0_2.6.4-1ubuntu3_amd64.deb
$ wget http://de.archive.ubuntu.com/ubuntu/pool/universe/l/likewise-open/likewise-open-gui_6.1.0.406-0ubuntu10_amd64.deb
$ sudo dpkg -i likewise-open_6.1.0.406-0ubuntu10_amd64.deb
$ sudo dpkg -i libglade2-0_2.6.4-1ubuntu3_amd64.deb
$ sudo dpkg -i likewise-open-gui_6.1.0.406-0ubuntu10_amd64.deb
That’s all for downloading and installing ‘likewise-open‘ packages needed for joining ‘Ubuntu 14.04‘ to Active Directory. Also you can backup all of this three packages for a later reuse.
Step 2: Integrating Ubuntu 14.04 to Zentyal PDC
The procedure for joining ‘Ubuntu 14.04‘ with ‘likewise‘ is the same as for all Ubuntu predecessors as in this post Integrate Ubuntu in Zentyal PDC.
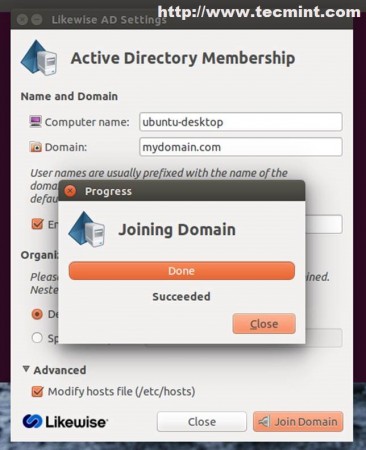
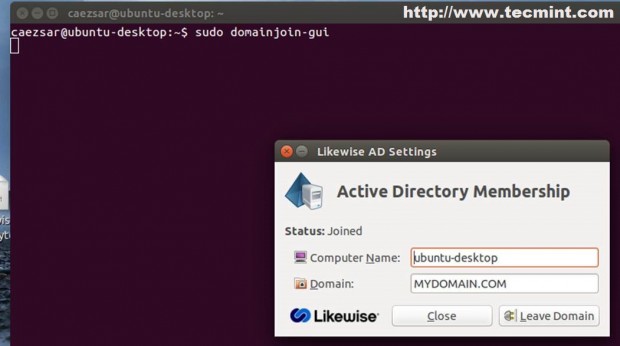
3. If you prefer using a GUI, issue the following command in Terminal, enter your settings and PDC administrator credentials.
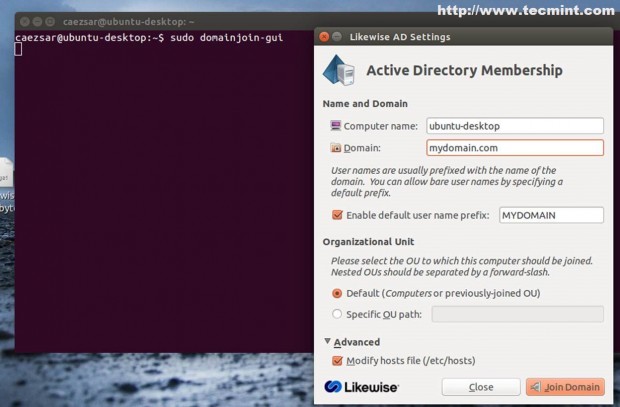
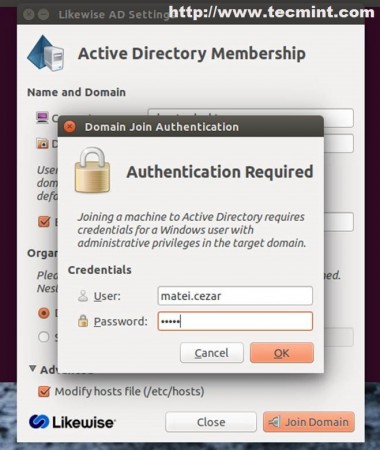
If your network settings are correct and DNS entry points to ‘Zentyal PDC‘ at the end you should get a successfully confirmation message.
4. If you prefer command line, issue the following command to integrate ‘Ubuntu 14.04’ to Active Directory.
$ sudo domainjoin-cli join domain.tld domain_administrator
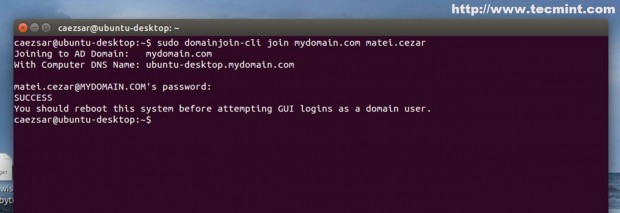
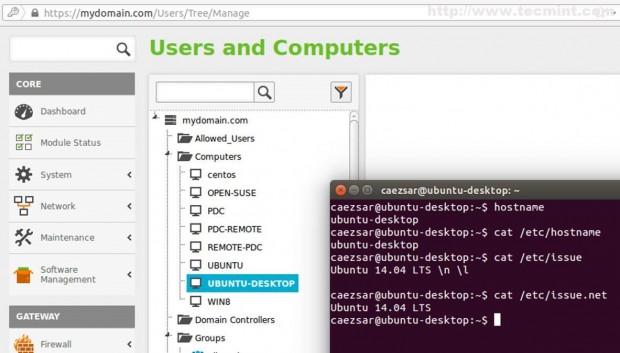
5. After joining Ubuntu 14.04 successfully, reboot your system. Next, open a browser and navigate to ‘Zentyal Web Interface‘ and verify if ‘Ubuntu 14.04‘ hostname appears in Users and Computers module.
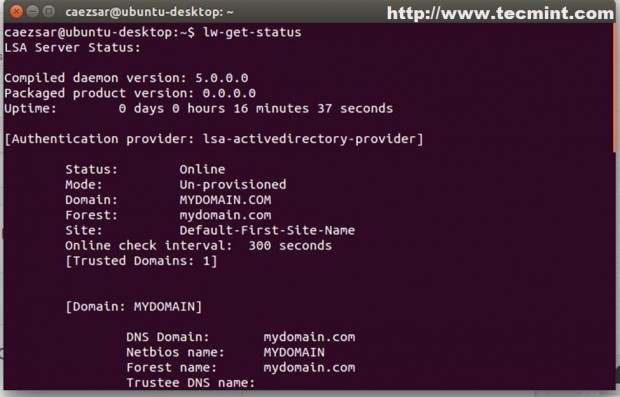
You can see your ‘Zentyal PDC Server‘ status by running the following command.
$ lw-get-status
Step 3: Login with Domain Credentials
Ubuntu 14.04 accepts only internal system users on Logon screen and doesn’t provide the ability to manual login a user from Active Directory.
6. To actually perform a GUI Logon on Ubuntu 14.04 with an Active Directory User edit ‘50-ubuntu.conf‘ file located in ‘/usr/share/lightdm.conf.d/‘ path and add the following lines then reboot to apply changes.
allow-guest=false      		## If you want to disable Guest login
greeter-show-manual-login=true  ## Enables manual login field
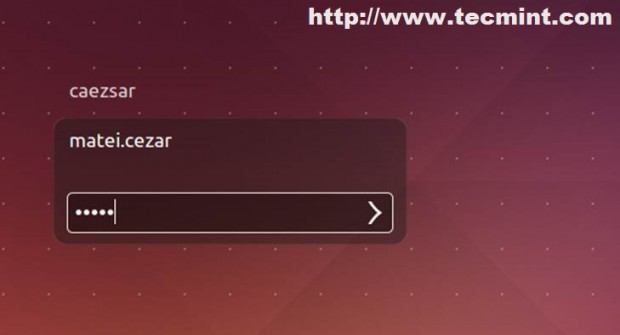
7. After reboot on Logon screen select Login and provide your Active Directory User credentials with related to syntax.
domain_name\domain_user
domain_name.tld\domain_user
domain_user
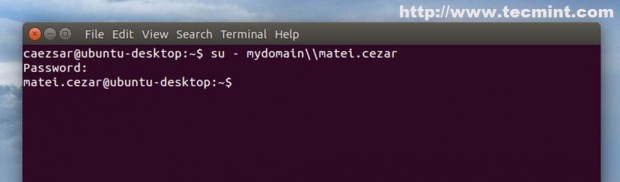
8. To perform a CLI login from Terminal use the following syntax.
$ su - domain_name\\domain_user
$ su - domain_user
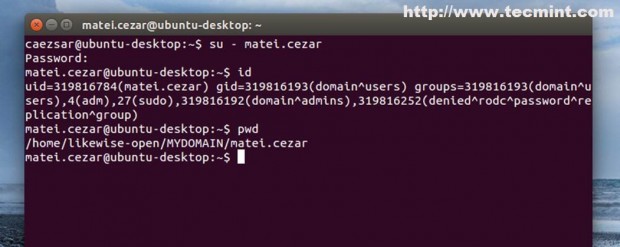
As you can see the Active Directory User has home Path, UID and group appearance different from internal Ubuntu users.
Step 4: Enable Active Directory Administrative Rights
Remote users from Active Directory have the same Standard status as internal Ubuntu users and are not allowed to perform administrative tasks on system.
9. To grant root privileges to an Active Directory Administrative User, issue the following command with root privileges.
$ sudo usermod -a -G sudo AD_administrative_user
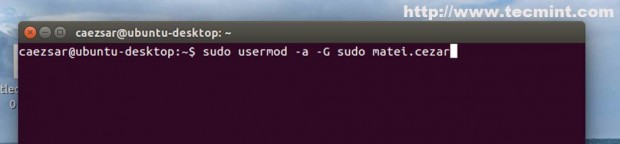
Basically the above command, adds the Active Directory Administrative User to Ubuntu local group “sudo“, group enabled with root powers.
Step 5: Leave Domain
10. For leaving domain from GUI, open ‘Likewise‘ from command line and hit on Leave Domain.
If you prefer to do from command line, run the following command and provide AD Admin User password.
$ sudo domainjoin-cli leave domain_name

That’s all the settings needed for a basic Ubuntu 14.04 integration into a Primary Domain Controller Active Directory with the help of ‘Likewise-open‘ packages borrowed from Ubuntu 13.10 repositories.

It’s not possible to just integrate Zentyal into a Domain controler as a simple member. The design of its web admin console doesn’t allow just a simple membership. It can function as a PDC or BDC.
Hi Cezar,
This procedure can be applied for second Zentyal 4 server. I can see into webadmin interface of Zentyal this type of membership with PDC. I what that Zentyal to be a simple member of domain, not BDC or PDC. I have already one Zentyal – role PDC.
Thanks in advanced
I have joined the domain successfully. But could not see the 50-ubuntu.conf file in the designated folder. It contains 5 files. I am running kubuntu 64 Bit
Hi
I have added windows domain to ubuntu 14.04
I have edited /usr/share/lightdm/lightdm.conf.d/50-ubuntu.conf
But I still can’t login with domain user also I can still see Guest Login.
Please help me to login with domain user.
Thanks
The same issue with lightdm
Here is the solution:
update /etc/pam.d/common-session and made the following change the line:
session sufficient pam_lsass.so
to:
session [success=ok default=ignore] pam_lsass.s
After a reboot, my path was ok, and everything seems to be working as normal again.
https://bugs.launchpad.net/ubuntu/+source/lightdm/+bug/1228079
Yeah Man! Thanks for the instructions, it will help others..
I followed the instruction to the letter but i cannot use my domain credentials to log in plus.
@Ashima Loomba : There’s seems to be a problem with lightdm, try this from shell:
sudo mv /home/pbis/domain/domain_user/.Xauthority /home/pbis/domain/domain_user/.Xauthority.backup ,
rm /home/pbis/domain/domain_user/.profile
sudo service lightdm restart
mv /home/pbis/domain/domain_user/.config /home/pbis/domain/domain_user/.config.bak
If this settings wont work try reinstall lightdm or ubuntu-desktop:
sudo dpkg-reconfigure lightdm
sudo apt-get update
sudo apt-get install –reinstall ubuntu-desktop
sudo apt-get install unity
If none of this settings work for you try reinstall your system.
I am sorry i typed a wrong email-id in my previous post.
Pl ignore the previous comment
Could you please help ? It’s very important.
I am able to do
su domain_user
It logs me as domain-user. But when I try to login from login screen. It logs me in and immediately logs me out. It also creates a home directory in /home/pbis/domain/domain_user
I am able to run enum-users, get-status command without any error. Just from main login screen it’s not able to log me in.
I am using Ubunto 14.04 LTS with PowerBroker (likewise package I got from net).
Please help. It’s quite urgent
You have to verify your /etc/resolv.conf file to check if it points to the right DNS server.
Error: DNS_ERROR_BAD_PACKET [code 0x0000251e]
A bad packet was received from a DNS server. Potentially the requested address does not exist.
?
Hi Thanks for this, I was just wondering if you had any pointers on how to mount the users directory on the server as home instead of /home/likewise-open/server/username.
I am trying to setup 5 machines in a small lab but 10-15 users logging in to any machine at different times so would like their files saved to the server home instead of the local machine.
Excellent tutorial !
At the login screen I select “Login”, I type in the user, “chr\chr”, and I type in his password, then it tries to login for some seconds. but suddenly it puts me back at the login screen again.
Content of: /var/log/auth.log
May 6 18:42:42 ch-ub14 lightdm: pam_succeed_if(lightdm:auth): requirement “user ingroup nopasswdlogin” not met by user “chr\chr”
May 6 18:42:43 ch-ub14 lightdm: pam_unix(lightdm-greeter:session): session closed for user lightdm
May 6 18:42:43 ch-ub14 lightdm: pam_unix(lightdm:session): session opened for user CHR\chr by (uid=0)
May 6 18:42:44 ch-ub14 lightdm: pam_unix(lightdm:session): session closed for user CHR\chr
….
Thank.
Sorry my last post. My mother lang is spanish. My android device is spanish toó. What i wanted to say is Your posts are great
Thanks for this excellent tutorial!
Just one question:
How can I enable the login history for domain accounts in lightdm greeter?
It seems that lightdm ignores these users because their folders are listed in /home/likewise-open/%user%/ instead of /home/%user%
thanks.