Brief: In this guide, we will discuss some useful examples of the screen command. By the end of this guide, users will be able to work with multiple shell sessions using a single Linux terminal window.
As Linux users, we often need to work on long-running tasks, such as – downloading or copying large files, executing time-consuming database queries, and so on. Sometimes these important tasks get terminated abruptly due to a session timeout.
To mitigate such scenarios, we can use the screen command, which is a full-screen software program that can be used to multiplexes a physical console between several processes (typically interactive shells). It offers a user to open several separate terminal instances inside a single terminal window manager.
The screen application is very useful if you are dealing with multiple programs from a command-line interface and for separating programs from the terminal shell. It also allows you to share your sessions with others users and detach/attach terminal sessions.
In this guide, we will discuss how to install, configure, and use the screen command on a Linux system. Throughout this guide, we will understand the usage and benefits of the screen command using practical examples.
[ez-toc]
So let’s get started.
Install Screen Command in Linux
On my Ubuntu Server Edition, the screen command has been installed by default. But, Linux Mint does not have a screen installed by default, so I need to install it first using the apt-get command before using it.
Please follow your distribution installation procedure to install the screen.
$ sudo apt-get install screen      [On Debian, Ubuntu and Mint]
$ sudo yum install screen          [On RHEL/CentOS/Fedora and Rocky Linux/AlmaLinux]
$ sudo emerge -a sys-apps/screen   [On Gentoo Linux]
$ sudo apk add screen              [On Alpine Linux]
$ sudo pacman -S screen            [On Arch Linux]
$ sudo zypper install screen       [On OpenSUSE]
Now, let’s verify that the command has been installed successfully:
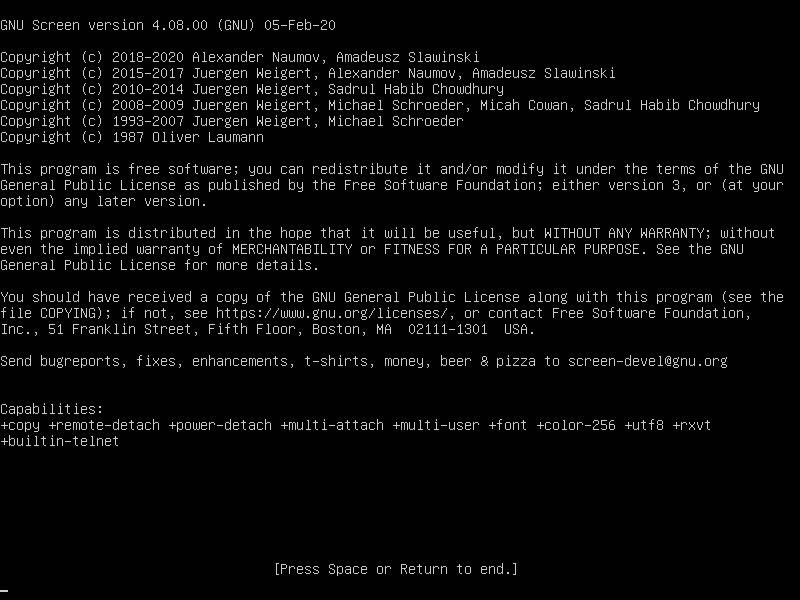
$ screen --version

Screen version 4.8.00 (GNU) 05-Feb-20
Actually, the screen is a very good terminal multiplexer program in Linux which is hidden inside hundreds of Linux commands.
Let’s start to see the usage of the screen command in Linux with the following examples.
Screen Command Syntax
The syntax of the screen command is as follows
$ screen [OPTIONS] [ CMD [ ARGS ] ]
In the above syntax, we can see that all the parameters are options and they are represented by the square brackets ([]).
1. Start Screen for the First Time
Just type the screen at the command prompt. Then the screen will show an interface exactly as the command prompt.
$ screen
2. Show Screen Parameter
When you enter the screen, you can do all your work as you are in the normal command-line environment. But since the screen is an application, so it has commands or parameters.
Type “Ctrl-A” and “?” without quotes. Then you will see all commands or parameters on the screen.
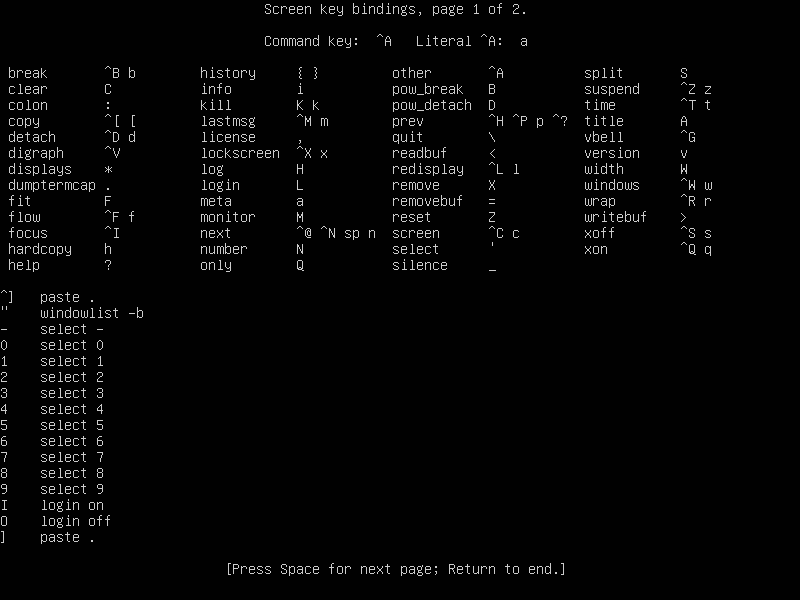
To get out of the help screen, you can press the “space-bar” button or “Enter“. (Please note that all shortcuts which use “Ctrl-A” are done without quotes).
3. How to List All Open Windows
In the previous example, we started a new shell session using the screen command. Now let’s use the ctrl-a + " key combination to list all open windows of the current screen session:
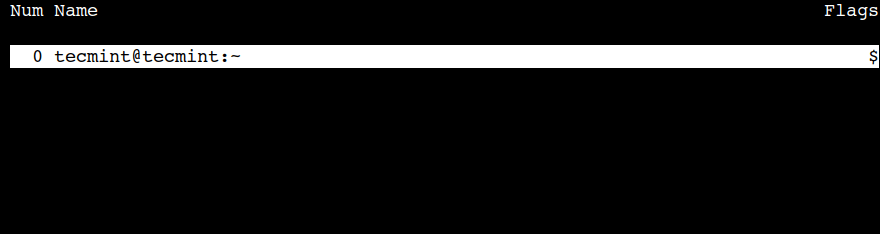
In the above output, we can see the number and name of the window. The first column represents the window number and it starts from zero.
The next column represents the name of the window and its default format is <user>@<hostname>:<working-directory>.
4. How to Terminate Screen Window Session
We can terminate the active window session using the ctrl-a + k key combinations. It is important to note that, this action will interrupt the command execution from the current virtual window.
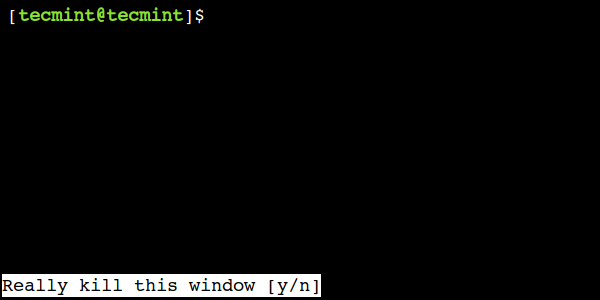
In the above output, we can see that the screen command is waiting for the user’s confirmation. It shows the warning message in the left bottom corner.
Just like other Linux commands, we can use 'y' to continue or 'n' to abort the operation.
5. How to Start a Screen Session with Name
The screen command allows us to create a session with a user-defined name, which comes in handy when there are multiple sessions available.
So, let’s use the -S option of the command to create a named session:
$ screen -S demo-screen
In the above command, the demo-screen is the name of the session.
6. Detach the Terminal Session with Screen
One of the advantages of a screen that is you can detach it. Then, you can restore it without losing anything you have done on the screen. Here’s the sample scenario:
You are in the middle of SSH on your server. Let’s say that you are downloading a 400MB patch for your system using the wget command.
The download process is estimated to take 2 hours long. If you disconnect the SSH session, or suddenly the connection is lost by accident, then the download process will stop. You have to start from the beginning again. To avoid that, we can use a screen and detach it.
Take a look at this command. First, you have to enter the screen.
$ screen
Then you can do the download process. For example on my Linux Mint, I am upgrading my dpkg package using the apt command.
$ sudo apt install dpkg
Reading package lists... Done
Building dependency tree
Reading state information... Done
The following packages will be upgraded:
  dpkg
1 upgraded, 0 newly installed, 0 to remove and 1146 not upgraded.
Need to get 2,583 kB of archives.
After this operation, 127 kB of additional disk space will be used.
Get:1 http://debian.linuxmint.com/latest/
testing/main dpkg i386 1.16.10 [2,583 kB]
47% [1 dpkg 1,625 kB/2,583 kB 47%]     14,7 kB/s
While downloading in progress, you can press “Ctrl-A” and “d“. You will not see anything when you press those buttons. The output will be like this:
[detached from 5561.pts-0.mint]
pungki@mint ~ $
7. Re-attach the Terminal Session with Screen
After you detach the screen, let’s say you are disconnecting your SSH session and going home. In your home, you start to SSH again to your server and you want to see the progress of your download process. To do that, you need to restore the screen. You can run this command:
pungki@mint ~ $ screen -r
And you will see that the process you left is still running.
When you have more than 1 screen session, you need to type the screen session ID. Use screen -ls to see how many screens are available.
pungki@mint ~ $ screen -ls
pungki@mint ~ $ screen -ls
There are screens on:
        7849.pts-0.mint (10/06/2021 01:50:45 PM)        (Detached)
        5561.pts-0.mint (10/06/2021 11:12:05 AM)        (Detached)
2 Sockets in /var/run/screen/S-pungki
If you want to restore screen 7849.pts-0.mint, then type this command.
pungki@mint ~ $ screen -r 7849
8. Using Multiple Screen Terminal Windows
When you need more than 1 screen to do your job, is it possible? Yes, it is. You can run multiple screen windows at the same time. There are 2 (two) ways to do it.
First, you can detach the first screen and run another screen on the real terminal. Second, you do a nested screen as shown.
To create new windows, use the ctrl-a + c key combination two times to create two new windows. Next, let’s use the ctrl-a + " key combination to list all active windows:

In the above output, we can see that now there are three windows.
9. How to Rename a Screen Window
In the previous example, we created two new windows. However, their default names are not providing any details about them. In such cases, we can assign some meaningful names to them.
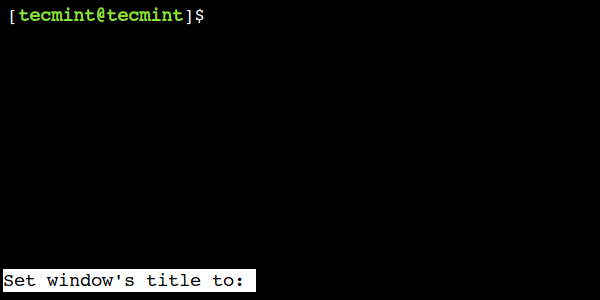
We can use the ctrl-a + A key combination to rename the current window session. This key combination prompts a user to set a window title:
10. Switching Between Screen Terminal Windows
In the previous example, we created multiple windows. Now let’s see how to switch between them.
First, let’s list all active windows using the ctrl-a + " key combination. Next, use the up or down arrow key to select the appropriate window. Finally, press the enter key to switch to the selected window.

In this example, we have selected the window with the title – db-query.
11. How to Move to the Next Screen Window
We can use the ctrl-a + n key combination to move to the next windows. Let’s understand this with an example.
First, switch to the first window and verify it using the ctrl-a + " key combination:

Now, let’s press the ctrl-a + n key combination two times to go to the third window and use the ctrl-a + " key combination to verify the same.

In the above output, we can see now we are on the third window.
12. How to Move to the Previous Screen Window
In a similar way, we can use the ctrl-a + p combination to switch to the previous window.
Currently, we are on the third window. So, let’s use the ctrl-a + p key combination two times and verify that we are on the first window again:

In the above output, we can see that now we came back to the first window.
13. How to Switch Between Current and Previous Window
Sometimes, we just want to switch between two windows. In such cases, we can use the ctrl-a + ctrl-a key combination.
To understand this, first switch to the first window:

Next, switch to the last window:

Finally, use the ctrl-a + ctrl-a key combination to jump to the first window again.
14. How to Jump to a Particular Screen Window
In the previous examples, we saw various ways to switch between windows. However, sometimes we want to jump to a particular window. In such scenarios, we can use the window numbers.
First, let’s use the ctrl-a + " key combination to find the window number:

In the above output, the first column represents the window number. It is important to note that, the screen command starts numbering from zero.
Now, let’s use the ctrl-a + 2 key combination to jump to the third window and verify that we are in the correct window:

15. How to Split a Screen Window Horizontally
Just like normal terminals, we can also split the screen window. We can use the ctrl-a + S key combination to split the window horizontally.

Now, we can use the ctrl-a + tab key combination to jump between the regions.
Lastly, we can use the ctrl-a + X key combination to remove the current region. It is important to note that here we have to use an uppercase X character.
16. How to Split a Screen Window Vertically
Similarly, we can use the ctrl-a + | key combination to split the current window vertically:

In addition to this, we can also use the ctrl-a + tab key combination switch between the regions and the ctrl-a + X key combination to close the current region.
17. Enable Screen Logging in Linux
Sometimes it is important to record what you have done while you are in the console. Let’s say you are a Linux Administrator who manages a lot of Linux servers.
With this screen logging, you don’t need to write down every single command that you have done. To activate the screen logging function, just press “Ctrl-A” and “H“. (Please be careful, we use a capital ‘H’ letters. Using non-capital ‘h’, will only create a screenshot of the screen in another file named hardcopy).
At the bottom left of the screen, there will be a notification that tells you to like: Creating logfile “screenlog.0“. You will find a screenlog.0 file in your home directory.
This feature will append everything you do while you are in the screen window. To close the screen to log running activity, press “Ctrl-A” and “H” again.
Another way to activate the logging feature, you can add the parameter “-L” when the first time running the screen. The command will be like this.
pungki@mint ~ $ screen -L
18. Lock Linux Terminal Screen
The screen also has a shortcut to lock the screen. You can press the “Ctrl-A” and “x” shortcuts to lock the screen. This is handy if you want to lock your screen quickly. Here’s a sample output of the lock screen after you press the shortcut.
Screen used by Pungki Arianto  on mint.
Password:
You can use your Linux password to unlock it.
19. Add Password to Screen Session
For security reasons, you may want to put the password to your screen session. A Password will be asked whenever you want to re-attach the screen. This password is different from the Lock Screen mechanism above.
To make your screen password protected, you can edit the “$HOME/.screenrc” file. If the file doesn’t exist, you can create it manually. The syntax will be like this.
password crypt_password
To create the “crypt_password” above, you can use the “mkpasswd” command on Linux. Here’s the command with the password “pungki123“.
pungki@mint ~ $ mkpasswd pungki123
l2BIBzvIeQNOs
mkpasswd will generate a hash password as shown above. Once you get the hash password, you can copy it into your “.screenrc” file and save it. So the “.screenrc” file will be like this.
password l2BIBzvIeQNOs
Next time you run the screen and detach it, a password will be asked when you try to re-attach it, as shown below:
pungki@mint ~ $ screen -r 5741
Screen password:
Type your password, which is “pungki123” and the screen will re-attach again.
After you implement this screen password and press “Ctrl-A” and “x“, then the output will be like this.
Screen used by Pungki Arianto on mint.
Password:
Screen password:
A Password will be asked to you twice. The first password is your Linux password, and the second password is the password that you put in your .screenrc file.
20. Leaving Screen Terminal Session
There are 2 (two) ways to leave the screen. First, we are using “Ctrl-A” and “d” to detach the screen. Second, we can use the exit command to terminate the screen. You also can use “Ctrl-A” and “K” to kill the screen.
Screen Command Cheat Sheet
| Command | Description |
|---|---|
screen -S <session_name> |
Start a new session with session name. |
screen -ls |
List running sessions / screens. |
screen -x |
Attach to a running session. |
screen -r <session_name> |
Attach to a running session with name. |
screen -d <session_name> |
Detach a running session. |
Ctrl-a c |
Create new window. |
Ctrl-a Ctrl-a |
Change to last-visited active window. |
Ctrl-a <number> |
Change to window by number. |
Ctrl-a ' <number or title> |
Change to window by number or name. |
Ctrl-a n or Ctrl-a <space> |
Change to next window in list. |
Ctrl-a p or Ctrl-a <backspace> |
Change to previous window in list. |
Ctrl-a " |
See window list. |
Ctrl-a w |
Show window bar. |
Ctrl-a k |
Kill current window. |
Ctrl-a \ |
Kill all windows. |
Ctrl-a A |
Rename current window. |
Ctrl-a S |
Split display horizontally. |
Ctrl-a | or Ctrl-a V |
Split display vertically. |
Ctrl-a tab |
Jump to next display region. |
Ctrl-a X |
Remove current region. |
Ctrl-a Q |
Remove all regions but the current one. |
Ctrl-a H |
Enable logging in the screen session. |
Ctrl-a x |
Lock (password protect) display. |
That’s some of the screen command usage on daily basis. There are still a lot of features inside the screen command. You may see the screen man page for more detail.
Do you know of any other best example of the screen command in Linux? Let us know your views in the comments below.


Setting the correct timezone on an Ubuntu Server ensures accurate timekeeping for logs, scheduled tasks (cron jobs), and system updates. This is especially important for servers running in different geographical regions or used in distributed environments.
Much appreciated. I’m a huge fan of screen, but working with it is sometimes challenging :)
Jeezus, I may be many years late but THANK YOU for this wonderful article. So succinct and verbose I love it! You are a genius~!
This guide was really useful and easy to follow.
Another useful command is: “
screen -S NAME -d -m COMMAND“.This starts a detached session named “NAME” and runs the command “COMMAND” inside.
You then can later reattach and see what “COMMAND” is doing with “screen -r NAME”
Under: “Using Multiple Screen” you are missing text on the second way to view. Suspect it’s using split screen, but it’s a mystery.
Since I started using lainux in 1998, I have ALWAYS logged in ROOT on tty1 and [ME] on tty3. That way, I can run a long admin task as ROOT and ctrl alt F3 to [ME]s X session to continue while ROOT works on his task.
Also, if an unscrupulous Indian company takes over my session, claiming it has magical info from Microsoft regarding viruses, I can ctrl alt F1 to get ROOT to kill the browser hosting the Indian company’s process.
I’ve been trying to install screen for the past few hours without success.
Any help guys. Using ubunto 16.4.3
Make sure you have enabled Ubuntu repositories:
To enable all repositories (main, universe, restricted, multiverse), use the following commands:
Thank you Ravi. Today after giving up and looking for a Windows machine to use i then tried again and it managed to install.
I have a query, how I can install screen utility in Virtual desktop (VMware) ???
@Rupali,
In most Linux distributions, screen utility pre-installed, if not just install it with using your package manager.
Thanks Ravi for the reply but It’s not Linux, sorry i forgot to mention we have Solaris as our virtual machine (remote server).
Which package manager and commands need to be used in order to install screen utility in Solaris server ????
@Rupali,
To install screen on Solaris 10 and 11:
Very nice article with easy to understand examples..
Very nice post. It is also possible to run screen as a detached process with a script. For example
screen -d -m script.sh
This will start screen as a detached process. Its pretty useful.
@Sul,
Thanks a ton for the tip, yes you can detach any command or process with screen command as you pointed in your example..
I was using GNU Screen, and then I found tmux! Both tools are interesting anyway!
https://tmux.github.io/
yum –> dnf (new command)
it is simple and clear. Thanks a lot!
Man, thanks for the tips
Thanks!
Very nice.
Great primer on screen. I was unaware that you could lock a screen, very handy.
Thanks for sharing, you made is super simple.
Regards
Omer
Thank you. Glad to know this article can help you :-)
Thank you very much. I learned a couple of things today thanks to you!
Hi Arakhne
Thank you. Glad to know this article can help you :-)
Nice post. Very helpful and informative.
Keep it up!
Is there any way to view two screens simultaneously ? Somewhat similar to view files using split command on Vi .
Thanks
Daljeet
Hi Daljeet
I’m not sure if screen have a built-in command / parameter to make simultaneously screen view.
But I think you can install tmux, as terminal multiplexer. It can split console / terminal. Then after you split your console, you can run screen on each console.
I hope this help.
Thank you
Hello, how can I see the previous results (output) if they’re long, because when I scroll up when I was inside the ‘screen’ I can’t scroll up to see them.
Thanks!
Hi IPC Oye
You may press Ctrl – a and Esc to enter Copy mode. It will bring you into Copy Mode. Once you are there, you can use PageUp and PageDown button to scroll.
To exit Copy Mode, press Esc one more.
I hope this help.
Thank you
Great and really helpful article. This helped me save implementation of log in my project
Congratulations for the article! The most screen’s feature I like is “S” option (Split) the Virtual Terminal into two “regions”. Inside each “region” you can have a diferent bash prompt.
That is my contribution/sugestion to improve the article.
[]’s
This is great stuff to know, and very much improves my workflow. Thanks!
Thanks this is a very useful article!
Great article, Thanks
very useful article, thanks
Hi,
Very helpfull post.
Thanks
Use a different English translator, Mohsin – study harder, you belong where you are :)
Very well written and very well explained. Thank you!
Thank you very much. Hope it’s help.
Hi its good doc.
You can use the multiple screen like
screen -S testing —– it will create a screen with testing name
then
screen -ls wil show the currently screen attached name
There is a screen on:
2063.testing (Attached)
1 Socket in /var/run/screen/S-root.
then to connect with that screen
screen -x testing — you will be connect to the testing screen.
Because I’m a newbie still in the world of Linux and using the Terminal….I don’t understand the usage of this….does it open up new terminals in one screen? or is it that there are different processes running in the same terminal window?…I have opened more than one terminal and then had them running in different work-spaces, is this something akin to that?…or is it something different?….just looking for a little guidance on this stuff….
Thank you for this article. I’ve been using the screen for several years but haven’t heard of password-protecting screen session before.
After reading comments I’m definitely gonna give tmux a try.
screen is dead. Tmux is a much better replacement.
Screen is fine for the plain console but for a GUI environment, such as KDE which I use, I prefer Yakuake, http://kde-apps.org/content/show.php?content=29153
Multiple tabbed windows, drops down with F12 and stays as long as I need it, etc… Guake for Gnome, http://guake.org/
No comparison. Yakuake is just another terminal. Terminal is terminal multiplexer with session you can detach and reconnect later on a remote machine. See it much more as a window manager in text mode
Great Article, Nice to have this info for the System admin who are running the time consuming process for remote location…Thanks again , Keep the good work.
Thank you.
If you’re using Ubuntu Server, I just found that they also have byobu application which is similar with screen but more advanced. Please take a look at https://help.ubuntu.com/10.04/serverguide/byobu.html
A more advanced alternative to the standard GNU screen is tmux.
tmux offers a variety of improvements such as status bar, multiple sessions in same terminal, search, ..etc
Thank you for your share. It’s really valuable for me :)
tmux combine with tmuxinator is definitively a screen killer. Used to use screen for years switch 2 years ago for tmux. Never go back