Have you ever considered using someone else’s computer with all your personal files and settings? Well, it’s possible with any Linux distribution! Yes, you can run your own custom Linux operating system on any computer using just a USB drive.
This tutorial focuses on installing the latest Linux OS on your USB drive (a fully reconfigurable personalized OS, not just a Live USB). You’ll learn how to customize it and use it on any PC you can access.
For this tutorial, I’ll be using Ubuntu 24.04, but you can use any Linux distribution.
Requirements:
You’ll need the following items:
- A main USB drive (16GB or more), let’s call it the Main USB drive.
- Another USB drive (4GB or more) or a DVD disk to use as bootable Linux installation media.
- A Linux OS ISO file, such as Ubuntu 24.04.
- A PC with internal hard drives disconnected to prevent alterations to the boot record.
Note: Although this process won’t result in data loss, certain users have noticed alterations in their internal drive’s bootup behavior depending on the chosen Linux distributions. To avoid any potential issues, you might consider disconnecting your hard drive before proceeding with the USB installation part of the tutorial.
Step 1: Create Bootable Linux Installation Media
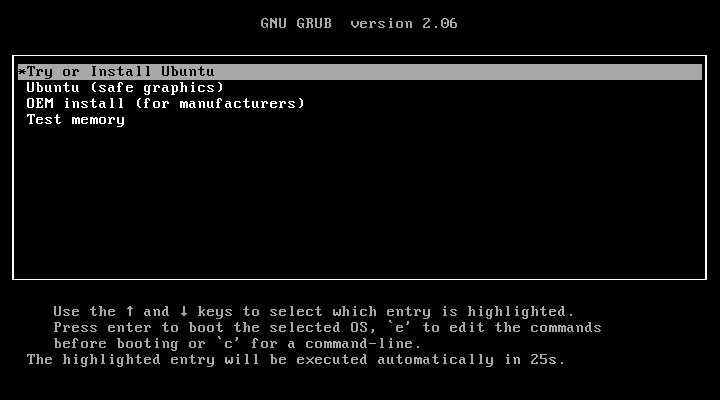
To create a bootable Linux installation media for Ubuntu 24.04, follow these steps:
- Download the Ubuntu 24.04 ISO file from the official Ubuntu website.
- Connect a USB drive with a storage of at least 4GB into your computer.
- Download and install a USB bootable creation tool such as Rufus or Etcher.
- Open the USB bootable creation tool and select the Ubuntu 24.04 ISO file you downloaded.
- Choose the USB flash drive you inserted as the destination drive for the Ubuntu installation media.
- Click on the “Start” or “Create” button to start the process of creating the bootable Ubuntu 24.04 installation media.
Once the process is complete, you can use it to install Ubuntu 24.04 on your main USB drive or try Ubuntu without installing it.
Step 2: Install Linux on Main USB Drive
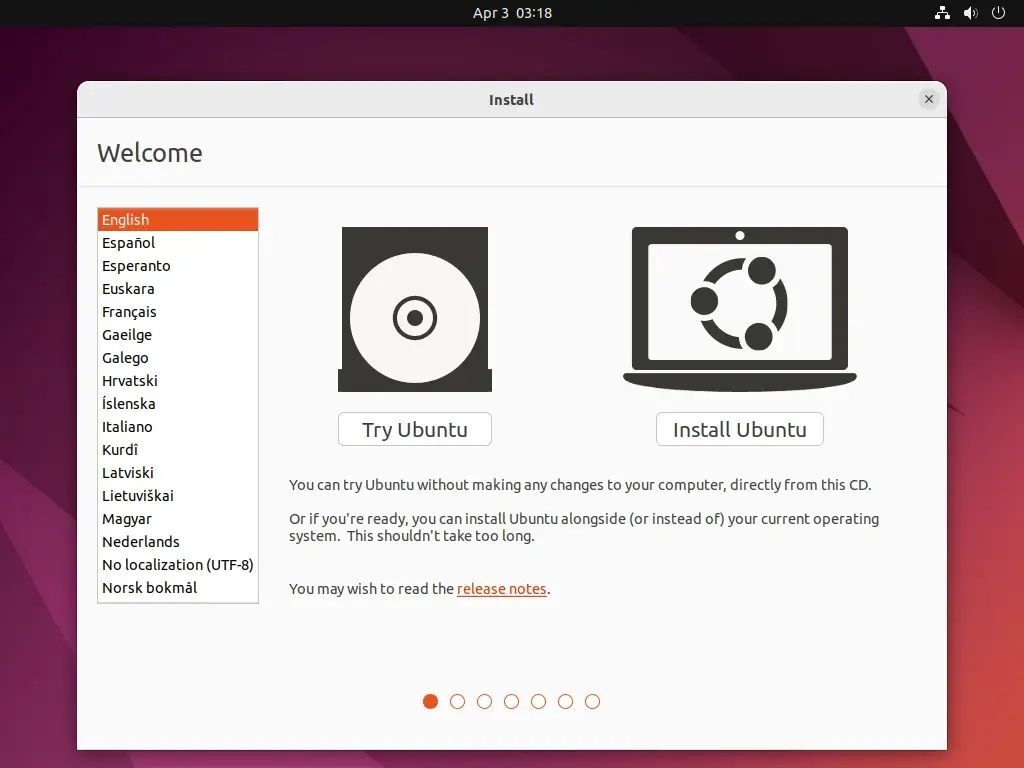
Now restart your computer and boot from the main USB drive, once it booted, you will be presented with the option to try Ubuntu or install it. Choose the “Install Ubuntu” option to begin the installation process.
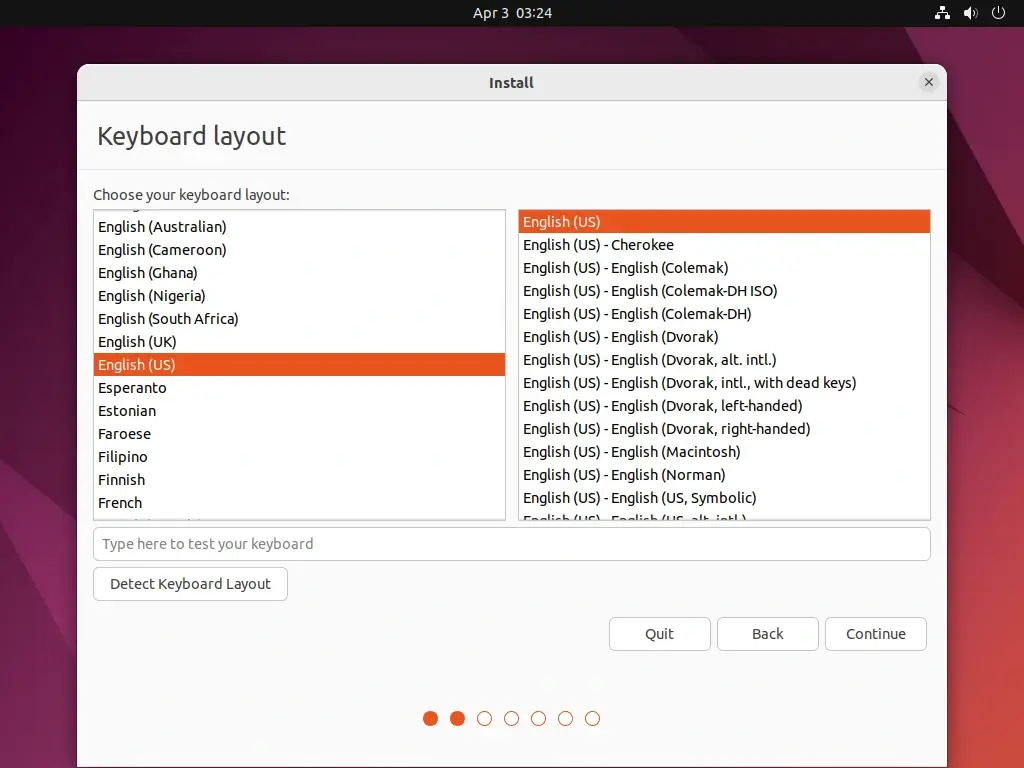
Follow the on-screen instructions to select your language, timezone, keyboard layout, and other preferences.
Step 3: Partitioning Steps (Most Crucial Part)
When prompted with the installation type, select “Something else” to manually configure partitions on your Main USB drive.
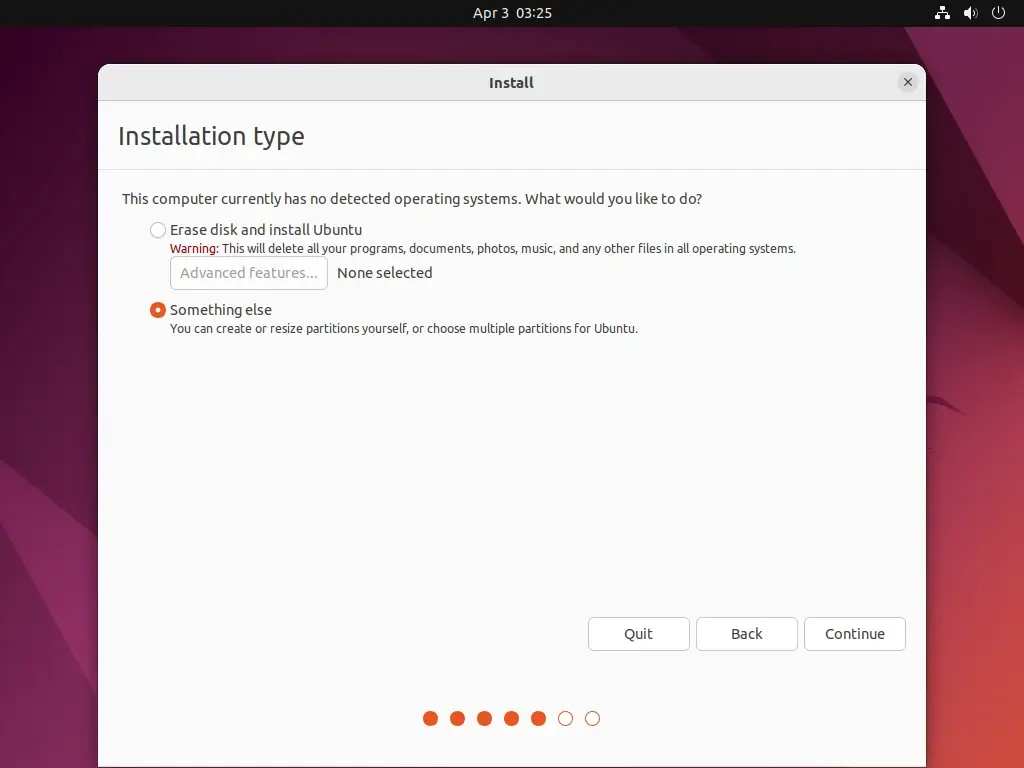
Identify your Main USB drive from the list of available drives. Be cautious to choose the correct drive to avoid overwriting your internal hard drive or other data.
Once selected, you need to create the following partitions:
EFI System Partition (for UEFI systems):
Size: 512MB
Type: EFI System Partition
Mount point: /boot/efi
Root Partition (/):
Size: Allocate the majority of your USB drive space here (e.g., 10GB or more).
Type: Ext4 journaling file system
Mount point: /
Swap Partition:
Size: Typically equal to your system’s RAM size (e.g., 2GB, 4GB, etc.).
Type: Swap area
Once you’ve set up these partitions, click “Install Now” and confirm your choices.
Continue with the installation process, providing your name, username, password, and other details as required. Once the installation is complete, restart your computer and remove the USB drive.
Boot your computer from the USB drive to access your newly installed Ubuntu system. You can now enjoy Ubuntu 24.04 on any computer that supports booting from USB drives.
Conclusion
Installing Ubuntu 24.04 on a USB drive offers a convenient and portable way to experience Ubuntu without making any permanent changes to your computer. By following the steps outlined in this guide, you can create your own Ubuntu USB drive and take your favorite operating system with you wherever you go.


