do-release-upgrade, the same tool Canonical recommends for every LTS-to-LTS jump.Ubuntu 26.04 LTS is the newest long-term support release from Canonical, and many Ubuntu 24.04 users are already planning upgrades on desktops, VPS instances, and home lab servers. Since both are LTS releases, the upgrade path is officially supported and relatively smooth when the system is prepared properly beforehand.
Every failed Ubuntu release upgrade I’ve seen over the years usually came down to one of three things: the system wasn’t fully updated first, an old third-party PPA broke dependency resolution, or the machine wasn’t rebooted after a kernel update. Once those issues are handled, the actual upgrade process becomes much easier.
One thing to know before starting is that Canonical normally staggers LTS-to-LTS upgrade notifications gradually, but some Ubuntu 24.04 systems may not immediately receive the Ubuntu 26.04 upgrade prompt until the first point release becomes available.
In this tutorial, you’ll learn how to safely upgrade from Ubuntu 24.04 LTS to Ubuntu 26.04 LTS using the terminal, including pre-upgrade checks, repository cleanup, post-upgrade tasks, and common fixes for upgrade-related issues.
What’s New in Ubuntu 26.04 LTS
Ubuntu 26.04 LTS includes several improvements for desktop users, developers, and server administrators. Some changes are immediately noticeable after login, while others improve hardware support and system behavior quietly in the background.
One of the biggest updates is the newer GNOME 50 desktop environment, which feels smoother on multi-monitor systems and modern laptops. Wayland support has improved further, fractional scaling behaves better on high-resolution displays, and desktop responsiveness feels more polished overall.
Ubuntu 26.04 also ships with the Linux 7.0 kernel, which adds better support for newer AMD and Intel hardware, updated Wi-Fi drivers, and improved power management for laptops and mobile workstations.
Developers will notice newer versions of Python 3.14, GCC, OpenSSL, and updated container-related packages. Ubuntu’s Snap integration has also improved, reducing some of the package conflicts users occasionally experienced on older releases.
Server administrators benefit from updated virtualization packages, newer cloud-init support, and improved compatibility for Docker and Kubernetes environments.
Note: Some third-party applications and PPAs may not support Ubuntu 26.04 immediately after release, so always verify compatibility before upgrading production systems.
Pre-Upgrade Checklist for Ubuntu 26.04
Before starting the Ubuntu 26.04 upgrade, spend a few minutes checking the current system state, because most upgrade failures happen due to pending updates, broken repositories, or low disk space that were ignored beforehand.
I normally run these checks first on both desktops and remote Linux servers before touching any major release upgrade.
1. Back Up Your Important Data
Always create a backup before upgrading the operating system, because even a stable LTS upgrade can fail due to power loss, package conflicts, or unexpected hardware problems.
For desktop systems, backing up the /home directory is usually enough. On servers, also back up databases, website files, SSH keys, and important configuration files inside /etc.
A simple backup using rsync looks like this:
sudo rsync -avh /home /backup-drive
Command breakdown:
-apreserves file permissions and symbolic links.-vdisplays detailed progress output.-hshows file sizes in human-readable format.
A common mistake is storing backups on the same disk as the operating system. If the drive fails, the backup becomes useless too.
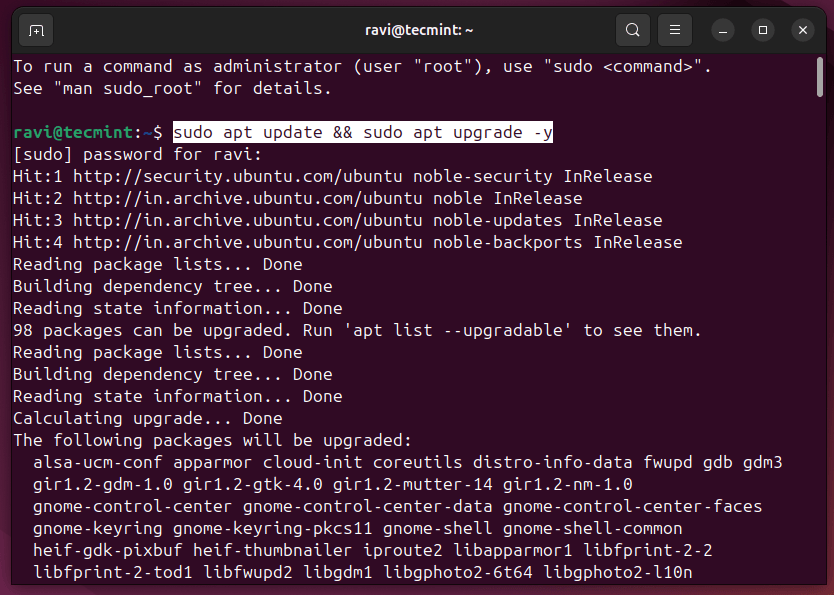
2. Fully Update Your Current Ubuntu System
Your Ubuntu 24.04 system should be fully updated before attempting a release upgrade, because it refreshes package indexes and installs all pending package updates.
sudo apt update && sudo apt upgrade -y
If packages are still being held back, run:
sudo apt dist-upgrade -y
3. Apply Any Pending Snap Updates
Ubuntu uses Snap packages for several built-in applications, so outdated snaps can occasionally create issues during major upgrades.
Refresh installed snaps using:
sudo snap refresh
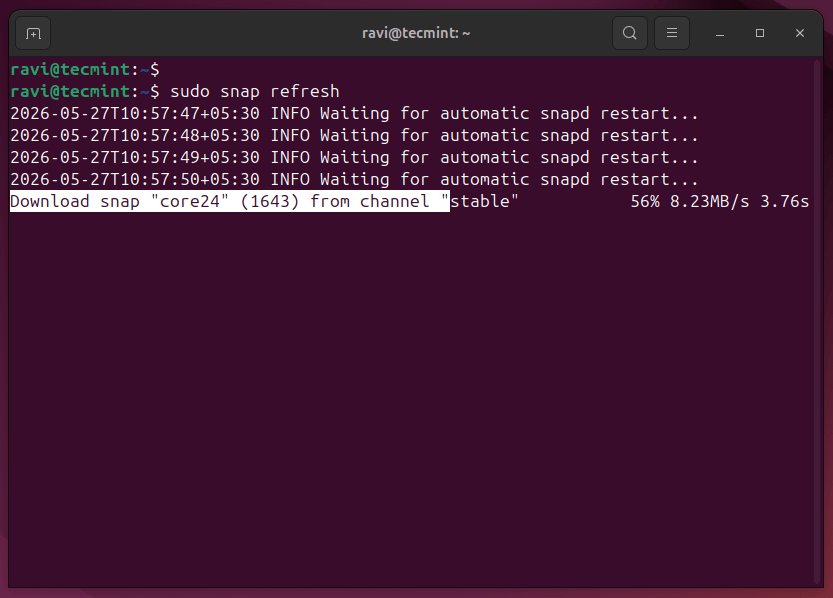
If updates are available, Ubuntu downloads and installs them automatically.
4. Reboot After Kernel Updates
If the system has recently installed a new kernel, reboot before starting the release upgrade.
Check whether a reboot is required:
[ -f /var/run/reboot-required ] && echo "Reboot required"
Expected output:
Reboot required
If you see that message, reboot the machine:
sudo reboot
After rebooting, verify the active kernel:
uname -r
This confirms the running kernel matches the installed packages.
6.17.0-29-generic
5. Check Available Disk Space
Ubuntu upgrades need several gigabytes of free disk space for package downloads and temporary files, so check available storage using:
df -h /
Expected output:
Filesystem      Size  Used Avail Use% Mounted on
/dev/vda2        59G   11G   45G  20% /
Try to keep at least 10 GB of free space available before upgrading, because low disk space during upgrades can leave the package manager in a broken state.
6. Check Your PPAs and Third-Party Repositories
Third-party repositories are one of the most common causes of Ubuntu upgrade failures, so list enabled repositories using:
grep -r "^deb " /etc/apt/sources.list.d/
Expected output:
/etc/apt/sources.list.d/docker.list:deb https://download.docker.com/linux/ubuntu noble stable
/etc/apt/sources.list.d/nodesource.list:deb https://deb.nodesource.com/node_20.x noble main
These repositories may not yet provide packages for Ubuntu 26.04, so temporarily disable them.
sudo mv /etc/apt/sources.list.d/docker.list /etc/apt/sources.list.d/docker.list.disabled
sudo mv /etc/apt/sources.list.d/nodesource.list /etc/apt/sources.list.d/nodesource.list.disabled
Warning: PPAs built for Ubuntu 24.04 may break package dependencies on Ubuntu 26.04 until maintainers release updated packages.
Configure Ubuntu LTS Upgrade Settings
Ubuntu systems use the /etc/update-manager/release-upgrades configuration file to decide which releases should be offered.
Check the current upgrade setting:
cat /etc/update-manager/release-upgrades
Expected output:
[DEFAULT]
Prompt=lts
The Prompt=lts setting tells Ubuntu to follow only LTS upgrades.
If the value is different, update it using:
sudo sed -i 's/Prompt=.*/Prompt=lts/' /etc/update-manager/release-upgrades
Start Ubuntu 24.04 to 26.04 Upgrade (Desktop)
Ubuntu uses the do-release-upgrade utility to safely handle major release upgrades, so install the required upgrade manager package if it is missing:
sudo apt install update-manager-core
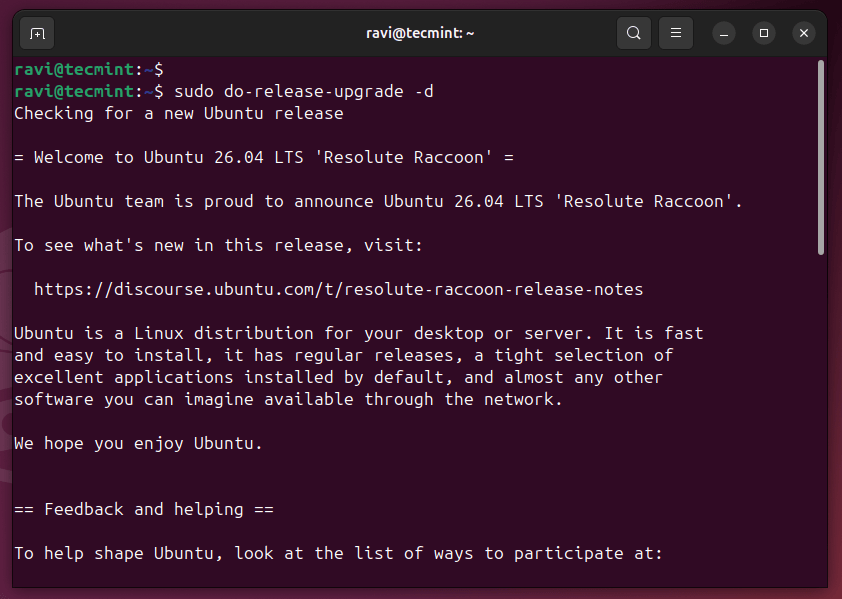
Now start the Ubuntu 26.04 upgrade:
sudo do-release-upgrade
Some Ubuntu 24.04 systems may currently display this message when running the above upgrade command:
Checking for a new Ubuntu release
There is no development version of an LTS available.
To upgrade to the latest non-LTS development release
set Prompt=normal in /etc/update-manager/release-upgrades.
This usually happens because Canonical rolls out LTS upgrades gradually instead of enabling them for everyone immediately after release day, but you can temporarily force the Ubuntu 26.04 upgrade using -d option, which simply bypasses the staged rollout restriction and forces the upgrader to check for the newest available release.
sudo do-release-upgrade -d
Warning: Avoid using -d on important production servers unless you already tested the upgrade on another machine first.
The upgrade process normally goes through four stages:
- Calculating package changes
- Downloading packages
- Installing upgraded packages
- Removing obsolete packages
Depending on your internet connection and system speed, the process may take anywhere from 20 minutes to over an hour.
Upgrading Ubuntu Over SSH (Servers Only)
If you’re upgrading a remote server over SSH, you need extra protection against a dropped connection killing the upgrade mid-process, so wrap the upgrade in tmux so the session keeps running on the server even if your local connection drops:
sudo apt install tmux -y
tmux new -s upgrade
Then run the following command inside the tmux session.
sudo do-release-upgrade -d
If your SSH connection drops, reconnect to the server and reattach to the running session with:
tmux attach -t upgrade
Your upgrade will still be running exactly where it left off. Also note that do-release-upgrade may start a secondary SSH daemon on port 1022 as a fallback during the upgrade, so make sure your firewall or cloud security group allows traffic on that port before you start.
Verify the Upgrade After Reboot
Once the system comes back up, desktop users will see the Ubuntu 26.04 LTS welcome screen with the Resolute Raccoon logo and a “Welcome to Ubuntu 26.04 LTS!” message.
That’s your first confirmation that the upgrade worked, so click Next to dismiss it, then open a terminal to verify from the command line.
lsb_release -a
Also, verify the kernel version to confirm you booted into the new kernel that ships with 26.04.
uname -r
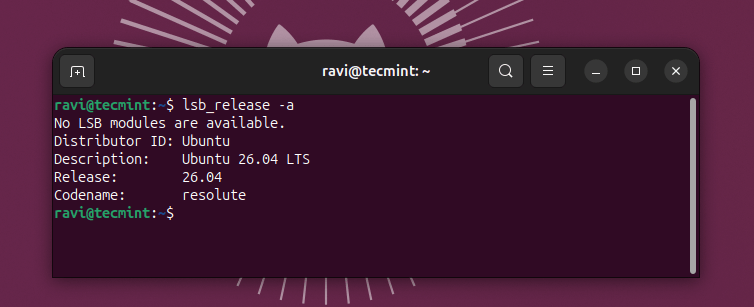
This confirms the system is now running Ubuntu 26.04 LTS with the newer Linux kernel.
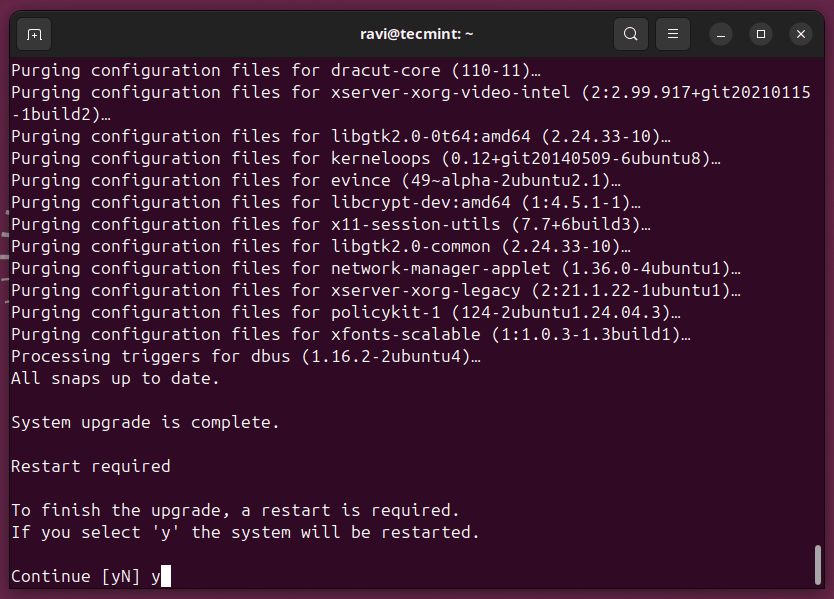
Step 7: Clean Up After the Upgrade
After the upgrade, remove packages that are no longer needed, which are mostly old kernel images and library versions that got orphaned during the transition:
sudo apt autoremove --purge -y
Run a final update pass to make sure everything in 26.04 is current before you put the system back into service. Some packages get held back during the release upgrade and only resolve cleanly once you’re fully on the new release:
sudo apt update && sudo apt upgrade -y
Conclusion
You learned how to prepare Ubuntu 24.04 for a safe release upgrade, apply pending updates, clean up third-party repositories, run the Ubuntu 26.04 upgrade process, and handle important post-upgrade tasks afterward.
A good next step is testing the upgrade first inside a virtual machine or spare VPS before upgrading an important workstation or production server. That gives you time to verify application compatibility and check how services behave on Ubuntu 26.04.
Have you already upgraded to Ubuntu 26.04 LTS, or are you waiting for the first point release before moving from Ubuntu 24.04? Let us know how the upgrade went and what changes you noticed after upgrading.


Excellent tutorial, thank you Aaron! Very thorough and easy to follow.
Excellent tutorial, thanks!
It didn’t worked for me on my Ubuntu 14.04 system, when I run command.
Checking for a new Ubuntu release
No new release found
@Hippo
At this point in time, I don’t know if this upgrade is still being offered. Nevertheless, make sure that in /etc/update-manager/release-upgrades file, set
Prompt=ltsas in the screenshot in the article. Also, ensure that you have network connectivity to one of the official mirrors or to a locally accessible mirror. Then try once more, if it fails, the upgrade might have been disabled.Just rand into the same issue but removing
-dseemed to do the trick for meCan I run the server upgrade steps to upgrade Ubuntu desktop version? I’m trying to upgrade the desktop version though command line only without using the GUI.
If I run do-release-upgrade on a 14.04 LTS system and have an older python 2.7 installed, will the upgrade wipe it out, and thus I’d have to manually reinstall?
I did it. IT WAS A GREAT MISTAKE! I GOT SLOW AND UNSTABLE SYSTEM.
@Yury
Oh really, try to find out why your system is slow and unstable.
kernel panic
@Anwar
Ooops.. Try to boot into old kernel; hold Shift down when starting up, to enter Grub menu, and choose kernel to boot in. If it fails, try reinstalling.
I am getting following error: You might want to run ‘apt-get -f install‘ to correct these.
The following packages have unmet dependencies:

linux-image-extra-3.13.0-107-generic : Depends: linux-image-3.13.0-107-generic but it is not installable

linux-image-extra-3.13.0-116-generic : Depends: linux-image-3.13.0-116-generic but it is not installable

linux-image-generic : Depends: linux-image-3.13.0-116-generic but it is not installable

E: Unmet dependencies. Try using -f.
@Ripen
An important tip here, i hope it worked for you. Many thanks for sharing this with us.
I getting the following error at the end of the upgrade.
Hit:1 http://us.archive.ubuntu.com/ubuntu xenial InRelease
Get:2 http://security.ubuntu.com/ubuntu xenial-security InRelease [102 kB]
Get:3 http://us.archive.ubuntu.com/ubuntu xenial-updates InRelease [102 kB]
Get:4 http://us.archive.ubuntu.com/ubuntu xenial-backports InRelease [102 kB]
Fetched 306 kB in 1s (165 kB/s)
Reading package lists… Done
Reading package lists… Done
Building dependency tree
Reading state information… Done
Calculating upgrade… Done
The following packages were automatically installed and are no longer required:
apt-xapian-index aptitude-common gcc-4.8-base gcc-4.9-base libapt-inst1.5
libarchive-extract-perl libbind9-90 libboost-iostreams1.54.0
libboost-iostreams1.58.0 libcgi-fast-perl libcgi-pm-perl libck-connector0
libclass-accessor-perl libcwidget3 libdns100 libencode-locale-perl
libept1.4.12 libfcgi-perl libgck-1-0 libgcr-3-common libgcr-base-3-1
libhtml-parser-perl libhtml-tagset-perl libhttp-date-perl
libhttp-message-perl libio-html-perl libio-string-perl libisc95 libisccc90
libisccfg90 libjson0 liblinear1 liblog-message-perl
liblog-message-simple-perl liblwp-mediatypes-perl liblwres90
libmodule-pluggable-perl libmodule-runtime-perl libparams-classify-perl
libparse-debianchangelog-perl libpod-latex-perl libprocps3
libsigc++-2.0-0c2a libsub-name-perl libsystemd-daemon0 libsystemd-login0
libterm-ui-perl libtext-soundex-perl libtimedate-perl liburi-perl
libxapian-1.3-5 libxapian22v5 libxtables10 linux-generic
linux-headers-3.13.0-83 linux-headers-3.13.0-83-generic
linux-headers-3.13.0-86 linux-headers-3.13.0-86-generic
linux-headers-3.13.0-93 linux-headers-3.13.0-93-generic
linux-headers-generic linux-image-3.13.0-86-generic
linux-image-3.13.0-93-generic linux-image-extra-3.13.0-86-generic
linux-image-extra-3.13.0-93-generic linux-image-generic
python-ndg-httpsclient python-requests python-urllib3 python-xapian
python3-xapian1.3 thermald watershed
Use ‘sudo apt autoremove’ to remove them.
0 upgraded, 0 newly installed, 0 to remove and 0 not upgraded.
4 not fully installed or removed.
After this operation, 0 B of additional disk space will be used.
Do you want to continue? [Y/n] Y
Setting up initramfs-tools (0.122ubuntu8.8) …
update-initramfs: deferring update (trigger activated)
Setting up linux-image-extra-4.4.0-59-generic (4.4.0-59.80) …
run-parts: executing /etc/kernel/postinst.d/apt-auto-removal 4.4.0-59-generic /b oot/vmlinuz-4.4.0-59-generic
run-parts: executing /etc/kernel/postinst.d/initramfs-tools 4.4.0-59-generic /bo ot/vmlinuz-4.4.0-59-generic
update-initramfs: Generating /boot/initrd.img-4.4.0-59-generic
gzip: stdout: No space left on device
E: mkinitramfs failure cpio 141 gzip 1
update-initramfs: failed for /boot/initrd.img-4.4.0-59-generic with 1.
run-parts: /etc/kernel/postinst.d/initramfs-tools exited with return code 1
dpkg: error processing package linux-image-extra-4.4.0-59-generic (–configure):
subprocess installed post-installation script returned error exit status 1
dpkg: dependency problems prevent configuration of linux-image-generic:
linux-image-generic depends on linux-image-extra-4.4.0-59-generic; however:
Package linux-image-extra-4.4.0-59-generic is not configured yet.
dpkg: error processing package linux-image-generic (–configure):
dependency problems – leaving unconfigured
dpkg: dependency problems prevent configuration of linux-generic:
linux-generic depends on linux-image-generic (= 4.4.0.59.62); however:
Package linux-image-generic is not configured yet.
dpkg: error processing package linux-generic (–configure):
dependency problems – leaving unconfigured
Processing triggers for initramfs-tools (0.122ubuntu8.8) …
No apport report written because the error message indicates its a followup erro r from a previous failure.
No apport report written because the error message ind icates its a followup error from a previous failure.
update-initramfs: Generating /boot/initrd.img-4.4.0-59-generic
gzip: stdout: No space left on device
E: mkinitramfs failure cpio 141 gzip 1
update-initramfs: failed for /boot/initrd.img-4.4.0-59-generic with 1.
dpkg: error processing package initramfs-tools (–configure):
subprocess installed post-installation script returned error exit status 1
No apport report written because MaxReports is reached already
Errors were encoun tered while processing:
linux-image-extra-4.4.0-59-generic
linux-image-generic
linux-generic
initramfs-tools
E: Sub-process /usr/bin/dpkg returned an error code (1)
Instead of interweaving desktop and server upgrades and showing confusion, why couldn’t you have done the LOGICAL “click here for server, here for desktop instructions”?
I’ll now go elsewhere for more coherent advice!
What Is the difference from regular upgrade and server upgrade?
A very helpful article. I’d had enough of GUI frontend wrappers failing and never knowing what the error was so I used the CLI method you described to upgrade my Mythbuntu installation. It worked flawlessly, thanks to you!
@Sylvester Rac
You are welcome and thanks so much for the feedback, always remember to stay connected to Tecmint and access more of similar content in other areas of Linux.
A bit of scare after the whole upgrade finished the installation, prompts and messages I did not understand, left it alone without answering anything and waited for it complete. Restarted my server and working like a charm without any problems. Big relief.
@Nick Els
Could you please share the prompts and messages that you did not understand, they could prove useful to another user who may get similar output in the future.
Unfortunately, not being terribly IT savvy, it did not occur to me to make a note of the prompts. My server is still working without any problems. Next time, I promise.
@N JEls
Okay, no problem, next time you can take note of the prompts because another user some where might encounter similar prompts and you would be the one to help, by explaining to them that output.
Thank you, the post was very useful. I managed to upgrade server from 14.04 to 16.04 without any problem using this guide.
@Imani,
Thanks for finding this post useful and we’re glad that you upgraded your Ubuntu 14.04 to 16.04 without any trouble…
I tried updating my FOG server today, and lost the fog db. I ended up rolling back to a previous checkpoint.
Upgrades sometimes go wrong just as i mentioned, but being able to recover lost data always proves helpful.
Which ever route you go for you should backup first. So you could backup, upgrade and if it works great. If it doesn’t do a fresh install and restore your data from backup.
That is a good recommendation, always backup first.
From what I have read this is a bad bad idea. There are so many differences that upgrading from 1404 to 1604 is bound to be “very buggy” at best. The best option is a clean install, I am afraid.
“…many differences…”
Such as, LAMP-wise?
You can always choose what you think is best for you, direct upgrade is not always 100% good, sometimes when their is poor Internet connectivity, it may go wrong. I once broke my system when an upgrade failed due to poor Internet connectivity, so you have to decide what you think is safe for you.