As mentioned in Part 1 of the Gentoo installation procedure, installing Gentoo is quite daunting, and often requires a lot of patience due to the sheer number of steps involved. Nonetheless, with the right technical know-how, you will end up with a clean and working Gentoo environment.
This section takes over from where we left off in the previous guide.
7. Configure Gentoo Installation
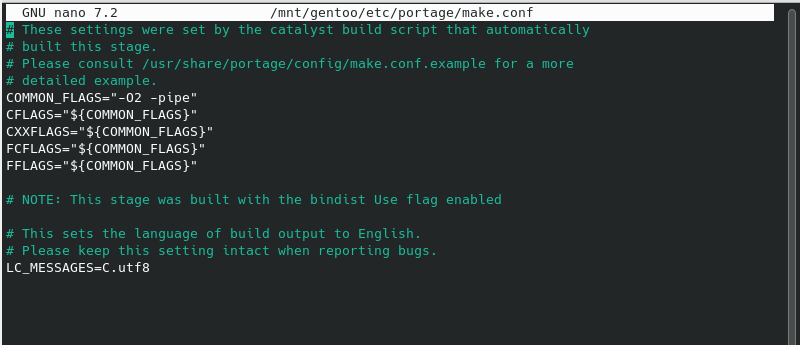
The make.conf file contains system variables that determine how the system runs. Portage references this file and determines runtime behavior based on the values specified.
You can optimize the system by making a few adjustments to the file. To access the file, use the nano command-line editor.
nano /mnt/gentoo/etc/portage/make.conf
The CFLAGS and CXXFLAGS variables define the optimization flags for GCC, C, and C++ compilers respectively.
These are already defined as shown below.
For maximum performance, you need to optimize these flags for each application separately.
For now, the default values will work just fine so we won’t make any changes. For optimizations, check out the Gentoo GCC documentation Wiki.
8. Selecting Gentoo Mirrors
It’s recommended to select a fast mirror to necessitate a faster download of the Gentoo source code. The most convenient approach is to browse the Gentoo mirror list and search for a mirror (or mirrors) closest to the system’s physical location.
A tool called mirrorselect provides a user-friendly and intuitive text interface to help you quickly select your preferred mirror. To launch it, run the following command, which will append the selected mirror to the make.conf file.
mirrorselect -i -o >> /mnt/gentoo/etc/portage/make.conf
On your screen, you should see the following text user interface.
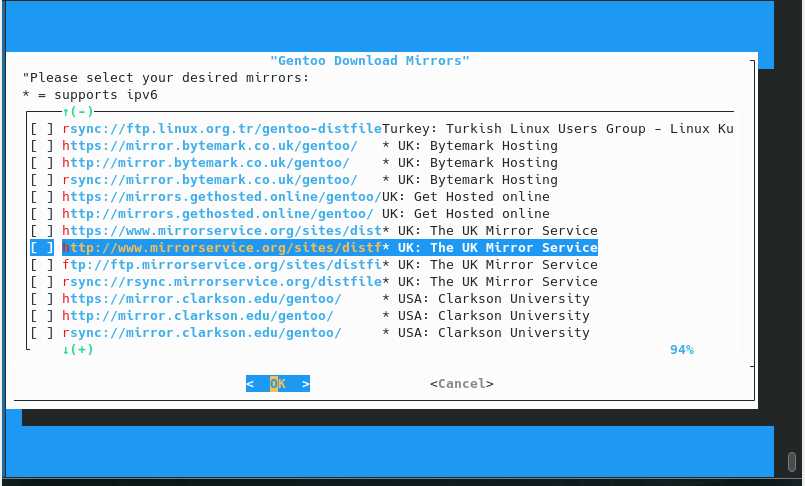
Scroll up and down using the arrow keys and hit ENTER on your preferred mirror.
9. Configure Gentoo Ebuild Repository
Equally important is to configure the Gentoo ebuild repository, which is defined in the /etc/portage/repos.conf/gentoo.conf configuration file that contains sync information responsible for updating the package repository or set of ebuild and related files that ship with information portage required to download and install packages.
So first, create the repos.conf file using the mkdir command.
mkdir --parents /mnt/gentoo/etc/portage/repos.conf
Next, copy the Gentoo repository configuration file provided by Gentoo to the just-created repos.conf file.
cp /mnt/gentoo/usr/share/portage/config/repos.conf /mnt/gentoo/etc/portage/repos.conf/gentoo.conf
10. Copy DNS Information
Before entering the new environment, you must copy the DNS information specified in the /etc/resolv.conf file. This is a DNF resolver file that translates domain names to IP addresses by querying the Domain Name Server (DNS).
Copying this file is crucial to ensure networking works upon entering a new environment.
cp --dereference /etc/resolv.conf /mnt/gentoo/etc/
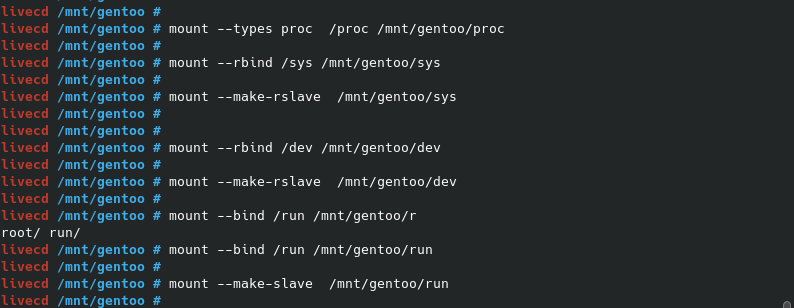
11. Mounting File Systems
In the next step, we will switch to the new Gentoo environment. Before we do so, we need to make the following filesystems available: /proc, /sys, /run, and /dev.
So, run the following commands to mount the filesystems
For /proc
mount --types proc /proc /mnt/gentoo/proc
For /sys
mount --rbind /sys /mnt/gentoo/sys
mount --make-rslave /mnt/gentoo/sys
For /dev
mount --rbind /dev /mnt/gentoo/dev
mount --make-rslave /mnt/gentoo/dev
For /run
mount --bind /run /mnt/gentoo/run
mount --make-slave /mnt/gentoo/run
The --make-rslave flag is required for systemd support later in the installation.
Some distributions make /dev/shm a symbolic link to /run/shm/ which, after entering the new environment, becomes invalid. Therefore we need to make /dev/shm/ a proper tmpfs beforehand as shown.
test -L /dev/shm && rm /dev/shm && mkdir /dev/shm
mount --types tmpfs --options nosuid,nodev,noexec shm /dev/shm
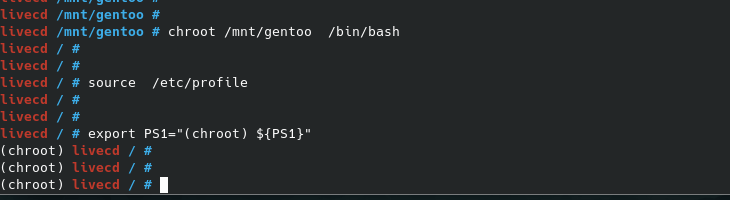
12. Switching to New Gentoo Installation Environment
With all partitions mounted and initialized, and the base environment installed, it is time to switch to the new Gentoo installation environment. We are going to achieve this by chrooting into it.
This implies that the session will change its root from the current installation environment (Usually a bootable USB drive or CD) to the installation system that includes the just created and mounted partitions.
Chrooting involves three main steps:
- The root location is switched from
/(on the installation medium) to/mnt/gentoo/(on the partitions) using the chroot command. - Settings in
/etc/profileare reloaded in memory using the source command. - The primary prompt changes, letting us know that the current session is inside a chroot environment.
So, run the following commands, in order of appearance.
chroot /mnt/gentoo /bin/bash
source /etc/profile
export PS1="(chroot) ${PS1}"
With the new environment in place, the next step is to mount the correct partition for the bootloader. For the BIOS/Legacy system that we created, we will mount the first partition, /dev/sda1 to the /boot mount point.
mount /dev/sda1 /boot
13. Installing a Gentoo ebuild Repository Snapshot
Moving on, you need to install a snapshot of the Gentoo ebuild repository. This contains a set of files that inform portage about the available software titles, the profiles a systems administrator can select, etc.
To do so, invoke the emerge-webrsync command as shown.
emerge-webrsync
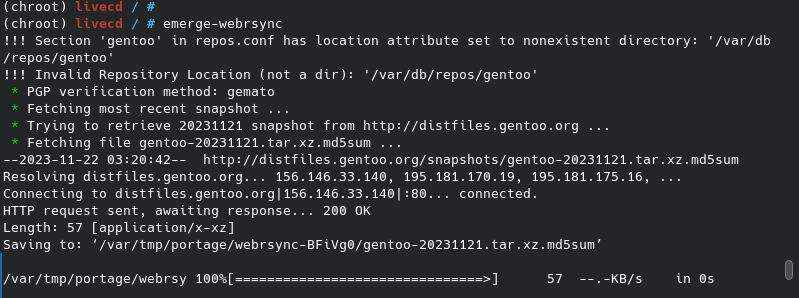
The command fetches the latest snapshot from one of Gentoo’s mirrors and installs it on your system. The snapshot is usually released on a daily basis from Gentoo. If there’s a need to update the repository, you can do so using the command:
emerge --sync
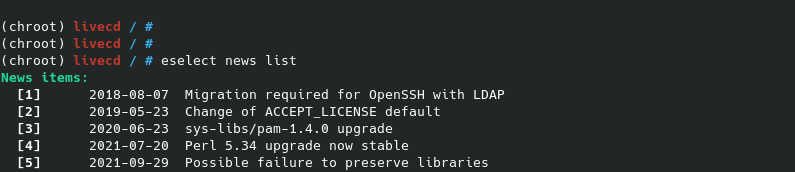
14. Reading News Items
News items provide a way of pushing critical messages to users via the ebuild repository. Sometimes, you might encounter a message on the terminal as shown.
* IMPORTANT: 1 news item needs reading for repository 'gentoo'.
* Use eselect news to read news items.
The eselect utility allows the users to read these critical messages from a common management interface for system administration.
To list news items, run the command:
eselect news list
To read the news items, run:
eselect news read
You can remove news items that have been read and won’t be re-read as shown.
eselect news purge
For more command-line options for the news reader, run the command
man news.eselect
15. Selecting Gentoo Profile
A profile is a foundation for any Gentoo system. It specifies a range of package versions to be used as well as default values for important variables such as CFLAGS. These settings are constantly maintained by Gentoo’s Portage developers.
To get a list of available profiles, run the command:
eselect profile list
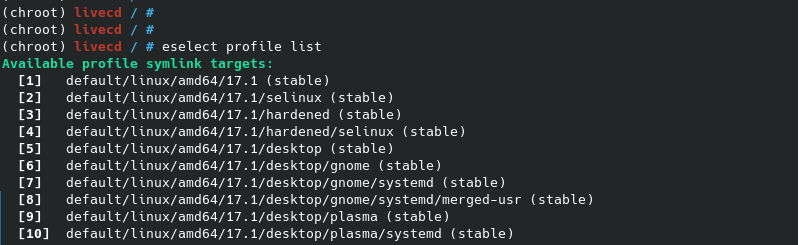
Once you’ve viewed the available profiles for the amd64 architecture, select the preferred option as shown. In our case, we will select the profile for the KDE systemd as shown.
eselect profile set 10
16. Configure Gentoo Timezone
The next step is to configure time zones, which are usually stored in the /usr/share/zoneinfo directory. You can use the ls command to have a glance at all the time zones as shown.
ls /usr/share/zoneinfo
To set the timezone (for systemd systems), create a symbolic link of your preferred timezone to the /etc/localtime path as shown
ln -sf ../usr/share/zoneinfo/Europe/Paris /etc/localtime
Your system’s date and time should be in sync with the preferred timezone.
17. Configure Gentoo Locales
Next up is the configuration of locales, which specify the language that you will use to interact with the system and also time and date formats. They are case-sensitive and should be represented as they are.
Supported system locales must be defined in the /etc/locale.gen file.
nano /etc/locale.gen
To specify locales, add your preferred locale. Below are the locales for US English with UTF-8 format.
en_US ISO-8859-1
en_US.UTF-8 UTF-8
Save and exit, then generate the locales.
locale-gen
Now reload the environment to persist the changes.
env-update && source /etc/profile && export PS1="(chroot) ${PS1}"
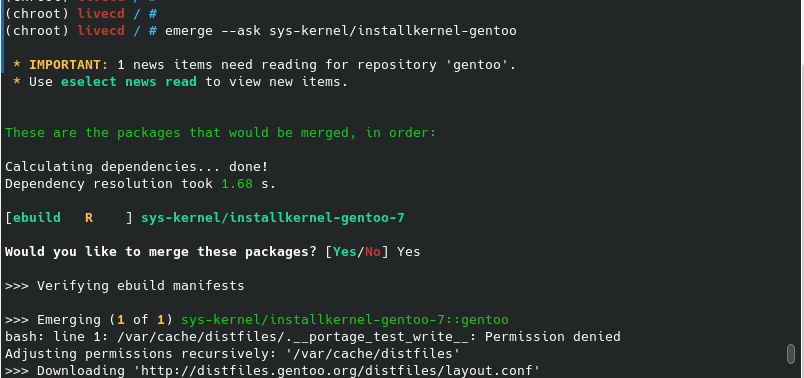
18. Installing Kernel on Gentoo
Some hardware devices might need firmware installed on the system to work correctly especially if you have wireless network interfaces and video chips such as NVIDIA and AMD on laptops and desktops.
To install the firmware, run the command:
emerge --ask sys-kernel/linux-firmware
Next up, install the distribution kernel for the traditional /boot layout.
emerge --ask sys-kernel/installkernel-gentoo
Then build the kernel with Gentoo patches from the source.
emerge --ask sys-kernel/gentoo-kernel
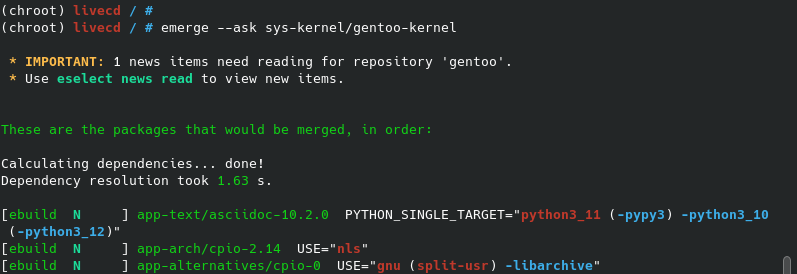
NOTE: This step takes quite a while to complete depending on your hardware resources and system architecture.
Once completed you can list the kernel installed as shown.
eselect kernel list

To set the kernel as the active one, run the following command. This also creates a symbolic link in the /usr/src/linux directory.
eselect kernel set 1

19. Configure /etc/fstab File
With the kernel already in place, the remaining steps will involve configuring basic system settings. In this step, we will configure the /etc/fstab file to automatically mount the system partitions created in the first part of this installation guide.
Therefore, open the /etc/fstab file using the nano editor.
sudo nano /etc/fstab
Add the following entries to specify the partitions, mount point, and filesystem types.
/dev/sda1  /boot     ext4 	defaults		0 2
/dev/sda2  none      swap   sw            		0 0
/dev/sda3  /         ext4	defaults,noatime       0 1
/dev/cdrom  /mnt/cdrom   auto  noauto,user         0 0
Save the changes and exit the file.
20. Configure System Hostname
Next up, configure a hostname, which will be used to identify the system in a local area network. To do so, run the command below where tecmint is the hostname in this case.
echo tecmint > /etc/hostname
To confirm the hostname set, run the hostname command
hostname
21. Configure /etc/hosts File
Setting up a hostname is not enough. You need to configure the /etc/hosts file to enable hostname resolution.
nano /etc/hosts
Add the following lines.
# This defines the current system and must be set
127.0.0.1     tecmint.mynetwork localhost

# Optional definition of other systems on the network
192.168.0.10  ravi.mynetwork ravi
22. Set Root Password
The root account is the most privileged account in a Linux system and can perform all the tasks without restrictions.
To set the root password, run the command:
passwd
This prompts you for a password. Provide one, hit ENTER, and repeat to confirm.
22. Install Additional Services
Some additional services will come in handy when installed, these include mlocate used for updating the locate database, chrony for automatically synching system date and time, dhcpcd for automatic IP addressing, and cronie for automating cron jobs.
To install them run:
emerge --ask sys-apps/mlocate
emerge --ask net-misc/chrony
emerge --ask net-misc/dhcpcd
emerge --ask sys-process/cronie
Then enable the services to run on system boot, including SSH.
systemctl enable cronie
systemctl enable sshd
systemctl enable chronyd.service
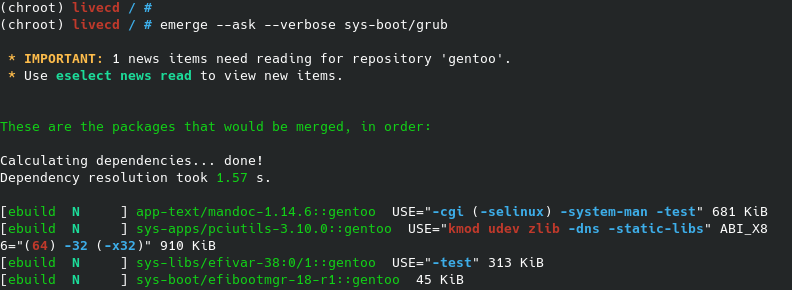
23. Install and Configure GRUB Bootloader
The final stage is to install the GRUB bootloader, which is a program that helps boot up the system.
On a BIOS system, run the command:
emerge --ask --verbose sys-boot/grub
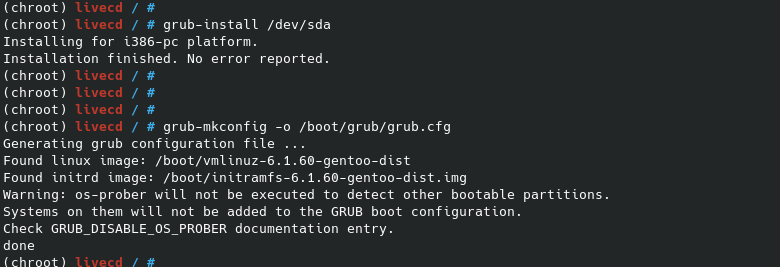
Next, Install the GRUB bootloader on the boot partition using the grub-install command.
grub-install /dev/sda
Next, generate the GRUB configuration file.
grub-mkconfig -o /boot/grub/grub.cfg
24. Rebooting the System
The Gentoo base system alongside everything required to run the system in now installed. The only thing remaining is to reboot and start using the system.
So, exit the chrooted environment and unmount all the mounted partitions.
exit
cd
umount -l /mnt/gentoo/dev{/shm,/pts,}
umount -R /mnt/gentoo
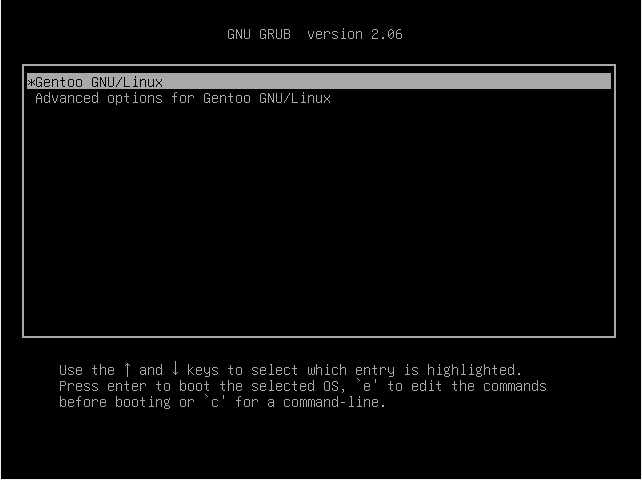
Then reboot the system.
reboot
Upon rebooting, you will find the following GRUB menu. Hit ENTER to continue.
On the terminal screen, enter ‘root’ as the username and provide the root password to access the Linux shell. From here you can continue to run system administration tasks as you deem fit such as creating more users, configuring the network, etc.
Be sure to also remove the stage3 tarball file.
rm /stage3-*.tar.*
Conclusion
Congratulations if you have come this far. You have installed a minimal Gentoo Linux system which will allow you to carry out system administration tasks. From here you can install your preferred desktop environment, graphic drivers, and additional third-party software applications and packages to transform it into a powerful desktop PC or server environment.
This was the second and last part of the Gentoo installation. As you have noted, it’s quite a lengthy and complex process that requires high technical expertise. It’s by no means a surprise why most users and beginners shy away from Gentoo. For intermediate and advanced users, this is a suitable distro to sharpen their Linux skills.


For me, “chroot”ing /bin/bash doesn’t work.
“chroot: failed to run command ‘/bin/bash’: Exec format error”
There’s nothing so far on the forums to fix this.
Correction, I’ve fixed it. Instead of “chrooting straight away, cd back to the /root directory, then run the Source and Export commands.
Matthew Salve,
Congratulations for tutorial.
It went well until grub2 install, where grub2 says not found. Just go with simple grub, no crashes, but the reboot will not boot.
I need help because I strive for two weeks with the installation.
Thank you!
This step didn’t work for me:
From what I read, this command output is meant for a repos.conf file under /etc/portage/repos.conf/.
What did work was the same command but without the “-r” (this also added HTTP and FTP mirror options, not just rsync):
If you look at the make.conf file after running mirrorselect with “-r”, you can see that it doesn’t add a valid bash variable, which is what causes the “emerge-webrsync” to fail.
Source: https://wiki.gentoo.org/wiki/Mirrorselect#Usage
I am looking forward to read part 3.
The best gentoo install tutorial 10x
i get kernel panic, on boot. i try to remove kernel and initfram /boot and recompile with “genkernel all” but still kernel panic with latest version of virtualbox v.5 and liveDvd gentoo 11.2. do you have solution for kernel panic problem.?
Try to recompile a different kernel version an pay attention to compile with the appropriate modules! Still, maybe there’s a bug with virtualbox, but that i can’t know for sure!
Pls post the part 3 of the tutorial
For your own sake, never edit /etc/sudoers directly. If you make a syntax error, and you don’t know root’s password, you may get locked out from using sudo.
I’m referencing this: http://unix.stackexchange.com/questions/27594/why-do-we-need-to-use-visudo-instead-of-directly-modifying-the-sudoers-file
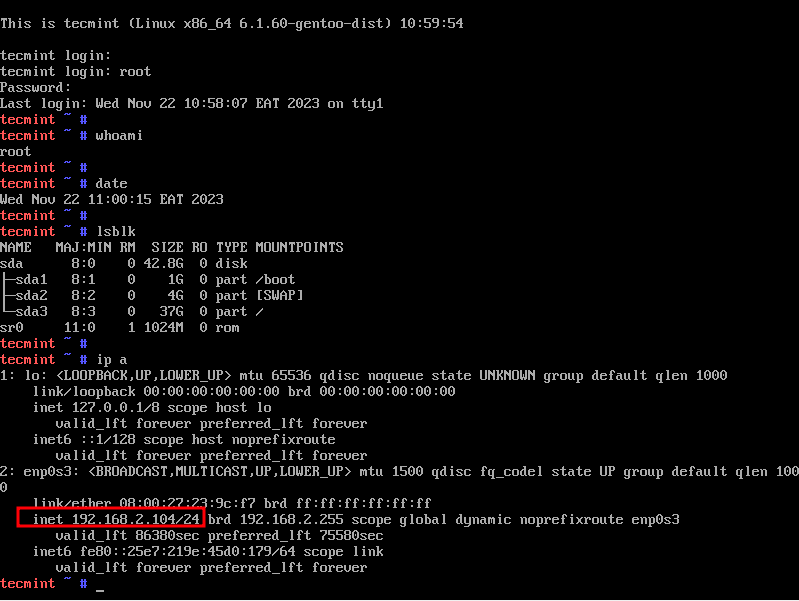
darryl, maybe you have used wifi connection? :)
Seems like author assumed you’re using wired connectivity.
Thanks so much for this webpage, it saved me a lot of time by not having to read through the handbook or watch videos.
Everything went flawless, except ’emerge –sync’ failed to connect.