This tutorial will focus on how you can enable the networking plugin for Collectd daemon in order to act as a central monitoring server for other Collectd clients installed on various servers over you network.

The requirements for this setup is to configure one Collectd daemon (with Collectd-web interface) on a host over your premises which will be activated to run in server mode providing a central point of monitoring. The rest of the monitored hosts, which run Collectd daemon, should only be configured in client mode in order to send all their collected statistics to the central unit.
Requirements
Step 1: Enable Collectd Server Mode
1. Assuming that Collectd daemon and Collectd-web interface are already installed on your machine that will act as a server, the first step that you’ll need to take care of is to assure that the system time is synchronized with a time server in your proximity.
To achieve this goal you can install the the ntp server on your machine, or, a more convenient method would be to synchronize system time regularly by executing the ntpdate command from cron against a local time server or a public time server near your premises by consulting the http://pool.ntp.org website for available ntp servers.
So, install ntpdate command, if is not already present on your system, and do a time syncing with the closest time server by issuing the following commands:
# apt-get install ntpdate		[On Debain based Systems]
# yum install ntpdate			[On RedHat based Systems]
OR
# dnf install ntpdate
# ntpdate 0.ro.pool.ntp.org
Note: Replace the ntp server URL accordingly in the above command.

2. Next, add the above time sync command to the crontab daemon root file in order to be scheduled daily at midnight by issuing the below command:
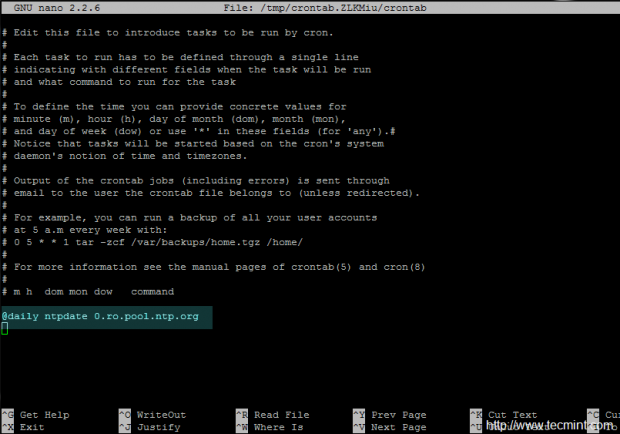
# crontab -e
3. Once the root crontab file is opened for editing, add the following line at the bottom of the file, save it and exit, in order to activate the schedule:
@daily ntpdate 0.ro.pool.ntp.org
Note: Repeat this steps concerning time synchronizing on all the feature Collectd client instances present in your network in order to have all their system time aligned with a central time server.
Step 2: Configure Collectd in Server Mode on the Central Monitoring System
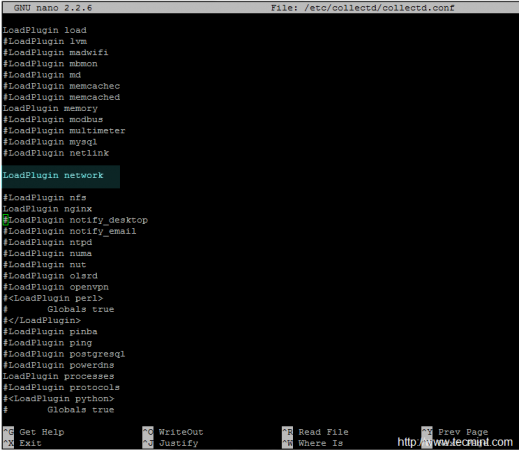
4. In order to run Collectd daemon as a server and gather all the statistics from collectd clients, you need to enable the Network plugin.
The role of the Network plugin is to listen for connections on default 25826/UDP port and receive data from client instances. So, open the main collectd configuration file for editing and uncomment the following statements:
# nano /etc/collectd/collectd.conf
OR
# nano /etc/collectd.conf
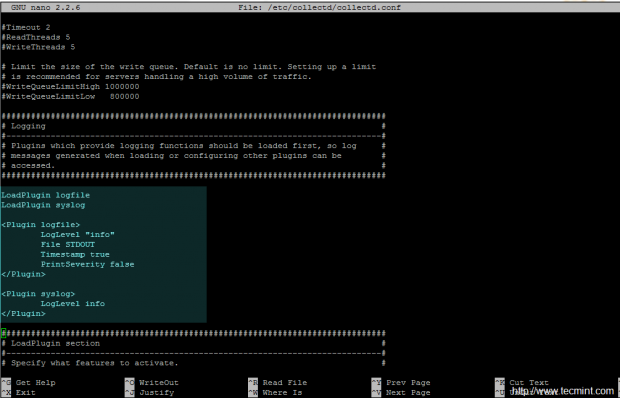
Search and uncomment the statements as below:
LoadPlugin logfile
LoadPlugin syslog

<Plugin logfile>
       LogLevel "info"
       File STDOUT
       Timestamp true
       PrintSeverity false
</Plugin>

<Plugin syslog>
        LogLevel info
</Plugin>

LoadPlugin network
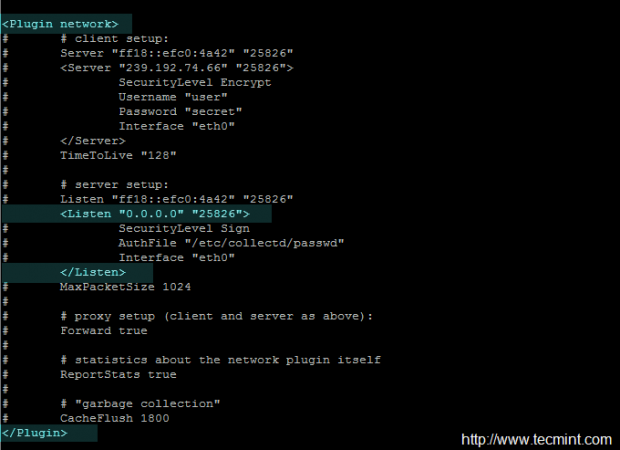
Now, search deeply on file content, identify the Network plugin block and uncomment the following statements, replacing the Listen address statement as presented on the following excerpt:
<Plugin network>
...
# server setup:
      <Listen "0.0.0.0" "25826">
       </Listen>
....
</Plugin>
5. After you’re done editing the file, save it and close it and restart Collectd service to reflect changes and become a server listening on all network interfaces. Use the netstat command to get Collectd network socket output.
# service collectd restart
or
# systemctl restart collectd   [For systemd init services]
# netstat –tulpn| grep collectd


Thresholds must be configured on client side, because the data can differ from one client to another. Consult collectd docs for more. https://collectd.org/documentation/manpages/collectd-threshold.5.shtml
Thresholds must be configured on client side, because the data can differ from one to another. Consult collectd docs for more. https://collectd.org/documentation/manpages/collectd-threshold.5.shtml
Hi,
Just had a small query since i am setting up a client server architecture for collectd, is it possible that for all the clients my thresholds are set on the server side?