Most Linux distributions provide ISO files that are designed and built to run in Live Mode directly from a bootable media such as CD /DVD, Flash/USB cards, or even directly from a Hard Drive using the Linux Grub menu without the need to burn it to a CD/DVD or create a bootable USB using USB creator tools.
This tutorial will concentrate on presenting a way you can run some Linux ISO distributions directly from your hard disk by editing Ubuntu 22.04 GRUB2 (works on Ubuntu 20.04 or earlier) menu which is the default boot loader in most modern Linux distributions.
Running an operating system from a hard disk provides a faster way of using Linux, and also has a great impact on privacy because all your settings and live sessions are not preserved by default.
The distributions presented in this topic are Rocky Linux, Fedora, Kali Linux, Arch Linux and Gentoo Live DVD.
Requirements
A newly installed Ubuntu 22.04 (or any other Linux distribution with the GRUB2 bootloader) is on your system’s hard drive.
Step 1: Download Linux Live ISO Files
1. To able boot and run any Linux distribution without installing them to your hard drive, make sure to download the “Live CD/DVD” release of each Linux ISO image.
- Download Rocky Linux Live ISO Image
- Download Fedora Live ISO Image
- Download Kali Linux Live ISO Image
- Download Arch Linux Live ISO Image
- Download Gentoo Linux Live ISO Image
Step 2: Add ISO Images to the Directory
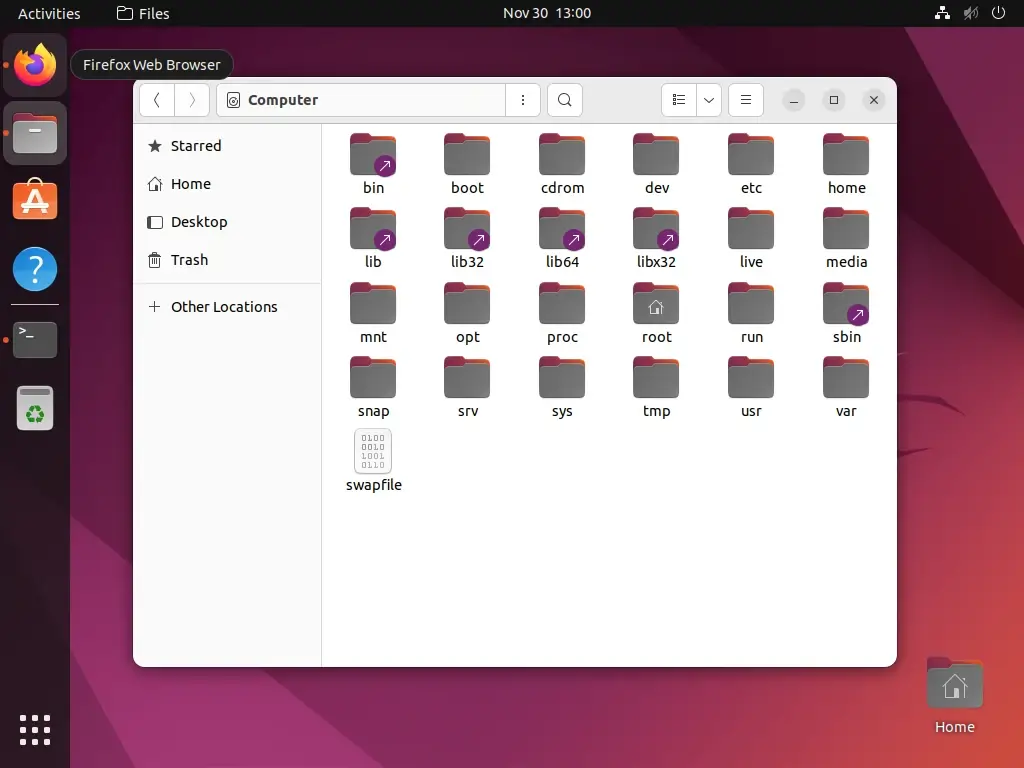
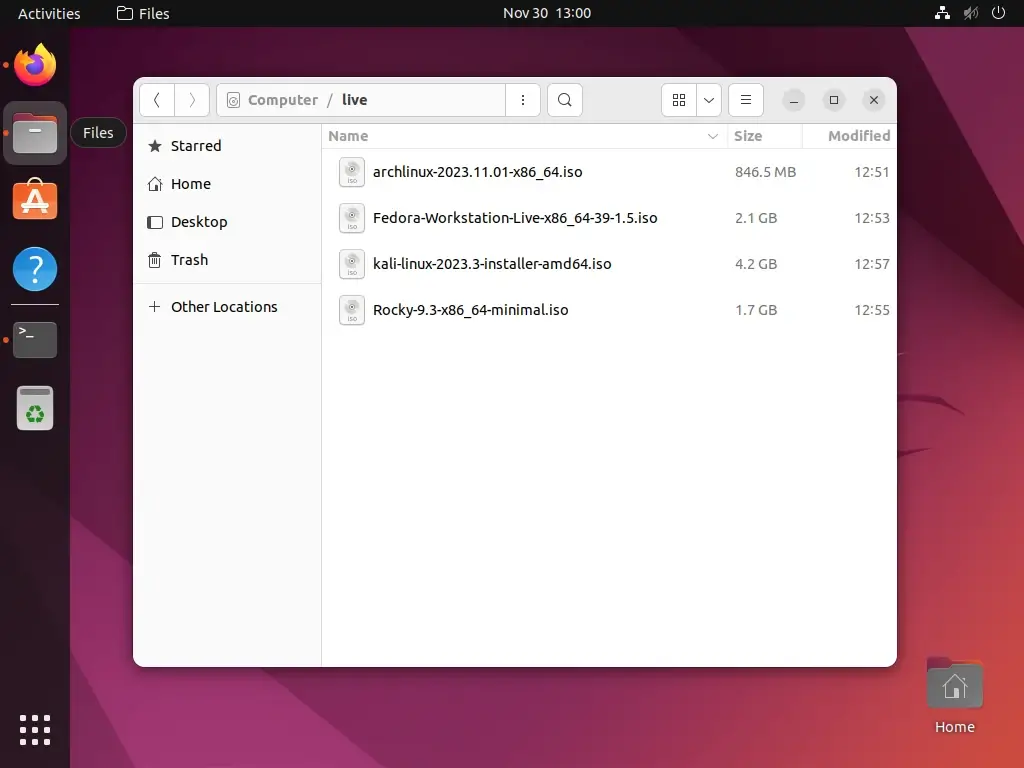
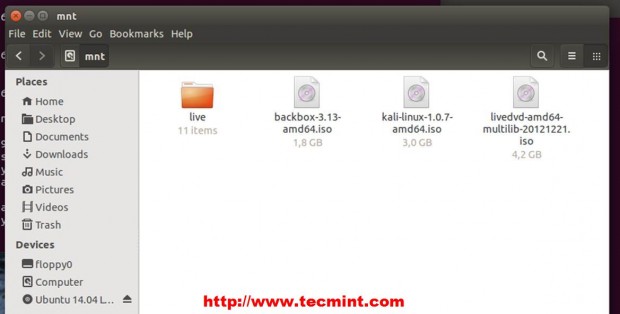
2. After you have downloaded your favorite Linux ISO Live DVD Images, open Ubuntu Nautilus with root privileges using the ‘sudo nautilus‘ command from the terminal and create a directory called live in your system root path and move the ISO file to this folder.
$ sudo nautilus
Step 3: Find Disk Partition UUID
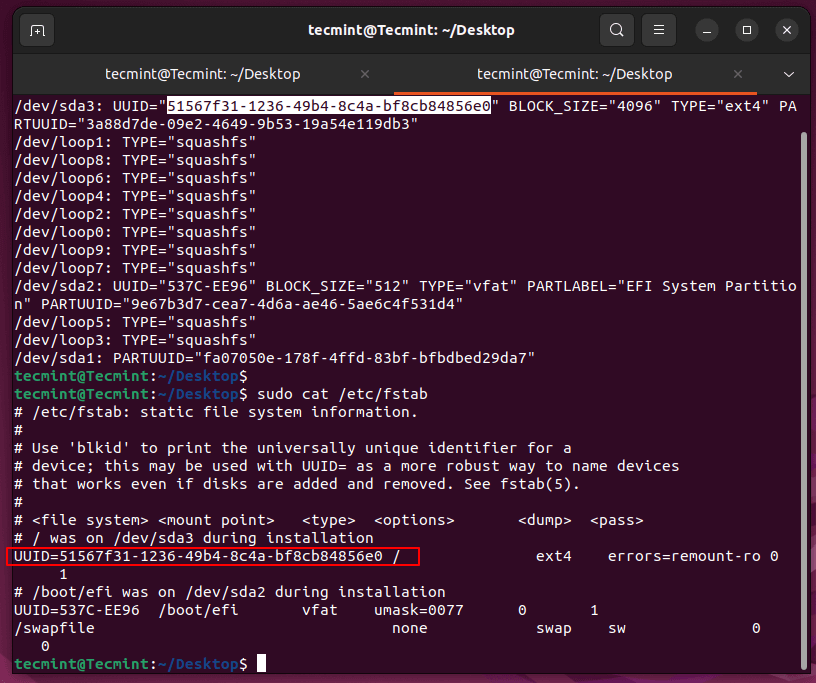
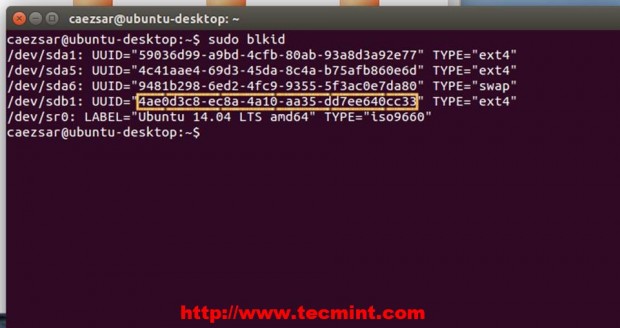
3. To continue further will need to provide Grub2 with our disk partition UUID – Universally Unique Identifier (the partition where ISO files are located).
To get partition UUID run the following blkid command.
$ sudo blkid
For automatically mounted partitions or hard disks on the system boot run the following cat command.
$ sudo cat /etc/fstab
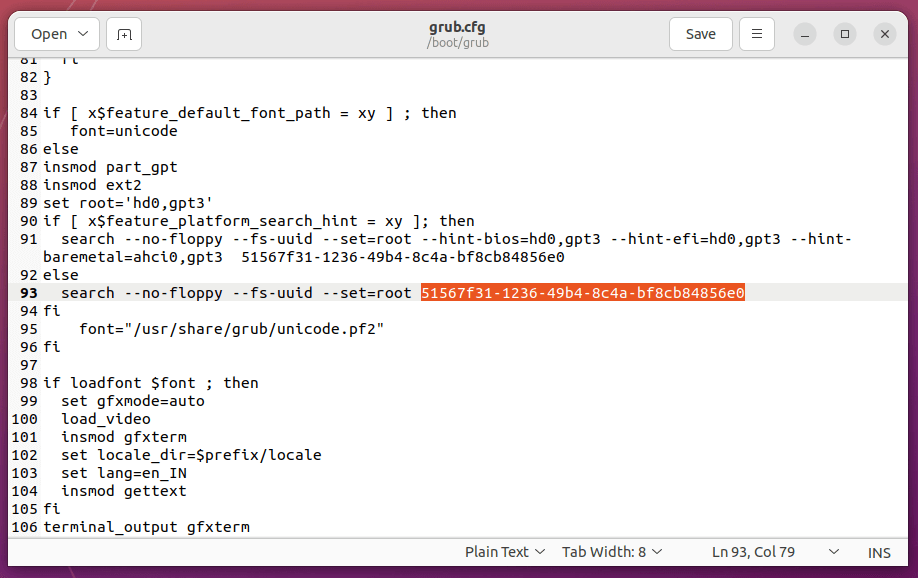
4. Another method to get your partition UUID is, to open and visualize grub.cfg file content located in /boot/grub/ path and search for --fs-uuid a string (in case you don’t have a separated partition for /boot).
Step 4: Add ISO Images to the GRUB2 Menu
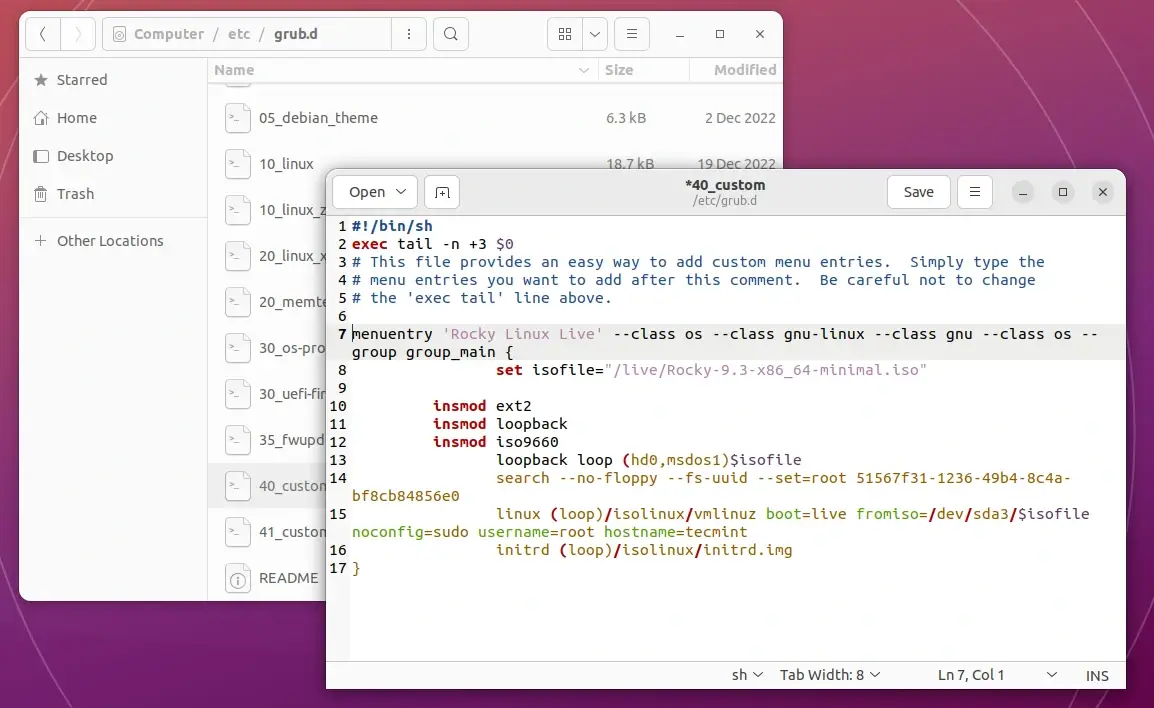
5. After you obtain your root partition UUID code move to /etc/grub.d/ directory, open the 40_custom file for editing and add the following lines at the bottom of this file.
menuentry 'Rocky Linux Live' --class os --class gnu-linux --class gnu --class os --group group_main {
                set isofile="/live/Rocky-9.3-x86_64-minimal.iso"

         insmod ext2
         insmod loopback
         insmod iso9660
                set root=(hd0,3)
                search --no-floppy --fs-uuid --set=root 51567f31-1236-49b4-8c4a-bf8cb84856e0
                linux /live/Rocky-9.3-x86_64-minimal/isolinux/vmlinuz noconfig=sudo username=root hostname=tecmint
                initrd /live/Rocky-9.3-x86_64-minimal/isolinux/initrd.img
}
Here the following directives represent:
- set isofile = A variable that holds ISO system path location.
- (hd0,msdos1) = First partition from first hard disk (In Linux disks are numbered starting with 0) – the same as /dev/sda3.
- –fs-uuid –set=root 51567f31-1236-49b4-8c4a-bf8cb84856e0 = First partition from first hard disk UUID code.
- linux and initrd = Custom kernel booting parameters – they are different depending on every Linux distribution.
6. After you finish editing the file, update-grub to add the new ISO (in this case Rocky Linux) to your Grub2 menu.
$ sudo update-grub
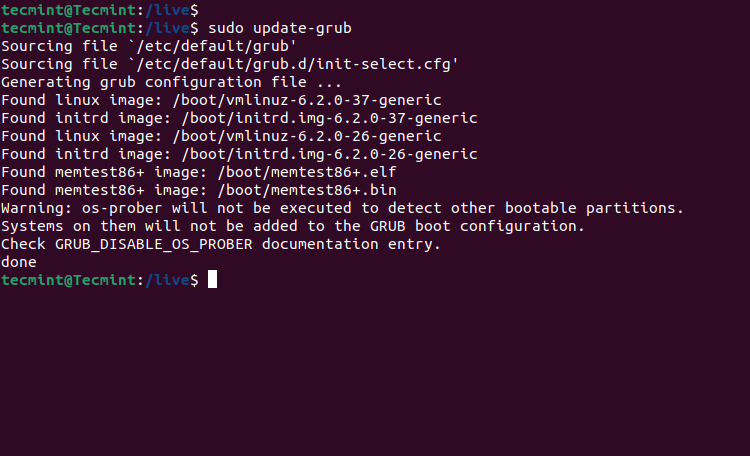
To verify it open /boot/grub/grub.cfg and search at the bottom for your ISO entry.

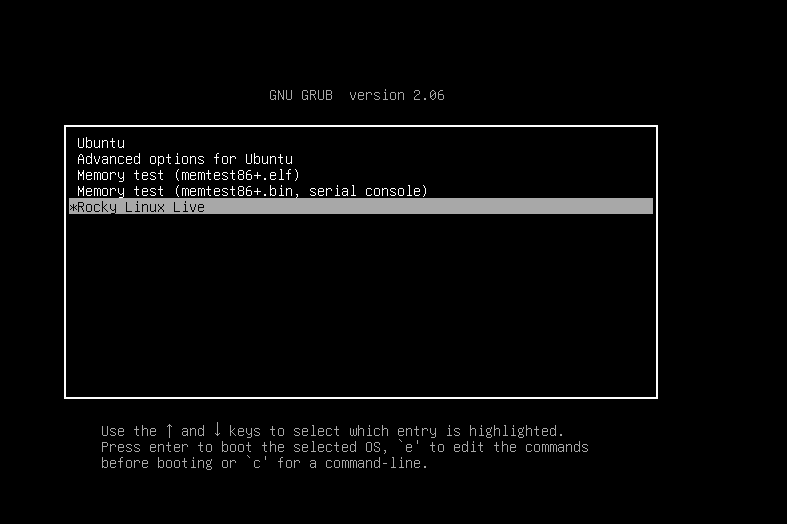
Step 5: Run Rocky Linux ISO from Hard Disk
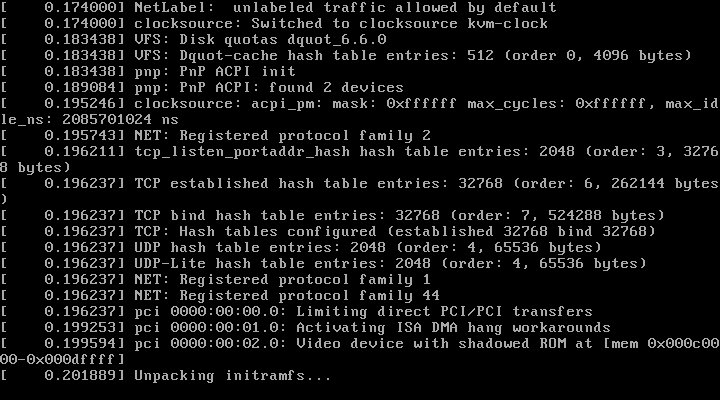
7. To run Rocky Linux Live ISO, reboot your computer, select Rocky Linux entry from the GRUB menu then press the Enter key.
In the same way, you can add the other Linux Live ISO distribution images to the GRUB2 menu as shown. Again open and edit /etc/grub.d/40_custom grub file and add the following entries.
For Fedora Live DVD
menuentry 'Fedora Live' --class os --class gnu-linux --class gnu --class os --group group_main {
                set isofile="/live/Fedora-Workstation-Live-x86_64-39-1.5.iso"

         insmod ext2
         insmod loopback
         insmod iso9660
                loopback loop (hd0,msdos1)$isofile
                search --no-floppy --fs-uuid --set=root 3b87d941-8ee7-4312-98fc-1f26828d62ab
                linux (loop)/isolinux/vmlinuz boot=live fromiso=/dev/sda1/$isofile noconfig=sudo username=root hostname=fedora
                initrd (loop)/isolinux/initrd.img
}
For Kali Linux Live DVD
menuentry 'Kali Linux Live' --class os --class gnu-linux --class gnu --class os --group group_main {
                set isofile="/live/kali-linux-2023.3-installer-amd64.iso"

         insmod ext2
         insmod loopback
         insmod iso9660
                loopback loop (hd0,msdos1)$isofile
                search --no-floppy --fs-uuid --set=root 3b87d941-8ee7-4312-98fc-1f26828d62ab
                linux (loop)/live/vmlinuz boot=live fromiso=/dev/sda1/$isofile noconfig=sudo username=root hostname=kalilinux
                initrd (loop)/live/initrd.img
}
For Gentoo Live DVD
menuentry 'Gentoo Linux Live' --class os --class gnu-linux --class gnu --class os --group group_main {
                set isofile="/live/archlinux-2023.11.01-x86_64.iso"

         insmod ext2
         insmod loopback
         insmod iso9660
                loopback loop (hd0,msdos1)$isofile
                search --no-floppy --fs-uuid --set=root 3b87d941-8ee7-4312-98fc-1f26828d62ab
                linux (loop)/live/vmlinuz boot=live fromiso=/dev/sda1/$isofile noconfig=sudo username=root hostname=gentoo
                initrd (loop)/live/initrd.img
}
8. Then update your GRUB menu again, reboot your computer, and choose your preferred Linux distribution ISO from the GRUB menu.
$ sudo update-grub
9. If you don’t have enough free space on your root partition, to host other Linux ISO files you can add another hard disk and move all your Linux distribution ISO files there. After you create a partition and add a file system mount it on the /mnt path to make it available.
$ sudo mount /dev/sdb1 /mnt
10. Then move all ISO on the new hard disk and grab its UUID using the blkid command.
$ sudo blkid
11. Again open and edit /etc/grub.d/40_custom grub file and add other Linux Live ISO distribution images to the GRUB2 menu using the same procedure but pay attention to every distribution Live Kernel booting parameters which can be inspected by mounting the ISO image using mount -o loop option or consult distribution Wiki pages.


Ventoy works even better. I have several Linux vtoys on an SSD and can boot any of them and update them or whatever. If I want to I could delete that vtoy and replace with a new pristine one.
I’m sure Ventoy works great with USB. However, unless it’s capable of installing/using a GRUB2 menu system and a hard drive path, it does not compare with this how-to at all.
This guide is literally about how to boot a wide variety of ISO files via GRUB2 without the use of a USB/DVD/etc.
Anyway, to boot VHD or image file from Grub?
Ventony did this, but we need to install Ventony.
Thanks for the article. I have a similar requirement, but my ISO is a customized linux ISO with a kickstart-based install. How can I achieve this using my customized ISO?
@balasubramanyam,
I didn’t work on a kickstart-based install, but I think it should work similar way to a standard Linux ISO image. I suggest you give it a try and see how it goes…
How about AlmaLinux? can we directly run from the hard disk using the grub menu?
@Mengyuan,
Yes, you can directly run any Linux distribution from your hard disk as explained in the article…
Does this work for prime os? It is a fork of android-x86.
Because initrd.img is located on /initrd.img in my iso and i dont have a vmlinuz file anywhere in my iso…
Does it work for other distros? Can I do it in my manjaro for backbox?
Does anyone know how to make this iso persistent?
I used this to boot and works for me.
menuentry ‘Kali Linux 2014 Live’ –class os –class gnu-linux –class gnu –class os –group group_main {
set isofile=”/live/kali-linux-1.1.0a-amd64.iso”
insmod ext2
insmod loopback
insmod iso9660
loopback loop (hd0,msdos2)$isofile
search –no-floppy –fs-uuid –set=root 07c0e976-866d-49f6-9ac7-018b5b4d9a8a
linux (loop)/live/vmlinuz boot=live fromiso=/dev/sda2/$isofile noconfig=sudo username=root hostname=kali
initrd (loop)/live/initrd.img
}
See This:
https://nkpro2000sr.github.io/man-manjaro/AlsoKali#Step_3_(Create_Persistent_Storage).Hey guys,
Great article!! It works fine for me (Ubuntu Gnome 14.04).
Only 1 more question, how can I know (or find) the linux and initrd section for other kind of live distros?
Thanks a lot!
hi guys im running ubuntu 14.04 (hd0,gpt7) the thing is when I launch kali there’s an error that pops up
Begin: Mounting root file system …/init: .: line 224: cant open ‘ /scripts/Live’
kernel panic – not syncing: attempted to kill init!
please help me
nice, but just wondering will this work for kali 1.0.9? thankyou
forgot to add my current 40_custom config
my grub file shows: hd1,msdos5
menuentry ‘Kali Linux 2014 Live’ –class os –class gnu-linux –class gnu –class os –group group_main {
set isofile=”/live/kali-linux-1.0.9a-amd64.iso”
insmod ext2
insmod loopback
insmod iso9660
loopback loop (hd1,msdos5)$isofile
search –no-floppy –fs-uuid –set=root b86769fa-9af1-4d92-b8f0-dc528f9a0f0f
linux (loop)/live/vmlinuz boot=live fromiso=/dev/sdb1/$isofile noconfig=sudo username=root hostname=kali
initrd (loop)/live/initrd.img
}
menuentry ‘Backbox Live ISO’ –class os –class gnu-linux –class gnu –class os –group group_main {
set isofile=”/backbox-4.0-amd64.iso”
loopback loop (hd1,5)$isofile
linux (loop)/casper/vmlinuz boot=casper iso-scan/filename=$isofile noprompt noeject
initrd (loop)/casper/initrd.gz
}
hey
first of all thx for the tutorial, but i do have a problem.
i did manage to add the kali linux to the grub menu
but after i pick it it simply restarts my computer and comes back to the grub menu
and ideas on how to fix?
Dear, can we use the same ubuntu partition for persistance live kali linux, without creating another partition?
I follow this tutorial but failed to see the menu entry in grub2. Checked the grub.cfg and saw the menu but it’s still not appear in grub2 menu
I’m running on ubuntu 12.04. and it is on the sda3. Actually I have multiple ubuntu version running on my system. sda1 and sda2 is for ubuntu OEM recovery. so here is the look of it:
sda1 – DELLUTILITY
sda2 – OS
sda3 – 12.04 x64 OEM
sda4 – Extended
sda5 – swap
sda6 – 10.04 x64
sda7 – 10.04 x86
sda8 – 12.04 x32
sda9 – 14.04 x32
sda10 – 14.04 x64
sda11 – data
sda12 – 12.04 x64
the sda3 is the owner of grub2, so I work on this sda3. Also I tried grub-imageboot but failed to boot cause of memdisk not found.
can you tell how to make it persistent?
I am trying to use BackBox and i have Ubuntu oh hd0, gpt 7
i tried changing every parameters, but get the following
error: secure boot forbids to load /boot/grub/…/*.mod (altough secure boot is disabled)
error: could not load kernel.
and 2 more
can you please provide me an entry for 40_custom, and yes my system is UEFI enabled)
/dev/sda6 in above input, which automatically means yes i have linux ext4 parition numberd 6. :)
@Waheed : Do you even have six partitions on your hard disk? Did you read topic: (hd0,6) or
hd0,gpt6 are just examples here, it means the 6th partition on first hard disk? Got it?
Change those numbers with your exact locations? Run fdisk -l to see have a point of view!
Removing any hd0,gpt6 like entry worked for me. my ubuntu partition is not visible when running kali linux, but this is i think because of the fact that we are running kali from ubuntu partition. the following entry for gpt drive worked for me
menuentry ‘Kali Linux 2014 Live’ –class os –class gnu-linux –class gnu –class os –group group_main {
set isofile=”/live/kali-linux-1.0.7-amd64.iso”
insmod part_gpt
insmod ext2
insmod loopback
insmod iso9660
loopback loop $isofile
search –no-floppy –fs-uuid –set=root YOURUBUNTUDRIVEUUID
linux (loop)/live/vmlinuz boot=live fromiso=/dev/sda6/$isofile noconfig=sudo username=root hostname=kali
initrd (loop)/live/initrd.img
}
Your details were really helpful. Still I needed to add extra line as:
set root='(hd0,gpt7)’
search –no-floppy –fs-uuid –set=root –hint-bios=hd0,gpt7 –hint-efi=hd0,gpt7 –hint-
baremetal=ahci0,gpt7 e8005837-2f2e-49e1-8a0d-c65728014928
now BackBox runs fine.
Here is a complete entry for Ubuntu 14.04 at six partiton on first GPT disk:
menuentry “[loopback]ubuntu-14.04-desktop-amd64″ {
set isofile=”/path_to_iso/ubuntu-14.04-desktop-amd64.iso”
loopback loop (hd0,6)/$isofile
linux (loop)/casper/vmlinuz.efi boot=casper iso-scan/filename=$isofile locale=en_US.UTF-8
initrd (loop)/casper/initrd.lz
}
The same instructions an apply on Linux Mint Qiana.
If doesn’t work try this:
insmod part_gpt
set root=(hd0,6)
or
search –fs-uuid –no-floppy –set=root –hint-bios=hd0,gpt2
tried all the options, something is wrong with this line on gpt “loopback loop (hd0,6)/$isofile”, tried hd0,gpt6 grub says cannot find hd0,gpt6 or hd0,6
i am trying it out for kali linux
what will be the input for GPT drives?
Will this work only for the specified Linux distributions or all distributions ?
Thank you for this great article.
I have a Linux iso “linuxmint-17-dvd-64bit-mate”
if you have a Custom kernel boot parameters for this.?
read from your posts, every linux has a different boot parameters.
Thank you for your attention