Have you ever tried to do the partitioning of hard disk larger than 2TB using fdisk utility and wondered why you end up getting a warning to use GPT? Yes, you got that right. We cannot partition a hard disk larger than 2TB using fdisk tool.
In such cases, we can use parted command. The major difference lies in the partitioning formats that fdisk uses DOS partitioning table format and parted uses GPT format.
TIP: You can use gdisk as well instead of parted tool.
In this article, we will show you to add a new disk larger than 2TB to an existing Linux server such as RHEL/CentOS or Debian/Ubuntu.
I am using fdisk and parted utilities to do this configuration.
First list the current partition details using fdisk command as shown.
# fdisk -l
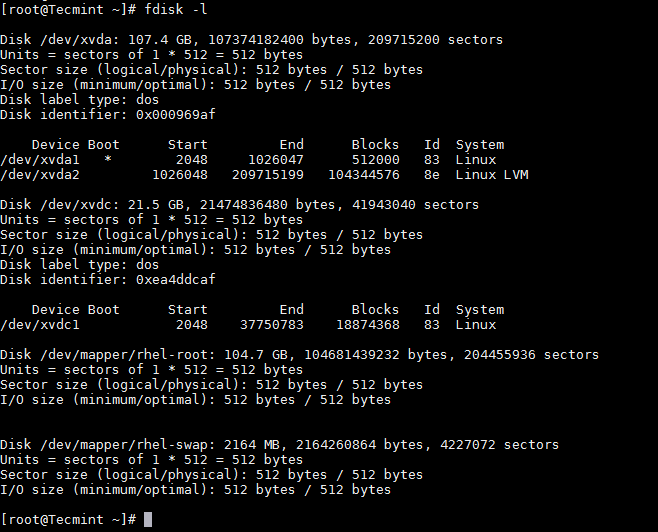
For the purpose of this article, I am attaching a hard disk of 20GB capacity, which can be followed for disk larger than 2TB as well. Once you added a disk, verify the partition table using same fdisk command as shown.
# fdisk -l

Tip: If you are adding a physical hard disk, you may find that partitions already created. In such cases, you can use fdsik to delete the same before using parted.
# fdisk /dev/xvdd
Use d switch for the command to delete the partition and w to write the changes and quit.

Important: You need to be careful while deleting the partition. This will erase the data on the disk.
Now its time to partition a new hard disk using parted command.
# parted /dev/xvdd
Set the partition table format to GPT
(parted) mklabel gpt
Create the Primary partition and assign the disk capacity, here I am using 20GB (in your case it would be 2TB).
(parted) mkpart primary 0GB 20GB

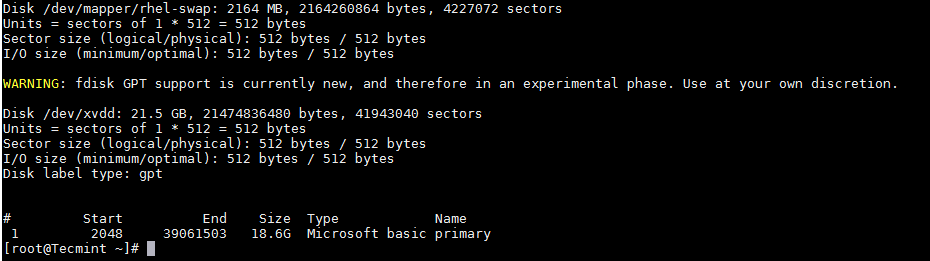
Just for curiosity, let’s see how this new partition is listed in fdisk.
# fdisk /dev/xvdd
Now format and then mount the partition and add the same in /etc/fstab which controls the file systems to be mounted when the system boots.
# mkfs.ext4 /dev/xvdd1
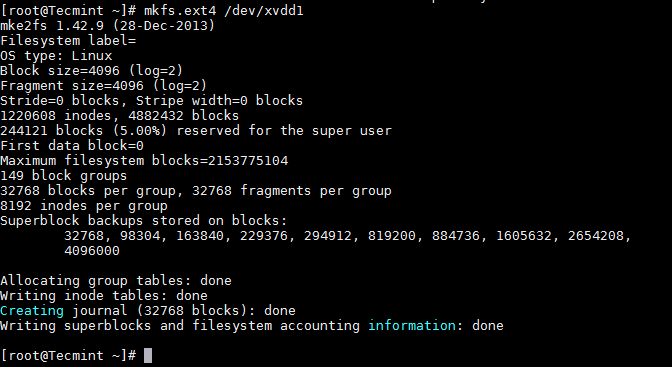
Once partition has been formatted, now it’s time mount the partition under /data1.
# mount /dev/xvdd1 /data1
For permanent mounting add the entry in /etc/fstab file.
/dev/xvdd1 /data1 ext4 defaults 0 0
Important: Kernel should support GPT in order to partition using GPT format. By default RHEL/CentOS have Kernel with GPT support, but for Debian/Ubuntu you need to recompile the kernel after changing the config.
That’s it! In this article, we have shown you how to use the parted command. Share your comments and feedback with us.


I know that the Tecmint crew likes to use CLI but, in this case, it would be much easier to and quicker use GParted.
1) fdisk has no error checking. You can wipe out a disk without realizing.
2) GParted gives instant visual feedback as it works.
Sure, it’s super kewl to use CLI but you will feel silly when you screw up the disk.
One can certainly hand write a letter but it is so much easier and faster to use a typewriter.
@dragonmouth,
I appreciate your input! You’re right – GParted offers instant visual feedback and error checking, which can make it safer and quicker for partitioning tasks.
While CLI tools are powerful, sometimes a graphical tool like GParted is more practical and user-friendly.
Thanks for documenting this – I’ve been using Linux for over 25 years, however, I was forced to retire 8 years ago, and stopped using Linux. I’m a prime example of the USE-IT-OR-LOSE-IT and have lost most of my knowledge, I’m trying to start using Linux again, just flipped bored out of my mind now, so I just wanted to let you know you’re a big help to me.
Good stuff, Lakshmi.
After creating partition by using parted tool and after formatting by mkfs.ext4 do I have to update the kernel table by parted or partx ?
@Abhishek,
I don’t think you need to update Kernel table…
Or, you know, use the GUI GParted that is likely available in your distro’s repositories. :-) (Or the live CD version…) Although it’s good to know how to do it from the command line, not everything has to be done from the command line.
Thanks for the comments . Ya for Linux distros..We have GUI option…We can use either CLI or GUI based on our comfort level.
Yeah, you can make it ext2/3/4, but I wouldn’t. Or more correctly, I did and found out the hard way about checking large ext filesystems. Fortunately, gparted let me shuffle the disk around and remake it with a filesystem friendlier to very large partitions.
@Bruce.. Appreciate your point.
You’re right about ext2 and ext3, but I’m using exclusively ext4 these days, even for large filesystems, and checking these is no problem whatsoever, in my experience.
It should be pointed out that if your planning to put the entire disk into one Volume Group, there technically isn’t a reason to partition the disk. A raw, unpartitioned device, can be added to a VG.
“By default RHEL/CentOS have Kernel with GPT support, but for Debian/Ubuntu you need to recompile the kernel after changing the config.”
That will certainly have been true years ago, but it is no longer correct. I have both Ubuntu (first 14.04, now 16.04) and Debian (first 8, now 9 testing), plus Slackware (first 14.1, os 14.2) on my laptop with one 1-TB harddisk that I partitioned using the GPT scheme, and none of these systems has ever had any troubles with GPT.
In fact, the only minor issue that I encountered was with the LILO bootloader under Slackware 14.1, because it didn’t support being installed onto the boot sector of a GPT partition. Even that got resolved with Slackware 14.2.
@luvr
Thanks for the comments…As you said this stands true for older versions…New versions come with GPT support…Keep posting your comments
Hello, one important observation – NEVER/EVER format anything using something like “mkfs.ext4 /dev/xvdd1“.
The same thing for mounting.
Use instead of /dev/disk/xvdd1 this /dev/disk/by-id/scsi-SATA_HGST_HDN724040A_PK2238P4XGDZ4A-part1, because:
-if your HDD/partition if fail, you it is very simple to identify the HDD(in my example, HGST is the manufacturer, HDN724040A is the model of HDD, PK2238P4XGDZ4A is the SerialNumber printed on the HDD label, and part1 is the partition number)
Anything like this are history if you start to use /dev/disk/by-id. You could see what it is in your system with:
Thank you for your article. AFAIK, we can use percent
%instead of GB in mkpart command to define a maximum storage size.In some cases using % easier than to remember what size of your HDD is. Especially, if it is necessary to install a several HDD’s of various size each one on several servers.
@Alexey
Thanks for the comments..
Nice post… Like the hands on approach in the article without delving into too much theory…
Thanks Anish