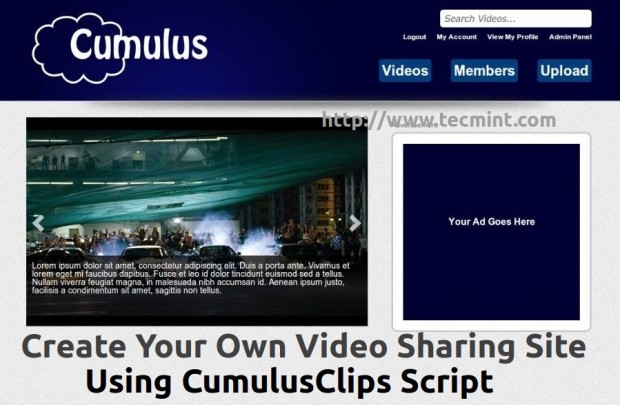
CumulusClips is an open source video sharing (content management) platform, that provides one of the best video sharing features similar to Youtube. With the help of CumulusClips, you an start your own video sharing website or add video sections on your existing website, where users can register, upload videos, comment on videos, rate videos, embed videos and much more.
CumulusClips Features
- Easy uploading of videos (mpg, avi, divx and more) from user computer with upload progress bar.
- Add, Delete and Edit Videos from the Dashboard.
- Allow or disable comments on videos and as well as video embedding.
- Easy user registration with unique url for their profile page and fully profile customization.
- Approve or Reject user uploaded videos via Dashboard.
- Built-in theme/plugin and translation ready.
- Easily create, delete and run Ads.
- Support for future automatic updates.
CumulusClips Demo
Please have a quick look at the demo page deployed by the developer at the following location.
Server Requirements
CumulusClips application only runs in Unix/Linux operating systems. Following are the requirements to run CumulusClips on Linux platform.
- Apache Web Server with mod_rewrite and FFMpeg enabled.
- MySQL 5.0+ and FTP
- PHP 5.2+ with GD, curl, simplexml and zip modules.
PHP Settings
Following are the PHP requirements.
- upload_max_filesize = 110M
- post_max_size = 110M
- max_execution_time = 1500
- open_basedir = no value
- safe_mode = Off
- register _globals = Off
Testing Environment
- Operating System – CentOS 6.5 & Ubuntu 13.04
- Apache – 2.2.15
- PHP – 5.5.3
- MySQL – 5.1.71
- CumulusClips – 1.3.2
Installing CumulusClips in RHEL/CentOS/Fedora and Debian/Ubuntu/Linux Mint
Installing CumulusClips script is a very simple and involves few easy straightforward steps. Before you can start with the install process, make sure that your server meets the requirements for running CumulusClips script.
Step:1 Install Required Packages
Let’s first, install required packages that needed to run CumulusClips video sharing application on the system, using the following easy steps.
On RedHat, CentOS and Fedora
# yum install httpd mysql mysql-server
# yum install php php-mysql php-xml pcre php-common php-curl php-gd
Once, the required packages are installed, start the Apache and MySQL service.
# service httpd start
# service mysqld start
Next, install FFMPEG package by enabling third party RPMForge Repository under your Linux distributions.
# yum install ffmpeg
On Debian, Ubuntu and Linux Mint
On Debian based system, you can easily install required packages using following commands.
$ sudo apt-get install apache2 mysql-server mysql-client
$ sudo apt-get install php5 libapache2-mod-auth-mysql libmysqlclient15-dev php5-mysql curl libcurl3 libcurl3-dev php5-curl
$ sudo apt-get install ffmpeg
$ sudo service apache2 start
$ sudo service mysql start
Step 2: Create Database and User
Next, create a database and database user to run CumulusClips. Use the following commands to create a database and a user.
# mysql -u root -p
Enter password:
Welcome to the MySQL monitor.  Commands end with ; or \g.
Your MySQL connection id is 5340 to server version: 3.23.54

Type 'help;' or '\h' for help. Type '\c' to clear the buffer.

mysql> CREATE DATABASE cumulusclips;
Query OK, 1 row affected (0.00 sec)

mysql> GRANT ALL PRIVILEGES ON cumulusclips.* TO "cumulus"@"localhost" IDENTIFIED BY "password";
Query OK, 0 rows affected (0.00 sec)

mysql> FLUSH PRIVILEGES;
Query OK, 0 rows affected (0.01 sec)

mysql> quit
Note: The above, database name, username, and password will required later at the installation wizard.
Step 3: Configure PHP Settings
Open ‘php.ini‘ configuration file and make the following changes as suggested.
# vi /etc/php.ini [on RedHat based Systems]
$ sudo nano /etc/php5/apache2/php.ini [on Debian based Systems]
Search and modify values as suggested in the following.
upload_max_filesize = 110M
post_max_size = 110M
max_execution_time = 1500
open_basedir = no value
safe_mode = Off
register _globals = Off
Save and close the file after making changes. Next restart Apache Web Server.
# service httpd restart [on RedHat based Systems]
$ sudo service apache2 restart [on Debian based Systems]
Step 4: Install and Configure FTP
Now, install FTP server (i.e. vsftpd) on your Linux OS, using the following command.
# yum install vsftpd [on RedHat based Systems]
$ sudo apt-get install vsftpd [on Debian based Systems]
Once Vsftpd installed, you can adjust the configuration as shown below. Open up the configuration file.
# vi /etc/vsftpd/vsftpd.conf [on RedHat based Systems]
$ sudo nano /etc/vsftpd.conf [on Debian based Systems]
Change the ‘anonymous_enable‘ to NO.
anonymous_enable=NO
After that, remove ‘#‘ at the beginning of line ‘local_enable‘ option, changing it to YES.
local_enable=YES
Please remove the ‘#‘ at the start of these lines to enable all the local users to chroot to their home directories and will not have access to any other part of server.
chroot_local_user=YES
chroot_list_enable=YES
chroot_list_file=/etc/vsftpd/chroot_list
Finally restart the vsftpd service.
# service vsfptd restart [on RedHat based Systems]
$ sudo service vsftpd restart [on Debian based Systems]
Step 5: Download & Install CumulusClips
To begin, you must first grab your free copy of CumulusClips script at http://cumulusclips/download/, or you may use following wget command to download it as shown below.
# cd /var/www/html/ [on RedHat based Systems]
# cd /var/www/ [on Debian based Systems]
# wget http://cumulusclips.org/cumulusclips.tar.gz
# tar -xvf cumulusclips.tar.gz
# cd cumulusclips
Now grant the ‘777‘ (read, write and execute) permission on the following directories. Make sure these directories are writable by Web Server and PHP.
# chmod -R 777 cc-core/logs
# chmod -R 777 cc-content/uploads/flv
# chmod -R 777 cc-content/uploads/mobile
# chmod -R 777 cc-content/uploads/temp
# chmod -R 777 cc-content/uploads/thumbs
# chmod -R 777 cc-content/uploads/avatars
Next, grant the ownership to cumulusclips for web server to be writeable.
# chown -R apache:apache /var/www/html/cumulusclips [on RedHat based Systems]
# chown -R www-data:www-data /var/www/cumulusclips [on Debian based Systems]
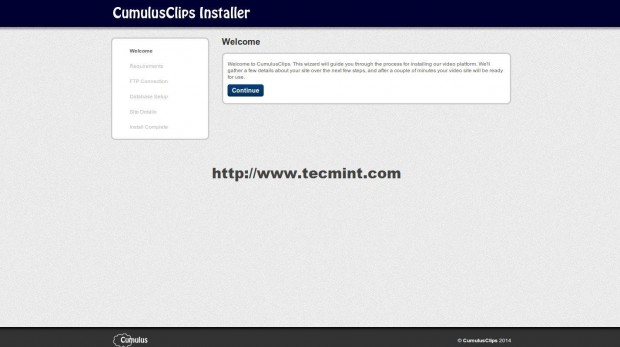
Step 6: CumulusClips Installation Wizard
Once everything is ready, you can have access to your CumulusClips installation wizard at the (http://your-domain.com/cumulusclips/cc-install/), using your web browser.
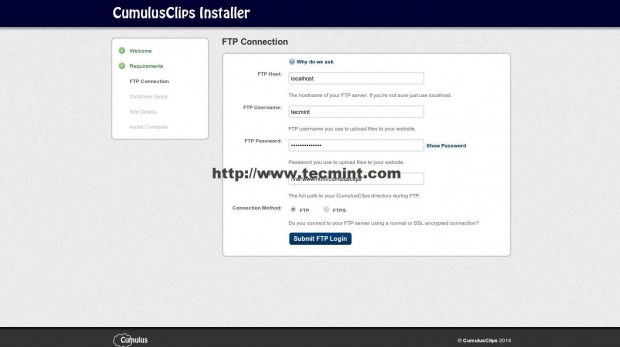
The installation wizard will verify the files are writable by the web server. If not, you will be asked to enter FTP credentials to perform future updates and other file system changes.
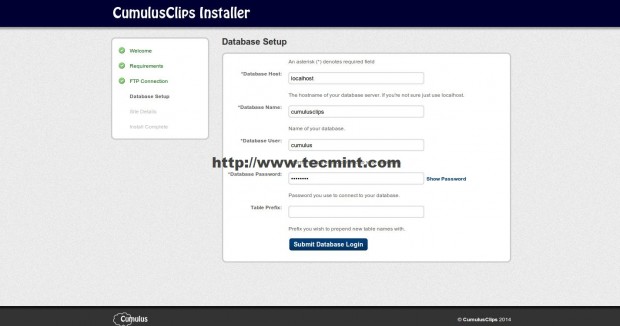
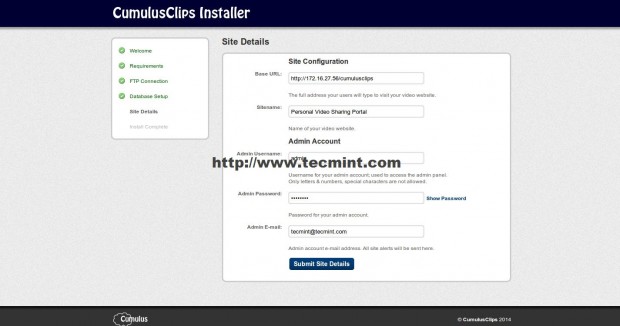
Enter the database details like database name, user and password, that we’ve created in Step #2 above.
Enter, about your site configuration like, Base URL, Sitename, Admin Account, Password and Email.
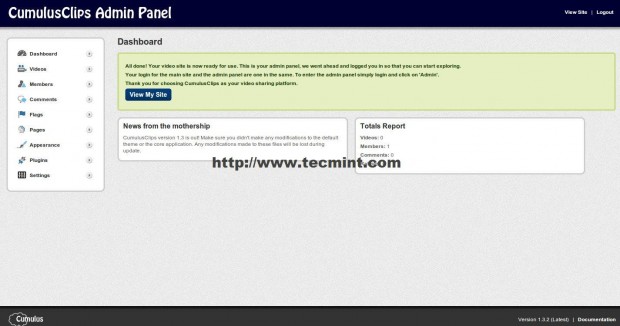
CumulsCliops Admin Panel
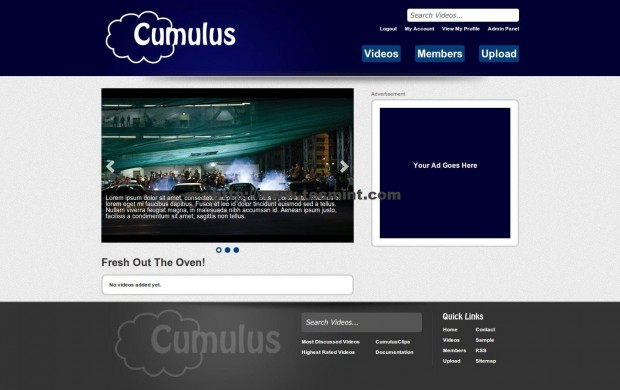
View Front page of a Website.
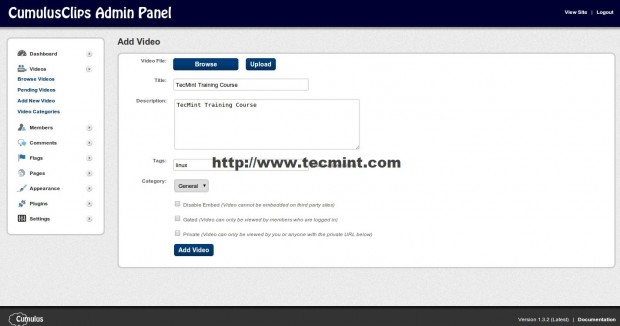
Start uploading your own videos.
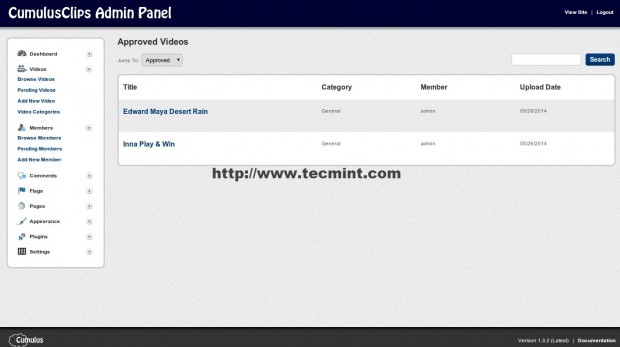
See list of Approved Videos.
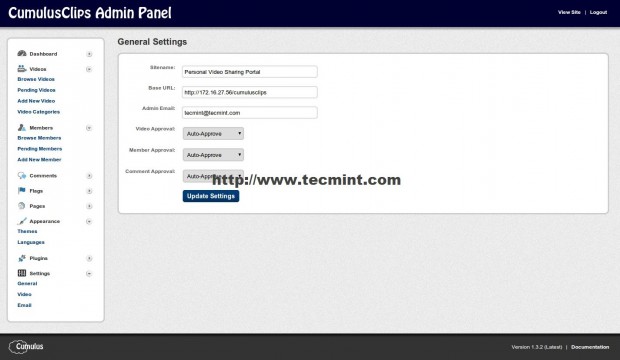
General Settings
Start playing videos


That’s it! Now, you can start uploading videos, customizing and branding of your newly installed CumulusClips Video Sharing website.


After finishing install, the display is not complete and the css and image not show. is it problem with access file?
@Samsul,
May its file permission issue, check Apache file permission and user its running to access the files.
Very good, I found a new one called YouPHPTube, an Open source video sharing written in PHP.
Website: youphptube.com/
Download : github.com/DanielnetoDotCom/YouPHPTube
Demo : demo.youphptube.com/
Tutorials: tutorials.youphptube.com
Try this one youphptube, very easy to install with video tutorials
Also a video tutorial to install it as shown here tutorials.youphptube.com/video/how-to-install-youphptube-in-a-fresh-unbutu-server
Sorry again, please correct my earlier post the correct link is tutorials.youphptube.com/video/how-to-install-youphptube-in-a-fresh-ubuntu-server.
Hi,
I want to upload & stream some 4K videos. Does CumulusClips support 4K videos or will my videos get scaled down? How can we support 4K videos if it is not supported by default.
Hoping for a positive reply.
Best Regards,
Joy
I think cumulusclip does not support but youphptube you can setup what video resolution you want on configuration menu
Can’t upload video and access permalink
——————–
Not Found
The requested URL /account/upload/ was not found on this server.
Apache/2.2.22 (Ubuntu) Server at 192.227.xxx.xxx Port 80
@Amri,
Do you have
AllowOverride Allset in the your .htaccess or Apache configuration file? Please check and confirm..it’s working upload video this tutorial?
I had problem with the cc-install not able to take port number in the base_url field. But I can get around it by setting it without the port number, and go to mysql database and change the base_url to the one with port number.
I got a problem. CumulusClips Installer does not accept port number, for example, http://your.domain:port/site/address. I cannot pass through that. Any work around?
I already followed your step by step installation and i also successfully login to administrator page but i cannot upload video.What is the problem?
@Muhammad,
Any error you getting while uploading videos? can you share error or a screenshot to help you out.
Where exactly are the videos that are uploaded stored? On My Server Correct?
Uploaded videos are get stored under ./cc-content/uploads/ directory.
Hi Ravi,
I have checked with IE 11, Opera, Google Chrome, Firefox – all are same.
I am a newbee in this, please help.
Dear, what error you getting, can you explain more clearly about your issue, so that I can help you out..
Hi Ravi,
With the instructions mentioned in this post, I have installed the Cumulusclips Video Server on RHEL6.3 64 bit. It started perfectly. I have created 2 users – 1 administrator user say “sn” and other normal user say abc. problem is when I am trying to logout apache saying “logout not found”. I closed the page and restarted again now during login apache saying “login not found”. Again I tried video, members, upload links – none is working.
I am unable to understand where is the problem.
Please help.
Make sure your mod_rewrite is enabled in Apache configuration file and also AllowOverride set to All in configuration. Please check these parameters in conf file..
Dear Ravi,
Thank you very much for your detailed instruction on how to install cumulusclips.
I have successfully installed it on my virtual machine (Centos), however, when I tried to upload a test video, it is not working for me.
When I am in the add new video screen, the “Browse” button is unclickable, so I have no way to browse to the video file and upload it.
Have you experienced such error? Would appreciate any inputs on this.
Thanks
Li
No I didn’t faced such issue, I think you should try from different browser.
Hi Ravi
the article is great.!!!
Even I change php.ini values
upload_max_filesize = 110M
post_max_size = 110M
max_execution_time = 1500
open_basedir = no value
safe_mode = Off
register _globals = Off accordingly but when I launch installer it is still showing
upload_max_filesize = 2M
post_max_size = 2M
max_execution_time =2M in browser let me know if anything I need to do.
thanx
Vikas
No idea Vikas? why it’s keep throwing same error again and again even after setting correct values, Can I’ve access to server?
in place of http://your-domain.com/cumulusclips/install/ this use http://your-domain.com/cumulusclips/cc-install/
Yeah Akshay, thanks for pointing me right direction, yes it was a mistake from me..now corrected in writeup..
i have enable short_open_tags and restart httpd and done all changes in php.ini but when opn gui for install it shows
short_open_tags This needs to be enabled
file_uploads
post_max_size Setting is too small. Server only allows 2M. More Info
upload_max_filesize Setting is too small. Server only allows 2M. More Info
max_execution_time Too short, currently 30 seconds. More Info
don’t know why
Please cross verify again, have you made entries in /etc/php.ini file?
Thanks for sharing this article. Good work.
One thing I noticed while following your steps. The web installation part on RHEL/CentOS with the link http://your-domain.com/cumulusclips/install/ doesn’t work.
I had to change install to cc-install in the above link. Is that a typo or a different version of cumulusclips, I am not sure.
Thanks
Thanks for the appreciation, but I’ve tried in my two machines CentOS and Ubuntu both the installation pointed to http://your-domain.com/cumulusclips/install/ and it worked for me correctly. I think you’re using different version may be older or beta version, please check at the download page of CumulusClips and get correct version as mentioned in the article.