Written in PHP, Magento is a popular open-source, and versatile eCommerce platform that provides businesses with an online shopping cart. It leverages various PHP frameworks such as Symfony and Laminas to enhance its functionality and usability.
Magento provides you with an Administrator’s control panel that helps you create your online shop, manage product catalog, monitor transactions and invoices, and keep track of customers’ purchase behavior among many other tasks.
Without much further ado, let’s embark on installing Magento on Rocky Linux and AlmaLinux.
Prerequisites
To successfully install Magento, first of all, need to have a LAMP stack installed on:
Also, ensure that you have a fully qualified domain name (FQDN) pointing to the public IP address of the server. In this guide, we will use the linuxtechgeek.info domain.
Lastly, ensure you have SSH access with a sudo user configured.
Step 1: Install Additional PHP Modules and Other Dependencies
We will start off with the installation of php modules which are a requirement for the installation of Magento.
$ sudo dnf install php-mysqlnd php-xml php-cli php-soap php-pd php-opcache php-iconv php-bcmath php-gd o php-intl php-mbstring php-json php-zip unzip wget -y
Once installed, head over and edit the php.ini configuration file.
$ sudo vim /etc/php.ini
Ensure that the values provided below reflect what you have. Of course, set your date.timezone value accordingly to correspond to your timezone.
memory_limit = 1024M
upload_max_filesize = 256M
zlib.output_compression = on
max_execution_time = 18000
date.timezone = Europe/London
Save the changes and exit.
Next, you need to install the PHP sodium extension – libsodium. This is a module that provides encryption functionalities in an easy and effective manner. To install the module, we need to install the EPEL repository which provides additional packages and dependencies to support its installation.
To install EPEL, execute the command:
$ sudo dnf install https://dl.fedoraproject.org/pub/epel/epel-release-latest-8.noarch.rpm
Next, install additional dependencies.
$ sudo dnf install php-cli libsodium php-pear php-devel libsodium-devel make
With all the packages and dependencies in place, install the libsodium PHP module by running the following commands in that order.
$ sudo pecl channel-update pecl.php.net
$ sudo pecl install libsodium
Head back to the php.ini file.
$ sudo vim /etc/php.ini
Append the following line.
extension=sodium.so
Save and exit.
To verify if PHP sodium was installed run the command:
$ php -i | grep sodium

Great! Now proceed to the next step.
Step 2: Create Database for Magento
The next step involves the creation of a database and a database user for Magento. Therefore, log in to the MariaDB database server:
$ sudo mysql -u root -p
Create a database and a database user by running the following SQL queries.
CREATE DATABASE magento_db;
CREATE USER 'magento_user'@'localhost' IDENTIFIED BY 'password';
Next, Grant privileges to the database user on the Magento database.
GRANT ALL ON magento_db.* TO 'magento_user'@'localhost' IDENTIFIED BY 'password' WITH GRANT OPTION;
Finally, enable the changes to take effect by reloading grant tables.
FLUSH PRIVILEGES;
EXIT;
Below is a summary of the SQL queries.

Step 3: Install and Configure Elasticsearch in Linux
The next step is to install Elasticsearch. This is an open-source distributed search and analytics engine based on Apache Lucene. It is used to search, store and analyze huge volumes of data fast and conveniently.
Elasticsearch is written in Java, and as a prerequisite, we need to install Java first. We are going to install OpenJDK 11 which is the latest stable version of OpenJDK.
$ sudo dnf install openjdk-11-jdk -y
Once the installation of OpenJDK is complete, verify the version of Java installed.
$ java -version

Next, import the Elasticsearch GPG key.
$ sudo rpm --import https://artifacts.elastic.co/GPG-KEY-elasticsearch
Once done, create a repository for Elasticsearch.
$ sudo vim /etc/yum.repos.d/elasticsearch.repo
Paste the following content.
[elasticsearch-7.x]
name=Elasticsearch repository for 7.x packages
baseurl=https://artifacts.elastic.co/packages/7.x/yum
gpgcheck=1
gpgkey=https://artifacts.elastic.co/GPG-KEY-elasticsearch
enabled=1
autorefresh=1
type=rpm-md
Save the changes and exit the Elasticsearch repository file.
Now use the DNF package manager to install elasticsearch.
$ sudo dnf install elasticsearch
Some additional configuration is required for Elasticsearch. So edit the elasticsearch.yml file.
$ sudo vim etc/elasticsearch/elasticsearch.yml
Uncomment the lines below and ensure that the network.host directive is set to 127.0.0.1.
cluster.name: my-application
     node.name: node-1
     path.data: /var/lib/elasticsearch
     network.host: 127.0.0.1
Save the changes and exit the file.
Now, enable the Elasticsearch service to start on boot time and start the service using the following commands.
$ sudo systemctl enable elasticsearch
$ sudo systemctl start elasticsearch
Then verify the running status of Elasticsearch.
$ sudo systemctl status elasticsearch
Additionally, you can test Elasticsearch by sending a GET request using the curl command as shown.
$ curl -X GET ‘localhost:9200’
You should get the following output in JSON format.
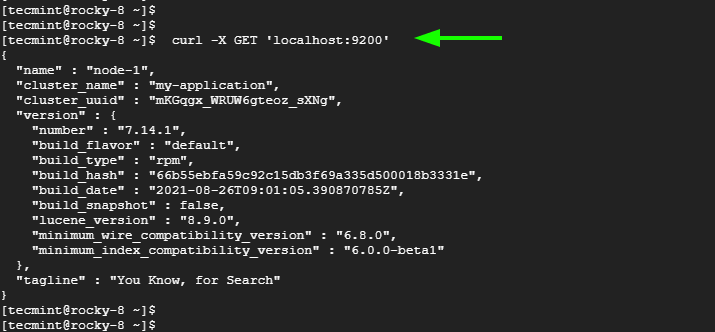
This is a confirmation that Elasticsearch was successfully installed.
Step 4: Download and Install Composer in Linux
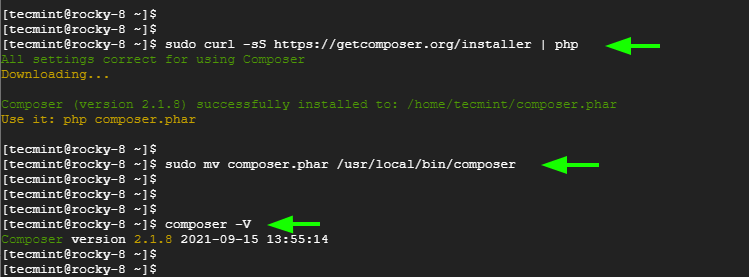
The next step is to install composer which is a PHP package manager. So, first, download the installer file.
$ sudo curl -sS https://getcomposer.org/installer | php
Then move the file to the /usr/local/bin/ path.
$ sudo mv composer.phar /usr/local/bin/composer
To confirm the installation, execute the command:
$ composer -V
Step 5: Download and Install Magento in Linux
The next step is to download the Magento zip file. Currently, the latest version is Magento 2.4.2. Using the wget command-line utility, download the installation file as follows.
$ wget https://github.com/magento/magento2/archive/refs/tags/2.4.2.zip
Once downloaded, extract the contents of the archive file.
$ unzip 2.4.2.zip
Then move the decompressed directory to the document root directory and rename it to magento2 for the sake of simplicity.
$ sudo mv magento2-* /var/www/html/magento2
Then navigate to the magento directory
$ cd /var/www/html/magento2
And use composer to install all the PHP dependencies.
$ sudo /usr/local/bin/composer install
NOTE: You are bound to get an error when using sudo to run composer. This is merely a warning since running composer as root can be risky depending on what is being installed. So just proceed and run it nonetheless.
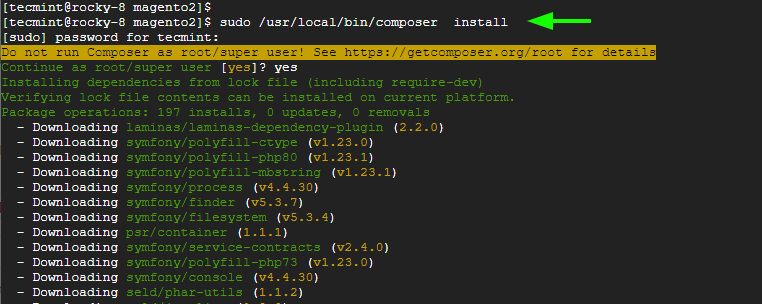
Once all dependencies are installed, set the following permissions for the magento2 directory.
$ sudo chown -R apache:apache /var/www/html/magento2
$ sudo chmod 755 /var/www/html/magento2
Still in the magento2 directory, invoke the following additional permissions.
$ sudo find var generated vendor pub/static pub/media app/etc -type f -exec chmod g+w {} +
$ sudo find var generated vendor pub/static pub/media app/etc -type d -exec
$ sudo chown -R apache:apache .
$ sudo chmod u+x bin/magento
We are done with setting the permissions now. Let’s proceed and configure Apache for Magento.
Step 6: Create an Apache Virtual Host for Magento
Next, we will configure an Apache virtual host file for Magento installation.
$ sudo vim /etc/httpd/conf.d/magento.conf
Paste the following configuration file.
<VirtualHost *:80>
ServerAdmin [email protected]
ServerName example.com
DocumentRoot /var/www/html/magento2/
DirectoryIndex index.php

<Directory /var/www/html/magento2/>
Options Indexes FollowSymLinks MultiViews
AllowOverride All
Order allow,deny
allow from all
</Directory>

ErrorLog /var/log/httpd/magento_error.log
CustomLog /var/log/httpd/magento_access.log combined
</VirtualHost>
Save the changes and exit the file.
Then restart the Apache HTTP server
$ sudo systemctl restart httpd
Step 7: Install Magento and Set Up Magento Cron Jobs
To install Magento, run the following command which configures a new user, an admin user, and several other salient variables.
sudo -u apache bin/magento setup:install --admin-firstname="james" --admin-lastname="kiarie" --admin-email="[email protected]" --admin-user="admin" --admin-password="Secure@123" --db-name="magento_db" --db-host="localhost" --db-user="magento_user" --db-password="P@ssword@321" --language=en_US --currency=USD --timezone=Europe/London --cleanup-database --base-url=http://"linuxtechgeek.info"
At the very end, you will get the following output providing the admin page path.

Before accessing Magento from the browser, configure SELinux policies as shown.
$ sudo restorecon -R /var/www/magento
$ sudo setsebool -P httpd_unified 1
Then, open the browser and type the full URL as shown.
http://linuxtechgeek.info/admin_yquaor
You will be redirected to the following login page. Sign in using the admin credentials as earlier specified and click on ‘Sign In‘.
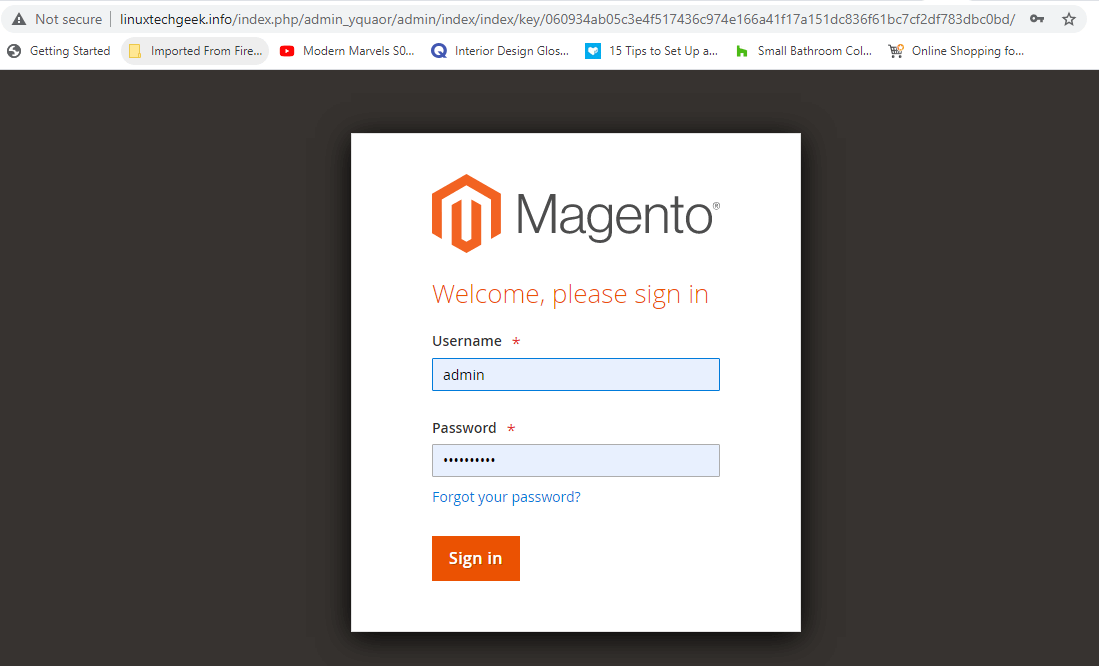
This ushers you to the Magento dashboard.
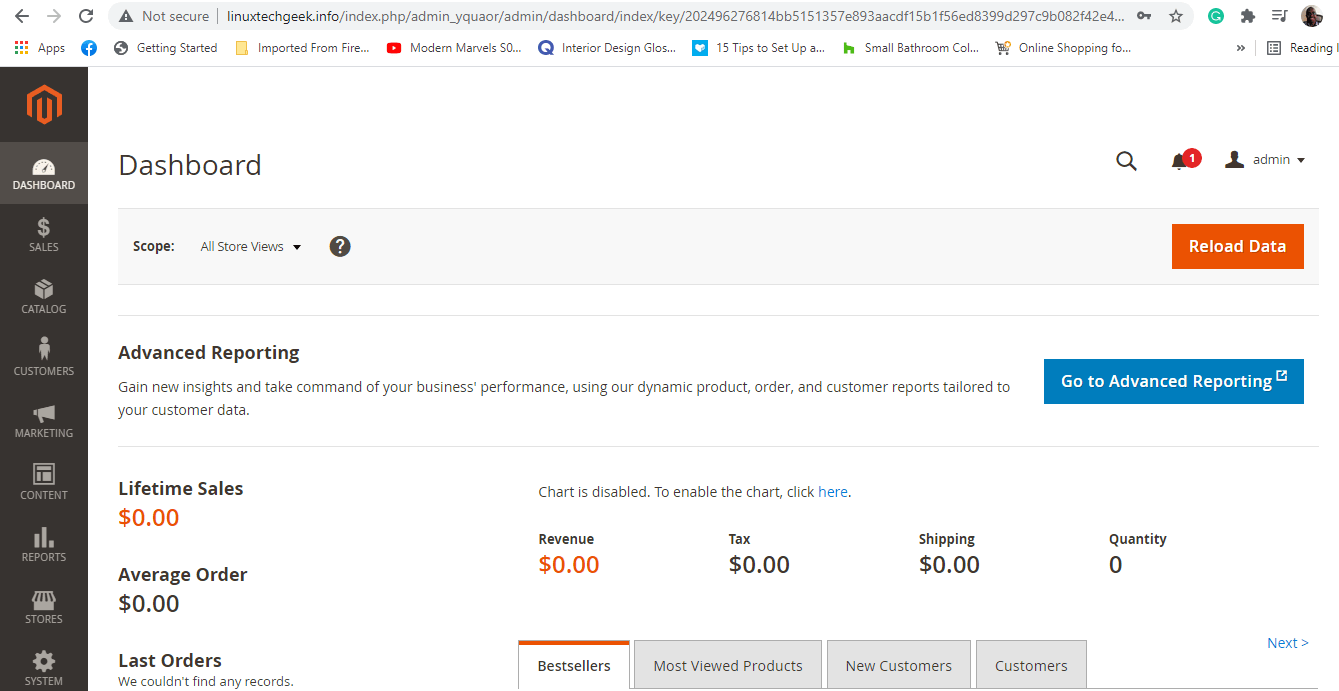
From here, you can proceed to create your online shop, manage item prices, invoices and keep track of customer activity among many other tasks. We have successfully installed Magento on Rocky Linux and AlmaLinux.



What’s your suggestion if someone does not have much technical expertise. So is managed Magento hosting a reliable solution like Cloudways.