This tutorial will show you how to add a second Samba4 domain controller, provisioned on Ubuntu 16.04 server, to the existing Samba AD DC forest in order to provide a degree of load balancing/failover for some crucial AD DC services, especially for services such as DNS and AD DC LDAP schema with SAM database.
Requirements
This article is a Part-5 of Samba4 AD DC series as follows:
Step 1: Initial Configuration for Samba4 Setup
1. Before you start to actually perform domain joining for the second DC, you need to take care of few initial settings. First, make sure the hostname of the system which will be integrated into Samba4 AD DC contains a descriptive name.
Assuming that the hostname of the first provisioned realm is called adc1, you can name the second DC with adc2 in order to provide a consistent naming scheme across your Domain Controllers.
To change the system hostname you can issue the below command.
# hostnamectl set-hostname adc2
else you can manually edit /etc/hostname file and add a new line with the desired name.
# nano /etc/hostname
Here add the hostname.
adc2
2. Next, open local system resolution file and add an entry with the IP address witch points to the short name and FQDN of the main domain controller, as illustrated in the below screenshot.
Through this tutorial, the primary DC name is adc1.tecmint.lan and it resolves to 192.168.1.254 IP address.
# nano /etc/hosts
Add the following line:
IP_of_main_DC FQDN_of_main_DC short_name_of_main_DC

3. On the next step, open /etc/network/interfaces and assign a static IP address for your system as illustrated in the below screenshot.
Pay attention to dns-nameservers and dns-search variables. These values should be configured to point back to the IP address of the primary Samba4 AD DC and realm in order for DNS resolution to work correctly.
Restart the network daemon in order to reflect changes. Verify /etc/resolv.conf file to assure that both DNS values from your network interface are updated to this file.
# nano /etc/network/interfaces
Edit and replace with your custom IP settings:
auto ens33
iface ens33 inet static
        address 192.168.1.253
        netmask 255.255.255.0
        brodcast 192.168.1.1
        gateway 192.168.1.1
        dns-nameservers 192.168.1.254
        dns-search tecmint.lan
Restart network service and confirm changes.
# systemctl restart networking.service
# cat /etc/resolv.conf

The dns-search value will automatically append the domain name when you query a host by its short name (will form the FQDN).
4. In order to test if DNS resolution is working as expected, issue a series of ping commands against your domain short name, FQDN and realm as shown in the below screenshot.
In all these cases Samba4 AD DC DNS server should reply with the IP address of your main DC.

5. The final additional step that you need to take care off is time synchronization with your main Domain Controller. This can be accomplished by installing NTP client utility on your system by issuing the below command:
# apt-get install ntpdate
6. Assuming that you want to manually force time synchronization with samba4 AD DC, run ntpdate command against the primary DC by issuing the following command.
# ntpdate adc1

Step 2: Install Samba4 with Required Dependencies
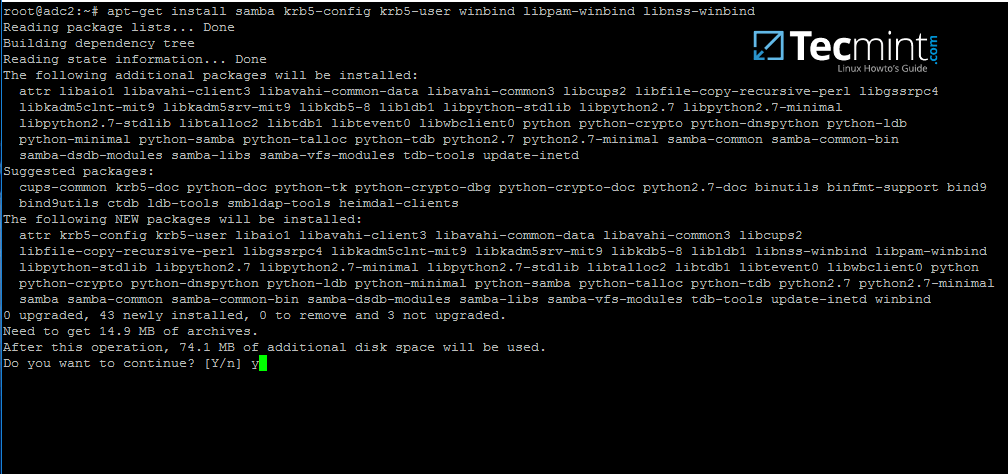
7. In order to enroll Ubuntu 16.04 system into your domain, first install Samba4, Kerberos client and a few other important packages for later use from Ubuntu official repositories by issuing the below command:
# apt-get install samba krb5-user krb5-config winbind libpam-winbind libnss-winbind
8. During the installation you will need to provide Kerberos realm name. Write your domain name with upper cases and press [Enter] key to finish the installation process.

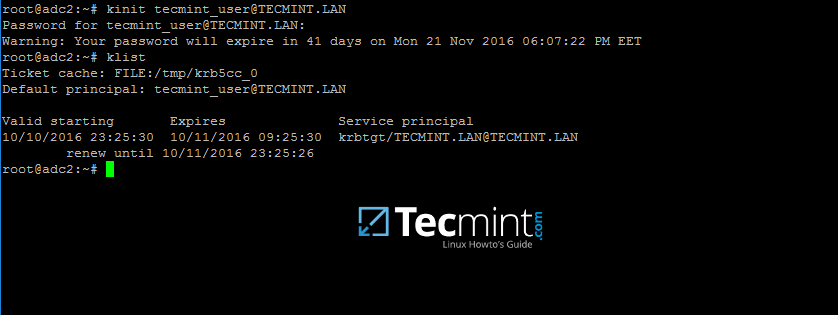
9. After the packages installation finishes, verify the settings by requesting a Kerberos ticket for a domain administrator using kinit command. Use klist command to list granted Kerberos ticket.
# kinit domain-admin-user@YOUR_DOMAIN.TLD
# klist
Step 3: Join to Samba4 AD DC as a Domain Controller
10. Before integrating your machine into Samba4 DC, first make sure all Samba4 daemons running on your system are stopped and, also, rename the default Samba configuration file in order to start clean. While provisioning the domain controller, samba will create a new configuration file from scratch.
# systemctl stop samba-ad-dc smbd nmbd winbind
# mv /etc/samba/smb.conf /etc/samba/smb.conf.initial
11. In order to start the domain joining process, first start only samba-ad-dc daemon, after which you will run samba-tool command to join the realm using an account with administrative privileges on your domain.
# samba-tool domain join your_domain DC -U "your_domain_admin"
Domain integration excerpt:
# samba-tool domain join tecmint.lan DC -U"tecmint_user"
Sample Output
Finding a writeable DC for domain 'tecmint.lan'
Found DC adc1.tecmint.lan
Password for [WORKGROUP\tecmint_user]:
workgroup is TECMINT
realm is tecmint.lan
checking sAMAccountName
Deleted CN=ADC2,CN=Computers,DC=tecmint,DC=lan
Adding CN=ADC2,OU=Domain Controllers,DC=tecmint,DC=lan
Adding CN=ADC2,CN=Servers,CN=Default-First-Site-Name,CN=Sites,CN=Configuration,DC=tecmint,DC=lan
Adding CN=NTDS Settings,CN=ADC2,CN=Servers,CN=Default-First-Site-Name,CN=Sites,CN=Configuration,DC=tecmint,DC=lan
Adding SPNs to CN=ADC2,OU=Domain Controllers,DC=tecmint,DC=lan
Setting account password for ADC2$
Enabling account
Calling bare provision
Looking up IPv4 addresses
Looking up IPv6 addresses
No IPv6 address will be assigned
Setting up share.ldb
Setting up secrets.ldb
Setting up the registry
Setting up the privileges database
Setting up idmap db
Setting up SAM db
Setting up sam.ldb partitions and settings
Setting up sam.ldb rootDSE
Pre-loading the Samba 4 and AD schema
A Kerberos configuration suitable for Samba 4 has been generated at /var/lib/samba/private/krb5.conf
Provision OK for domain DN DC=tecmint,DC=lan
Starting replication
Schema-DN[CN=Schema,CN=Configuration,DC=tecmint,DC=lan] objects[402/1550] linked_values[0/0]
Schema-DN[CN=Schema,CN=Configuration,DC=tecmint,DC=lan] objects[804/1550] linked_values[0/0]
Schema-DN[CN=Schema,CN=Configuration,DC=tecmint,DC=lan] objects[1206/1550] linked_values[0/0]
Schema-DN[CN=Schema,CN=Configuration,DC=tecmint,DC=lan] objects[1550/1550] linked_values[0/0]
Analyze and apply schema objects
Partition[CN=Configuration,DC=tecmint,DC=lan] objects[402/1614] linked_values[0/0]
Partition[CN=Configuration,DC=tecmint,DC=lan] objects[804/1614] linked_values[0/0]
Partition[CN=Configuration,DC=tecmint,DC=lan] objects[1206/1614] linked_values[0/0]
Partition[CN=Configuration,DC=tecmint,DC=lan] objects[1608/1614] linked_values[0/0]
Partition[CN=Configuration,DC=tecmint,DC=lan] objects[1614/1614] linked_values[28/0]
Replicating critical objects from the base DN of the domain
Partition[DC=tecmint,DC=lan] objects[97/97] linked_values[24/0]
Partition[DC=tecmint,DC=lan] objects[380/283] linked_values[27/0]
Done with always replicated NC (base, config, schema)
Replicating DC=DomainDnsZones,DC=tecmint,DC=lan
Partition[DC=DomainDnsZones,DC=tecmint,DC=lan] objects[45/45] linked_values[0/0]
Replicating DC=ForestDnsZones,DC=tecmint,DC=lan
Partition[DC=ForestDnsZones,DC=tecmint,DC=lan] objects[18/18] linked_values[0/0]
Committing SAM database
Sending DsReplicaUpdateRefs for all the replicated partitions
Setting isSynchronized and dsServiceName
Setting up secrets database
Joined domain TECMINT (SID S-1-5-21-715537322-3397311598-55032968) as a DC

12. After the Ubuntu with samba4 software has been integrated into the domain, open samba main configuration file and add the following lines:
# nano /etc/samba/smb.conf
Add following excerpt to smb.conf file.
dns forwarder = 192.168.1.1
idmap_ldb:use rfc2307 = yes

   template shell = /bin/bash
   winbind use default domain = true
   winbind offline logon = false
   winbind nss info = rfc2307
        winbind enum users = yes
        winbind enum groups = yes
Replace dns forwarder IP address with your own DNS forwarder IP. Samba will forward all DNS resolution queries that are outside your domain authoritative zone to this IP address.
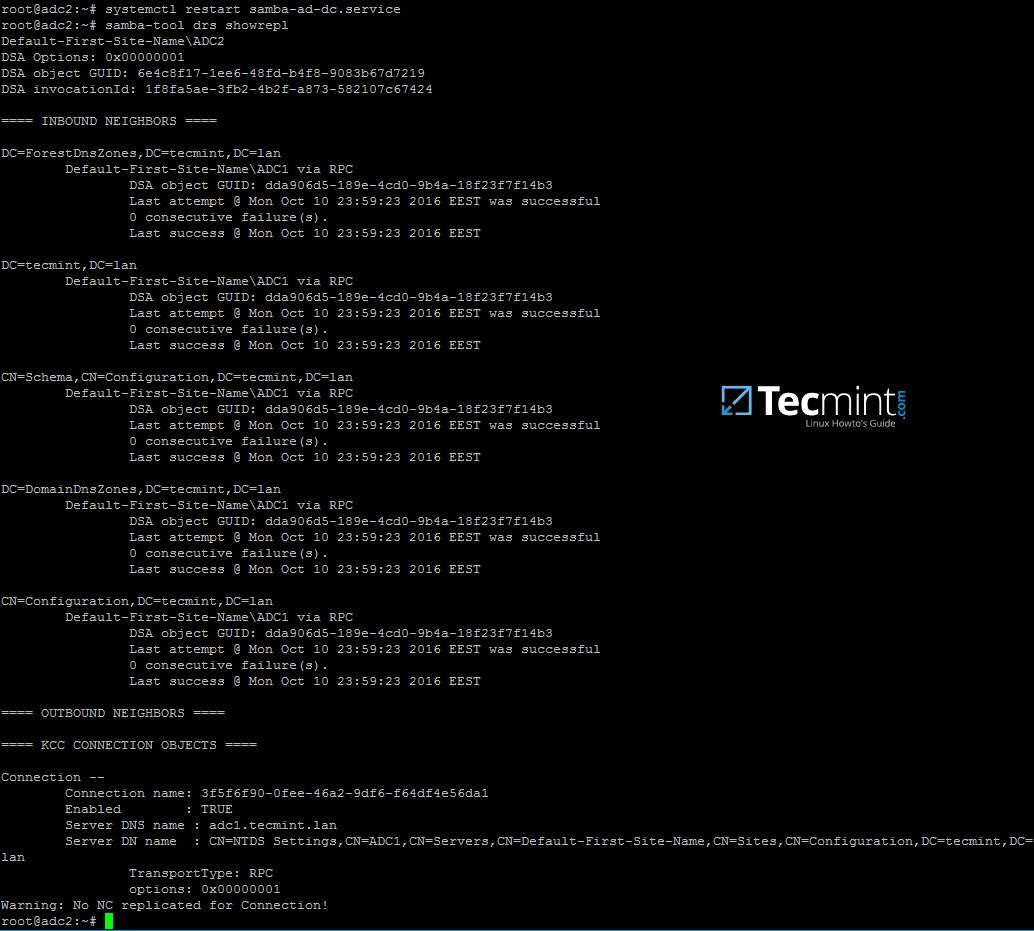
13. Finally, restart samba daemon to reflect changes and check active directory replication by executing the following commands.
# systemctl restart samba-ad-dc
# samba-tool drs showrepl
14. Additionally, rename initial Kerberos configuration file from /etc path and replace it with the new krb5.conf configuration file generated by samba while provisioning the domain.
The file is located in /var/lib/samba/private directory. Use Linux symlink to link this file to /etc directory.
# mv /etc/krb5.conf /etc/krb5.conf.initial
# ln -s /var/lib/samba/private/krb5.conf /etc/
# cat /etc/krb5.conf

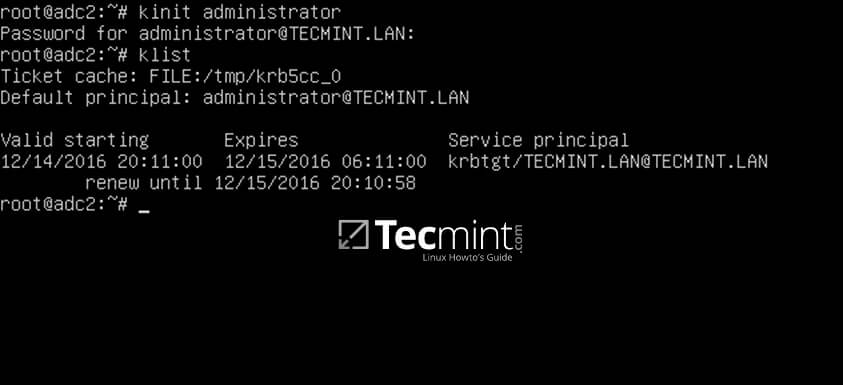
15. Also, verify Kerberos authentication with samba krb5.conf file. Request a ticket for an administrator user and list the cached ticket by issuing the below commands.
# kinit administrator
# klist
Step 4: Additional Domain Services Validations
16. The first test you need to perform is Samba4 DC DNS resolution. To validate your domain DNS resolution, query the domain name using host command against a few crucial AD DNS records as presented on the below screenshot.
The DNS server should replay by now with a pair of two IP addresses for each query.
# host your_domain.tld
# host -t SRV _kerberos._udp.your_domain.tld  # UDP Kerberos SRV record
# host -t SRV _ldap._tcp.your_domain.tld  # TCP LDAP SRV record

17. These DNS records should also be visible from an enrolled Windows machine with RSAT tools installed. Open DNS Manager and expand to your domain tcp records as shown in the below image.

18. The next test should indicate if domain LDAP replication works as expected. Using samba-tool, create an account on the second domain controller and verify if the account is automatically replicated on the first Samba4 AD DC.
On adc2:
# samba-tool user add test_user
On adc1:
# samba-tool user list | grep test_user


19. You can also create an account from a Microsoft AD UC console and verify if the account appears on both domain controllers.
By default, the account should be automatically created on both samba domain controllers. Query the account name from adc1 using wbinfo command.


20. As a fact, open AD UC console from Windows, expand to Domain Controllers and you should see both enrolled DC machines.

Step 5: Enable Samba4 AD DC Service
21. In order to enable samba4 AD DC services system-wide, first disable some old and unused Samba daemons and enable only samba-ad-dc service by running the below commands:
# systemctl disable smbd nmbd winbind
# systemctl enable samba-ad-dc

22. If you remotely administer Samba4 domain controller from a Microsoft client or you have other Linux or Windows clients integrated into your domain, make sure you mention the IP address of the adc2 machine to their network interface DNS server IP settings in order to gain a level of redundancy.
The below screenshots illustrates the configurations required for a Windows or a Debian/Ubuntu client.


Assuming that the first DC with 192.168.1.254 goes offline, reverse the order of the DNS server IP addresses in the configuration file so it won’t try to query first an unavailable DNS server.
Finally, in case you want to perform local authentication on a Linux system with a Samba4 Active Directory account or grant root privileges for AD LDAP accounts in Linux, read the steps 2 and 3 from the tutorial Manage Samba4 AD Infrastructure from Linux Command Line.


After following this guide with a freshly installed Ubuntu 22.04, I get a message in Windows saying that the RPC server is unavailable. I can’t see anything in logs about it and am at a loss on how to proceed. Is anyone else running into this?
Not sure it will help you particularly, but I had to reference both the official documentation https://wiki.samba.org/index.php/Joining_a_Samba_DC_to_an_Existing_Active_Directory#Installing_Samba. However, this article/blogs covers I some gaps that are not easy to see or easy to miss in the official doc.
Would this also work on a domain with a Windows Server as primary DC? (given, that the functional level of the AD is 2008R2 or below)
This would be a nice way to slowly migrate away from Windows
If you shut down the primary DC, the secondary DC fails to serve any requests.
Me too, please help me!
Your network settings are wrong (doesn’T hurt here, though). It’s called broadcast and, in this particular setting, it should be 192.168.1.255.
IMPORTANT FOR DEBIAN USERS: Make sure the dnsutils package is installed or the dns update will fail (only the first dc appears in
host -t A your.domainand your logs are filled with error messages.) The package contains the required nsupdate tool.Deploying a backup domain controller to Debian 10. The computer started with “net ads join -U username -D DOMAIN” command.
When entering the domain with the second controller “samba-tool domain join test.local DC -U” TEST\administrator”
“Samba-tool: error: No such option: -U.”
What for a mistake?
Step 16: host your_domain.tld returns me with only the primary IP and not two IPs as mentioned. Any idea as to why that might be happening?
How long do the servers will do a replication? I created the domain replication successfully, but it cannot do the replication streamingly.
Question: if I have an existing Active Directory (2012 R2 forest and domain level) can I use this method to add an Ubuntu DC as my secondary?
I follow all the steps, however, my second dc not replicating to the primary one. everything else seems successful. both machines came up as DC within the RSTAT tool, ldap and krb5 info was generated for both machine on rstat. Any thoughts ?
Make sure your secondary AD Server has IP of Primary AD Server as its first DNS IP (resolv.conf).
You have a typo here on step 14.
should be
also step 11
should be
@Travis,
Thanks a ton man, corrected the commands in the article..:)
Hello, when I worked this line samba-tool domain join your_domain -U “your_domain_admin”, I had an error that is:
oin failed - cleaning up
checking sAMAccountName
ERROR(ldb): uncaught exception - LDAP error 68 LDAP_ENTRY_ALREADY_EXISTS -
  File "/usr/local/samba/lib64/python2.7/site-packages/samba/netcmd/__init__.py", line 175, in _run
    return self.run(*args, **kwargs)
  File "/usr/local/samba/lib64/python2.7/site-packages/samba/netcmd/domain.py", line 555, in run
    machinepass=machinepass, use_ntvfs=use_ntvfs, dns_backend=dns_backend)
  File "/usr/local/samba/lib64/python2.7/site-packages/samba/join.py", line 1172, in join_DC
    ctx.do_join()
  File "/usr/local/samba/lib64/python2.7/site-packages/samba/join.py", line 1075, in do_join
    ctx.join_add_objects()
  File "/usr/local/samba/lib64/python2.7/site-packages/samba/join.py", line 515, in join_add_objects
    ctx.samdb.add(rec)
If you have any idea, Could you help me?
Hello again,
Maybe it will be very usefull to add ALL the additional DC, like this(on adc1):
samba-tool dns add 127.0.0.1 your_domain.tld @ NS adc2.your_domain.tld -UAdministrator
In this case ALL DCs will can act as full NS for DC.
And the best way to test fail-over AD DC is to stop the first AD DC server, for one or 2 days, and to see if you can work as usually with any AD client. This is the best test that you can try.
Hello to all,
In my opinion, Step 3: Join to Samba4 AD DC as a Domain Controller could be …as a Additional Domain Controller. It ill be more clear.
smb.conf will be better with
winbind offline logon = true
– because if your AD client is in a remote location he will not be able to logon, or even in the case that AD is down
– on both AD DC you must put in resolv.conf the both AD DC ip address as nameservers.
– on any additional AD DC you must setup the ntp in the correct way, if you do not go in problems – see a older tutorial from this series about samba4/AD.
I also think it was wise to tell that if you run a samba file server on any AD DC server you need to reset the sysvol… and use rsync. Also kerberos could be improved so you can make a logon from different IP network/lan.
As a side note the lower IP address are for servers (192.168.0.1 for example) and higher are for networks devices like routers (like 192.168.0.254), or I am wrong ?
And the last sentence…. backup. If you loose all AD DC you loose everything, so make backups of everything, AD DC, multiple switching path, bonding and so on !