Manjaro 21.0, also codenamed Ornara, was released on May 31st, 2021, and ships with impressive features, updates, and improvements such as:
- Linux Kernel 5.10
- A brand new theme – Breeze theme – with polished icons & overall UI.
- Improved flatpak and Snap package support.
- ZFS file system support in Manjaro Architect.
- Latest drivers.
- Improved Calamares Installer.
This guide will walk you through a step-by-step procedure of how to install the Manjaro 21.0 Linux distribution. As you might know, Manjaro is available for download in 3 different desktop environments: XFCE, KDE Plasma, and GNOME.
In this guide, we will demonstrate the installation of Manjaro using the KDE-Plasma desktop environment.
Manjaro System Requirements
For satisfactory user experience, it’s recommended that your PC satisfies the following minimum requirements:
- 2GB RAM
- 30 GB of Hard disk space
- Minimum of 2 GHz processor
- HD graphics card and monitor
- A stable internet connection
Download Manjaro ISO Images
You can download your preferred Manjaro ISO Edition from Manjaro’s official website.
Additionally, ensure that you have a bootable USB stick of Manjaro 21.0, you can use the UNetbootin, Etcher, or Rufus tool to make your USB or pen drive bootable using the downloaded ISO file.
Installing Manjaro 21.0 (KDE Edition) Desktop
After making your USB drive bootable, plug it in your PC and reboot your system.
Booting Manjaro Linux
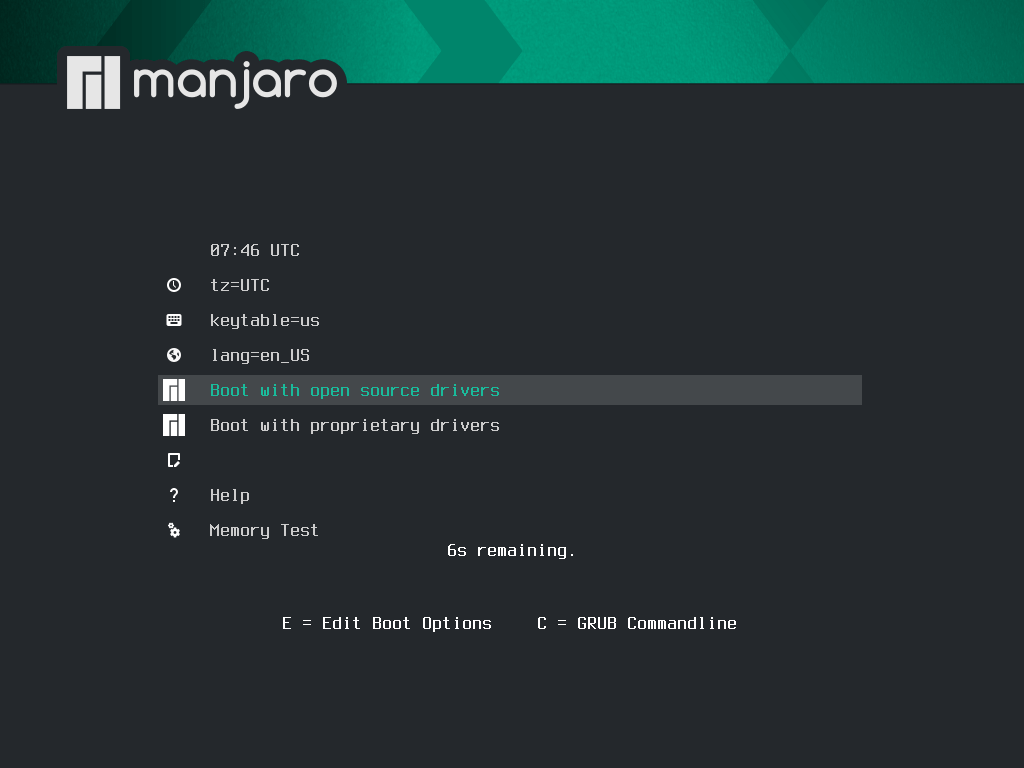
1. While booting, make sure that you tweak the boot priority in the BIOS settings to boot from your installation medium first. Next, save the changes and continue booting into the system. Upon booting, you will be greeted by this screen:
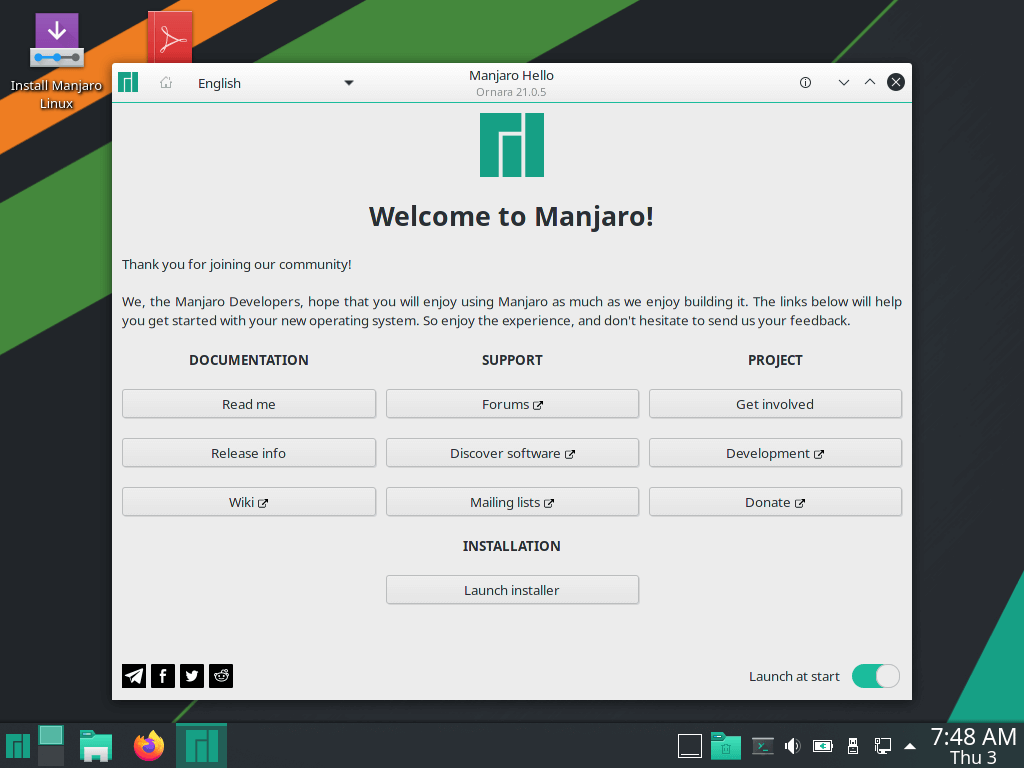
2. Shortly thereafter, the screen below will be displayed. You will get enough documentation and support links that will help to acquaint you further with Manjaro OS. But since we are only interested in the installation of Manjaro 21, we will click on the ‘Launch Installer’ button.
Select System Language
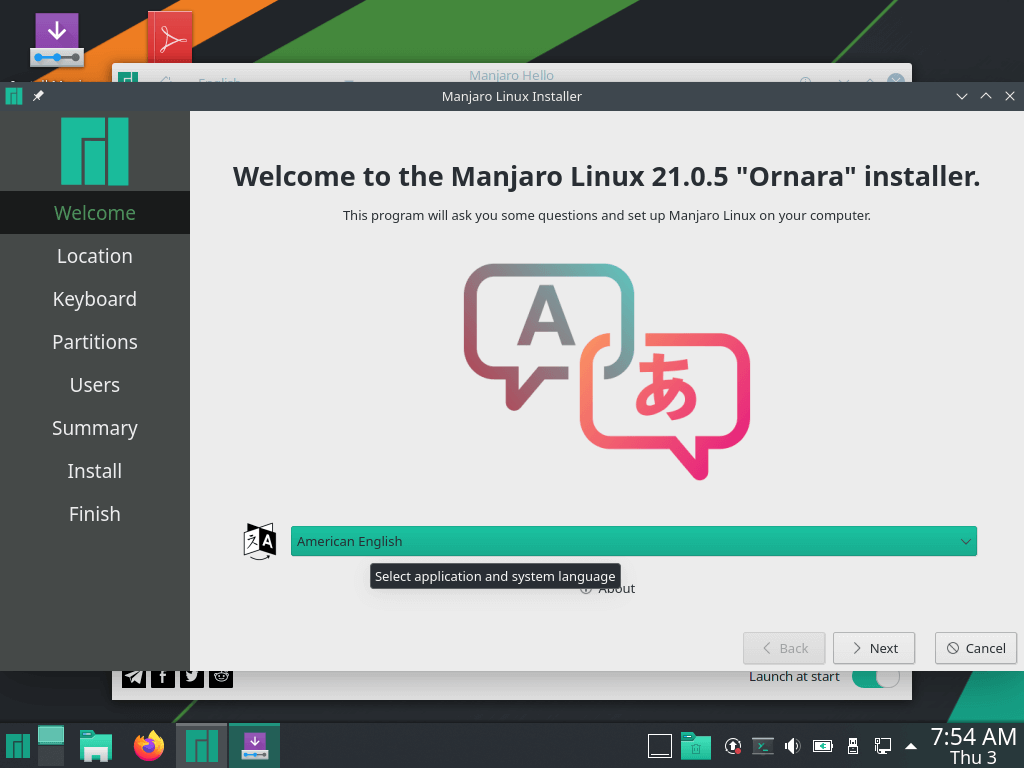
3. The next screen requires you to select your preferred system language. By default, this is set to American English. Select the language you are most comfortable with and click the ‘Next’ button.
Select the Timezone
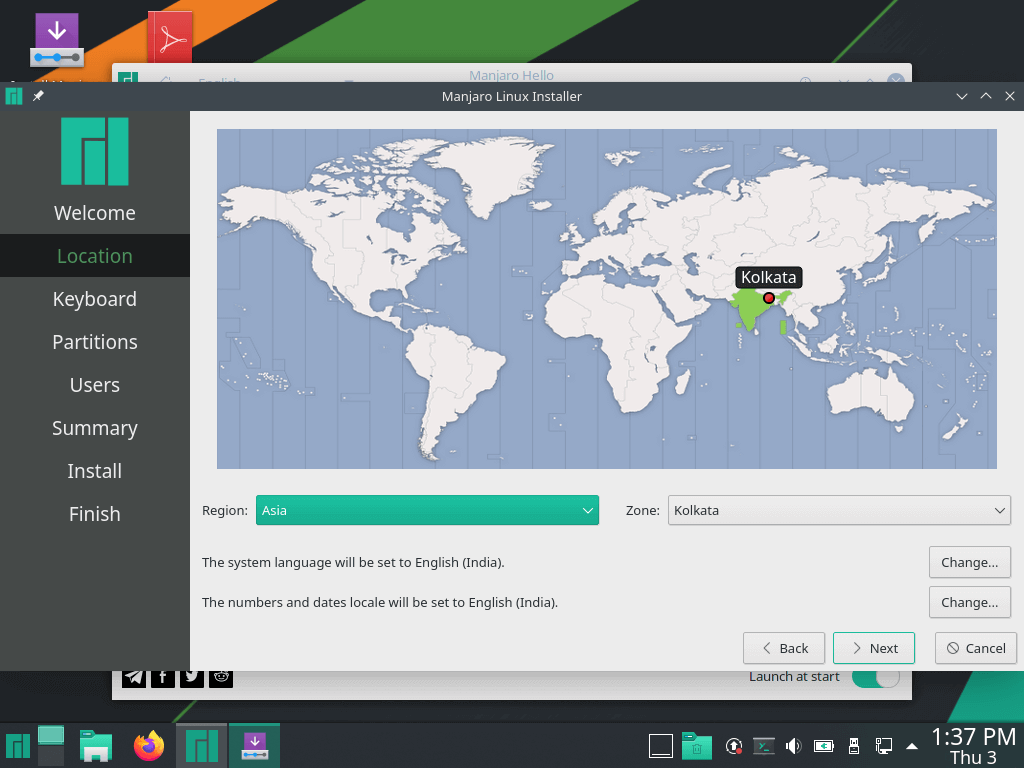
4. If you are connected to the internet, the installer will automatically detect your region and time zone on the world map. If you are comfortable with the selection, hit ENTER. Else, feel free to set your region and zone as you deem fit.
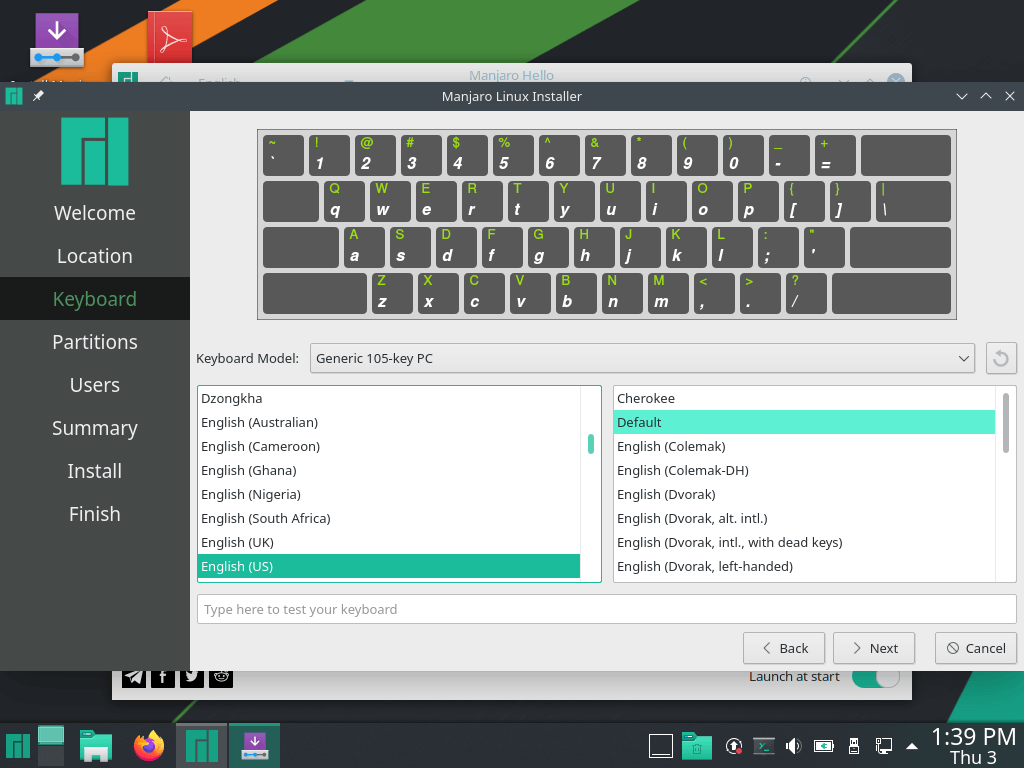
Select Keyboard Layout
5. On the next step, select your preferred Keyboard layout and click ‘Next’.
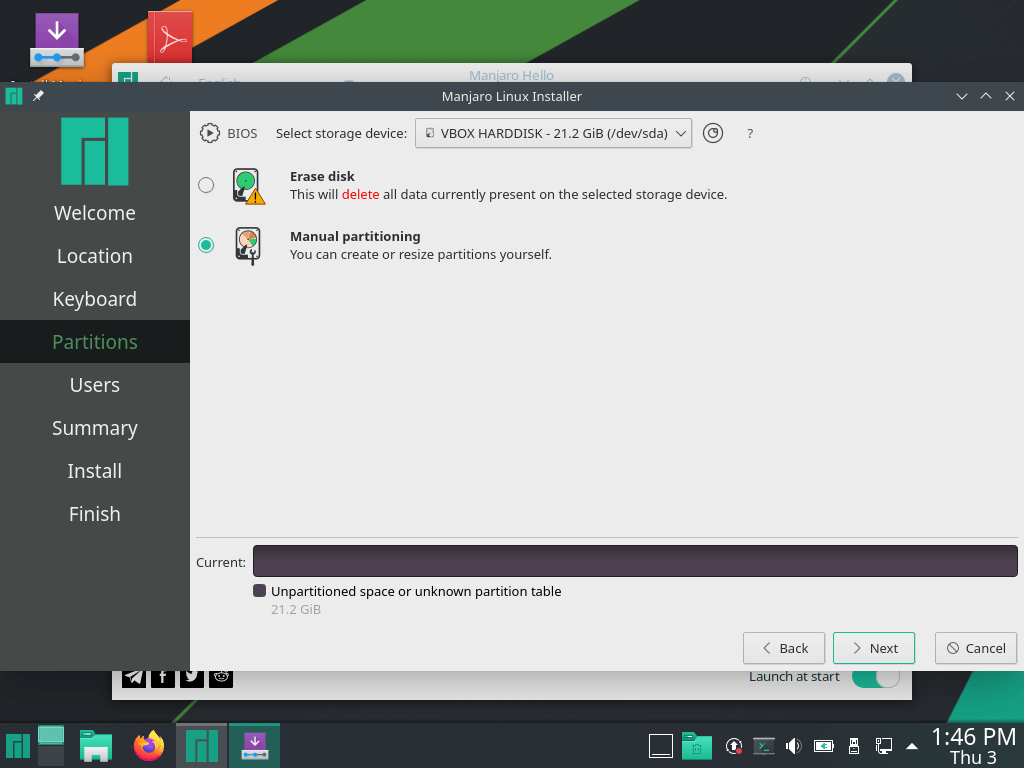
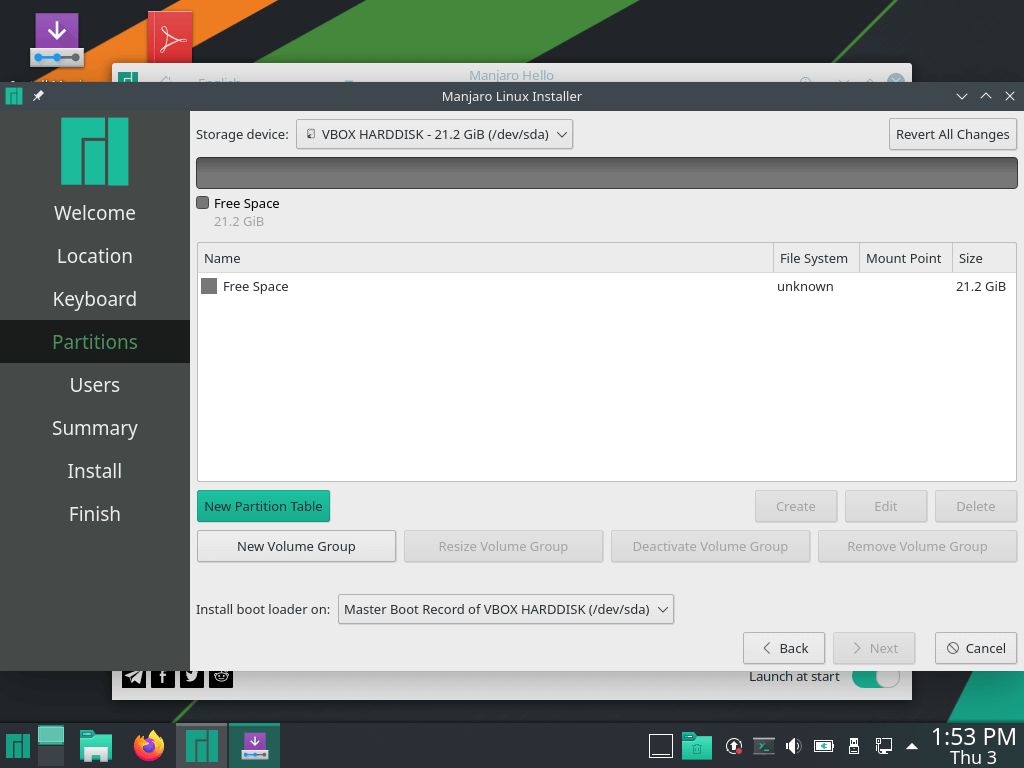
Partition Hard Disk
6. This step requires you to partition your hard drive before the installation can begin. You are presented with 2 options: Erase Disk and Manual partitioning.
The first option comes in handy if you want the system to automatically partition the hard disk for you. This option is suitable for beginners or users who are not confident in manually partitioning the hard drive
The second option – Manual partitioning – gives you the flexibility of manually creating your own disk partitions.
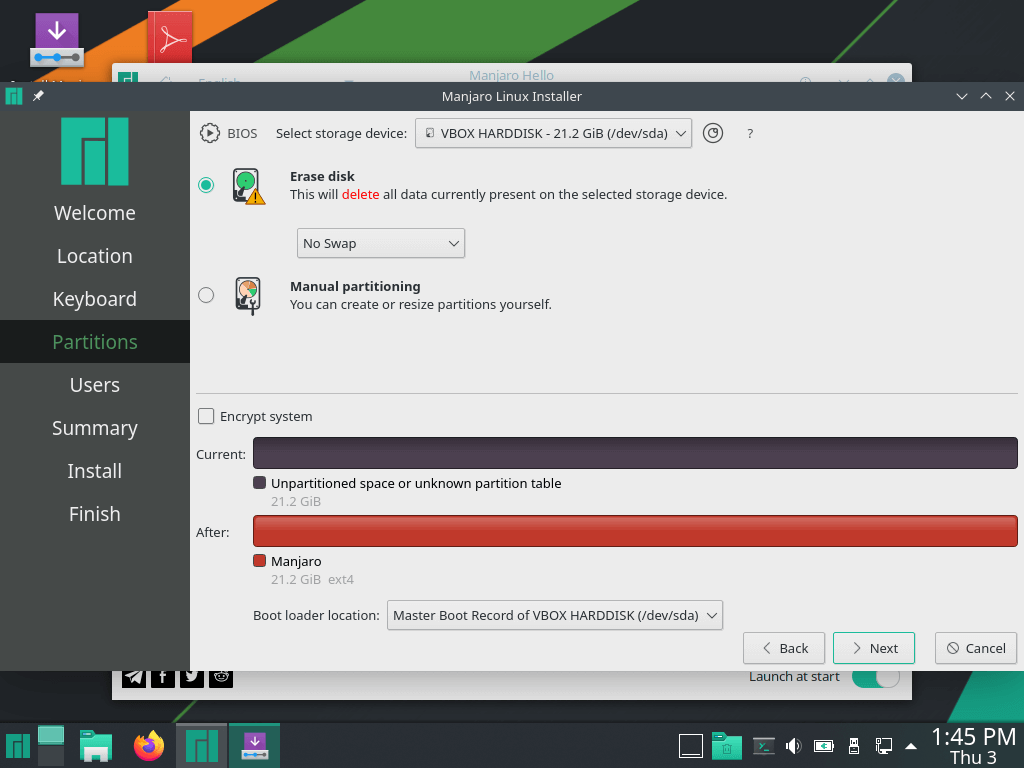
For this guide, we are going to opt for the ‘Manual partitioning’ selection and create the disk partitions ourselves.
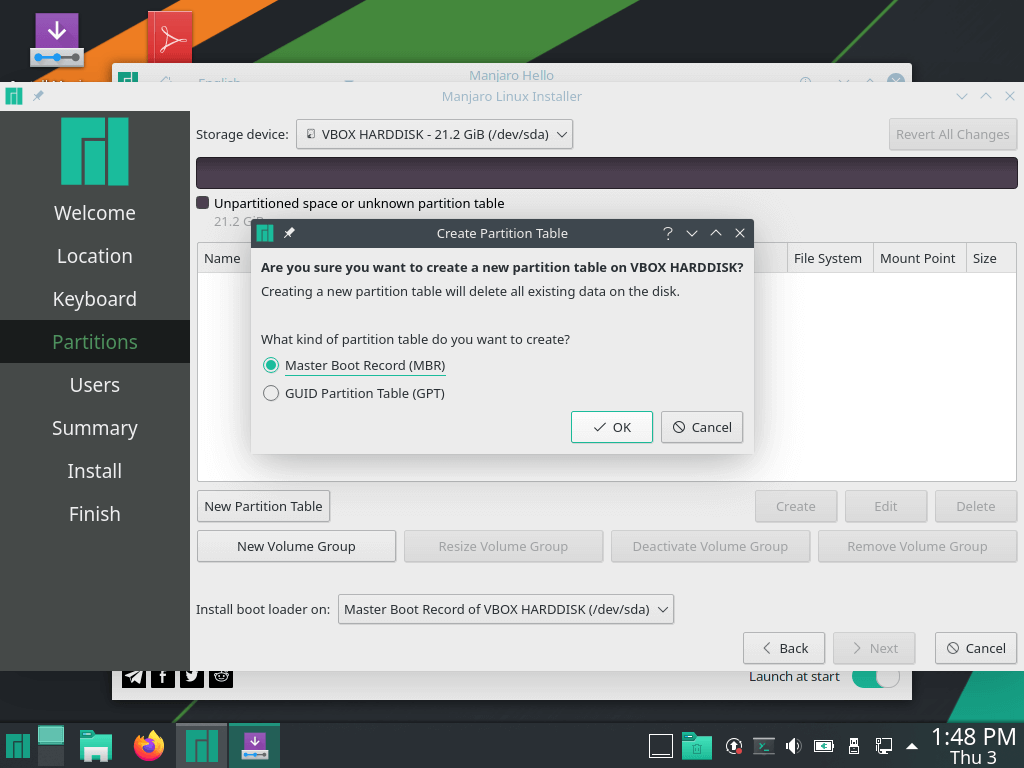
7. Then choose the partition table format. Here, you are presented with either the MBR or GPT formats. If your motherboard supports the UEFI system, (Unified Extensile Format), select the GPT option. If you are using a Legacy BIOS system, select MBR and then hit ‘Next’.
Using the free space, we will create 3 quintessential partitions with memory allocation as shown:
- /boot partition – 512MB
- swap partition – 2048MB
- /root partition – remaining space
Creating Boot Partition
8. To create the boot partition, click on the ‘New Partition Table’ button and the pop-up window will be displayed as shown. Follow the steps shown. Specify the memory size of your partition, file system type, and mount point and click ‘Ok’.
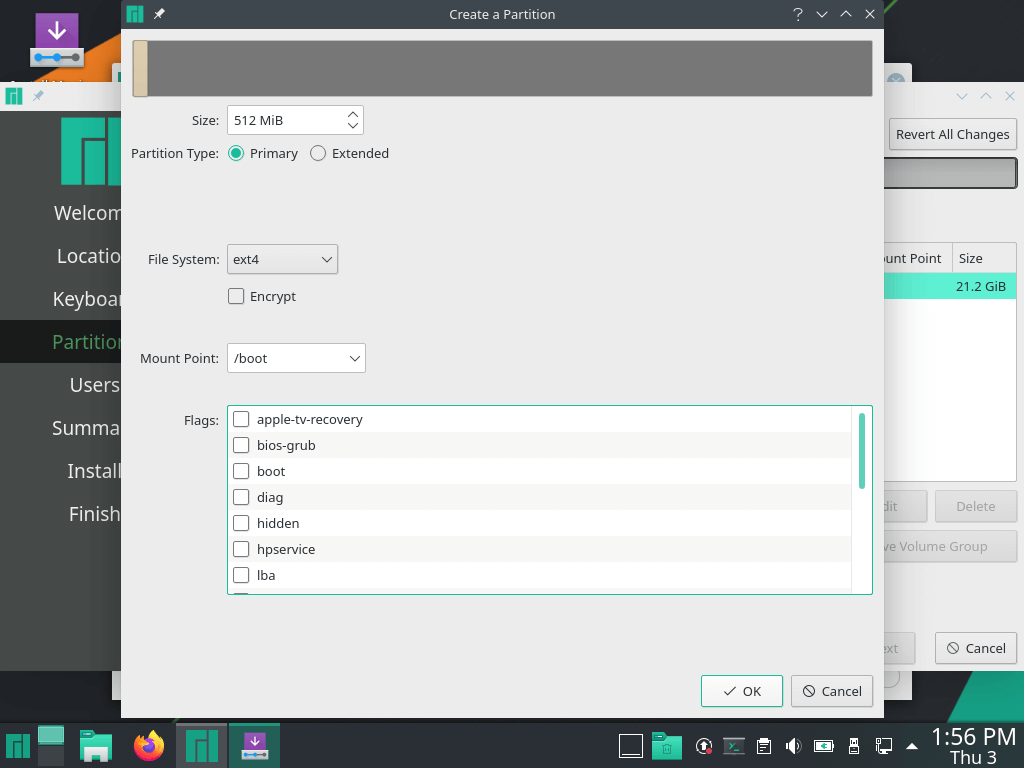
The partition table now looks as shown below. A careful look shows that the boot partition is now created and also some remaining free space.

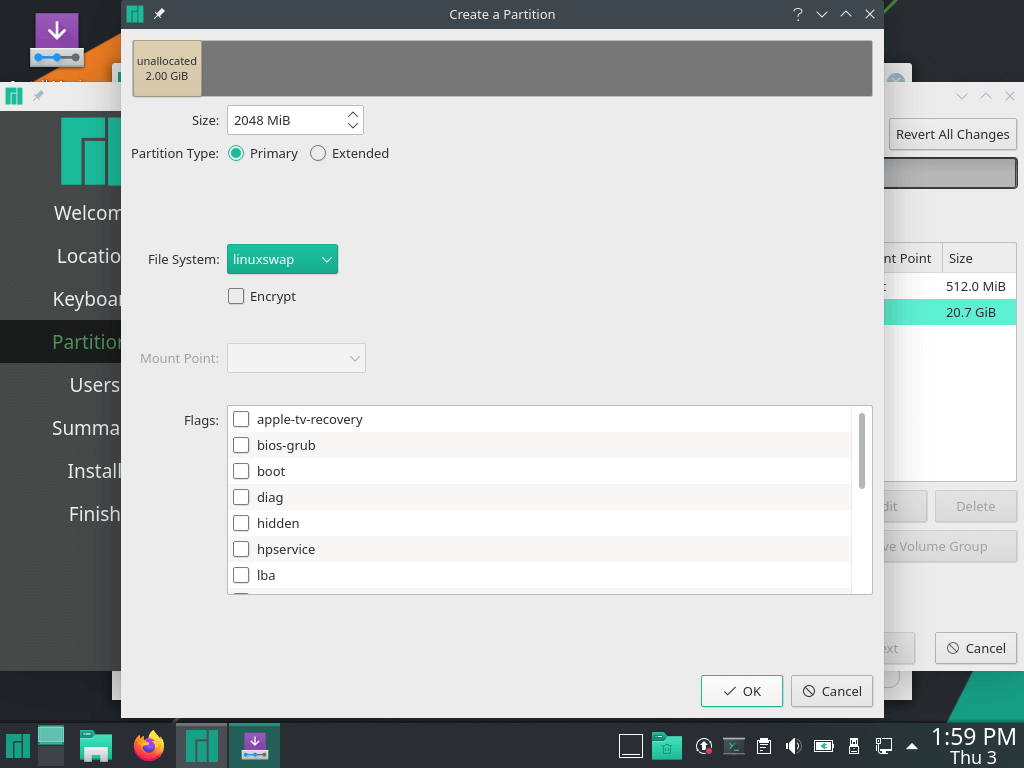
Create a Swap Partition
9. To create swap space, again, click on the ‘New Partition Table’ button and follow the steps shown. Notice that when you select the file system as ‘LinuxSwap’ the mount point is grayed out and cannot be created.
This is because Swap is a virtual memory space that is used when the main memory begins to get used up and not a mount point that can be used for data storage.
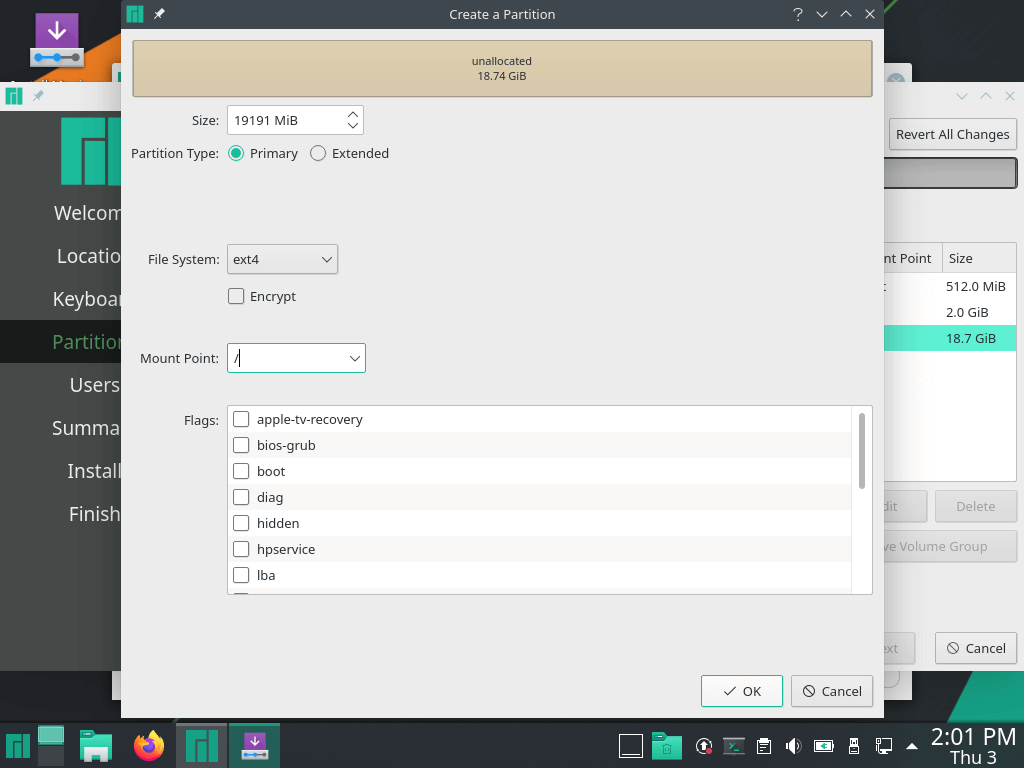
Create Root Partition
10. With the remaining free space, now create the root partition.
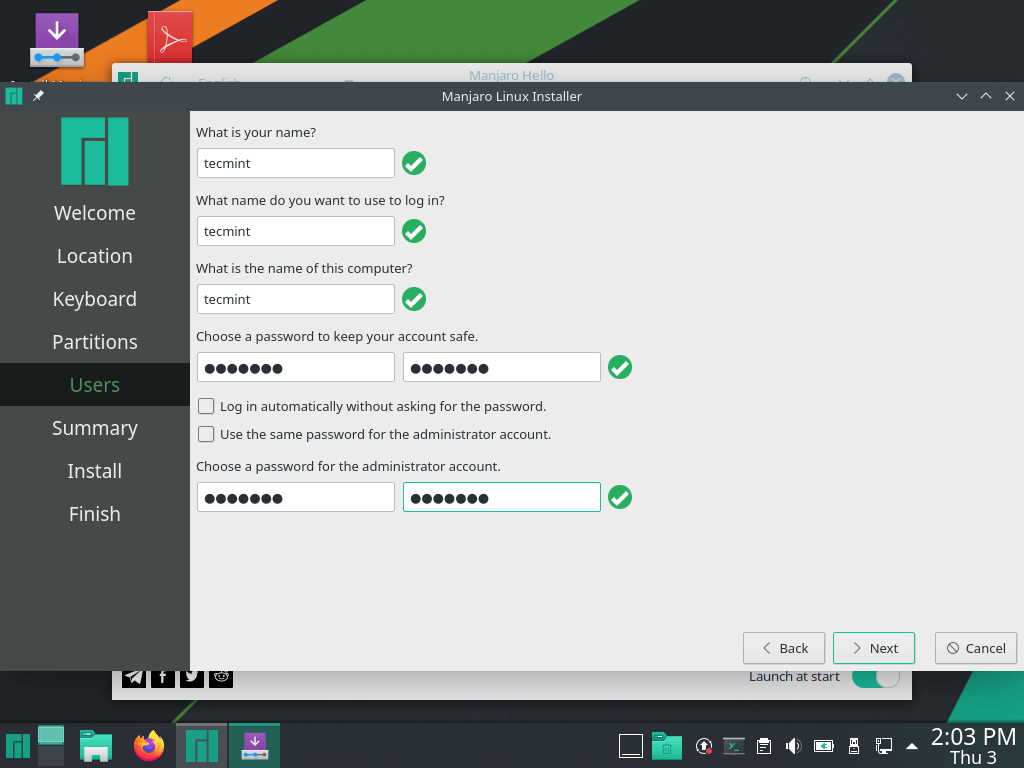
Create a User Account
11. In the next step, create a regular user account by providing account details such as the username, password as well as root password. Provide all the required details and hit ‘Next’.
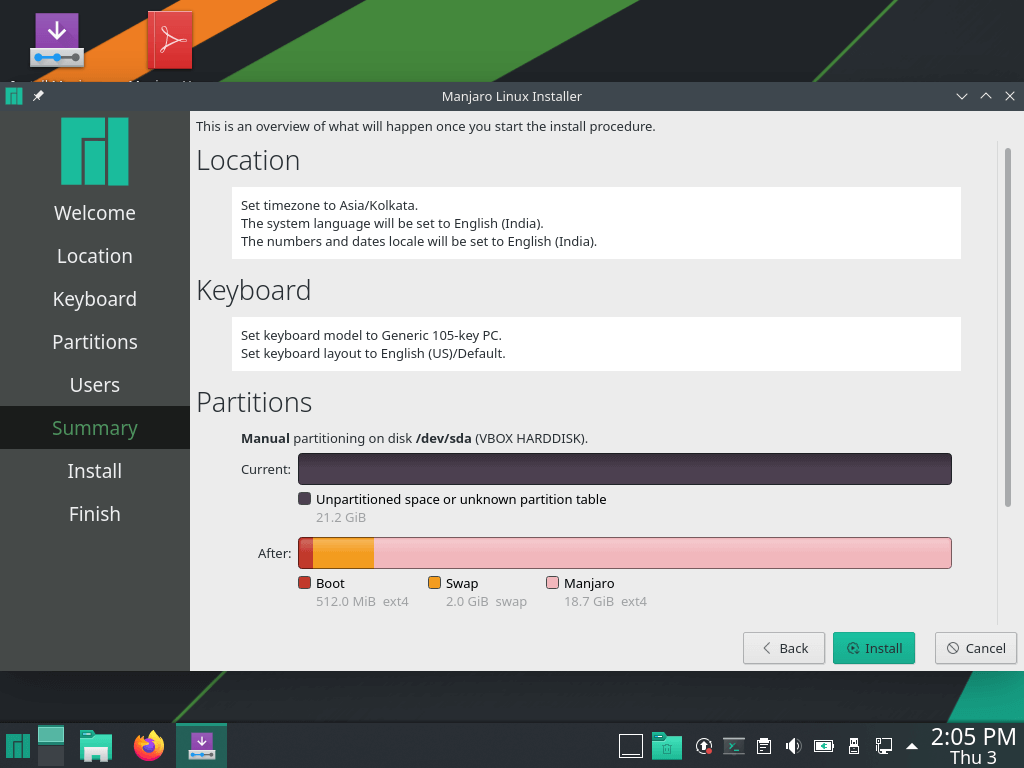
Manjaro Installation Summary
12. The next step gives a summary of all the settings that you have made from the start. It’s prudent to take your time and ensure all is well. If all sits well with you, click the ‘Install’ button. If you need to make a few changes, click on the ‘back’ button.
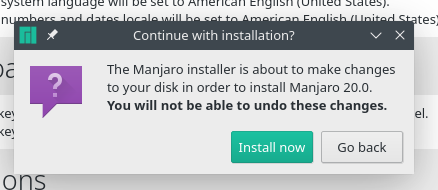
Begin Manjaro Installation
13. Upon clicking on the ‘Install’ button, a pop-up will be displayed, prompting you to proceed with the installation. Click on ‘Install now’. Also, if you have any misgivings about going forward and perhaps you need to have a look at something, hit ‘Go back’
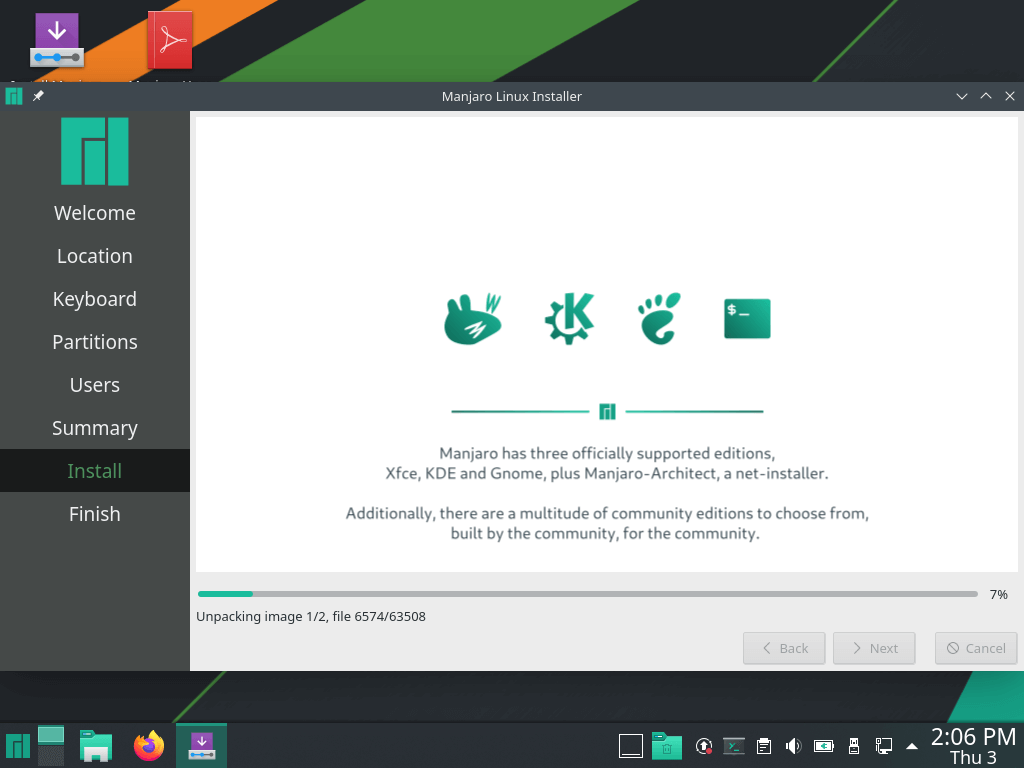
14. Thereafter the installation will commence, with the installer creating the system partitions, installing all the software packages, and the grub bootloader.
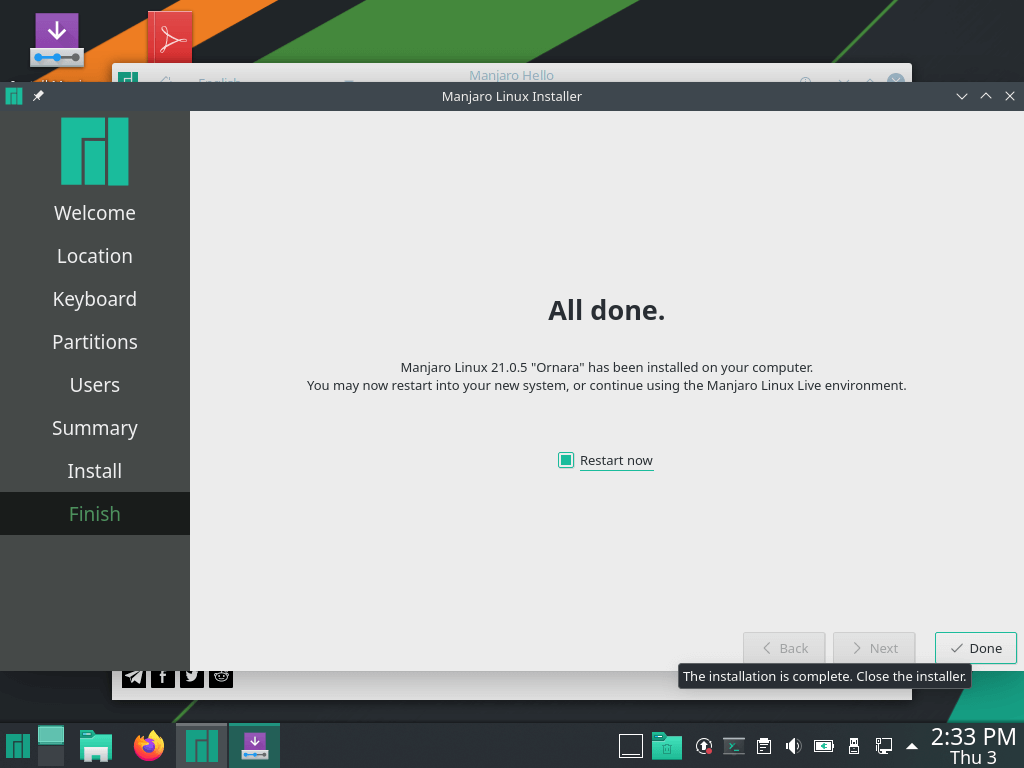
15. Once the installation is complete, you will be prompted to reboot the system as shown.
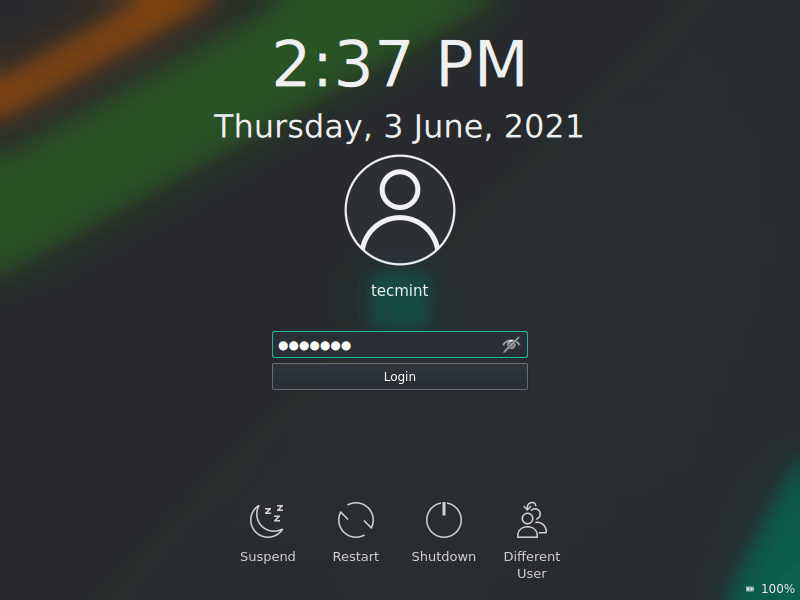
16. Your system will reboot presenting you with the screen below. Provide your login details and click on the ‘Login’ button.
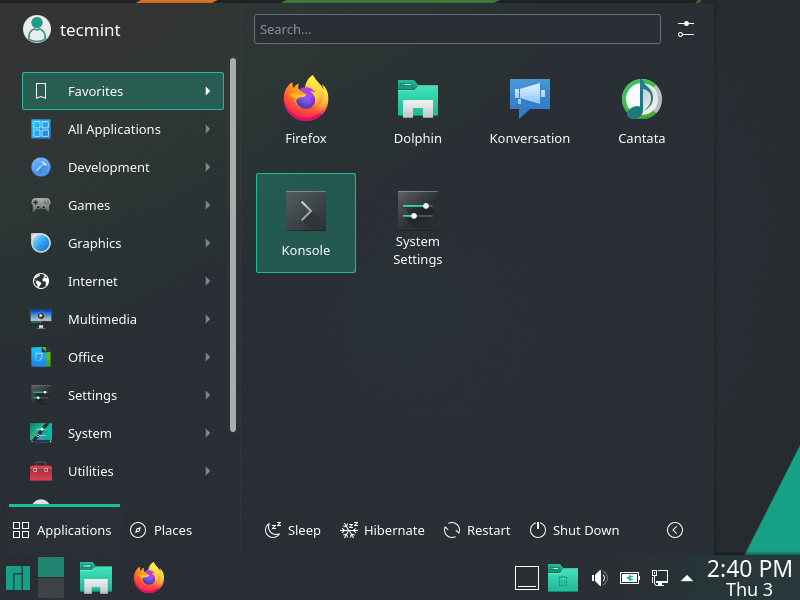
17. This ushers you into Manjaro 21’s desktop as shown below. You can now enjoy the new look theme and features that ship with the latest release.
And this brings us to the end of our topic today on the installation of Manjaro 21.0. Feel free to send us some feedback in case of any clarification.

Thanks, guys really helpful…
How do i fix the Wi-Fi isdisabled by hardware switch error while trying to connect to the web with WiFi. Thanks
You need to enable the wifi by pressing a button/switch on your pc/laptop.
Hello I’ve installed manjaro xfce edition 0.8.10 today. After complete installation i cannot login into manjaro even though i have correctly entered the username and password. Please help.
Hi, I have been trying to use Manjaro on VirtualBox
Could you please tell me how I do this because I would like to start running Manjaro, but I want to test it first.
Thanks,
Dear MaxTheCoder, so where is the problem?
Have you setup virtualbox?
If yes then boot and install.
If not tell us where you are stuck.
Loosely, what you want do is:
– open virtualbox
– create a new VM (arch linux)
– go to settings; disable floppy in boot order
– add your ISO to the virtual CD/DVD drive
– ^ be sure to not place your ISO on the host desktop
– run Manjaro, the rest is self explanatory and on this webpage
– good luck and welcome!
I have been using Manjaro since reading your review. I’m an advanced newbie who had no problems installing or configuring the desktop to my liking.
I installed Google Chrome, setup Skype and am learning how to video edit using Kdnlive.
I use Manjaro “Cup of Linux” version from Spatry.
My system
CPU: Intel Core2 Duo CPU E8400 @ 3GH GPU: GeForce 8400 GS Rev. 3 RAM: 2g
Thanks,
Paul
Thanks @ Paul von Elsner,
for your time and feedback.
I’m having a problem with the Majaro XFCE-netbook. The installation works fine on my asus laptop and loaded fine too. But with my acer laptop, it’s always rebooted to “operating system not found”. I have checked the iso installer and no error. I don’t know anymore how to solve this.
I thought it might be the grub problem so I installed it alongside Ubuntu. Then tried not installing the bootloader (because there is Ubuntu GRUB already) but it is still the same problem after reboot “operating system not found”.
I downloaded the iso from the website directly (“Manjaro Community Edition”).
The issue with live refusing to login is being addressed. Several users have reported it in the forum. Did you try from USB or DVD, as it appears that this happens mostly on DVD. If you create a bootable USB it works fine.
So? I tried the DVD on 2 different machines, I still can’t run it. Impossible to log in. How do you manage to run it? You won’t get a lot of users with this kind of bug.
I have a issue with linux when multiple apps are using internet , for eg , i am using transmission and firefox/epiphany , i would prefer firefox/epiphany to get higher priority/bandwidth but transmission does not allow firefox/epiphany to use the BW and firefox is waiting indefinitely and transmission is using full BW ,
Any suggestion for my issue.
Very Nice Article, but archlinux works best for me , i am newbie with computers but i did not find archlinux installation difficult as some suggest and OS management including pacman too very easy.
Once you get a hang of archlinux you will not use any other distro.
Great work.
I am trying to log in a live DVD with user manjaro and password manjaro but the login fails. What to do?
Dear @ Gilbert Dion,
From where did you downloaded the ISO image?
Please Use the Official Download Mirror, as suggested above in our download section.
I should login automatically without the need of any password in Live Mode.
Feel free to contact us, for any further assistance.
I downloaded the ISO image (manjaro-xfce-0.8.9-x86_64.iso) from right here on this page. It keeps rebooting wether I let it login automatically or I type a login name & password
hould I Try the 32 bit version?
Dear Gilbert Dion,
In some cases (on some machine) it was found, Users could not login to Manjaro. It is Ridiculous.
In Live mode it should login directly.
i am Hereby creating a thread in Manjaro User Group, to fix the issue/ for a solution.
Thank you. I find it strange that this behaviour occurs on some machines but not on others. I just tried Manjaro Live CD on a third machine (Acer Extensa 44420, 2008) and it logs in directly.
Same thing happened to me too. Manjaro kept on rebooting to login screen each time I put in the required user and password. Very weird!
While running the 64 bit version from the DVD in ‘LIVE’ mode I wanted to install the updates which requires a root password. I figured out that this password is ‘manjaro’ (without the quotation marks)