Hi all. Before we start the second part, let’s review about what we have done in Part 01. In Part 01 of this clustering series, we’ve discussed about clustering technique and in which cases it can be used along with the advantages and disadvantages of clustering. And also we have covered the pre-requisites for this setup and what each package will do after we configured the kind of a setup.

You can review Part 01 and Part 03 from below links.
- What is Clustering and Advantages/Disadvantages of Clustering
- Fencing and Adding a Failover to Cluster – Part 3
As I said in my last article, that we prefer 3 servers for this setup; one server act as a cluster server and others as nodes.
Cluster Server: 172.16.1.250
Hostname: clserver.test.net

node01: 172.16.1.222
Hostname: nd01server.test.net

node02: 172.16.1.223
Hostname: nd02server.test.net
In today’s Part 2, we will see how to install and configure clustering on Linux. For this we need to install below packages in all three servers.
- Ricci (ricci-0.16.2-75.el6.x86_64.rpm)
- Luci (luci-0.26.0-63.el6.centos.x86_64.rpm)
- Mod_cluster (modcluster-0.16.2-29.el6.x86_64.rpm)
- CCS (ccs-0.16.2-75.el6_6.2.x86_64.rpm)
- CMAN(cman-3.0.12.1-68.el6.x86_64.rpm)
- Clusterlib (clusterlib-3.0.12.1-68.el6.x86_64.rpm)
Step 1: Installing Clustering in Linux
So let’s start installing these packages in all three servers. You can easily install all these packages using yum package manager.
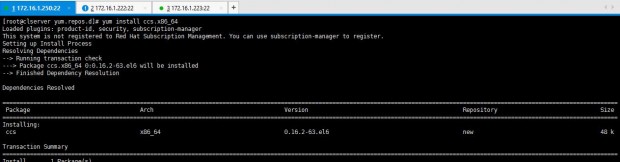
I will start by installing “ricci” package on all these three servers.
# yum install “ricci”
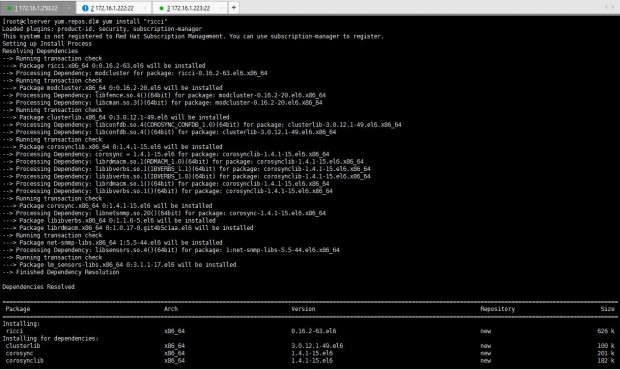
After ricci installation is done, we can see it has installed mod_cluster and cluster lib as its dependencies.

Next I’m installing luci using yum install “luci” command.
# yum install "luci"
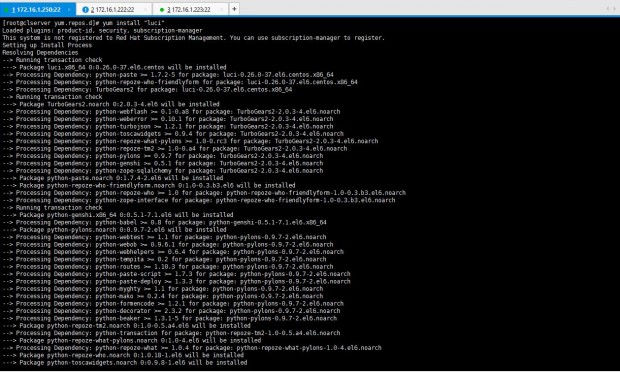
After the installation of luci, you can see it has installed the dependencies it needed.
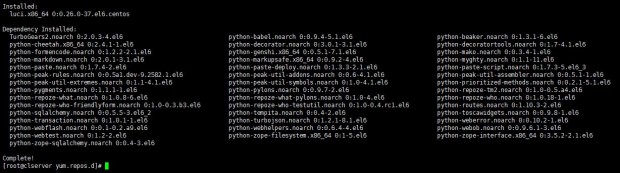
Now, let’s install ccs package in the servers. For that I entered yum install ccs.x86_64 which is shown in the list when I issued yum list |grep “ccs” or else you can simply issue yum install “ccs”.
# yum install “ccs”
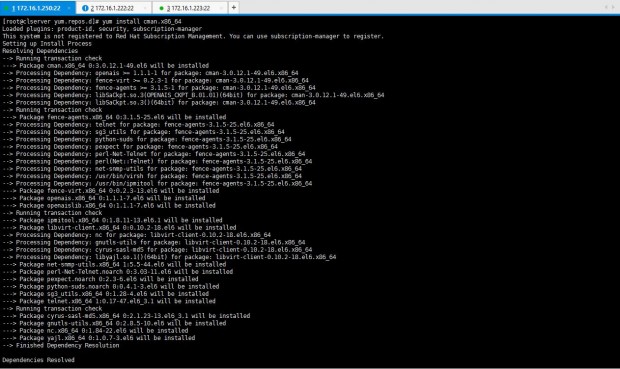
Let’s install cman as the last requirement for this particular setup. The command is yum install “cman” or yum install cman.x86_64 as shown in the yum list as I mentioned earlier.
# yum install “cman”
We need to confirm the installations are in place. Issue below command to see whether the packages we needed are installed properly in all three servers.
# rpm -qa | egrep "ricci|luci|modc|cluster|ccs|cman"

Perfect all the packages are installed and all we need to do is configuring the setup.
Step 2: Configure Cluster in Linux
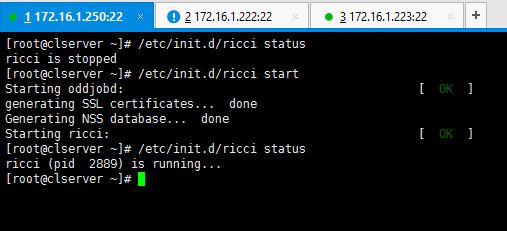
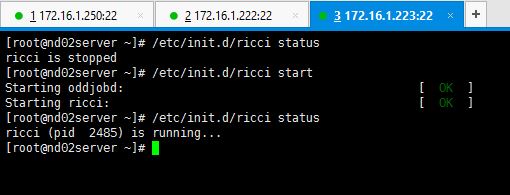
1. As the first step for setting up the cluster, you need to start the ricci service on all three servers.
# service ricci start
OR
# /etc/init.d/ricci start

2. Since ricci is started in all servers, now it’s time to create the cluster. This is where ccs package comes to our help when configuring the cluster.
If you don’t want to use ccs commands then you will have to edit the “cluster.conf” file for adding the nodes and do other configs. I guess easiest way is to use following commands. Let’s have a look.
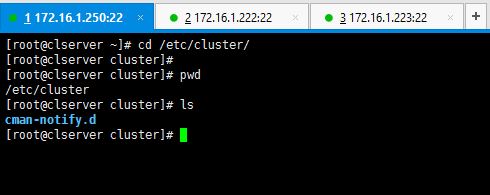
Since I haven’t created the cluster yet, there’s no cluster.conf file created in /etc/cluster location yet as shown below.
# cd /etc/cluster
# pwd
# ls
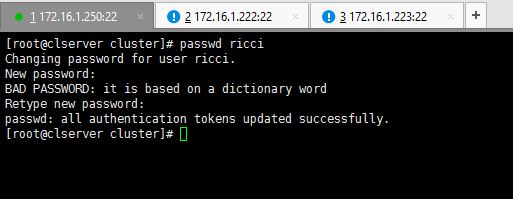
In my case, I do this in 172.16.1.250 which is dedicated for cluster management. Now onwards, everytime we try to use ricci server, it will ask for ricci’s password. So you will have to set the password of ricci user in all servers.
Enter passwords for ricci user.
# passwd ricci
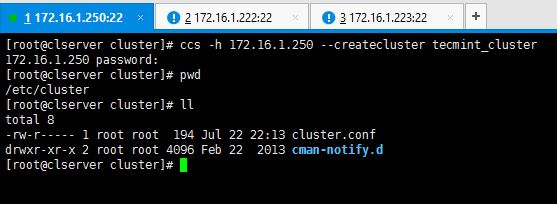
Now enter the command as shown below.
# ccs -h 172.16.1.250 --createcluster tecmint_cluster
You can see after entering above command, cluster.conf file is created in /etc/cluster directory.
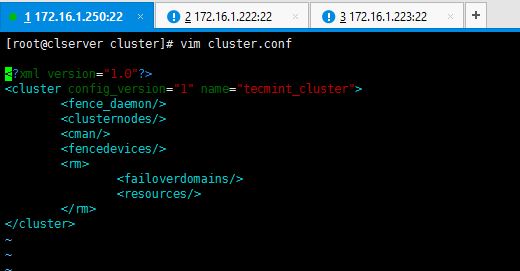
This is how my default cluster.conf looks like before I do the configs.
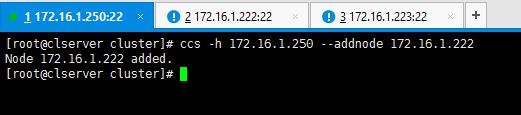
3. Now let’s add the two nodes to the system. In here also we use ccs commands to make the configurations. I’m not going to manually edit the cluster.conf file but use the following syntax.
# ccs -h 172.16.1.250 --addnode 172.16.1.222
Add the other node too.
# ccs -h 172.16.1.250 --addnode 172.16.1.223

This is how cluster.conf file looks like after adding the node servers.
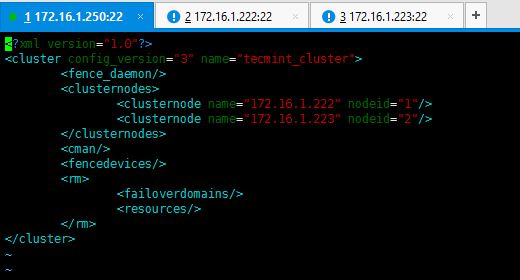
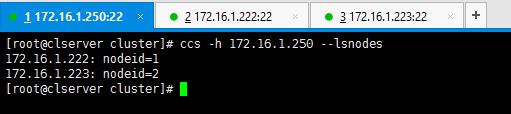
You also can enter below command to verify node details.
# ccs –h 172.16.1.250 --lsnodes
Perfect. You have successfully created the cluster yourself and added two nodes. For further details about ccs command options, enter ccs –help command and study the details. Since now you know how to create the cluster and add nodes to it, I will post Part 03 soon for you.
Thank you, till then keep connected with Tecmint for handy and latest How To’s.


Is there a way to register Nagios or monitoring tools with Linux HA (Pacemaker, Corosync, pcs)?
Also, I would appreciate it if you leave a comment to see if there are any websites you can refer to.
Dependency missing. Where I can get with all needed dependency
[root@node01 ~]# ccs -h node01 –createcluster clus_cluster
Unable to connect to node01, make sure the ricci server is started.
[root@node01 ~]# service ricci status
ricci (pid 2416) is running…
sir , can help me to figure this out , why its showing like “make sure the ricci server is started.” as i ain’t able to proceed further
Good one mate.
Cannot install ricci in Centos 7. It says”No package ricci available.Error: Nothing to do”. Please help in configuring the clustering in Centos 7.
As I’ve mentioned in some other queries on the same publish, some packages are deprecated in CentOS 7and RedHat 7. There are new packages introduced.
Hi Thilina,
great article, appriciate.
but i’m stuck at –>
$ ccs -h 192.168.1.201 –addfenceinst dsfence 192.168.1.202 Method1
Method ‘Method1’ not found in node ‘192.168.1.202’
I was installing all cluster package (ricci, clusterlib, modcluster, luci, ccs, cman) on master-server
should i install luci, ccs and cman on others 2 servers?
pls advice
Enroen,
You are correct. The packages should be available in each node.
can anyone share the DRBD configuration steps.
I am unable to install ricci on my Centos 7.
Hi Nauman,
As I’ve mentioned in some other queries on the same publish, some packages are depricated in CentOS 7and RedHat 7. There are new packages introduced.
Hi Thilina,
I have created Clusters using LUCI Cluster.conf is created in Nodes but it did not created in master server. I transferred cluster.conf to master using scp.
I have already raised this query in other posts also, that after creating clusters i am unable to start cman service in master server.
Unable to get the configuration.
Cannot find node name in cluster.conf
cman_tool :Corosync daemon could not start.Check Cluster logs for details.
Hi, having an issue similar to Rakesh – ‘Cannot find node name in cluster.conf’, therefore cman_tool will not start.
Any resolution found?
Rakesh and Tom,
Does the entries in the conf can be resolved by master server? You may check the hosts file file and verify.
I believe only Nodes will have cman running on it.Not the Cluster manager.
So cman will work for both nodes not Cluster Server
Wait, so are all three servers serving content? Such that the CMS server, Node 1, and Node 2 could all be running an Apache webserver? Or is the CMS server not affiliated in this matter?
Hi Clark,
The CMS does not affiliated in any content serving activity. It only serves the purpose of handling Nodes. But if you want the CMS too to serve the content, it not impossible but not recommended by the good standards.
Has anyone tried this on Fedora? I am looking to use this for a school project and I want to use more up to date software.
Hi Duncan,
I’ve not used this in a Fedora environment. Try it and let the community know. It’ll be a good research for you.
Hi Thilina,
Thanks for Posting this articles. It’s really helpful for the beginner. Can you just help out by posting the last part i.e Part 4
Awsum ,,very useful and easy to understand.
Thanx Rakesh :)
Hi,
The article was excellent.
I have face the following error.
Error: Unable to retrieve information from ricci (is modcluster installed?)
#ccs -h 192.168.6.1 –createcluster eq_cluster
I have checked modcluster package with yum
modcluster.x86_64 0.16.2-29.el6
Packages was installed.
Pls can u guide
while try to execute
Hi Ram,
Can you tell me wht RHEL version you’re using
Thanks for your post, very interesting and complete. I’m waiting the third part of this tutorial xD
Hi Daniel,
Thanx for your interest. Part 3 is now available.
https://www.tecmint.com/fencing-and-adding-a-failover-to-clustering-server/
Hi Daniel,
Thank you for your interest. Third part is now available.
https://www.tecmint.com/fencing-and-adding-a-failover-to-clustering-server/
Thank you for your reply. I’m reading the third part.
I have a question:
Why you use 3 servers? I set up a cluster with 2 nodes but i have used only 2 servers, and in the first node i have installed luci and i have configured all elements of the cluster (except for the fence device i’m just using quorum disk)
You are right. Using 2 servers saves the resources. But in here I used 3 servers just give a clear idea to the users when they read the post. Otherwise a newbie could confuse when I use the same IP to both node and the cluster manager. No issue using 2 servers. :)
Thank for you reply. About the fence device, if i will to make a virtual fence like you, what is the ip address that i must use? For default a cluster use a multicast IP address, but, there is an option to use a unicast UDP packet, that would be an IP address that both servers can reach, right?
This is great, thx. Looking forward the 3rd part.
Hi Krisztián,
Thanks very much for your interest. Will post the part 3 and 4 soon. :)
Hi Krisztián,
Part 3 is availabale now.
https://www.tecmint.com/fencing-and-adding-a-failover-to-clustering-server/
Why not use luci? It will save you trouble in typing via command line.. luci is part of conga suites together with ricci and its a web base and its very easy to use and will show same result
Hi Mark,
Doing everything using a GUI is not for an Engineer who seek to gain knowledge. By using commands not only you know what happens after you executing such commands but also give you opportunities to gain knowldege that way. But you are correct. using luci interface will make things easier . But less fun.
Great article :)
Thanx Charith :)
Great article. Have not used what you are using. But will take a look :D. i have mostly used xCAT “Xtreme cluster administration toolkit” , which i think is a really good.
Hi Jonathan,
Thank you. I will definitely try xCAT soon
Excellent article..eagerly waiting for Part 3 and Part 4.
Thanx for your interest Mayuresh. Will post the others soon
Hi Mayuresh,
Part 3 is availabe now.
https://www.tecmint.com/fencing-and-adding-a-failover-to-clustering-server/
Thanks now waiting for the last part. :D
Will post it soon :)
Perhaps you did and I missed it, or are planning on doing it before finishing this series, but you may want to clarify that this is valid for CentOS/RHEL up to version 6. I could not find most of the packages listed in this article in my RHEL 7 box (unless they can be found in some fancy repository :) ). Nice work!
Thanx for pointing it out Gabriel. For some reason, RHEL/CentOS have deprecated the packages above. You can use corosync, pacemaker, pcs instead
Excelent post Thilina. Could you update this for RHEL/CentOS 7 please? Or do you have special post for it?
Thanks!