Most people setting up a Rocky Linux server don’t realize that Cockpit is often already available or just a quick install away.
You simply enable the service, open the firewall port (usually 9090), and then log in from your browser using the same username and password you already use for SSH.
Once you’re inside Cockpit, you can manage common server tasks like checking system performance, viewing logs, managing services, and handling storage, all from a clean web interface that is designed to make basic server management much easier, especially if you are new to Linux.
If you need something more powerful for hosting-style control, like managing Apache, MySQL, DNS zones, or running a full control panel setup, then Webmin is worth looking at instead, because it goes much deeper and exposes a lot more system configuration options.
But for a fresh Rocky Linux server, day-to-day management, and getting comfortable with Linux administration, Cockpit is usually the best and simplest place to start.
Step 1: Check That Cockpit Is Installed
On Rocky Linux 10, Cockpit is usually available by default, but it’s still a good habit to verify before you try enabling anything.
Open your terminal and run:
rpm -q cockpit
If Cockpit is installed, you’ll see output like this:
cockpit-356-1.el10.rocky.0.1.x86_64
If instead you see something like:
package cockpit is not installed
Then you just need to install it manually.
sudo dnf install -y cockpit
This pulls Cockpit directly from Rocky Linux’s default repositories, so you don’t need to add any third-party repos or do extra configuration.
Once the installation finishes, you’re ready to enable and start using it.
Step 2: Enable and Start Cockpit
Cockpit works a bit differently from most services because it uses something called socket activation, which means it does not run all the time. Instead, it waits quietly and only starts when you open the web interface on port 9090.
To enable it and make sure it starts automatically after reboot, run:
sudo systemctl enable --now cockpit.socket
Now check if it is running correctly:
sudo systemctl status cockpit.socket
You should see output similar to this:
● cockpit.socket - Cockpit Web Service Socket
     Loaded: loaded (/usr/lib/systemd/system/cockpit.socket; enabled; preset: enabled)
     Active: active (listening) since Wed 2026-06-03 09:19:21 IST; 5s ago
 Invocation: d5062b17e260469b867f8b9b19c07039
   Triggers: ● cockpit.service
       Docs: man:cockpit-ws(8)
     Listen: [::]:9090 (Stream)
    Process: 7747 ExecStartPost=/usr/share/cockpit/issue/update-issue  localhost (code=exited, status=0/SUCCESS)
    Process: 7754 ExecStartPost=/bin/ln -snf active.issue /run/cockpit/issue (code=exited, status=0/SUCCESS)
      Tasks: 0 (limit: 51091)
     Memory: 8K (peak: 2.7M)
        CPU: 14ms
     CGroup: /system.slice/cockpit.socket

Jun 03 09:19:21 localhost.localdomain systemd[1]: Starting cockpit.socket - Cockpit Web Service Socket...
Jun 03 09:19:21 localhost.localdomain systemd[1]: Listening on cockpit.socket - Cockpit Web Service Socket.
Here’s what this means in plain language:
- active (listening) means the cockpit is ready and waiting for you to open it in a browser on port 9090.
- enabled means it will automatically come back after a reboot without you needing to run any command again.
At this point, Cockpit is running in the background in a “ready but idle” state.
systemctl and managing services on Linux, the 100+ Essential Linux Commands course covers it properly with real server examples.Step 3: Open the Firewall for Cockpit
On Rocky Linux, incoming connections are blocked by default for security, which means even if Cockpit is running, you still won’t be able to access it from your browser until you allow it through the firewall.
The good news is that Cockpit already has a predefined firewall service in firewalld, so you don’t need to open a port manually, but just allow the service by name.
sudo firewall-cmd --add-service=cockpit --permanent
sudo firewall-cmd --reload
Now check if it’s enabled:
sudo firewall-cmd --list-services
You should see something like:
cockpit dhcpv6-client ssh
If the cockpit appears in the list, the firewall is correctly configured, and remote access is allowed.
A quick breakdown of what you just did:
--add-service=cockpitallows Cockpit traffic through the firewall.--permanentmakes sure the rule survives a reboot.--reloadapplies the change immediately without restarting the server.
If you ever get an error like “FirewallD is not running”, it simply means the firewall service itself is inactive, so start it with:
sudo systemctl enable --now firewalld
Then re-run the two firewall commands again.
Step 4: Log Into Cockpit
Now that everything is set up, it’s time to access Cockpit from your browser.
Open your web browser and go to the following url and make sure to replace your-server-ip with the actual IP address of your Rocky Linux server.
https://your-server-ip:9090
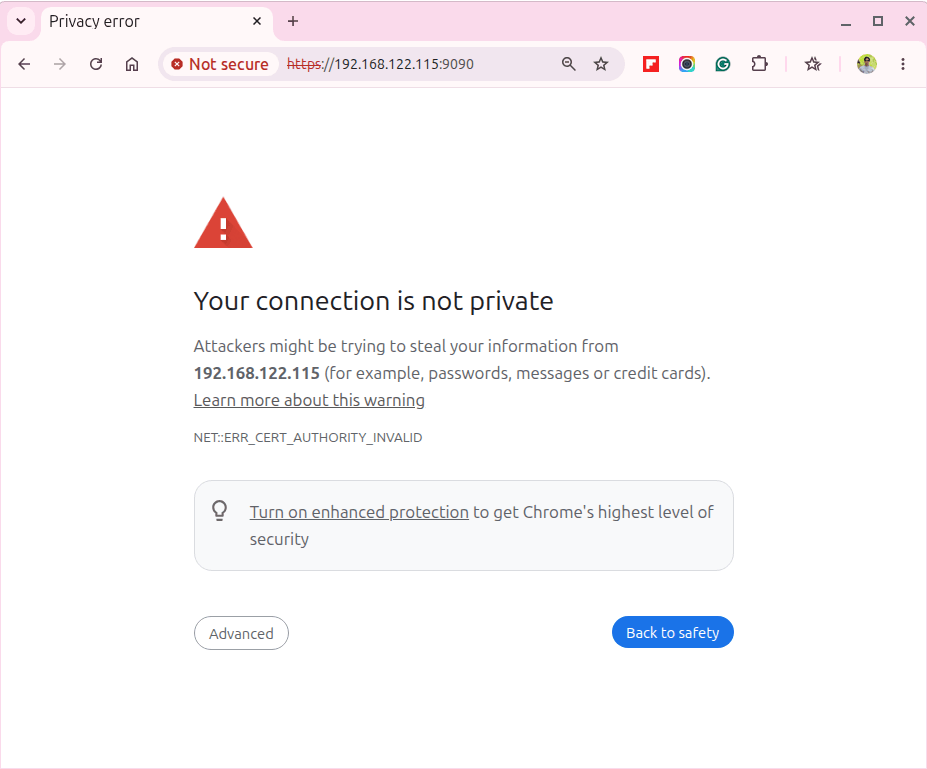
The first thing you’ll likely see is a security warning about an untrusted certificate, which happens because Cockpit uses a self-signed SSL certificate by default.
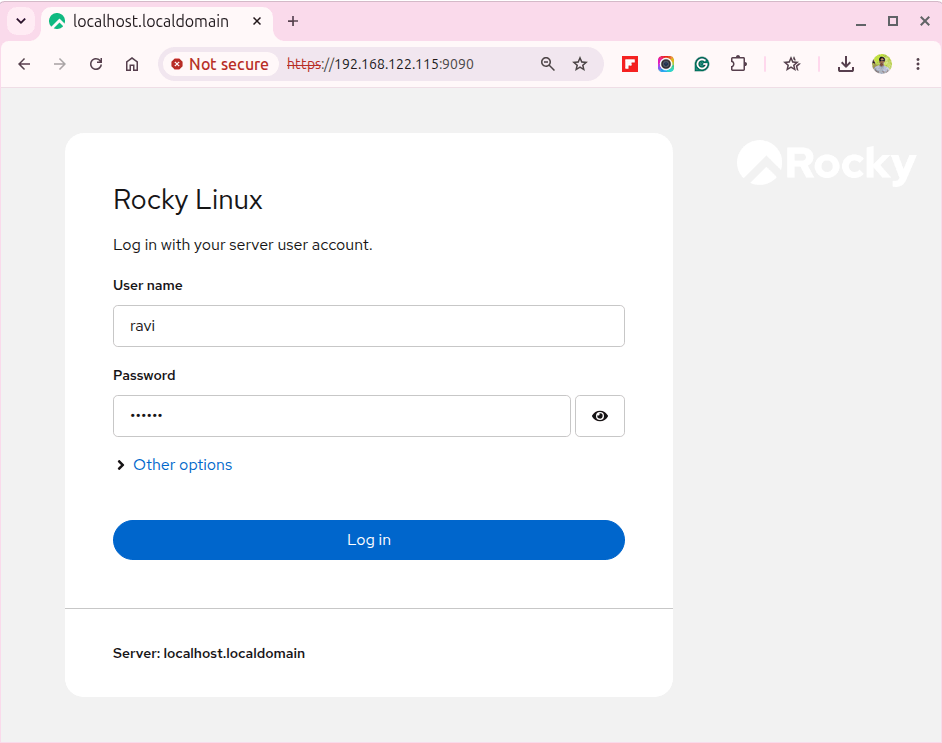
After bypassing the warning, you’ll reach the Cockpit login page, where you can Log in using your normal Linux system credentials (the same username and password you use for SSH).
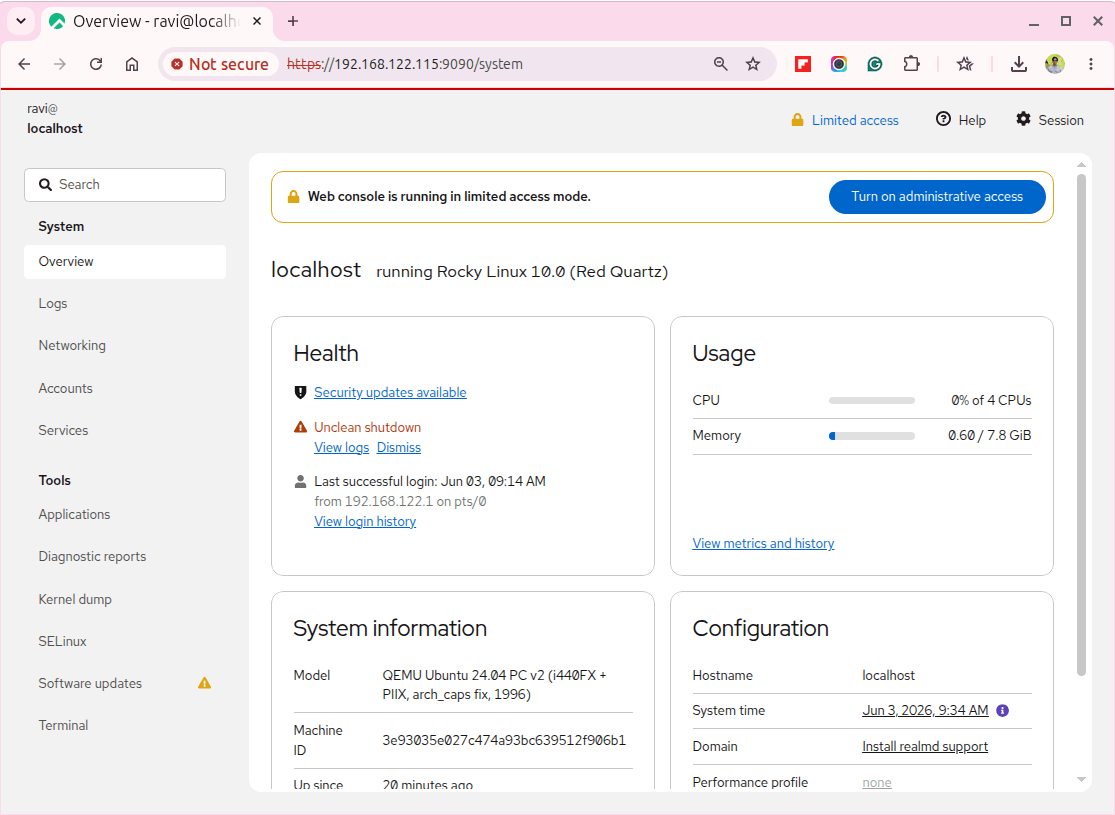
Once you log in, Cockpit takes you straight to the system overview dashboard, where you’ll see a live summary of your server, including:
- Hostname and system uptime
- CPU usage
- Memory usage
- Disk usage
- Network activity
Everything is shown in real time, so you can quickly understand how your server is performing without running any terminal commands.
At this point, you’re fully inside the system. From here, you can start managing services, storage, logs, and users directly from the web interface without touching the command line.
Getting Started with the Cockpit Dashboard
Once you’re inside Cockpit, the left sidebar becomes your main control panel. Think of it as a visual version of all the Linux commands you already know, just easier to navigate and harder to break accidentally.
Here are the sections you’ll use most on a fresh Rocky Linux setup.
Services
This is where you manage everything running on your server, so click Services to see all systemd services.
From here you can:
- Start or stop a service.
- Restart services safely.
- Enable or disable services at boot.
- Check service status in real time.
It’s basically a graphical version of systemctl, showing you the same status details but without needing to remember command flags.
Storage
Click Storage to see how your disks are being used.
You can view:
- All connected disks and partitions.
- Mount points and filesystem usage.
- Disk usage in a clean visual layout.
- SMART health status for physical drives.
- LVM volumes if you configured them during install.
This is especially useful when you want to quickly check disk space or confirm if a new drive is detected.
Networking
The Networking section shows how your server is connected.
Here you can:
- View active network interfaces.
- Monitor live upload and download traffic.
- Configure firewall rules visually.
- Add or remove rules without using
firewall-cmd.
Any change you make here is instantly reflected in firewalld as well, so both tools stay in sync.
Logs
Click Logs to access the system journal, where you do not need to type long commands like journalctl -xe, you can:
- Filter logs by time range.
- Search by service name.
- View errors and warnings quickly.
- Drill into specific system events.
It’s one of the fastest ways to debug issues when something stops working unexpectedly.
Terminal
The Terminal tab gives you a full browser-based shell on the server, and it behaves exactly like an SSH session, but inside your browser.
You can:
- Run any Linux command.
- Install or update packages.
- Edit configuration files.
- Troubleshoot services directly.
It’s especially useful for quick tasks where opening a separate SSH client feels unnecessary.
At this point, you essentially have a full graphical control layer on top of your Rocky Linux server, without losing access to the command line when you need it.
Accessing Cockpit Remotely Over SSH
Opening port 9090 directly to the internet is not a good idea, as it exposes the Cockpit login to anyone who can reach your server, which increases the risk of brute-force attempts.
A safer and standard approach is to use an SSH tunnel that keeps port 9090 completely closed to the outside world while still letting you use the full web interface.
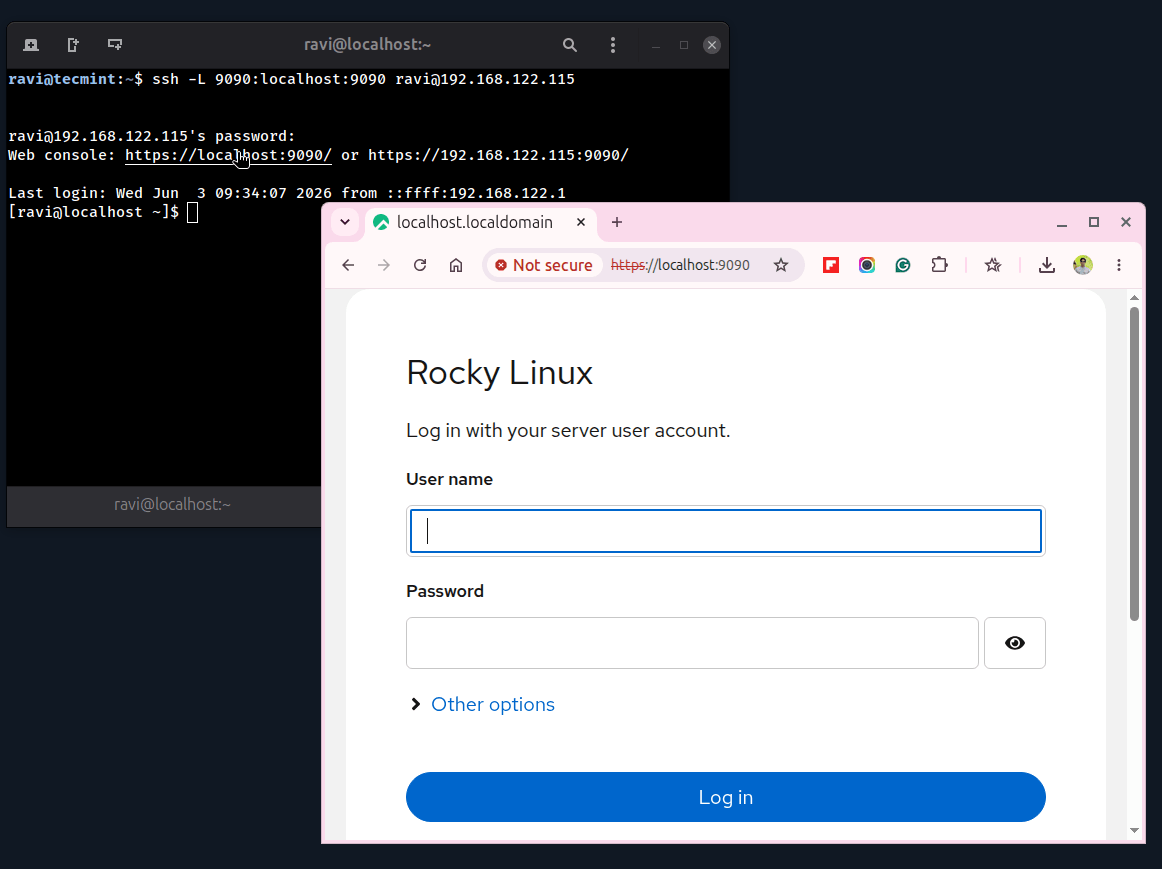
First, create an SSH tunnel from your local machine.
ssh -L 9090:localhost:9090 username@server-ip
If you don’t want to keep a terminal window open, you can run the tunnel in the background:
ssh -N -f -L 9090:localhost:9090 username@server-ip
Then open your browser and go to:
https://localhost:9090
What happens here is simple:
- Your browser connects to
localhost:9090on your own machine. - SSH securely forwards that traffic to the remote server.
- Cockpit runs normally on the server, but is never exposed publicly.
This setup is commonly used for securely accessing admin panels without exposing them publicly.
To stop the background tunnel when you’re done:
ps aux | grep "ssh -N -f"
kill pid
Replace pid with the process ID shown in the output.
Conclusion
Cockpit is already available on your Rocky Linux server, and setting it up is surprisingly quick. With just a few commands to enable it and a single firewall rule, you get a fully working browser-based management dashboard in under 5 minutes.
It is not meant to replace the terminal, and it does not try to, but instead, it gives you a simple, visual way to handle everyday server tasks.
For things like:
- Checking what is running on your system.
- Reading and filtering logs.
- Managing disks and storage.
- Monitoring CPU, memory, and network usage.
Cockpit is often the fastest and most convenient option right after a fresh install. If you need something more advanced that goes deeper into application-level control, such as managing Apache, MySQL, or DNS zones, then our Webmin guide on Rocky Linux is the next step.
And if you run into any issues or see an error that is not covered here, feel free to ask in the comments, and I’ll help you troubleshoot it.
Hi, I have some trouble with the web console terminal If I scroll more than 100000 lines it just stops. So I should reset the terminal…
Is there any other way to keep scrolling lines in the terminal?
I need this functionality for my SW demonstration…
If somebody knows how to do it. Please tell me the way to set up..
I’m not receiving email messages from the cockpit after installing and configuring. It performs the auto-updates but no emails.