Icinga2 is a powerful free and open-source monitoring tool that keeps an eye on your network resources and sends alerts or notifications in case of failure or outages. It also collects metrics from network resources that can help you generate performance data and create reports.
Icinga2 is scalable and it can monitor small to large and complex networks across various locations. In this guide, you will learn how to install the Icinga2 monitoring tool on Ubuntu 20.04 and Ubuntu 22.04.
Step 1: Install Apache, MariaDB, and PHP
We start off by installing Apache, MariaDB, and PHP with additional PHP modules which are required during the final setup of Icinga2 on a web browser.
$ sudo apt install apache2 mariadb-server mariadb-client mariadb-common php php-gd php-mbstring php-mysqlnd php-curl php-xml php-cli php-soap php-intl php-xmlrpc php-zip php-common php-opcache php-gmp php-imagick php-pgsql -y
Once installed, make sure all the services are running. If so, run the following commands.
$ sudo systemctl start {apache2,mariadb}
$ sudo systemctl enable {apache2,mariadb}
$ sudo systemctl status {apache2,mariadb}
Next, you need to use mysql_secure_installation script to set up the password for the database root account, remove anonymous users, disallow root login remotely and remove the test database.
$ sudo mysql_secure_installation
With the PHP modules in place, you need to modify the php.ini file which is the default configuration file for applications running on PHP.
Using your preferred editor, open the file. Here. we are using a nano command-line editor.
$ sudo nano /etc/php/8.1/apache2/php.ini   [On Ubuntu 22.04]
$ sudo nano /etc/php/7.4/apache2/php.ini   [On Ubuntu 20.04]
Make the following changes to the following parameters.
memory_limit = 256M
post_max_size = 64M
upload_max_filesize = 100M
max_execution_time = 300
default_charset = "UTF-8"
date.timezone = "Asia/Kolkata"
cgi.fix_pathinfo=0
For the date.timezone parameter, be sure to set it up to reflect your current time zone. Here is a list of supported times zones by PHP.
To apply the changes made, simply restart the Apache webserver.
$ sudo systemctl restart apache2
Step 2: Install Icinga2 on Ubuntu
With the PHP configuration out of the way, we will proceed and install Icinga2. However, the Icinga2 repository is not provided by the Ubuntu 20.04 repositories. As such, we need to manually add the repository to your system.
Therefore, start off by adding the GPG key using the curl command.
$ curl https://packages.icinga.com/icinga.key | apt-key add -
Next, create a repository file for Icinga2.
$ sudo vim /etc/apt/sources.list.d/icinga-focal.list
Add the following entries.
deb http://packages.icinga.com/ubuntu icinga-focal main
deb-src http://packages.icinga.com/ubuntu icinga-focal main
Save and exit the file.
To start using the repository, update the package lists as follows.
$ sudo apt update
Next, install Icinga2 and the monitoring plugins.
$ sudo apt install icinga2 monitoring-plugins

Once the installation is complete, enable and start the Icinga2 service.
$ sudo systemctl enable icinga2
$ sudo systemctl start icinga2
To confirm that the Icinga2 service is running, execute:
$ sudo systemctl status icinga2
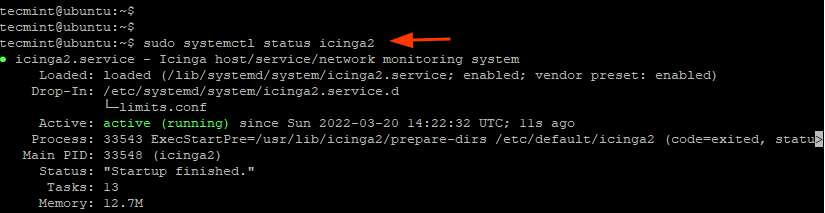
The output indicates that the Icinga2 daemon is running and we are good to go.
Step 3: Install the Icinga2 IDO Module
The Icinga2 Data Output (IDO) exports all the configuration and status information into a database. The IDO database is then used by Icinga Web 2 as a data backend.
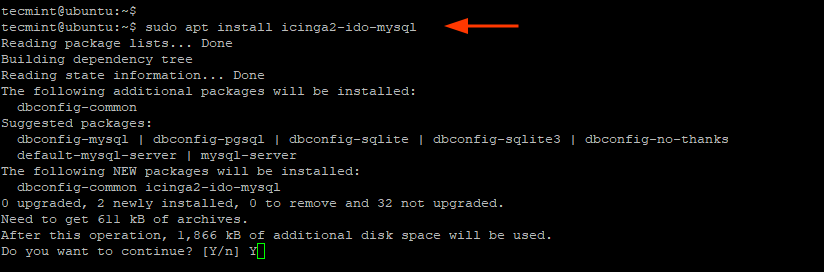
To install the module, run the command
$ sudo apt install icinga2-ido-mysql -y
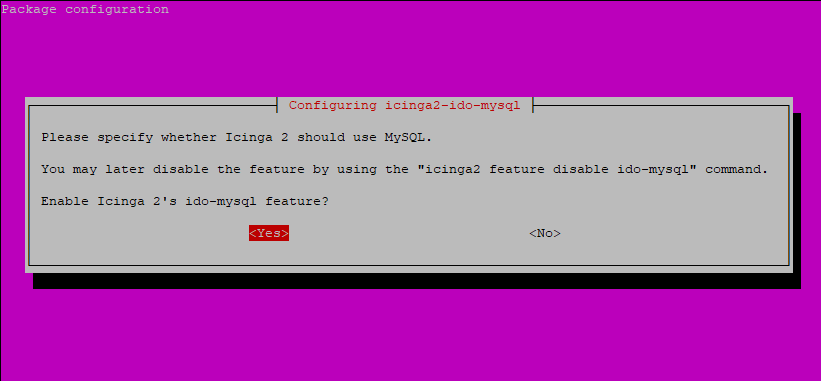
Along the way, a pop-up will be displayed on the terminal. To enable Icinga2’s ido-mysql feature, select ‘Yes‘ and press ENTER.
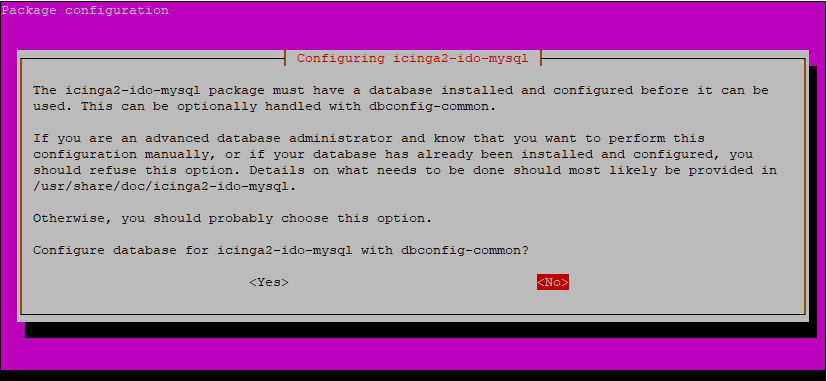
The icinga2-ido-mysql package requires a database installed and configured. This can be handled with dbconfig-common, but we are going to create the database ourselves. So select ‘No‘ and refuse this option.
Next, log in to your MariaDB database server.
$ sudo mysql -u root -p
Then, create a database and a database user for the icinga2-ido-mysql package and grant the user all the privileges on the database.
> CREATE DATABASE icinga_ido_db;
> GRANT ALL ON icinga_ido_db.* TO 'icinga_ido_user'@'localhost' IDENTIFIED BY 'Password321';
> FLUSH PRIVILEGES;
> EXIT;
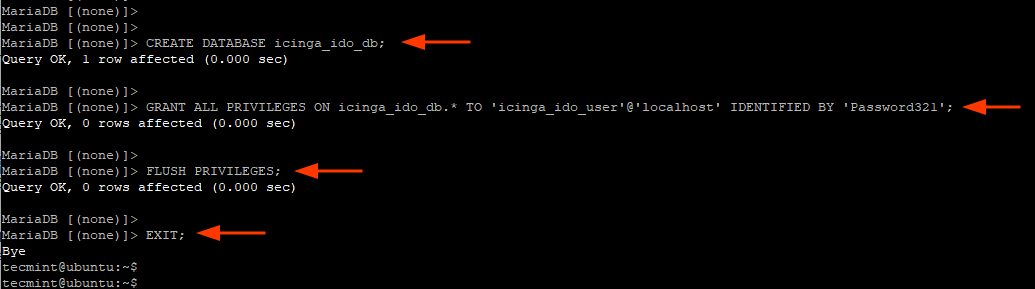
With the database in place, proceed and import the Icinga2 IDO schema using the command. You will be required to provide the database server’s root password.
$ sudo mysql -u root -p icinga_ido_db < /usr/share/icinga2-ido-mysql/schema/mysql.sql
Step 4: Enable the Icinga2 IDO Module
To enable the icinga2-ido-mysql database communication with Icinga Web 2, we need to go a step further and make changes to the default configuration file.
Open the icinga2-ido-mysql configuration file.
$ sudo vim /etc/icinga2/features-available/ido-mysql.conf
Edit the following entries and set them to match the icinga2-ido-mysql database details as specified in Step 3.

Save the changes and exit.
Then enable the icinga2-ido-mysql feature.
$ sudo icinga2 feature enable ido-mysql
For the changes to come into effect, restart Icinga2.
$ sudo systemctl restart icinga2

Step 5: Install and Setup IcingaWeb2
The last component to install and configure is IcingaWeb 2, which is a fast, powerful, and extensible PHP framework that acts as the front end to Icinga2.
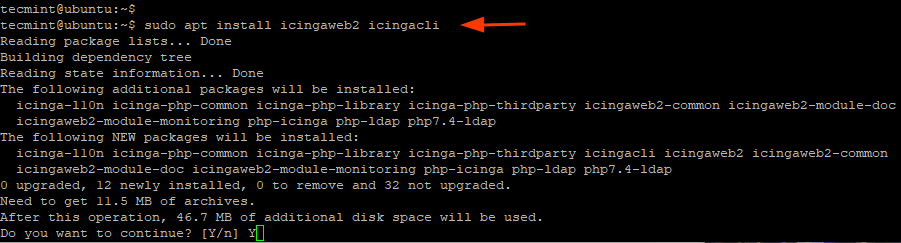
So install IcingaWeb2 and the Icinga CLI, run the command.
$ sudo apt install icingaweb2 icingacli -y
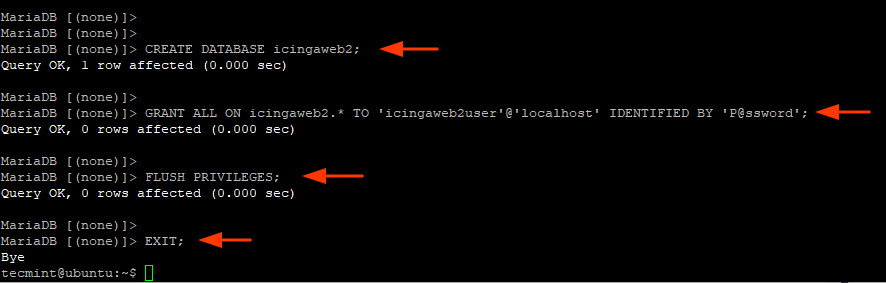
We need to create a second database schema that will be designated for Icinga Web 2.
Once again, log in to your database server.
$ sudo mysql -u root -p
Then create the database and database user for Icingaweb2 and grant all permissions to the database user on the database.
> CREATE DATABASE icingaweb2;
> GRANT ALL ON icingaweb2.* TO 'icingaweb2user'@'localhost' IDENTIFIED BY 'P@ssword';
> FLUSH PRIVILEGES;
> EXIT;
Thereafter, create a setup token using the following command. The setup token will be used during authentication when setting up Icinga2 on the browser.
$ sudo icingacli setup token create

In case you lose or forget the token, you can view it by running the command:
$ sudo icingacli setup token show

Step 6: Complete IcingaWeb2 Installation in Ubuntu
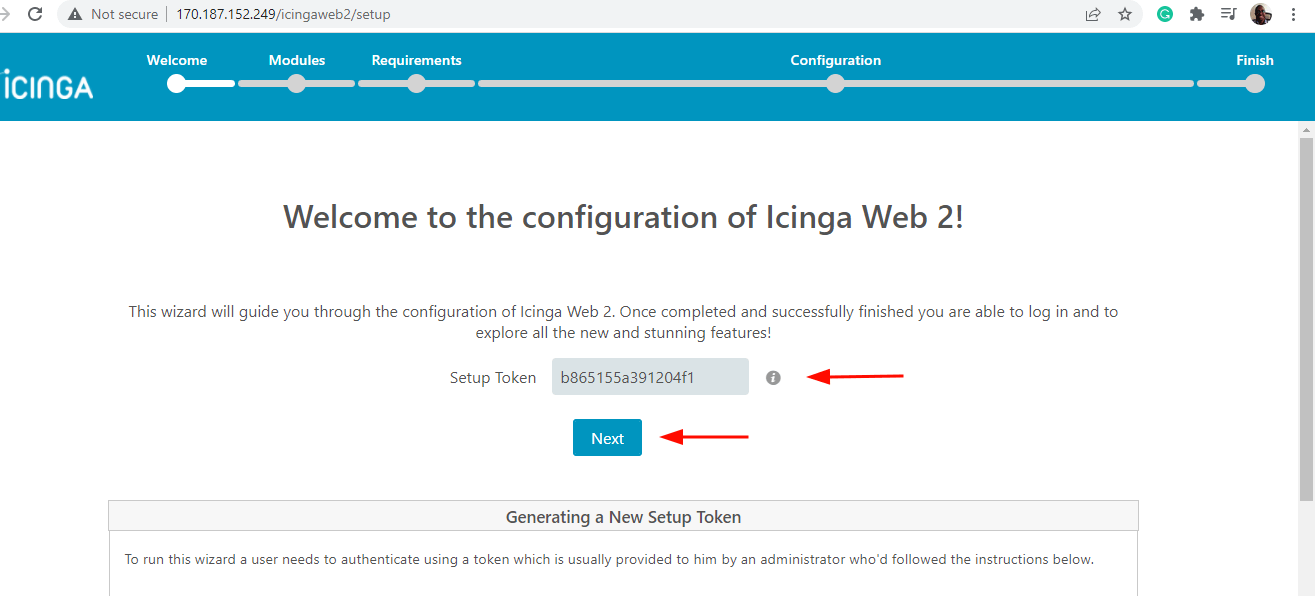
With all configurations in place, we will now complete the Icinga2 set up on a web browser. So, launch your browser and head over to the URL shown.
http://server-ip/icingaweb2/setup
This takes you to the Welcome page as shown. Remember the setup token that you created? Copy and Paste it in the text field and click ‘Next’.
On the ‘Modules‘ page, the ‘Monitoring’ module is enabled by default. However, you are at liberty to enable your preferred modules.
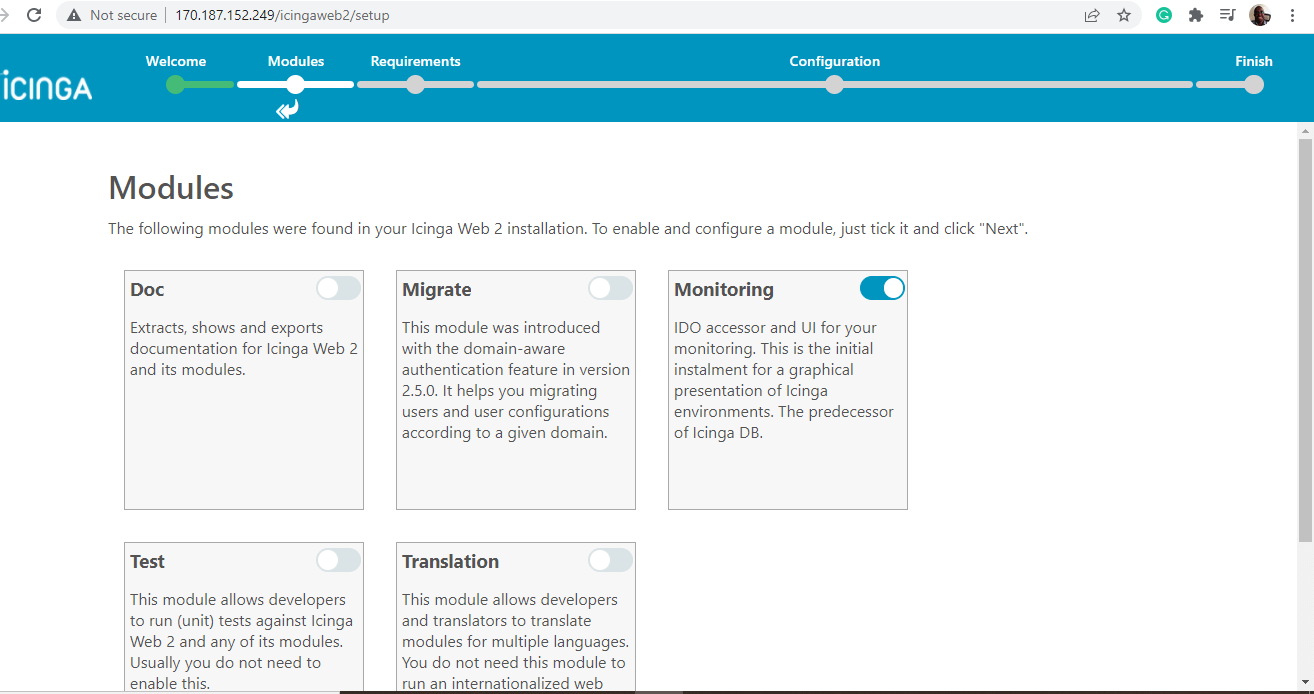
Then scroll down and click ‘Next‘.
In the next step, ensure that all the PHP modules and libraries are installed and directory permissions are correct.
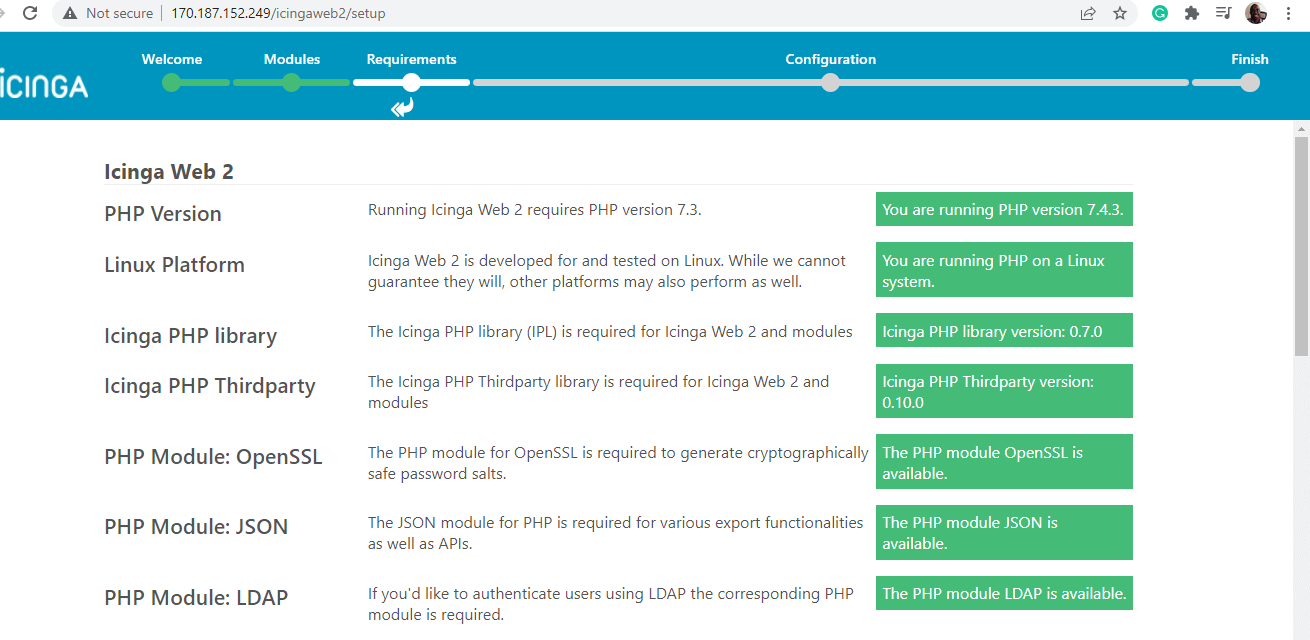
Then scroll down and click ‘Next‘.
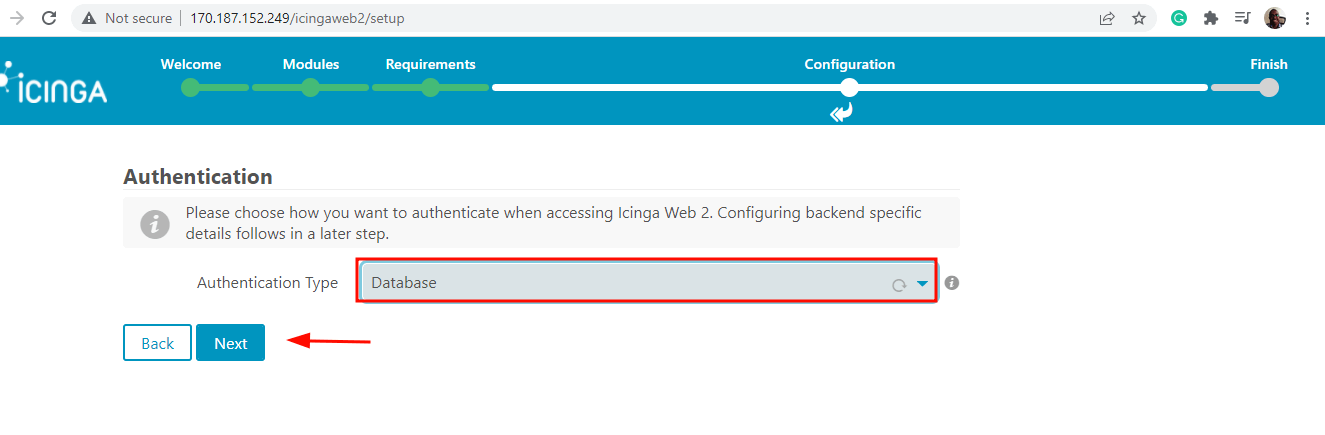
On the ‘Authentication’ page, select ‘Database’ as the authentication type and click ‘Next’.
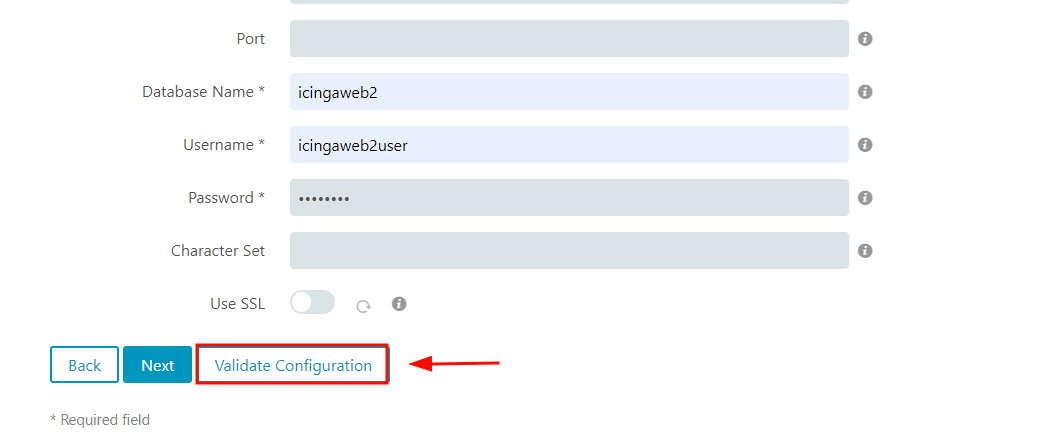
In the ‘Database Resource’ section, fill in the database details for IcingaWeb2 as specified in Step 5.
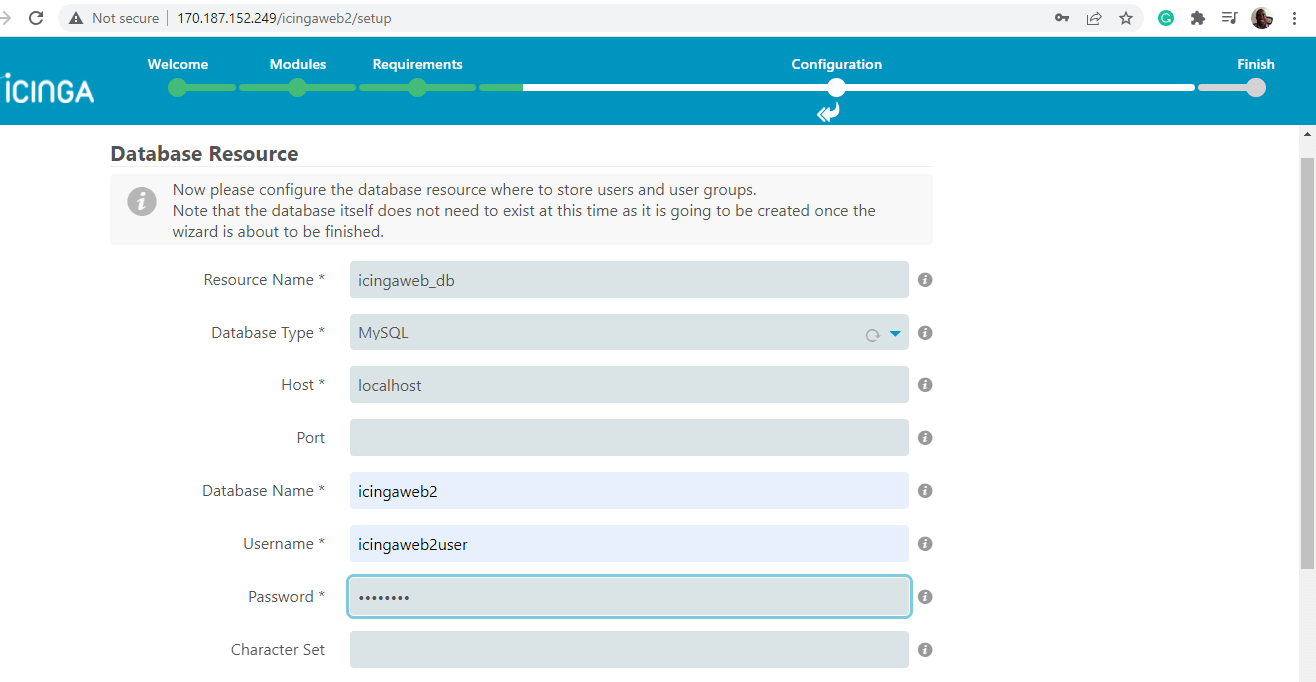
Then scroll down and click ‘Validate Configuration’ to validate the database details.
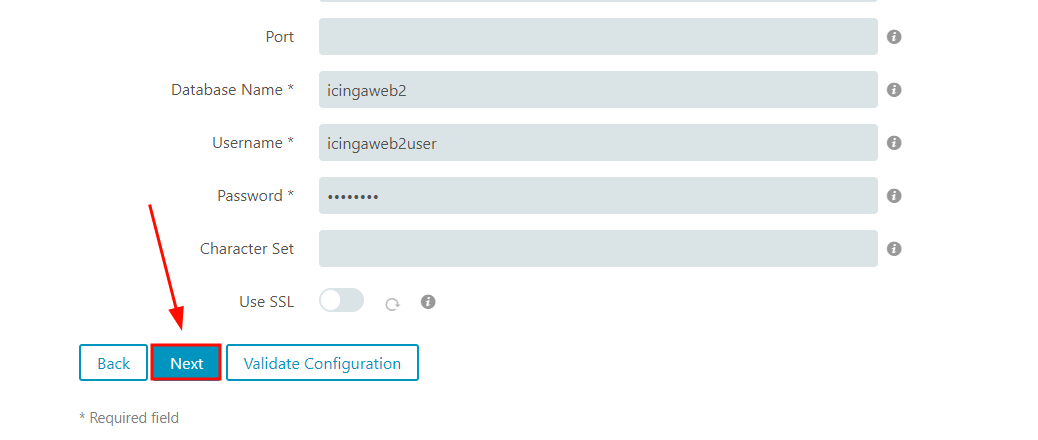
If all went well, the database configuration will be successfully validated. Once the validation is successful, scroll down and click ‘Next’.
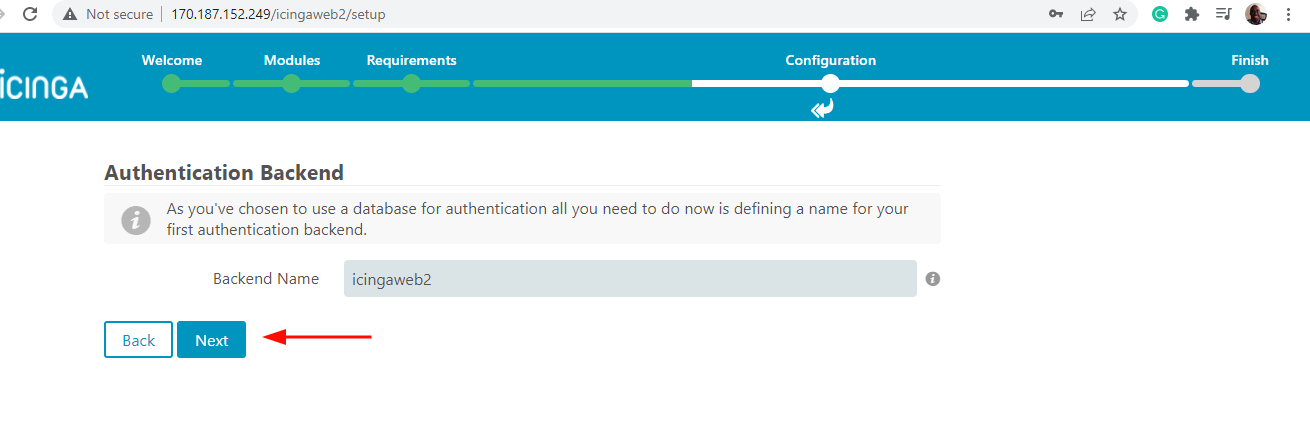
In the next step, click ‘Next’ to accept the defaults.
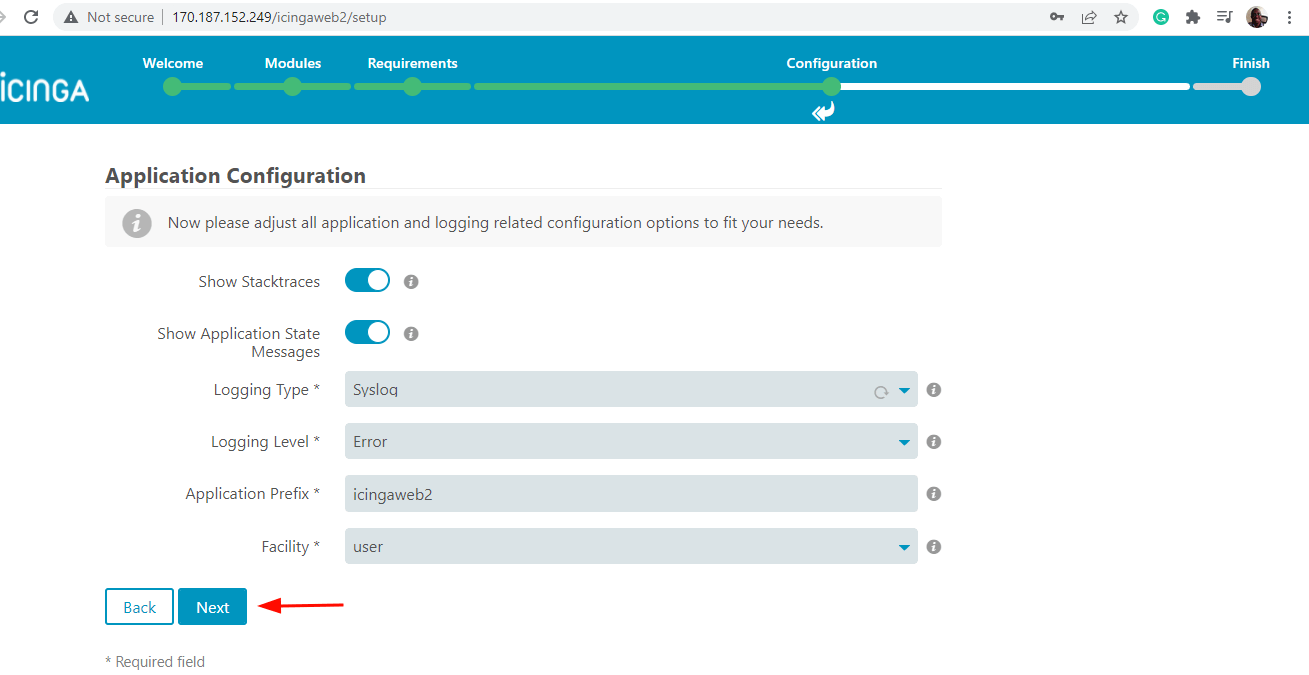
In the ‘Application Configuration’ section, click ‘Next’ to accept the defaults.
In the next step, take some time and review all the changes for Icinga Web 2. Ensure that all the configurations are correct and feel free to go back and make the necessary corrections.
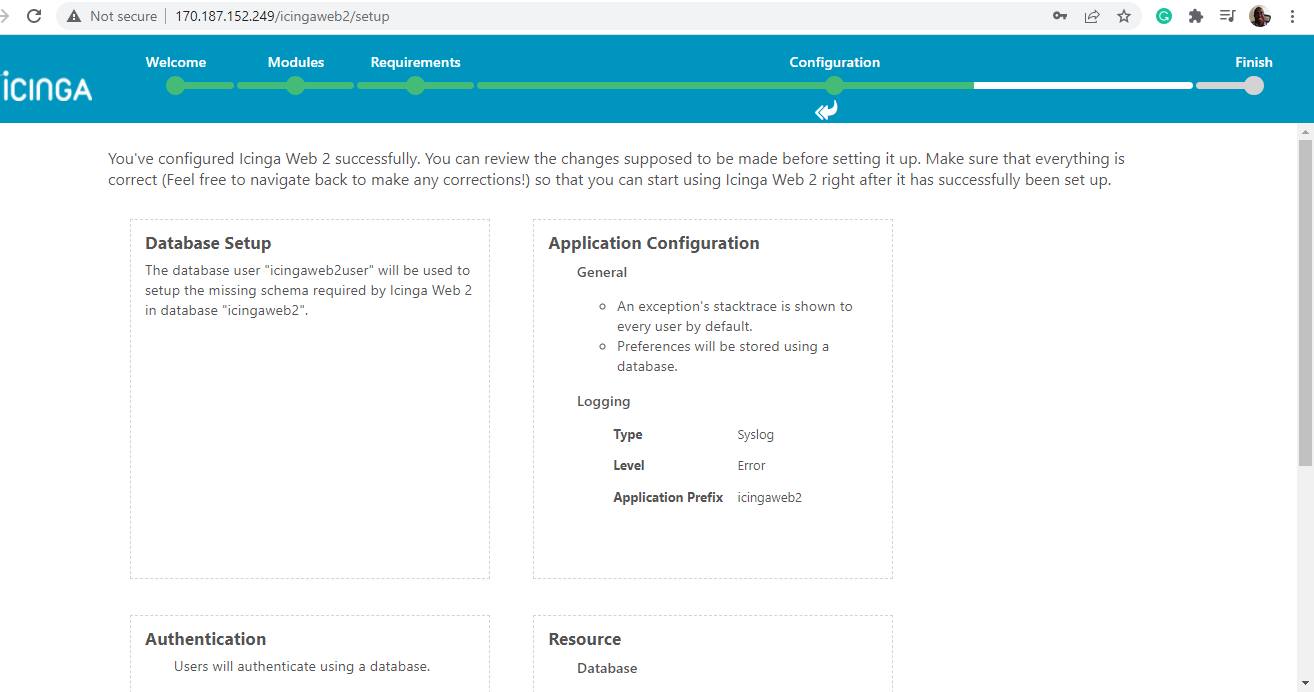
If all looks good, scroll down and click ‘Next‘.
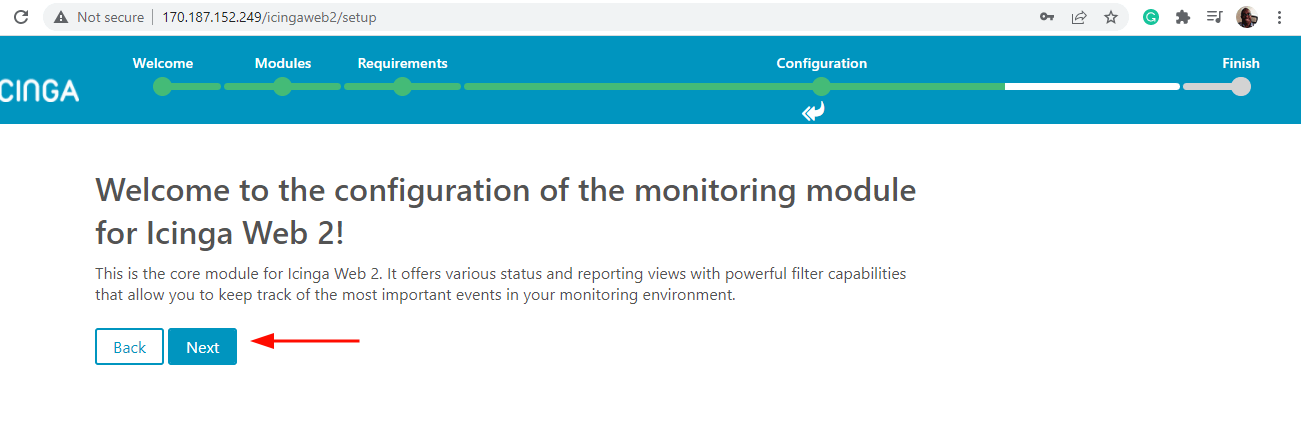
The last section in the Icinga2 web setup entails configuring the monitoring module. So, click ‘Next’.
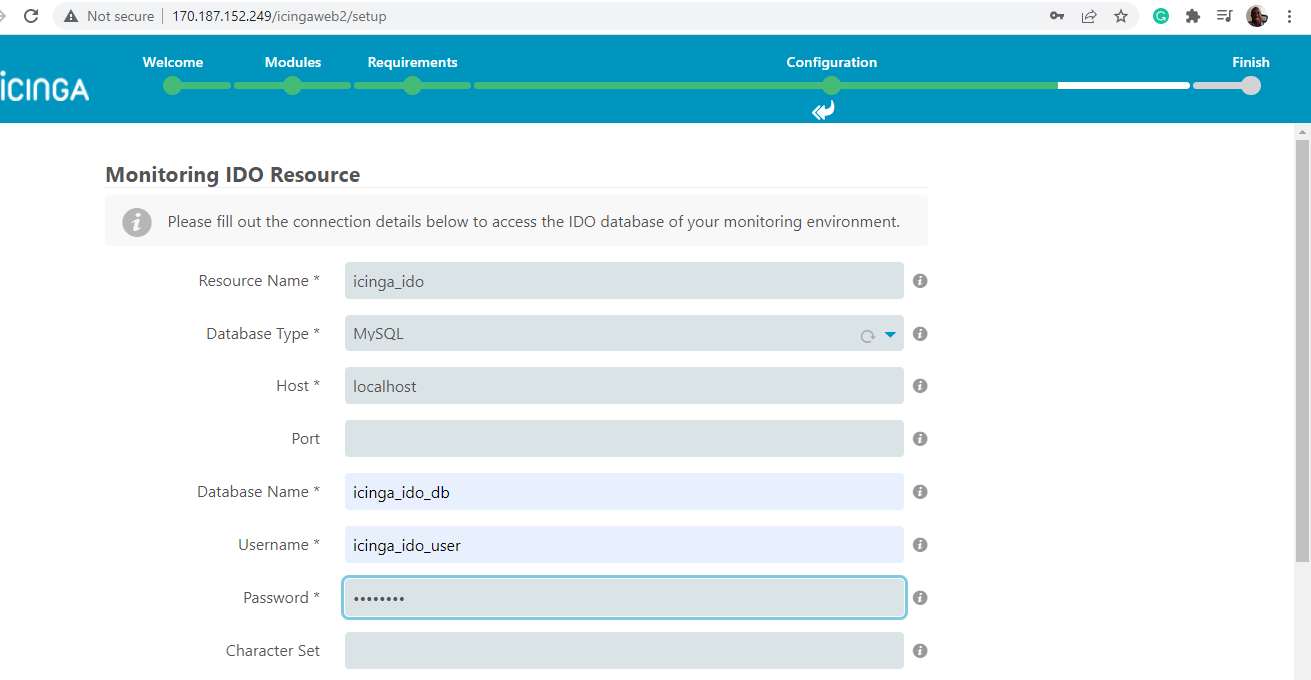
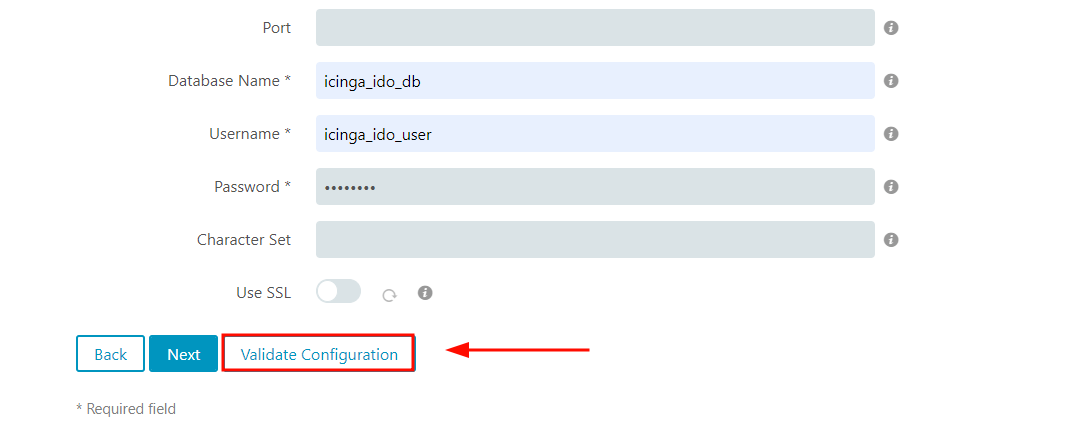
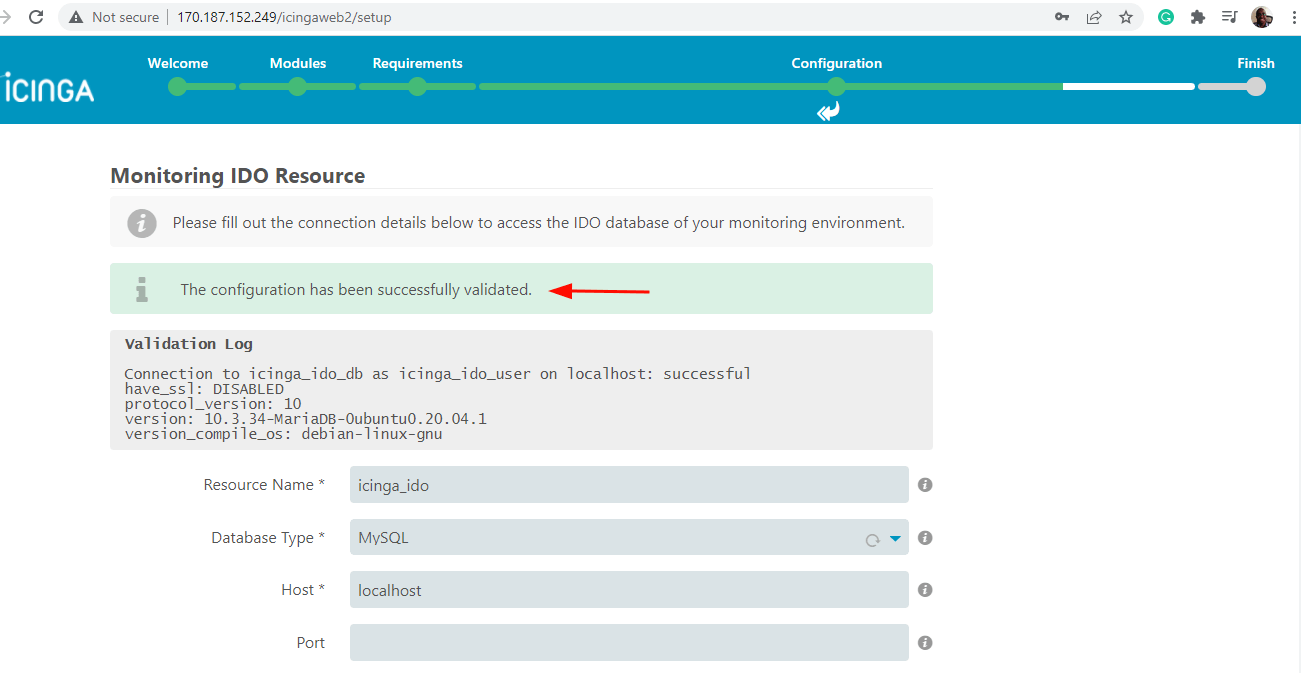
Next, fill in the database details for the Icinga2 IDO module as specified in Step 3.
Then scroll down and click ‘Validate Configuration’.
Once again, the validation of the database details should be a success. If you get an error, head back and ensure all the details are correct.
To head to the next step, scroll down and click ‘Next’.
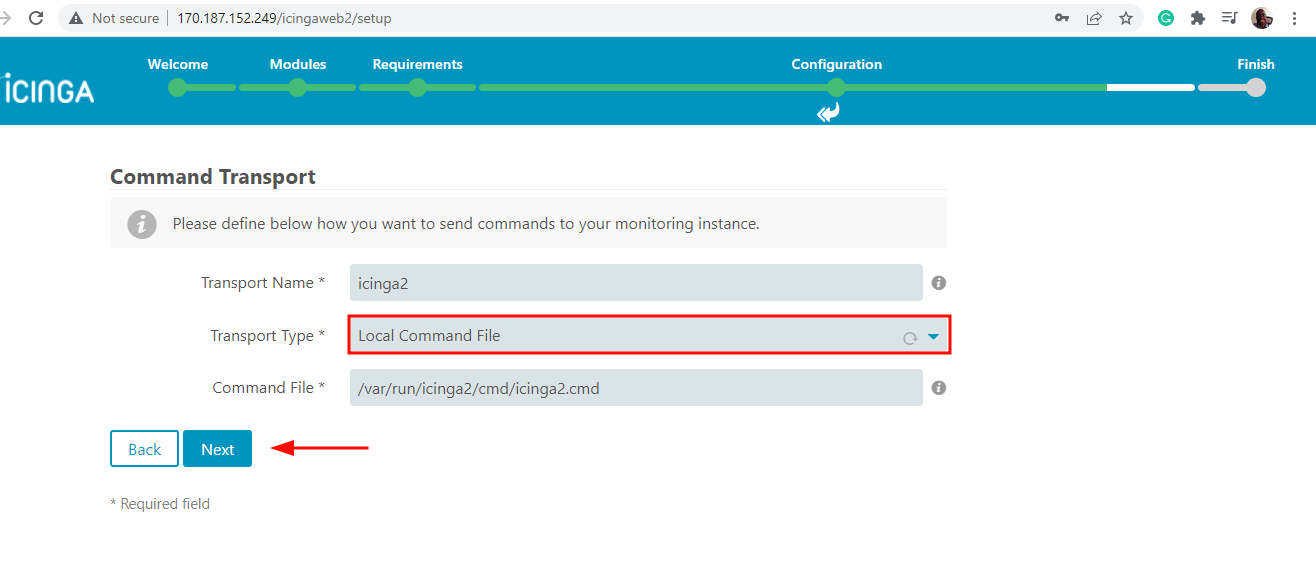
In the ‘Command Transport’ section, select ‘Local Command File’ as the transport type and click ‘Next’.
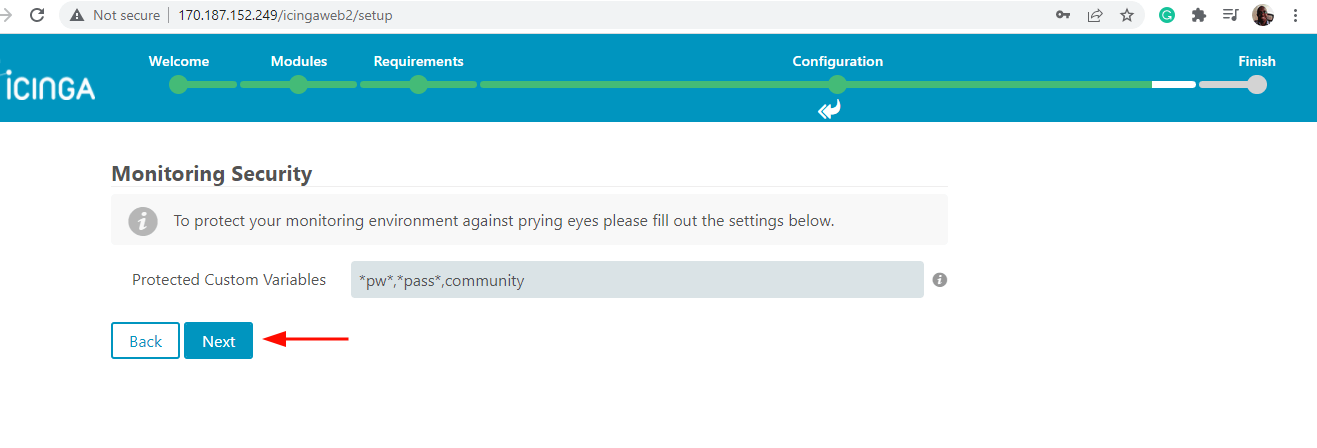
In the ‘Monitoring Security’ section, simply click ‘Next’ to go with the defaults.
Review all the changes for the monitoring module. If anything looks out of place, head back and make the necessary corrections.
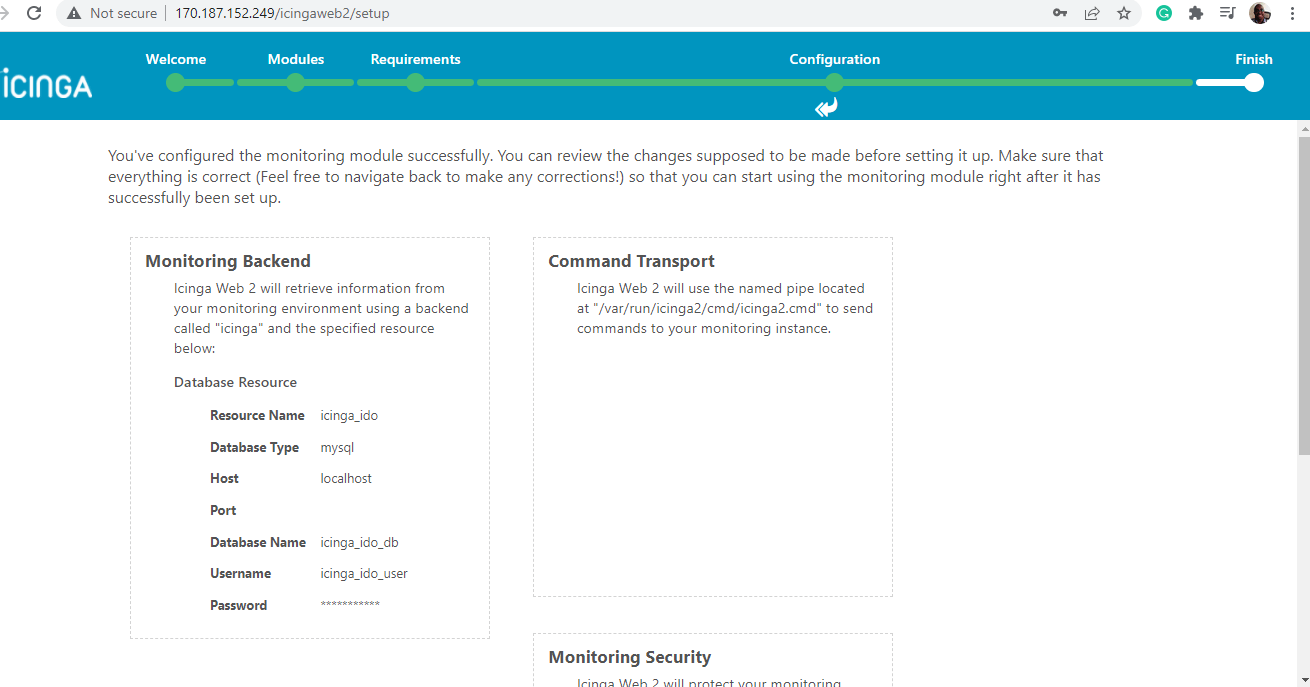
Then scroll down and click ‘Finish’.
At this point, Icinga Web 2 has successfully been set up and you should see a notification to that effect as shown below. To log in to the Icinga2 dashboard, click on ‘Login to Icinga Web 2’.

This takes you to the login page as shown. Provide your Admin account details and press ENTER to log in.
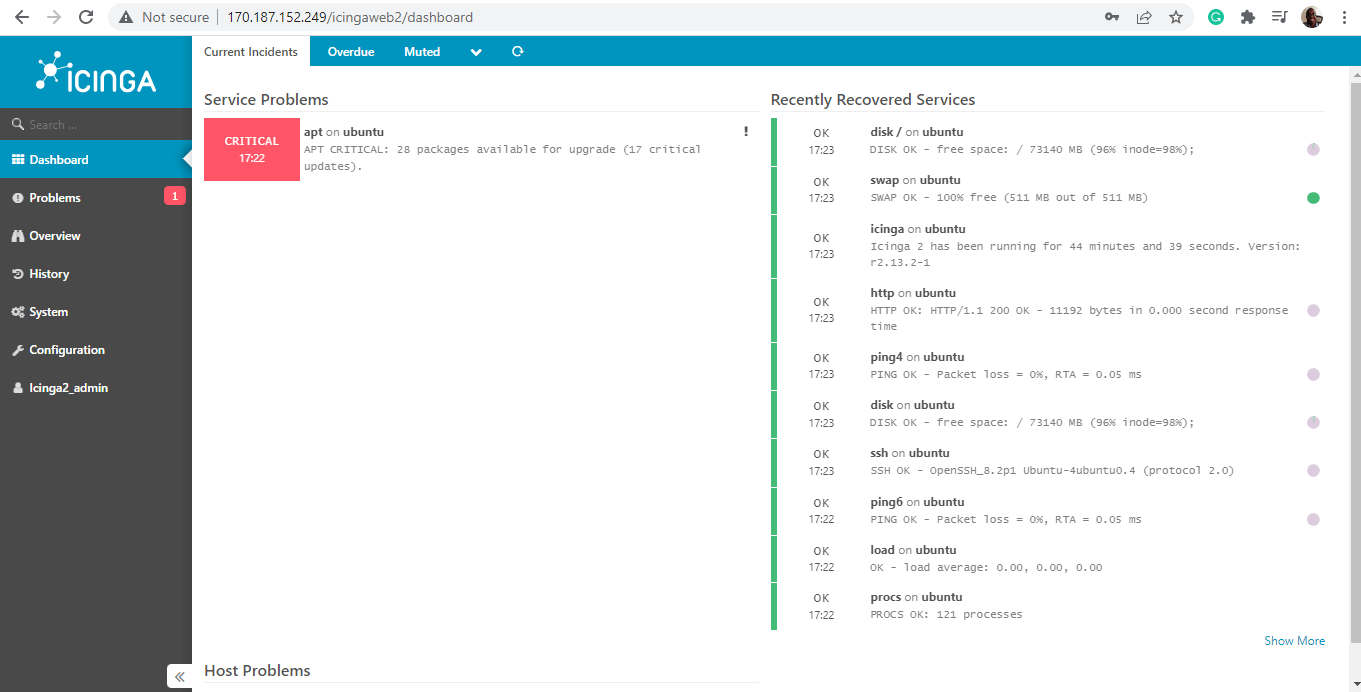
And the Icinga2 dashboard will come into view. Any existing issues will be displayed with their level of severity. For example, the dashboard notifies us of 28 packages with ready upgrades.
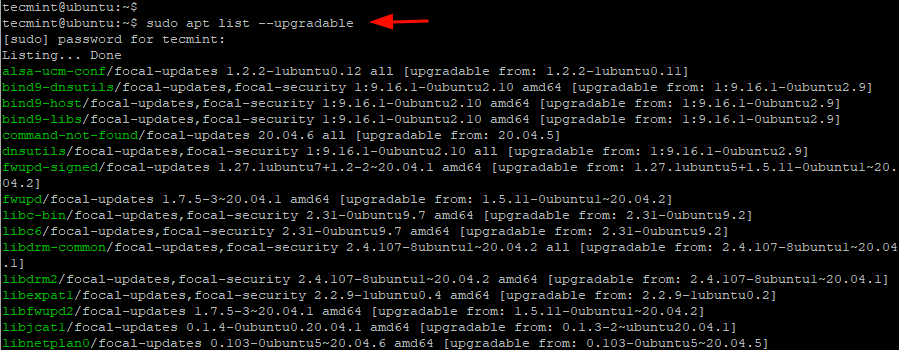
To verify this, we will head back to the terminal and run the command:
$ sudo apt list --upgradable
To upgrade the packages, we will simply run:
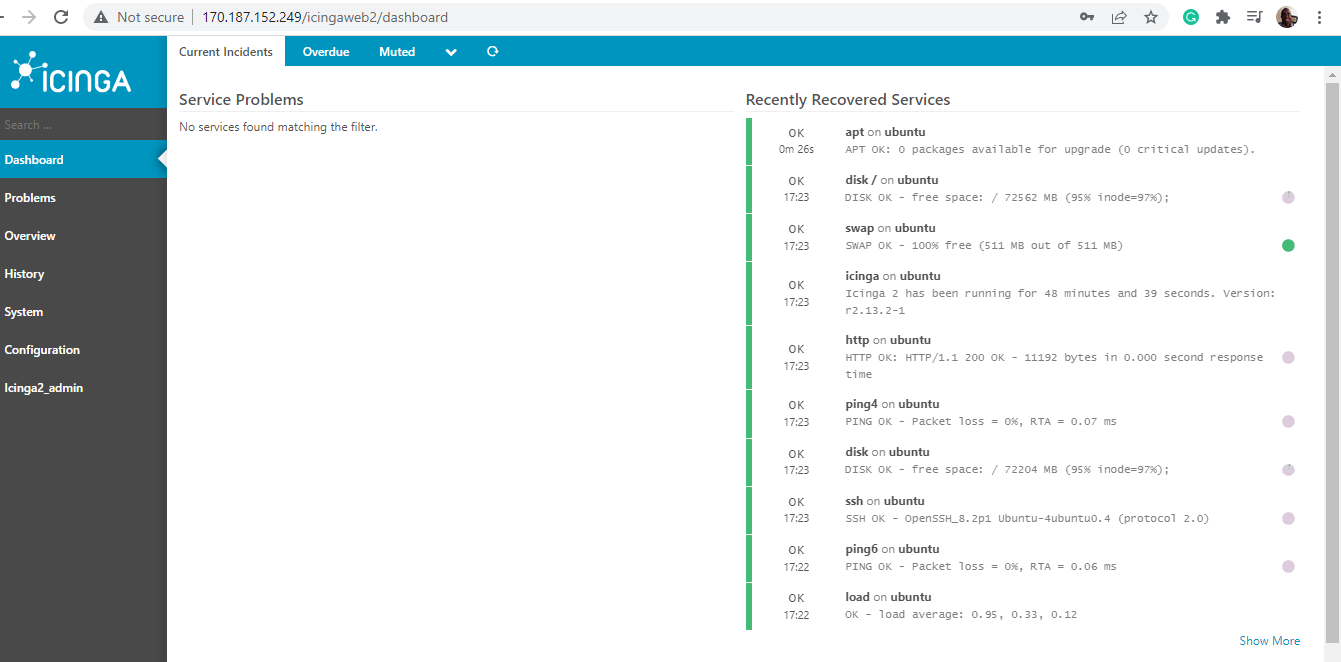
$ sudo apt upgrade -y
And this resolves the issue. From the dashboard, you can see that there are no more issues displayed.
In this guide, we have demonstrated how to install the Icinga2 monitoring tool on Ubuntu. Admittedly, the installation is quite long and requires attention to detail. Nonetheless, if you followed the steps to the latter, everything should work just fine.


This guide was a lifesaver! I was stuck trying to figure out how to manage my Ubuntu server after struggling with configuration issues for hours. The instructions here made everything so simple and smooth.
Wow, this was such a helpful read! I was setting up a Flask environment on Ubuntu and came across a similar issue while figuring out how to configure things properly. Luckily, I found this great guide to install Flask on Ubuntu, and everything finally clicked.
I appreciate the clean breakdown of PHP in this article – especially the example showing how it embeds directly into HTML.
Really loved the humble tone too. Thanks for sharing this!
@Neil Pittaway mentioned PHP 8.1 with Ubuntu 22.04 doesn’t work, so this command will not work.
You may need to edit and mention to use older PHP version with latest Ubuntu.
After generating token, error occurs on /icingaweb2/setup on page Requirements
Deprecated: Return type of Icinga\Application\Libraries::getIterator() should either be compatible with IteratorAggregate::getIterator(): Traversable, or the #[\ReturnTypeWillChange] attribute should be used to temporarily suppress the notice in /usr/share/php/Icinga/Application/Libraries.php on line 20
known bug : https://github.com/Icinga/icingaweb2/issues/4837
Also we get a warning that apt-key is going to be deprecated so as a workaround used this.
https://www.digitalocean.com/community/tutorials/how-to-handle-apt-key-and-add-apt-repository-deprecation-using-gpg-to-add-external-repositories-on-ubuntu-22-04
curl -L https://packages.icinga.com/icinga.key | sudo gpg --dearmor -o /usr/share/keyrings/icinga2 % Total % Received % Xferd Average Speed Time Time Time Current Dload Upload Total Spent Left Speed 100 1723 100 1723 0 0 9429 0 --:--:-- --:--:-- --:--:-- 9467Hello, the LDAP module and some other modules are missing.
What should I do? Please help.
@Vishavjeet,
To fix this issue, make sure that the LDAP module and other required modules are installed on your system.
You can use your package manager to verify their status.
Why would you install php-pgsql?
Think step 1 needs updating for the 22.04 LTS Server as it now installs PHP8.1 instead of 7.4. If you follow all of the steps exactly, the web interface fails to load (dependency errors). Need to force the installation of 7.4 to make this work as of 13 March 2023.
@Neil,
I have updated the article…
Thanks
The procedure is really good and would like to see the same for configuring Icinga in HA. I am trying to configure Icinga HA with MySql Galera Cluster and Arbitrator for witnesses and its a bit difficult to understand from the documentation.