When you manage online projects, you often need to limit access to that project in order to protect it against the outside world. There are might be different reasons for that – for example you want to prevent search engine crawlers from accessing your site while it is still in development phase.

In this tutorial, I am going to show you how to password protected different web sites directories in Apache web server. There are many ways you can achieve this, but we will review two of them which are most commonly used.
The first method configures password protection directly in Apache’s configuration file, while the second one uses .htaccess file.
Requirements
In order to setup password protection for your web directories, you will need to have:
- A working Apache web server
- The AllowOverride AuthConfig directive must be enabled in Apache configuration file.
Setup Apache Password Protected Directory
1. For this tutorial, we will be protecting the main web root directory /var/www/html. To protect that directory, open your Apache’s configuration:
---------------- On RedHat/CentOS based systems ----------------
# vi /etc/httpd/conf/httpd.conf

---------------- On Debian/Ubuntu based systems ----------------
# nano /etc/apache2/sites-available/000-default.conf
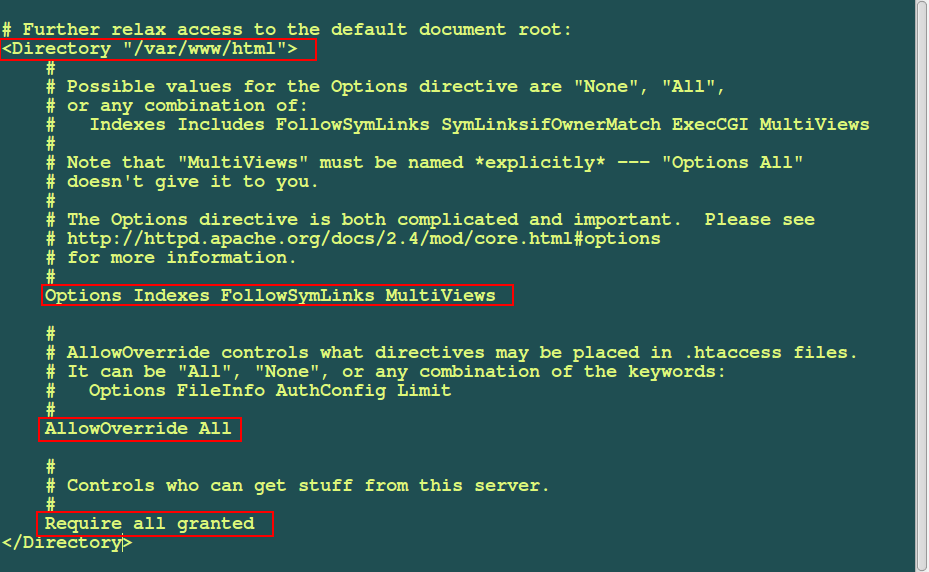
2. Find the Apache Document directory root for /var/www/html and add the following things as suggested:
On Apache 2.2 Version
<Directory /var/www/html>
Options Indexes Includes FollowSymLinks MultiViews
AllowOverride All
Order allow,deny
Allow from all
</Directory>
On Apache 2.4 Version
<Directory /var/www/html>
Options Indexes Includes FollowSymLinks MultiViews
AllowOverride All
Require all granted
</Directory>
3. Save the file and restart Apache by using the following command:
--------------- On Systemd -------------------
# systemctl restart httpd         [On RedHat based systems]
# systemctl restart apache2       [On Debian based systems]


--------------- On SysV init -----------------
# service httpd restart           [On RedHat based systems]
# service apache2 restart         [On Debian based systems]
4. Now we will use the htpasswd command to generate username and password for our protected directory. This command is used to manage user files for basic authentication.
The general syntax of the command is:
# htpasswd -c filename username
The -c option specifies the file that will keep the encrypted password and username specifies the user for the authentication.
5. Our password file needs to be located out of the Apache’s web accessible directory so that it is well protected. For that purpose, we will create new directory:
# mkdir /home/tecmint
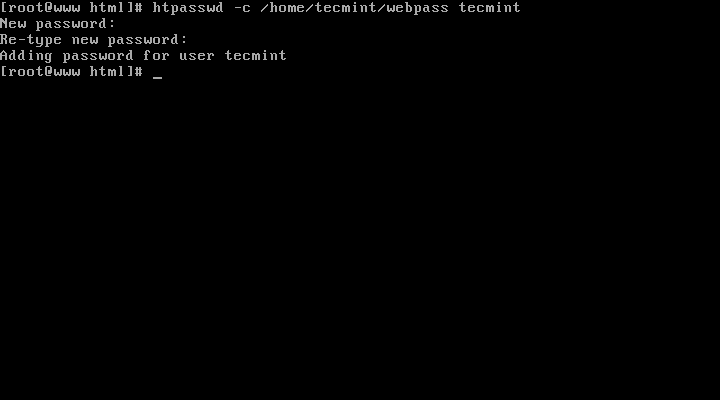
6. After that we will generate our username and password that will be stored in that directory:
# htpasswd -c /home/tecmint/webpass tecmint
Once you execute this command you will have to enter a password for our new user "tecmint" twice:
After that we will need to make sure that Apache is able to read the “webpass” file. For that purpose, you will need to change the ownership of that file with the following command:
---------------- On RedHat/CentOS based systems ----------------
# chown apache: /home/tecmint/webpass
# chmod 640 /home/tecmint/webpass
---------------- On Debian/Ubuntu based systems ----------------
# chown www-data /home/tecmint/webpass
# chmod 640 /home/tecmint/webpass
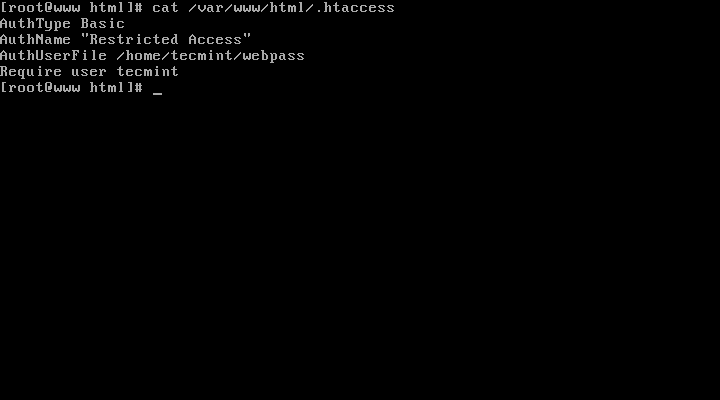
7. At this point our new user and password are ready. Now we need to tell Apache to request password when accessing our targeted directory. For that purpose, create file called .htaccess in /var/www/html:
# vi /var/www/html/.htaccess
Add the following code in it:
AuthType Basic
AuthName "Restricted Access"
AuthUserFile /home/tecmint/webpass
Require user tecmint
8. Now save the file and put your setup to the test. Open your browser and enter your IP address or domain name in the web browser, for example:
http://ip-address
You should be prompted for username and password:
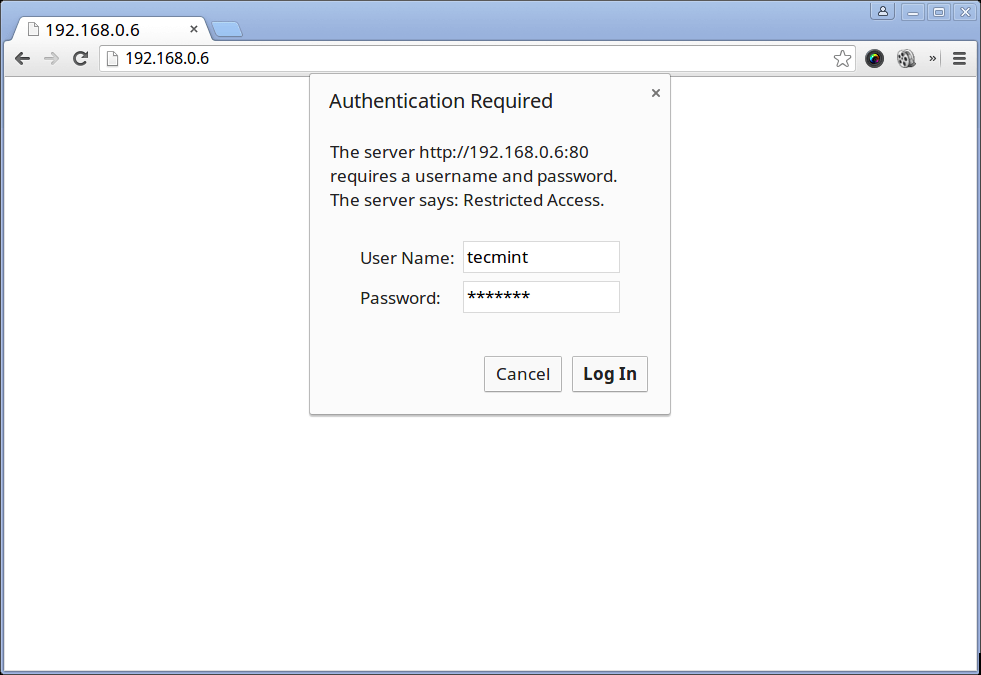
Enter the username and password that you set to proceed to your page.
Additional Notes
If you are using shared hosting, you will most probably not have access to the Apache configuration file. However most hosting companies have enabled the “AllowOverride All” option by default. This means that you will only need to generate the username and password and then select directory that you wish to protect. This significantly eases your task.
Conclusion
I hope that you found this tutorial useful and help you achieve your goal. If you have any questions or comments, please do not hesitate to post them in the section below.


Still valid today! Works great on a Rocky Linux 8 setup. I read through many articles, but this is the only one that worked as expected. Thank you.
I found that in above code the
Orderword is missing. That is Order allow,deny.@Madhav,
Thanks for pointing of error, corrected in the article.
Thanks. Much appreciated. Very simple and very easy to follow.
Just what I needed.
thanks man, you’ve help me a lot, works nicely on Debian 8
Hi,
Thanks for your article.
I was wondering what the preferred method is for using MySQL instead of htpasswd to store/read passwords. Since Apache2.4 it doesn’t work anymore because of deprecated modules I believe. What’s the best method now?
Hi,
In Apache 2.4 you can use mod_digest_auth as shown here: https://httpd.apache.org/docs/2.4/mod/mod_auth_digest.html
Thanks for the tutorial, works well on Ubuntu 14.04