As we all know that JBoss AS has been renamed to WildFly. A lots of new features has been added and lots of has been upgraded. Finally WildFly 8.0.0 Final has been released on Feb 11.2014. WildFly Project Lead Jason Greene announced the same.

WildFly 8 is Red Hat‘s Java EE 7 compliant open source application server. The Main features are as below:
Java EE 7 Compatibility
The biggest change in this is that now WildFly 8 is official Java EE7 Certified.
High Performance Web Server
Undertow is new high performance web server written in Java. Now this has been implemented in WildFly 8. This is really designed for high throughput and scalability and can handle millions of connections. Undertow’s lifecycle is completely controlled by the embedding application. This is extremely lightweight with core jar having size of 1MB and embedded server using less than 4MB of heap space. This is really great.
3Port Reduction
Since it is using Undertow which support for Upgrading HTTP, which will allow multiple protocols to be multiplexed over single HTTP port. WildFly 8 has moved nearly all of its protocols to be multiplexed over two HTTP ports: one is management and another one is application port. This is really a big change and benefit to cloud providers (such as OpenShift) who run hundreds to thousands of instances on a single server. In total, it has two default ports for configuration and they are 9990 (Web Administration Console) and 8080 (Application Console).
Management Role Based Access Control & Auditing
This is the new and interesting thing implemented in WildFly 8. By using this we can create different users and can assign those one to different roles as per requirements. I’ll show you later with screen shots.
Logging
The management API now supports the ability to list and view the available log files on a server. Now, we have attribute called “add-logging-api-dependencies” available for any kind of deployments in which we want to skip container logging. This will disable the adding of the implicit server logging dependencies. We have another option i.e. we can use a jboss-deployment-structure.xml to exclude the logging subsystem. Using this, it will help to stop the logging subsystem from going through any deployment.
We can also make use of another parameter i.e. use-deployment-logging-config for enabling/disabling processing of logging configuration files within a deployment.
Note: System Property that we were using for disabling per logging has been deprecated from this version.
Clustering
Again Big change is one clustering. All Features related to Clustering support had been changed in WildFly 8 and these includes as below:
- Distributed web session has been optimized for it with new Java Based Web Server i.e. Undertow.
- mod_cluster support for Undertow.
- Optimized Distributed SSO(Single Sign-On) capabilities and support for Undertow.
- New/optimized distributed @Stateful EJB caching implementation.
- WildFly 8 added some new public clustering API.
- For creating singleton services it provides new public APIs.
CLI Improvements
CLI Configuration has also been improved. You know All admin love to work on CLI ;). So, now we can create alias for particular server and then can use that alias whenever want to connect to that server using connect command.
There are still lots of enhancements and updates done in WildFly 8. You can check all these at:
Installation of WildFly 8 in Linux
Before moving ahead with Installation make sure that you have Java EE 7 installed on your system. WildFly 8 will not work with previous revisions. Please follow the below guide to install Java EE 7 in the Linux systems.
Step 1: Downloading WildFly 8
Use the following link to download the latest WildFly zip file.
You may also use ‘wget‘ command to download directly on the command line.
[root@tecmint]# wget http://download.jboss.org/wildfly/8.0.0.Final/wildfly-8.0.0.Final.zip
Copy zip file to any preferred location (e.g. ‘/data/‘ in my case) and extract using ‘unzip’ command.
[root@tecmint]# cp wildfly-8.0.0.Final.zip /data/
[root@tecmint]# cd /data/
[root@tecmint data]# unzip wildfly-8.0.0.Final.zip
Step 2: Setting Environment Variables
Now set some environment variables. You can set these on system wise or within your configuration files. Here I am setting within configuration files standalone.sh and standalone.conf in ‘bin‘ folder.
[root@tecmint data]# cd wildfly-8.0.0.Final
[root@tecmint data]# cd bin/
Add these two following lines to standlone.sh/standlone.conf files. Please specify your WildFly installation location and Java Home location.
JBOSS_HOME=”/data/wildfly-8.0.0.Final”
JAVA_HOME=”/data/java/jre7/bin/java”
Note: For whole system wide, you can set it under ‘/etc/profile‘ file.
Step 3: Starting WildFly 8
Now start server i.e. for standalone mode use ‘standalone.sh‘ and for domain mode use ‘domain.sh‘.
[root@tecmint bin]# ./standalone.sh
[root@tecmint bin]# ./domain.sh
But, here I am starting in standalone mode. By default it will get start by ‘standalone.xml‘ file, But You can also start with some other configuration using ‘–server-config‘ option.
As below I am starting server with ‘standalone-full-ha.xml‘ and this file is present in “$JBOSS_HOME/standalone(profile)/configuration/”.
[root@tecmint bin]# ./standalone.sh --server-config standalone-full-ha.xml
Sample Output
Calling "/data/wildfly-8.0.0.Final/standalone/configuration/standalone.conf"
Setting JAVA property to "/data/java/jre7/bin/java"
===============================================================================

  JBoss Bootstrap Environment

  JBOSS_HOME: "/data/wildfly-8.0.0.Final"

  JAVA: "/data/java/jre7/bin/java"

  JAVA_OPTS: "-client -Dprogram.name=standalone.sh -Xms64M -Xmx512M -XX:MaxPerm
Size=256M -Djava.net.preferIPv4Stack=true -Djboss.modules.system.pkgs=org.jboss.byteman"

===============================================================================

13:55:26,403 INFO  [org.jboss.modules] (main) JBoss Modules version 1.3.0.Final
13:55:33,812 INFO  [org.jboss.msc] (main) JBoss MSC version 1.2.0.Final
13:55:35,481 INFO  [org.jboss.as] (MSC service thread 1-1) JBAS015899: WildFly 8.0.0.Final "WildFly" starting
13:55:58,646 INFO  [org.jboss.as.server] (Controller Boot Thread) JBAS015888: Creating http management service using socket-binding (management-http)
...........
13:56:22,778 INFO  [org.jboss.as] (Controller Boot Thread) JBAS015961: Http management interface listening on http://127.0.0.1:9990/management
13:56:22,794 INFO  [org.jboss.as] (Controller Boot Thread) JBAS015951: Admin console listening on http://127.0.0.1:9990
13:56:22,794 INFO  [org.jboss.as] (Controller Boot Thread) JBAS015874: WildFly 8.0.0.Final "WildFly" started in 64534ms - Started 229 of 356 services (172 services are lazy, passive or on-demand)
Step 4: Acessing WildFly 8
Now you can point your browser to ‘http://localhost:8080‘ (if using the default configured http port) which brings you to the Welcome Screen.
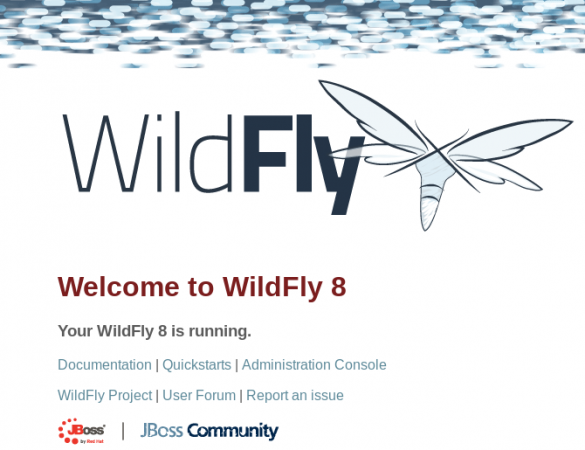
From here, you can access WildFly community documentation guides and enhanced web-based Administration Console access.
Step 5: Managing WildFly 8
WildFly 8 provides two administrative consoles for managing running instance:
- web-based Administration Console
- command-line interface
Before connecting to administration console or remotely using the command line, you will need to create a new user using the ‘add-user.sh‘ script in the bin folder.
Next, go to ‘bin‘ directory, set ‘JBOSS_HOME‘ in add-user.sh (if variable is not set on system bases) and create user as below.
[root@tecmint bin]# ./add-user.sh
Once starting the script you will be guided through the process to add a new user:
Sample Output
What type of user do you wish to add?
 a) Management User (mgmt-users.properties)
 b) Application User (application-users.properties)
(a):
Enter the details of the new user to add.
Using realm 'ManagementRealm' as discovered from the existing property files.
Username : admin
The username 'admin' is easy to guess
Are you sure you want to add user 'admin' yes/no? yes
Password recommendations are listed below. To modify these restrictions edit the add-user.properties configuration file.
 - The password should not be one of the following restricted values {root, admin, administrator}
 - The password should contain at least 8 characters, 1 alphanumeric character(s), 1 digit(s), 1 non-alphanumeric symbol(s)
 - The password should be different from the username
Password :
Re-enter Password :
What groups do you want this user to belong to? (Please enter a comma separated list, or leave blank for none)[  ]:
About to add user 'admin' for realm 'ManagementRealm'
Is this correct yes/no? yes
Added user 'admin' to file '/data/wildfly-8.0.0.Final/standalone/configuration/mgmt-users.properties'
Added user 'admin' to file /data/wildfly-8.0.0.Final/domain/configuration/mgmt-users.properties'
Added user 'admin' with groups  to file /data/wildfly-8.0.0.Final/standalone/configuration/mgmt-groups.properties'
Added user 'admin' with groups  to file /data/wildfly-8.0.0.Final/domain/configuration/mgmt-groups.properties'
Is this new user going to be used for one AS process to connect to another AS process?
e.g. for a slave host controller connecting to the master or for a Remoting connection for server to server EJB calls.
yes/no? yes
To represent the user add the following to the server-identities definition
Press any key to continue . . .
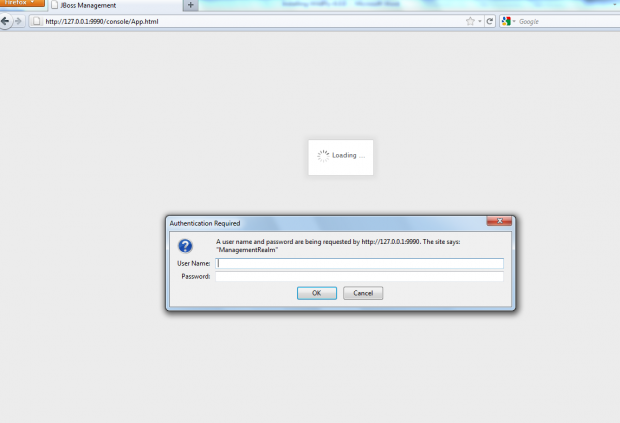
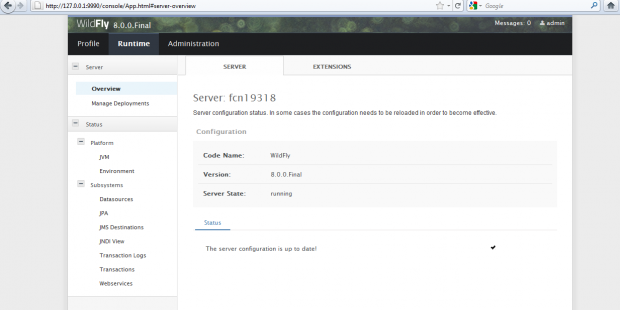
Now access the web-based Administration Console at ‘http://localhost:9990/console‘ and enter the new created username and password to directly access the Management Console.
First Screen After login.
If you prefer to handle your server from the CLI, run the ‘jboss-cli.sh‘ script from the ‘bin‘ directory that offers the same capabilities available via the web-based UI.
[root@tecmint bin]# cd bin
[root@tecmint bin]# ./jboss-cli.sh --connect
Connected to standalone controller at localhost:9999
For more information, follow the official WildFly 8 documentation at https://docs.jboss.org/author/display/WFLY8/Documentation.
Read Also : WildFly (JBoss AS) – How to Access and Manage CLI Using GUI


Hi, all
I have a problem when I run ./standalone.sh it show..
\\\\\\\\\\\\\\\\\\\\\\\\\\\\

JBoss Bootstrap Environment

JBOSS_HOME: /root/data/wildfly-8.0.0.Final

JAVA: /usr/java/jdk-9.0.4/bin/java/bin/java

JAVA_OPTS:  -server -Xms64m -Xmx512m -XX:MaxPermSize=256m -Djava.net.preferIPv4Stack=true -Djboss.modules.system.pkgs=org.jboss.byteman -Djava.awt.headless=true

=========================================================================

./standalone.sh: line 251: /usr/java/jdk-9.0.4/bin/java/bin/java: Not a directory
Help me please..
I installed wildfly complete and i run command
./standalone.sh --server-config standalone-full-ha.xmlcomplete, but i cannot test or access to http://10.168.1.129:8080/.It show Unable to connect
Firefox can’t establish a connection to the server at 10.168.1.129:8080.
The site could be temporarily unavailable or too busy. Try again in a few moments.
If you are unable to load any pages, check your computer’s network connection.
If your computer or network is protected by a firewall or proxy, make sure that Firefox is permitted to access the Web.
Hi Kuldeep,
while starting the server .getting the below errors .Please do needfull.
JBoss Bootstrap Environment
JBOSS_HOME: /home/javaboss/wildfly-8.0.0.Alpha3
JAVA: /opt/Java/jdk1.7.0_79/bin/java
JAVA_OPTS: -server -Xms64m -Xmx512m -XX:MaxPer ules.system.pkgs=org.jboss.byteman -Djava.awt.hea
Hi Kuldeep,
Thanks for this article. Its really helpful. I have been working on IBM WebSphere Application Server, and wanted to learn JBoss. As per your steps, I have installed JBoss properly, but not able to open the “Welcome Page” & Console. Need you help here.
Actually I connect to a server – let say, ABC from my machine(X). That ABC server is linux box and I connect via putty from my machine(X). I have installed Jboss and JDK on that ABC server and when I run the standalone.sh command and try to open welcome page from my machine(X) – http://ABC:8080. Nothing comes up.
The same ABC server has IBM WebSphere installed in it. If the secure admin port, let say is 9061, I am able to open IBM Console from my machine(X) with – https://ABC:9061/ibm/console.
My point is there any configuration file in JBoss, were i have to mention this server name – ABC. I guess hope u got my point here. Do let me know in case u didn’t understood my query.
Output of my standalone.sh script:
[root@ABC bin]# ./standalone.sh –server-config=standalone-full-ha.xml
=========================================================================
JBoss Bootstrap Environment
JBOSS_HOME: /opt/JBoss/Wildfly8/wildfly-8.0.0.Final
JAVA: /opt/JBoss/java7/7.0_SR9_FP20l64/jre/bin/java
JAVA_OPTS: -server -XX:+UseCompressedOops -Xms64m -Xmx512m -XX:MaxPermSize=256m -Djava.net.preferIPv4Stack=true -Djboss.modules.system.pkgs=org.jboss.byteman -Djava.awt.headless=true
=========================================================================
12:22:02,695 INFO [org.jboss.modules] (main) JBoss Modules version 1.3.0.Final
12:22:02,911 INFO [org.jboss.msc] (main) JBoss MSC version 1.2.0.Final
12:22:02,999 INFO [org.jboss.as] (MSC service thread 1-5) JBAS015899: WildFly 8.0.0.Final “WildFly” starting
12:22:04,707 INFO [org.jboss.as.server] (Controller Boot Thread) JBAS015888: Creating http management service using socket-binding (management-http)
12:22:04,725 INFO [org.xnio] (MSC service thread 1-7) XNIO version 3.2.0.Final
12:22:04,738 INFO [org.xnio.nio] (MSC service thread 1-7) XNIO NIO Implementation Version 3.2.0.Final
12:22:04,770 INFO [org.jboss.as.security] (ServerService Thread Pool — 56) JBAS013171: Activating Security Subsystem
12:22:04,781 INFO [org.jboss.as.clustering.jgroups] (ServerService Thread Pool — 43) JBAS010260: Activating JGroups subsystem.
12:22:04,786 INFO [org.jboss.as.jacorb] (ServerService Thread Pool — 39) JBAS016300: Activating JacORB Subsystem
12:22:04,788 INFO [org.jboss.as.clustering.infinispan] (ServerService Thread Pool — 38) JBAS010280: Activating Infinispan subsystem.
12:22:04,812 INFO [org.jboss.as.naming] (ServerService Thread Pool — 51) JBAS011800: Activating Naming Subsystem
12:22:04,821 INFO [org.jboss.as.security] (MSC service thread 1-2) JBAS013170: Current PicketBox version=4.0.20.Final
12:22:04,830 INFO [org.jboss.as.jsf] (ServerService Thread Pool — 46) JBAS012615: Activated the following JSF Implementations: [main]
12:22:04,842 INFO [org.jboss.as.webservices] (ServerService Thread Pool — 60) JBAS015537: Activating WebServices Extension
12:22:04,886 INFO [org.jboss.as.connector.logging] (MSC service thread 1-8) JBAS010408: Starting JCA Subsystem (IronJacamar 1.1.3.Final)
12:22:04,928 INFO [org.wildfly.extension.undertow] (ServerService Thread Pool — 59) JBAS017502: Undertow 1.0.0.Final starting
12:22:04,930 INFO [org.wildfly.extension.undertow] (MSC service thread 1-1) JBAS017502: Undertow 1.0.0.Final starting
12:22:04,988 INFO [org.jboss.remoting] (MSC service thread 1-6) JBoss Remoting version 4.0.0.Final
12:22:04,999 INFO [org.jboss.as.naming] (MSC service thread 1-4) JBAS011802: Starting Naming Service
12:22:05,002 INFO [org.jboss.as.mail.extension] (MSC service thread 1-5) JBAS015400: Bound mail session [java:jboss/mail/Default]
12:22:05,012 INFO [org.jboss.as.connector.subsystems.datasources] (ServerService Thread Pool — 33) JBAS010403: Deploying JDBC-compliant driver class org.h2.Driver (version 1.3)
12:22:05,024 INFO [org.jboss.as.connector.deployers.jdbc] (MSC service thread 1-5) JBAS010417: Started Driver service with driver-name = h2
12:22:05,196 INFO [org.wildfly.extension.undertow] (ServerService Thread Pool — 59) JBAS017527: Creating file handler for path /opt/JBoss/Wildfly8/wildfly-8.0.0.Final/welcome-content
12:22:05,213 INFO [org.wildfly.extension.undertow] (MSC service thread 1-8) JBAS017525: Started server default-server.
12:22:05,243 INFO [org.wildfly.extension.undertow] (MSC service thread 1-6) JBAS017531: Host default-host starting
12:22:05,323 INFO [org.wildfly.extension.undertow] (MSC service thread 1-2) JBAS017519: Undertow AJP listener ajp listening on /127.0.0.1:8009
12:22:05,333 INFO [org.jboss.modcluster] (ServerService Thread Pool — 62) MODCLUSTER000001: Initializing mod_cluster version 1.3.0.Final
12:22:05,335 INFO [org.wildfly.extension.undertow] (MSC service thread 1-8) JBAS017519: Undertow HTTP listener default listening on /127.0.0.1:8080
12:22:05,389 INFO [org.jboss.modcluster] (ServerService Thread Pool — 62) MODCLUSTER000032: Listening to proxy advertisements on /224.0.1.105:23364
12:22:05,517 INFO [org.hornetq.core.server] (ServerService Thread Pool — 62) HQ221000: live server is starting with configuration HornetQ Configuration (clustered=true,backup=false,sharedStore=true,journalDirectory=/opt/JBoss/Wildfly8/wildfly-8.0.0.Final/standalone/data/messagingjournal,bindingsDirectory=/opt/JBoss/Wildfly8/wildfly-8.0.0.Final/standalone/data/messagingbindings,largeMessagesDirectory=/opt/JBoss/Wildfly8/wildfly-8.0.0.Final/standalone/data/messaginglargemessages,pagingDirectory=/opt/JBoss/Wildfly8/wildfly-8.0.0.Final/standalone/data/messagingpaging)
12:22:05,545 INFO [org.hornetq.core.server] (ServerService Thread Pool — 62) HQ221006: Waiting to obtain live lock
12:22:05,656 INFO [org.jboss.as.jacorb] (MSC service thread 1-7) JBAS016330: CORBA ORB Service started
12:22:05,657 INFO [org.hornetq.core.server] (ServerService Thread Pool — 62) HQ221012: Using AIO Journal
12:22:05,796 INFO [io.netty.util.internal.PlatformDependent] (ServerService Thread Pool — 62) Your platform does not provide complete low-level API for accessing direct buffers reliably. Unless explicitly requested, heap buffer will always be preferred to avoid potential system unstability.
12:22:05,855 INFO [org.jboss.as.jacorb] (MSC service thread 1-5) JBAS016328: CORBA Naming Service started
12:22:05,866 INFO [org.jboss.as.connector.subsystems.datasources] (MSC service thread 1-6) JBAS010400: Bound data source [java:jboss/datasources/ExampleDS]
12:22:05,885 INFO [org.hornetq.core.server] (ServerService Thread Pool — 62) HQ221043: Adding protocol support CORE
12:22:05,895 INFO [org.hornetq.core.server] (ServerService Thread Pool — 62) HQ221043: Adding protocol support AMQP
12:22:05,898 INFO [org.hornetq.core.server] (ServerService Thread Pool — 62) HQ221043: Adding protocol support STOMP
12:22:05,980 INFO [org.jboss.ws.common.management] (MSC service thread 1-3) JBWS022052: Starting JBoss Web Services – Stack CXF Server 4.2.3.Final
12:22:05,989 INFO [org.hornetq.core.server] (ServerService Thread Pool — 62) HQ221034: Waiting to obtain live lock
12:22:05,990 INFO [org.hornetq.core.server] (ServerService Thread Pool — 62) HQ221035: Live Server Obtained live lock
12:22:05,994 INFO [org.jboss.as.server.deployment.scanner] (MSC service thread 1-1) JBAS015012: Started FileSystemDeploymentService for directory /opt/JBoss/Wildfly8/wildfly-8.0.0.Final/standalone/deployments
12:22:06,327 INFO [org.jboss.messaging] (MSC service thread 1-1) JBAS011615: Registered HTTP upgrade for hornetq-remoting protocol handled by http-acceptor-throughput acceptor
12:22:06,328 INFO [org.jboss.messaging] (MSC service thread 1-3) JBAS011615: Registered HTTP upgrade for hornetq-remoting protocol handled by http-acceptor acceptor
12:22:06,447 INFO [org.hornetq.core.server] (ServerService Thread Pool — 62) HQ221007: Server is now live
12:22:06,447 INFO [org.hornetq.core.server] (ServerService Thread Pool — 62) HQ221001: HornetQ Server version 2.4.1.Final (Fast Hornet, 124) [f0d6d0ea-a8cd-11e5-b68a-d1ffaffdeb86]
12:22:06,464 INFO [org.jboss.as.messaging] (ServerService Thread Pool — 62) JBAS011601: Bound messaging object to jndi name java:jboss/exported/jms/RemoteConnectionFactory
12:22:06,465 INFO [org.jboss.as.messaging] (ServerService Thread Pool — 63) JBAS011601: Bound messaging object to jndi name java:/ConnectionFactory
12:22:06,512 INFO [org.jboss.as.connector.deployment] (MSC service thread 1-4) JBAS010406: Registered connection factory java:/JmsXA
12:22:06,568 INFO [org.hornetq.ra] (MSC service thread 1-4) HornetQ resource adaptor started
12:22:06,569 INFO [org.jboss.as.connector.services.resourceadapters.ResourceAdapterActivatorService$ResourceAdapterActivator] (MSC service thread 1-4) IJ020002: Deployed: file://RaActivatorhornetq-ra
12:22:06,571 INFO [org.jboss.as.connector.deployment] (MSC service thread 1-4) JBAS010401: Bound JCA ConnectionFactory [java:/JmsXA]
12:22:06,571 INFO [org.jboss.as.messaging] (MSC service thread 1-4) JBAS011601: Bound messaging object to jndi name java:jboss/DefaultJMSConnectionFactory
12:22:06,645 INFO [org.jboss.as] (Controller Boot Thread) JBAS015961: Http management interface listening on http://127.0.0.1:9990/management
12:22:06,645 INFO [org.jboss.as] (Controller Boot Thread) JBAS015951: Admin console listening on http://127.0.0.1:9990
12:22:06,646 INFO [org.jboss.as] (Controller Boot Thread) JBAS015874: WildFly 8.0.0.Final “WildFly” started in 4521ms – Started 229 of 356 services (172 services are lazy, passive or on-demand)
Hey,
Please add parameter “-b 0.0.0.0” as well which starting server. By default its starting server on loopback address :).
Hope this will help you.
Thanks!
Hey,
Please add parameter “-b 0.0.0.0” as well while starting server. By default it start server on loopback address :).
Hope this will help you.
Thanks!
I have a similar problem but I am using java 8. The docs say that 7 onwards should work and the homepage talks about the plans for 8 and 9, so I thought there would be no problem. There is a fragment of the log output below. It seems to be complaining about a missing file, service-loader-resources. Any ideas please?
Setting JAVA property to “C:\Program Files\java\jdk1.8.0_60\bin\java”
===============================================================================
JBoss Bootstrap Environment
JBOSS_HOME: “C:\Program Files\wildfly-9.0.1.Final”
JAVA: “C:\Program Files\java\jdk1.8.0_60\bin\java”
JAVA_OPTS: “-Dprogram.name=standalone.bat -Xms64M -Xmx512M -XX:MaxPermSize=256M -Djava.net.preferIPv4Stack=true -Djboss.modules.system.pkgs=org.jboss.byteman”
===============================================================================
Java HotSpot(TM) 64-Bit Server VM warning: ignoring option MaxPermSize=256M; support was removed in 8.0
16:14:45,881 INFO [org.jboss.modules] (main) JBoss Modules version 1.4.3.Final
16:14:45,912 WARN [org.jboss.modules] (main) Failed to define class org.jboss.as.jmx.PluggableMBeanServerBuilder in Module “org.jboss.as.jmx:main” fr
om local module loader @707f7052 (finder: local module finder @11028347 (roots: C:\Program Files\wildfly-9.0.1.Final\modules,C:\Program Files\wildfly-
9.0.1.Final\modules\system\layers\base)): org.jboss.modules.ModuleLoadError: Error loading module from C:\Program Files\wildfly-9.0.1.Final\modules\su
n\jdk\main\module.xml
at org.jboss.modules.ModuleLoadException.toError(ModuleLoadException.java:74) [jboss-modules.jar:1.4.3.Final]
at org.jboss.modules.Module.getPathsUnchecked(Module.java:1384) [jboss-modules.jar:1.4.3.Final]
at org.jboss.modules.Module.loadModuleClass(Module.java:555) [jboss-modules.jar:1.4.3.Final]
at org.jboss.modules.ModuleClassLoader.findClass(ModuleClassLoader.java:197) [jboss-modules.jar:1.4.3.Final]
at org.jboss.modules.ConcurrentClassLoader.performLoadClassUnchecked(ConcurrentClassLoader.java:455) [jboss-modules.jar:1.4.3.Final]
at org.jboss.modules.ConcurrentClassLoader.performLoadClassChecked(ConcurrentClassLoader.java:404) [jboss-modules.jar:1.4.3.Final]
at org.jboss.modules.ConcurrentClassLoader.performLoadClass(ConcurrentClassLoader.java:385) [jboss-modules.jar:1.4.3.Final]
at org.jboss.modules.ConcurrentClassLoader.loadClass(ConcurrentClassLoader.java:130) [jboss-modules.jar:1.4.3.Final]
at java.lang.ClassLoader.defineClass1(Native Method) [rt.jar:1.8.0_60]
at java.lang.ClassLoader.defineClass(ClassLoader.java:760) [rt.jar:1.8.0_60]
at org.jboss.modules.ModuleClassLoader.doDefineOrLoadClass(ModuleClassLoader.java:353) [jboss-modules.jar:1.4.3.Final]
at org.jboss.modules.ModuleClassLoader.defineClass(ModuleClassLoader.java:432) [jboss-modules.jar:1.4.3.Final]
at org.jboss.modules.ModuleClassLoader.loadClassLocal(ModuleClassLoader.java:269) [jboss-modules.jar:1.4.3.Final]
at org.jboss.modules.ModuleClassLoader$1.loadClassLocal(ModuleClassLoader.java:77) [jboss-modules.jar:1.4.3.Final]
at org.jboss.modules.Module.loadModuleClass(Module.java:560) [jboss-modules.jar:1.4.3.Final]
at org.jboss.modules.ModuleClassLoader.findClass(ModuleClassLoader.java:197) [jboss-modules.jar:1.4.3.Final]
at org.jboss.modules.ConcurrentClassLoader.performLoadClassUnchecked(ConcurrentClassLoader.java:455) [jboss-modules.jar:1.4.3.Final]
at org.jboss.modules.ConcurrentClassLoader.performLoadClassChecked(ConcurrentClassLoader.java:404) [jboss-modules.jar:1.4.3.Final]
at org.jboss.modules.ConcurrentClassLoader.performLoadClass(ConcurrentClassLoader.java:385) [jboss-modules.jar:1.4.3.Final]
at org.jboss.modules.ConcurrentClassLoader.loadClass(ConcurrentClassLoader.java:130) [jboss-modules.jar:1.4.3.Final]
at javax.management.MBeanServerFactory.loadBuilderClass(MBeanServerFactory.java:446) [rt.jar:1.8.0_60]
at javax.management.MBeanServerFactory.checkMBeanServerBuilder(MBeanServerFactory.java:488) [rt.jar:1.8.0_60]
at javax.management.MBeanServerFactory.getNewMBeanServerBuilder(MBeanServerFactory.java:539) [rt.jar:1.8.0_60]
at javax.management.MBeanServerFactory.newMBeanServer(MBeanServerFactory.java:316) [rt.jar:1.8.0_60]
at javax.management.MBeanServerFactory.createMBeanServer(MBeanServerFactory.java:231) [rt.jar:1.8.0_60]
at javax.management.MBeanServerFactory.createMBeanServer(MBeanServerFactory.java:192) [rt.jar:1.8.0_60]
at java.lang.management.ManagementFactory.getPlatformMBeanServer(ManagementFactory.java:469) [rt.jar:1.8.0_60]
at org.jboss.modules.Main.main(Main.java:481) [jboss-modules.jar:1.4.3.Final]
Caused by: org.jboss.modules.xml.XmlPullParserException: Failed to add resource root ‘service-loader-resources’ at path ‘service-loader-resources’ (position: END_TAG seen … here –>\n … @28:57) caused by: java.io.FileNotFoundException: C:\Program Files\wildfly-9.0.1.Final\modules\sun\jdk\main\service-loader-resources (The system cannot find the file specified)
at org.jboss.modules.ModuleXmlParser.parseResourceRoot(ModuleXmlParser.java:802) [jboss-modules.jar:1.4.3.Final]
at org.jboss.modules.ModuleXmlParser.parseResources(ModuleXmlParser.java:646) [jboss-modules.jar:1.4.3.Final]
at org.jboss.modules.ModuleXmlParser.parseModuleContents(ModuleXmlParser.java:446) [jboss-modules.jar:1.4.3.Final]
at org.jboss.modules.ModuleXmlParser.parseDocument(ModuleXmlParser.java:261) [jboss-modules.jar:1.4.3.Final]
at org.jboss.modules.ModuleXmlParser.parseModuleXml(ModuleXmlParser.java:148) [jboss-modules.jar:1.4.3.Final]
at org.jboss.modules.ModuleXmlParser.parseModuleXml(ModuleXmlParser.java:127) [jboss-modules.jar:1.4.3.Final]
Hi,
It seems issue with Java version. Please try with version 7, then post results if it doesn’t work.
Normally, this error occurs when using incompatible/wrong java version.
Regards!
Hi Vilbi,
Sorry, I didn’t noticed about your comment.
Just, upgrade your jdk to version 7 as Wildwfly doesn’t support 6 or older.
@khaya-mfini
Thank you!!
Its good to add things to alternatives. But, another thing that I would suggest is that you can Install jdk-1.7 to any specific directory and it just set your variable in standalone.conf/sh file.
With this you can have multiple java version running on same systems and will not break running things :)..
Thanks!!
Hi Vilbi,
I know it’s months after, but you may want to also change your “alternatives” on your system for java. I have written steps for you below:
1. First install Java EE 7 on the server or pc
1.1) Download:
jdk-7u67-linux-i586.tar.gz (this should contain a jre on it)
1.2) Extract to /opt
1.3) Create a symlink called “java”
$ cd /opt
$ ln -s /opt/jdk1.7.0_67 java
1.4) You should see:
lrwxrwxrwx 1 root root 11 Aug 24 15:25 java -> jdk1.7.0_67
drwxr-xr-x 8 uucp 143 4096 Jul 25 18:14 jdk1.7.0_67
1.5) Make this version of java default:
1.5.1) Edit /etc/environment and append “/opt/java/bin” to your PATH environment variable.
Also add a JAVA_HOME that is set to “/opt/java”. Something like:
PATH=”/usr/local/sbin:/usr/local/bin:/usr/sbin:/usr/bin:/sbin:/bin:/opt/java/bin”
JAVA_HOME=”/opt/java”
These will take effect next time you restart your pc.
1.5.2) $ sudo update-alternatives –install “/usr/bin/java” “java” “/opt/java/jre/bin/java” 1
1.5.3) $ sudo update-alternatives –config java
1.5.4) Check if version is correct: $ java -version
java version “1.7.0_67”
Java(TM) SE Runtime Environment (build 1.7.0_67-b01)
Java HotSpot(TM) Client VM (build 24.65-b04, mixed mode)
Please go thrrough the installation steps and error
Installation Steps
======================================================================
mkdir /data
cd /data/
unzip wildfly-8.0.0.Final.zip
cd wildfly-8.0.0.Final/bin
yum install *openjdk* -y
find /usr -name *jdk // to see the java path /usr/lib/jvm/java-openjdk
vi standalone.conf
vi standalone.conf //JAVA_HOME=”/usr/lib/jvm/java-openjdk”
//JBOSS_HOME=”/data/wildfly-8.0.0.Final”
Java Vesion
=======================================================================
[root@REDHAT2 bin]# java -version
java version “1.6.0_20”
OpenJDK Runtime Environment (IcedTea6 1.9.7) (rhel-1.39.1.9.7.el6-i386)
OpenJDK Client VM (build 19.0-b09, mixed mode)
=======================================================================
Starting Wildfly
./standalone.sh –server-config standalone-full-ha.xml
OUTPUT
[root@REDHAT2 bin]# ./standalone.sh –server-config standalone-full-ha.xml
=========================================================================
OUTPUT
=========================================================================
JBoss Bootstrap Environment
JBOSS_HOME: /data/wildfly-8.0.0.Final
JAVA: /usr/lib/jvm/java-openjdk/bin/java
JAVA_OPTS: -server -Xms64m -Xmx512m -XX:MaxPermSize=256m -Djava.net.preferIPv4Stack=true –
Djboss.modules.system.pkgs=org.jboss.byteman -Djava.awt.headless=true
=========================================================================
21:53:13,426 INFO [org.jboss.modules] (main) JBoss Modules version 1.3.0.Final
21:53:13,436 WARN [org.jboss.modules] (main) Failed to define class org.jboss.as.jmx.PluggableMBeanServerBuilder in Module
“org.jboss.as.jmx:main” from local module loader @1ffc686 (finder: local module finder @142bece (roots: /data/wildfly-
8.0.0.Final/modules,/data/wildfly-8.0.0.Final/modules/system/layers/base)): java.lang.UnsupportedClassVersionError:
org/jboss/as/jmx/PluggableMBeanServerBuilder : Unsupported major.minor version 51.0
at java.lang.ClassLoader.defineClass1(Native Method) [rt.jar:1.6.0_20]
at java.lang.ClassLoader.defineClass(ClassLoader.java:634) [rt.jar:1.6.0_20]
at org.jboss.modules.ModuleClassLoader.doDefineOrLoadClass(ModuleClassLoader.java:345) [jboss-modules.jar:1.3.0.Final]
at org.jboss.modules.ModuleClassLoader.defineClass(ModuleClassLoader.java:423) [jboss-modules.jar:1.3.0.Final]
at org.jboss.modules.ModuleClassLoader.loadClassLocal(ModuleClassLoader.java:261) [jboss-modules.jar:1.3.0.Final]
at org.jboss.modules.ModuleClassLoader$1.loadClassLocal(ModuleClassLoader.java:76) [jboss-modules.jar:1.3.0.Final]
at org.jboss.modules.Module.loadModuleClass(Module.java:548) [jboss-modules.jar:1.3.0.Final]
at org.jboss.modules.ModuleClassLoader.findClass(ModuleClassLoader.java:189) [jboss-modules.jar:1.3.0.Final]
at org.jboss.modules.ConcurrentClassLoader.performLoadClassUnchecked(ConcurrentClassLoader.java:443) [jboss-
modules.jar:1.3.0.Final]
at org.jboss.modules.ConcurrentClassLoader.performLoadClassChecked(ConcurrentClassLoader.java:431) [jboss-
modules.jar:1.3.0.Final]
at org.jboss.modules.ConcurrentClassLoader.performLoadClass(ConcurrentClassLoader.java:373) [jboss-modules.jar:1.3.0.Final]
at org.jboss.modules.ConcurrentClassLoader.loadClass(ConcurrentClassLoader.java:118) [jboss-modules.jar:1.3.0.Final]
at javax.management.MBeanServerFactory.loadBuilderClass(MBeanServerFactory.java:441) [rt.jar:1.6.0_20]
at javax.management.MBeanServerFactory.checkMBeanServerBuilder(MBeanServerFactory.java:483) [rt.jar:1.6.0_20]
at javax.management.MBeanServerFactory.getNewMBeanServerBuilder(MBeanServerFactory.java:534) [rt.jar:1.6.0_20]
at javax.management.MBeanServerFactory.newMBeanServer(MBeanServerFactory.java:314) [rt.jar:1.6.0_20]
at javax.management.MBeanServerFactory.createMBeanServer(MBeanServerFactory.java:229) [rt.jar:1.6.0_20]
at javax.management.MBeanServerFactory.createMBeanServer(MBeanServerFactory.java:190) [rt.jar:1.6.0_20]
at sun.management.ManagementFactory.createPlatformMBeanServer(ManagementFactory.java:320) [rt.jar:1.6.0_20]
at java.lang.management.ManagementFactory.getPlatformMBeanServer(ManagementFactory.java:521) [rt.jar:1.6.0_20]
at org.jboss.modules.Main.main(Main.java:449) [jboss-modules.jar:1.3.0.Final]
Exception in thread “main” java.lang.UnsupportedClassVersionError: org/jboss/as/jmx/PluggableMBeanServerBuilder : Unsupported
major.minor version 51.0
at java.lang.ClassLoader.defineClass1(Native Method)
at java.lang.ClassLoader.defineClass(ClassLoader.java:634)
at org.jboss.modules.ModuleClassLoader.doDefineOrLoadClass(ModuleClassLoader.java:345)
at org.jboss.modules.ModuleClassLoader.defineClass(ModuleClassLoader.java:423)
at org.jboss.modules.ModuleClassLoader.loadClassLocal(ModuleClassLoader.java:261)
at org.jboss.modules.ModuleClassLoader$1.loadClassLocal(ModuleClassLoader.java:76)
at org.jboss.modules.Module.loadModuleClass(Module.java:548)
at org.jboss.modules.ModuleClassLoader.findClass(ModuleClassLoader.java:189)
at org.jboss.modules.ConcurrentClassLoader.performLoadClassUnchecked(ConcurrentClassLoader.java:443)
at org.jboss.modules.ConcurrentClassLoader.performLoadClassChecked(ConcurrentClassLoader.java:431)
at org.jboss.modules.ConcurrentClassLoader.performLoadClass(ConcurrentClassLoader.java:373)
at org.jboss.modules.ConcurrentClassLoader.loadClass(ConcurrentClassLoader.java:118)
at javax.management.MBeanServerFactory.loadBuilderClass(MBeanServerFactory.java:441)
at javax.management.MBeanServerFactory.checkMBeanServerBuilder(MBeanServerFactory.java:483)
at javax.management.MBeanServerFactory.getNewMBeanServerBuilder(MBeanServerFactory.java:534)
at javax.management.MBeanServerFactory.newMBeanServer(MBeanServerFactory.java:314)
at javax.management.MBeanServerFactory.createMBeanServer(MBeanServerFactory.java:229)
at javax.management.MBeanServerFactory.createMBeanServer(MBeanServerFactory.java:190)
at sun.management.ManagementFactory.createPlatformMBeanServer(ManagementFactory.java:320)
at java.lang.management.ManagementFactory.getPlatformMBeanServer(ManagementFactory.java:521)
at org.jboss.modules.Main.main(Main.java:449)
Please go through the steps that i follwed and error messages..
correct my mistakes
Installation Steps
======================================================================
mkdir /data
250 cd /data/
251 LS
252 ls
253 unzip wildfly-8.0.0.Final.zip
254 ls
255 cd wildfly-8.0.0.Final
256 ls
257 cd bin/
258 ls
259 find /usr -name *jdk
260 cd /usr/lib/jvm/java-openjdk
261 ls
262 cd /data/wildfly-8.0.0.Final/bin/
263 vi standalone.conf
264 pwd
265 vi standalone.conf //JAVA_HOME=”/usr/lib/jvm/java-openjdk”
//JBOSS_HOME=”/data/wildfly-8.0.0.Final”
=======================================================================
[root@REDHAT2 bin]# java -version
java version “1.6.0_20”
OpenJDK Runtime Environment (IcedTea6 1.9.7) (rhel-1.39.1.9.7.el6-i386)
OpenJDK Client VM (build 19.0-b09, mixed mode)
=======================================================================
266 ./standalone.sh –server-config standalone-full-ha.xml
[root@REDHAT2 bin]# ./standalone.sh –server-config standalone-full-ha.xml
=========================================================================
OUTPUT
=========================================================================
JBoss Bootstrap Environment
JBOSS_HOME: /data/wildfly-8.0.0.Final
JAVA: /usr/lib/jvm/java-openjdk/bin/java
JAVA_OPTS: -server -Xms64m -Xmx512m -XX:MaxPermSize=256m -Djava.net.preferIPv4Stack=true -Djboss.modules.system.pkgs=org.jboss.byteman -Djava.awt.headless=true
=========================================================================
21:53:13,426 INFO [org.jboss.modules] (main) JBoss Modules version 1.3.0.Final
21:53:13,436 WARN [org.jboss.modules] (main) Failed to define class org.jboss.as.jmx.PluggableMBeanServerBuilder in Module “org.jboss.as.jmx:main” from local module loader @1ffc686 (finder: local module finder @142bece (roots: /data/wildfly-8.0.0.Final/modules,/data/wildfly-8.0.0.Final/modules/system/layers/base)): java.lang.UnsupportedClassVersionError: org/jboss/as/jmx/PluggableMBeanServerBuilder : Unsupported major.minor version 51.0
at java.lang.ClassLoader.defineClass1(Native Method) [rt.jar:1.6.0_20]
at java.lang.ClassLoader.defineClass(ClassLoader.java:634) [rt.jar:1.6.0_20]
at org.jboss.modules.ModuleClassLoader.doDefineOrLoadClass(ModuleClassLoader.java:345) [jboss-modules.jar:1.3.0.Final]
at org.jboss.modules.ModuleClassLoader.defineClass(ModuleClassLoader.java:423) [jboss-modules.jar:1.3.0.Final]
at org.jboss.modules.ModuleClassLoader.loadClassLocal(ModuleClassLoader.java:261) [jboss-modules.jar:1.3.0.Final]
at org.jboss.modules.ModuleClassLoader$1.loadClassLocal(ModuleClassLoader.java:76) [jboss-modules.jar:1.3.0.Final]
at org.jboss.modules.Module.loadModuleClass(Module.java:548) [jboss-modules.jar:1.3.0.Final]
at org.jboss.modules.ModuleClassLoader.findClass(ModuleClassLoader.java:189) [jboss-modules.jar:1.3.0.Final]
at org.jboss.modules.ConcurrentClassLoader.performLoadClassUnchecked(ConcurrentClassLoader.java:443) [jboss-modules.jar:1.3.0.Final]
at org.jboss.modules.ConcurrentClassLoader.performLoadClassChecked(ConcurrentClassLoader.java:431) [jboss-modules.jar:1.3.0.Final]
at org.jboss.modules.ConcurrentClassLoader.performLoadClass(ConcurrentClassLoader.java:373) [jboss-modules.jar:1.3.0.Final]
at org.jboss.modules.ConcurrentClassLoader.loadClass(ConcurrentClassLoader.java:118) [jboss-modules.jar:1.3.0.Final]
at javax.management.MBeanServerFactory.loadBuilderClass(MBeanServerFactory.java:441) [rt.jar:1.6.0_20]
at javax.management.MBeanServerFactory.checkMBeanServerBuilder(MBeanServerFactory.java:483) [rt.jar:1.6.0_20]
at javax.management.MBeanServerFactory.getNewMBeanServerBuilder(MBeanServerFactory.java:534) [rt.jar:1.6.0_20]
at javax.management.MBeanServerFactory.newMBeanServer(MBeanServerFactory.java:314) [rt.jar:1.6.0_20]
at javax.management.MBeanServerFactory.createMBeanServer(MBeanServerFactory.java:229) [rt.jar:1.6.0_20]
at javax.management.MBeanServerFactory.createMBeanServer(MBeanServerFactory.java:190) [rt.jar:1.6.0_20]
at sun.management.ManagementFactory.createPlatformMBeanServer(ManagementFactory.java:320) [rt.jar:1.6.0_20]
at java.lang.management.ManagementFactory.getPlatformMBeanServer(ManagementFactory.java:521) [rt.jar:1.6.0_20]
at org.jboss.modules.Main.main(Main.java:449) [jboss-modules.jar:1.3.0.Final]
Exception in thread “main” java.lang.UnsupportedClassVersionError: org/jboss/as/jmx/PluggableMBeanServerBuilder : Unsupported major.minor version 51.0
at java.lang.ClassLoader.defineClass1(Native Method)
at java.lang.ClassLoader.defineClass(ClassLoader.java:634)
at org.jboss.modules.ModuleClassLoader.doDefineOrLoadClass(ModuleClassLoader.java:345)
at org.jboss.modules.ModuleClassLoader.defineClass(ModuleClassLoader.java:423)
at org.jboss.modules.ModuleClassLoader.loadClassLocal(ModuleClassLoader.java:261)
at org.jboss.modules.ModuleClassLoader$1.loadClassLocal(ModuleClassLoader.java:76)
at org.jboss.modules.Module.loadModuleClass(Module.java:548)
at org.jboss.modules.ModuleClassLoader.findClass(ModuleClassLoader.java:189)
at org.jboss.modules.ConcurrentClassLoader.performLoadClassUnchecked(ConcurrentClassLoader.java:443)
at org.jboss.modules.ConcurrentClassLoader.performLoadClassChecked(ConcurrentClassLoader.java:431)
at org.jboss.modules.ConcurrentClassLoader.performLoadClass(ConcurrentClassLoader.java:373)
at org.jboss.modules.ConcurrentClassLoader.loadClass(ConcurrentClassLoader.java:118)
at javax.management.MBeanServerFactory.loadBuilderClass(MBeanServerFactory.java:441)
at javax.management.MBeanServerFactory.checkMBeanServerBuilder(MBeanServerFactory.java:483)
at javax.management.MBeanServerFactory.getNewMBeanServerBuilder(MBeanServerFactory.java:534)
at javax.management.MBeanServerFactory.newMBeanServer(MBeanServerFactory.java:314)
at javax.management.MBeanServerFactory.createMBeanServer(MBeanServerFactory.java:229)
at javax.management.MBeanServerFactory.createMBeanServer(MBeanServerFactory.java:190)
at sun.management.ManagementFactory.createPlatformMBeanServer(ManagementFactory.java:320)
at java.lang.management.ManagementFactory.getPlatformMBeanServer(ManagementFactory.java:521)
at org.jboss.modules.Main.main(Main.java:449)
Hi vilbiraju,
Check your java version as :
#java -version
It should be 7.*. The error is due to old version of java, Upgrade this to 7 and it will work. WildFly is compatible with JDK 7.*.
Let us know, if you still have any issues.
Thanks!
Kuldeep
Let me check and revert back..
Thank You for the response
Thanks, the article is well written and easy to understand. Hoping to see more such posts from you. keep it bro!
Thanks Abhi!!
Thanks for a great write-up are you planning on doing more?
clustered version ?? are there still many ways to deploy the cluster ??
how about good examples of deploying apps (( i.e. different ways ?? ))
or even a short few articles on developing some basic apps ??
Cheers
hdaz
Hi hdaz,
It’s really good to know that you like this.
Yes, we are coming with more articles on WildFly-8 i.e. About Standalone, Clustered, different ways of deployment and undeployments etc.
Stay tuned with tecmint :) !!
Thanks!!
I really love your article Kuldeep , Because this is so simple and clear to understand at starting….
i will happy if you post Standalone ahead.
good work Boi
Thank you Vinod.
We’ll come up with your requested articles soon.
Thank!!
Why do you want to install JDK/JRE 7u25 on Feb 17 2014? 7u51 was already there for a while. Or is it because WildFly uses Guava which doesn’t work with 7u51?
Hi Thai,
WildFly 8 the First Release which is compatible with JEE 7. It’ll work with both 7u25 and 7u51. Infact, it’ll work with any release of JDK 7.
Hope this will help you!
Please let us know if still you have any queries.
Thanks!
Kuldeep