As system administrators, we would have got requirements wherein we need to configure raw hard disks to the existing servers as part of upgrading server capacity or sometimes disk replacement in case of disk failure.
In this article, I will take you through the steps by which we can add the new raw hard disk to an existing Linux server such as RHEL/CentOS or Debian/Ubuntu.
Suggested Read: How to Add a New Disk Larger Than 2TB to An Existing Linux
Important: Please note that the purpose of this article is to show only how to create a new partition and doesn’t include partition extension or any other switches.
I am using fdisk utility to do this configuration.
I have added a hard disk of 20GB capacity to be mounted as a /data partition.
fdisk is a command line utility to view and manage hard disks and partitions on Linux systems.
# fdisk -l
This will list the current partitions and configurations.

After attaching the hard disk of 20GB capacity, the fdisk -l will give the below output.
# fdisk -l
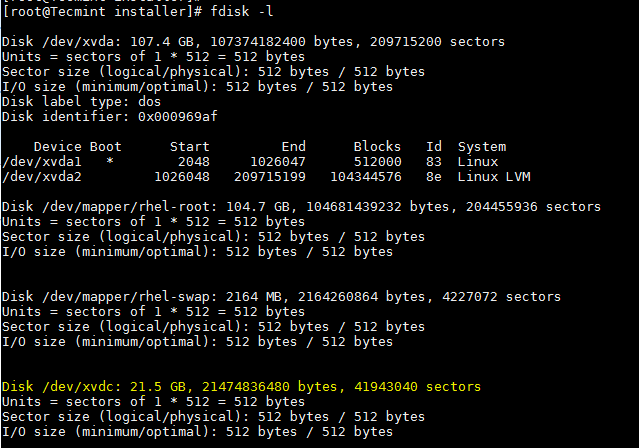
New disk added is shown as /dev/xvdc. If we are adding physical disk it will show as /dev/sda based of the disk type. Here I used a virtual disk.
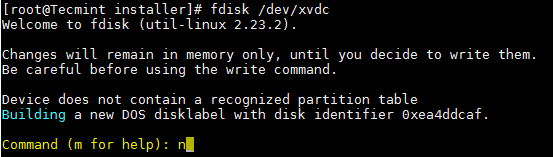
To partition a particular hard disk, for example /dev/xvdc.
# fdisk /dev/xvdc
Commonly used fdisk commands.
n– Create partitionp– print partition tabled– delete a partitionq– exit without saving the changesw– write the changes and exit.
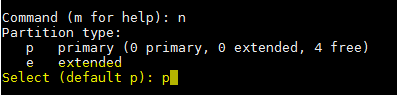
Here since we are creating a partition use n option.
Create either primary/extended partitions. By default we can have upto 4 primary partitions.
Give the partition number as desired. Recommended to go for the default value 1.

Give the value of the first sector. If it is a new disk, always select default value. If you are creating a second partition on the same disk, we need to add 1 to the last sector of the previous partition.

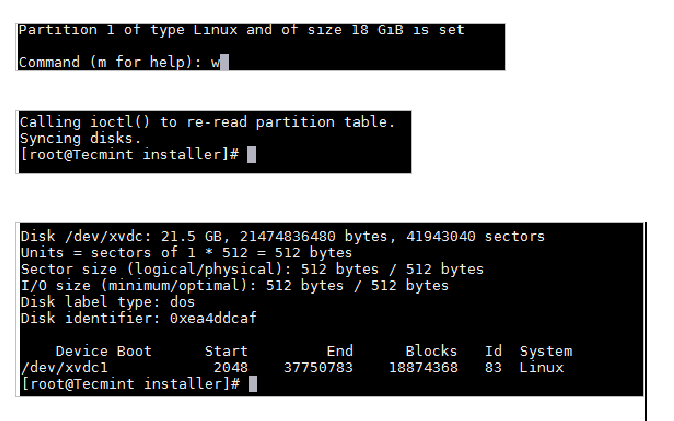
Give the value of the last sector or the partition size. Always recommended to give the size of the partition. Always prefix + to avoid value out of range error.

Save the changes and exit.
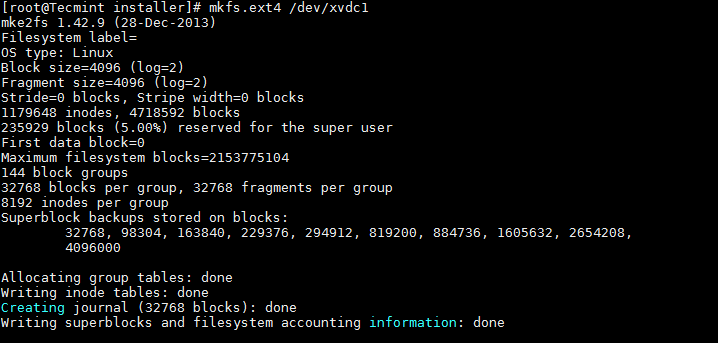
Now format the disk with mkfs command.
# mkfs.ext4 /dev/xvdc1
Once formatting has been completed, now mount the partition as shown below.
# mount /dev/xvdc1 /data
Make an entry in /etc/fstab file for permanent mount at boot time.
/dev/xvdc1 /data ext4 defaults 0 0
Conclusion
Now you know how to partition a raw disk using fdisk command and mount the same.
We need to be extra cautious while working with the partitions especially when you are editing the configured disks. Please share your feedback and suggestions.


I will suggest using UUID to mount devices. This gives some hardware independence, especially when working on a cloud where you can add and move devices as needed.
Use the uuid corresponding to the device and drive name of your convenience.
If I create a
/homefolder on the second drive, will it merge with the/homefolder on the first drive? Can not be afraid of data loss of the first disk?It will not merge the old /home folder, instead, it will replace it.
What I would do is:
Once you are comfortable, delete the old home folder.
If you run into problems, login as root, unmount /home, comment out or remove the fstab entry for the new drive, rename /home_old to /home and reboot.
Hi there,
I have a problem using Ubuntu. I have installed two hard drives one 128GB SSD and the other is 500 HD. On by default, I set 128 as a boot like using window and ubuntu at a time.
I have a problem there is when I open window in dual boot mode all partition work normal and good but when I open ubuntu my 500 Gb disk cannot show on ubuntu platform what I happen.
my all data exist on 500gb hard and I cannot see in ubuntu please guide some tricks
Hi,
I need to add another hard disk in rhel7 system and wanted to create a ‘sdb’ partition. May I know how to create it?
@Bhargvi,
Follow the same procedure as explained in this article, for adding new disk to an existing RHEL 7 system..
Thank you Ravi Saive
I need to add graphically not a command line mode…..
In graphical mode how to add the hard disk…
@Bhargavi,
I think you can do it by using any graphical disk management utility like Gparted or any other, that you need to find out..
You added 20 Gb Hard disk but in fdisk it is showing 21.5 GB. HOW??
Thanks Lakshmi! It’s very helpful!
Thanks Lakshmi. It worked well for my RHEL VM.
Thanks — I was able to follow this guide and get my drive installed with no headaches at all!
It might be useful to update with instructions to change the owner of the newly assigned drive. In Ubuntu 16.04, my freshly installed drive belonged to the user `root` and the group `root`. I just had to run `sudo chown : /dev/sda1` (in Ubuntu it seems both name and group are your login name) to get write access to the drive.
In your /etc/fstab consider using the UUID instead of the automatically assigned /dev/***.
UUID can be found using blkid.
e.g. fstab
Hi, before the command.
you should add: mkdir /data (if there is no /data)
Awesome page! Thanks for making this available!
Thanks @Dominic. Keep checking https://www.tecmint.com for latest updates and some tricks and tips on linux
Excellent Post. I looked all over the NET for the above information. sometimes found some pieces and some times just not very clear instructions. Yours was just perfect and it worked on the first try. This is the way Linux should be taught to anyone Linux newbie or not. Thanks !!!!
Thanks @Neo. Keep checking https://www.tecmint.com for latest updates and some tricks and tips on linux.
Can we mount the new disk at root
"/"partition?Why would you not use Logical Volume Manager?
What if the file system fills up? If you used LVM you could grow the file system with no impact to production.
@DGC
We can use LVM as well. But in this article I just gave steps for fdisk which is just another method
Great article, keep posting…
Thanks Anish.
Thank you.
It would be great to describe how to use parted if HDD size more 2 TB. Nowdays, it is a common already.
@Alexey
Thanks for mentioning it. Follow this link to know how to use parted command.
https://www.tecmint.com/add-disk-larger-than-2tb-to-an-existing-linux/
Thank you for the link
Very good article, should not be ext4 instead of xfs in the fstab file?
Thanks for the comments. We have made the correction in the article.
Nice post….cheers
Probably after attaching the new disk you should scan it first then only it will get reflected in “fdisk -l” output. But sometimes it depends which Linux version you are using. Also we can see the new disk info using “dmesg” command.
Thanks for the comment. Here I used RHEL 7 in virtual Infra . Hence when I added a new Disk, it was reflected in “fdisk -l” with out scanning.
Great post…… Cheers, Prasanna