This tutorial will guide you on how to add Ubuntu 14.10 Server, Ubuntu 14.04 Server and Debian 7 Wheezy distributions to PXE Network Boot Environment Setup on RHEL/CentOS 7.

Although for the purposes of this tutorial, I will only demonstrate how you can add 64-bit Network Installation Images, the same procedure can also be applied for Ubuntu or Debian 32-bit or other architectures images. Also, the process of adding Ubuntu 32-bit sources will be explained but not configured on my premises.
Installing Ubuntu or Debian from a PXE Server requires that your client machines must have an active Internet connection, preferably configured through NAT with DHCP dynamic addresses allocation, in order for the installer to pull the required packages and finish the installation process.
Requirements
Step 1: Add Ubuntu 14.10 and Ubuntu 14.04 Server to PXE Menu
1. Adding Network Installation Sources for Ubuntu 14.10 and Ubuntu 14.04 to PXE Menu can be achieved in two ways: One is by downloading the Ubuntu CD ISO Image and mount it on PXE Server machine in order to access Ubuntu Netboot files and the other is by directly downloading Ubuntu Netboot archive and extract it onto the system. Further I will discuss both methods:
Using Ubuntu 14.10 and Ubuntu 14.04 CD ISO Image
In order to use this method your PXE server needs a functional CD/DVD drive. On an arbitrary computer go to Ubuntu 14.10 Download and Ubuntu 14.04 Download page, grab the 64-bit Server Install Image, burn it to a CD, place the CD image to PXE Server DVD/CD drive and mount it on your system using the following command.
# mount /dev/cdrom /mnt
In case your PXE server machine has no CD/DVD drive you can download Ubuntu 14.10 and Ubuntu 14.04 ISO Image locally using wget command line and mount it on your server on the same above path by issuing the following commands (download and mount the CD).
On Ubuntu 14.10
------------------ On 32-Bit ------------------

# wget http://releases.ubuntu.com/14.10/ubuntu-14.10-server-i386.iso
# mount -o loop /path/to/ubuntu-14.10-server-i386.iso /mnt
------------------ On 64-Bit ------------------

# wget http://releases.ubuntu.com/14.10/ubuntu-14.10-server-amd64.iso
# mount -o loop /path/to/ubuntu-14.10-server-amd64.iso /mnt
On Ubuntu 14.04
------------------ On 32-Bit ------------------

# wget http://releases.ubuntu.com/14.04/ubuntu-14.04.1-server-i386.iso
# mount -o loop /path/to/ubuntu-14.04.1-server-i386.iso /mnt
------------------ On 64-Bit ------------------

# wget http://releases.ubuntu.com/14.04/ubuntu-14.04.1-server-amd64.iso
# mount -o loop /path/to/ubuntu-14.04.1-server-amd64.iso /mnt
Using Ubuntu 14.10 and Ubuntu 14.04 Netboot Image
For this approach download Ubuntu Netboot Images onto PXE Server using the following commands.
On Ubuntu 14.04
------------------ On 32-Bit ------------------

# cd
# wget http://archive.ubuntu.com/ubuntu/dists/utopic/main/installer-i386/current/images/netboot/netboot.tar.gz
------------------ On 64-Bit ------------------

# cd
# http://archive.ubuntu.com/ubuntu/dists/utopic/main/installer-amd64/current/images/netboot/netboot.tar.gz
On Ubuntu 14.04
------------------ On 32-Bit ------------------

# cd
# wget http://archive.ubuntu.com/ubuntu/dists/trusty-updates/main/installer-i386/current/images/netboot/netboot.tar.gz
------------------ On 64-Bit ------------------

# cd
# wget http://archive.ubuntu.com/ubuntu/dists/trusty-updates/main/installer-amd64/current/images/netboot/netboot.tar.gz
For other processor architectures visit Ubuntu 14.10 and Ubuntu 14.04 Netboot Official pages at following locations and select your architecture type and download the required files.
2. After you have downloaded the ISO Images or Netboot Installer archives copy the entire ubuntu-installer folder to PXE tftp server location by issuing the following commands depending on the method you have chosen.
A). For both CD ISO Images (32-bit or 64-bit) use the following command after you mounted the specific architecture CD onto PXE Server /mnt system path.
# cp -fr /mnt/install/netboot/ubuntu-installer/ /var/lib/tftpboot/
B). For Netboot archives run the following commands depending on the specific Ubuntu architecture.
# cd
# tar xfz netboot.tar.gz
# cp -rf ubuntu-installer/ /var/lib/tftpboot/
If you want to use both Ubuntu Server architectures on PXE Server, first download, mount or extract, depending on the case, the 32-bit architecture and copy ubuntu-installer directory to /var/lib/tftpboot, then unmount the CD or delete the Netboot archive and the extracted files and folders, and, repeat the same steps with 64-bit architecture, so that the final tftp path should have the following structure.
/var/lib/tftpboot/ubuntu-installer/amd64
/var/lib/tftpboot/ubuntu-installer/i386
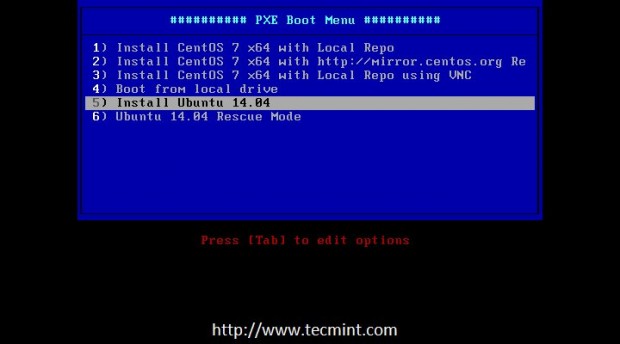
3. On the next step add the Ubuntu 14.10 and Ubuntu 14.04 Menu labels to PXE Server default configuration file by issuing the following command.
Important: It’s not possible for me to show the instructions for both Ubuntu versions, that’s the reason for demonstration purpose, I’m adding Ubuntu 14.04 Menu lable to PXE Server, but the same following instructions also applied to Ubuntu 14.10, only with minor changes to version numbers, just change the version numbers and path to OS architecture according to your Ubuntu distributions.
Open PXE default configuration file with the help of your favourite text editor, in my case it’s nano editor.
# nano /var/lib/tftpboot/pxelinux.cfg/default
Next, add the following configurations to PXE Menu.
For Ubuntu 14.04 32-bit
label 1
menu label ^1) Install Ubuntu 14.04 x32
kernel ubuntu-installer/i386/linux
append vga=788 initrd=ubuntu-installer/i386/initrd.gz -- quiet
label 2
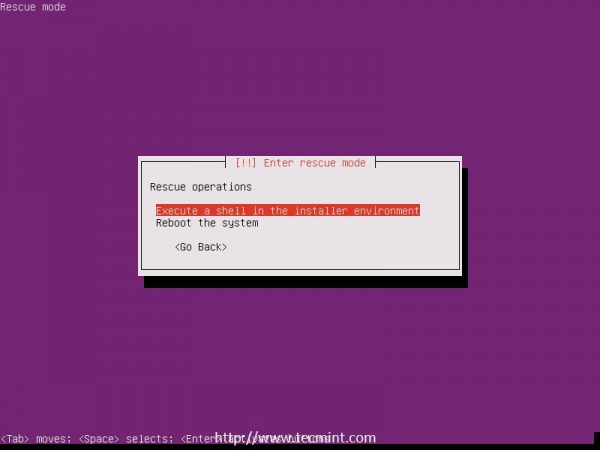
menu label ^2) Ubuntu 14.04 Rescue Mode x32
kernel ubuntu-installer/i386/linux
append vga=788 initrd=ubuntu-installer/i386/initrd.gz rescue/enable=true -- quiet
For Ubuntu 14.04 64-bit
label 5
menu label ^5) Install Ubuntu 14.04 x64
        kernel ubuntu-installer/amd64/linux
        append vga=788 initrd=ubuntu-installer/amd64/initrd.gz -- quiet

label 5
menu label ^6) Ubuntu 14.04 Rescue Mode
        kernel ubuntu-installer/amd64/linux
        append vga=788 initrd=ubuntu-installer/amd64/initrd.gz rescue/enable=true -- quiet
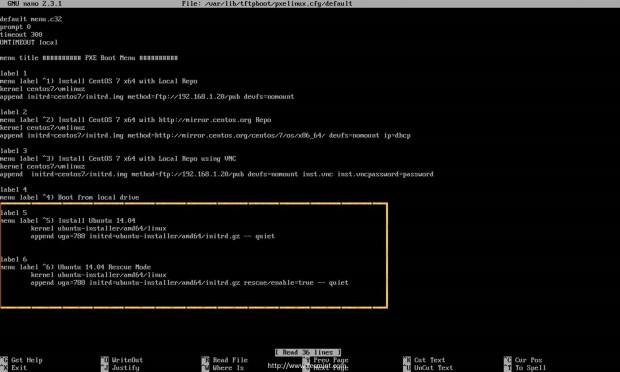
Note: If you want to include other Ubuntu architectures, follow the same above instructions and replace label numbers and ubuntu-installer/$architecture_name/ directory accordingly on PXE default menu configuration file.
4. After you have configured PXE menu configuration file, clean up the sources depending on the employed method and proceed with client PXE installations to test your configuration.
---------------------- For CD/DVD Method ----------------------

# umount /mnt
---------------------- For Netboot Method ----------------------

# cd && rm -rf ubuntu-installer/netboot.tar.gz pxelinux.* version.info
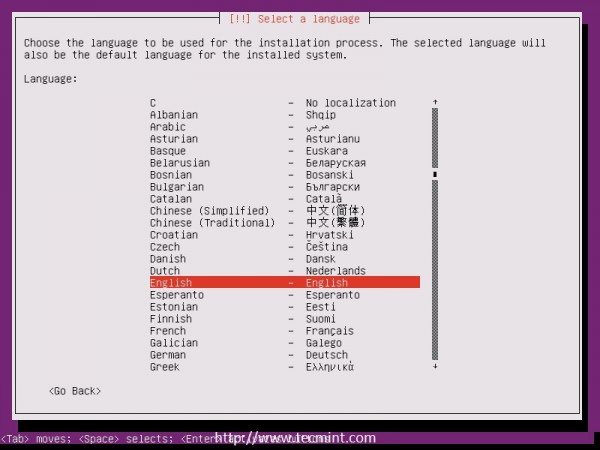
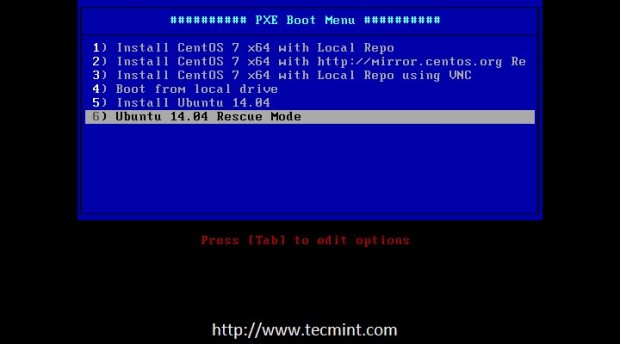
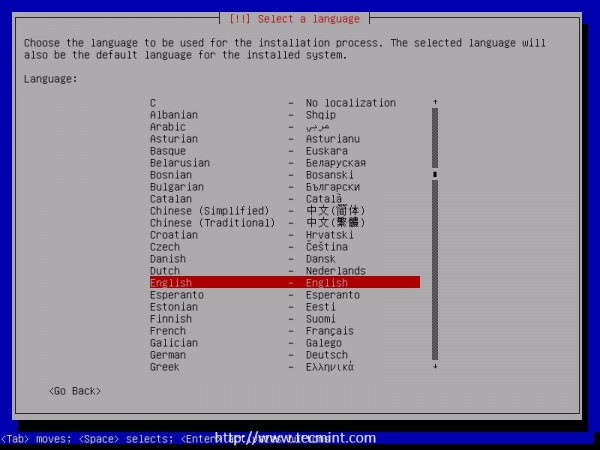
Below are some screenshots for Ubuntu 14.04 PXE Clients installations testing.
Step 2: Add Debian 7 Wheezy to PXE Menu
5. Adding Debian 7 to a PXE Server, requires the same steps as for Ubuntu Server Edition as explained above, the only differences being the Netboot archive images download links and the name for the sources directory, which is now debian-installer.
To download Debian Wheezy Netboot archives, go to official Debian Netinstall Download page, choose your desired system architecture from Network Boot menu, then hit the netboot link from Directory list and download the netboot.tar.gz archive from Filename list.
While Debian offers Netboot Installation Sources for a multitude of system architectures, such as Armel, ia64, Mips, PowerPC, Sparc etc, in this guide I will only discuss 64-bit architecture because the process of adding other architectures sources is almost the same as the current one, the only difference being the debian-installer/$directory_architecture name.
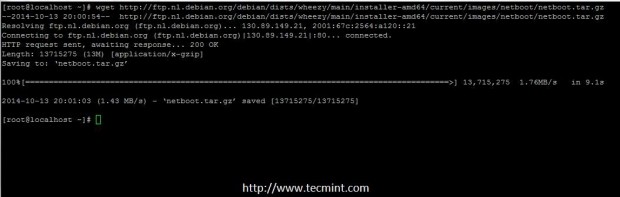
So, to proceed further, login to your PXE Server with root account and grab Debian 7 64-bit Netboot archive by issuing the below command.
# wget http://ftp.nl.debian.org/debian/dists/wheezy/main/installer-amd64/current/images/netboot/netboot.tar.gz
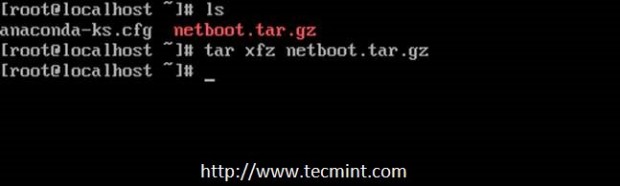
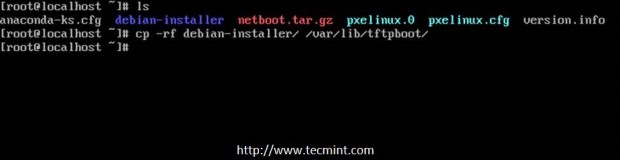
6. After wget finishes downloading the netboot.tar.gz file, extract it and copy debian-installer directory to tftp server default path by
running the following commands.
# tar xfz netboot.tar.gz
# cp -rf debian-installer/ /var/lib/tftpboot/
7. To add Debian Wheezy labels to PXE Menu, open PXE Server default configuration file with your favorite text editor and add the below labels.
# nano /var/lib/tftpboot/pxelinux.cfg/default
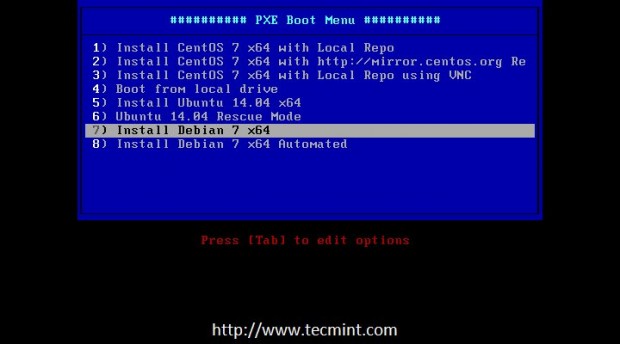
PXE Label Menu for Debian Wheezy 64-bit.
label 7
menu label ^7) Install Debian 7 x64
        kernel debian-installer/amd64/linux
        append vga=788 initrd=debian-installer/amd64/initrd.gz -- quiet

label 8
menu label ^8) Install Debian 7 x64 Automated
       kernel debian-installer/amd64/linux
       append auto=true priority=critical vga=788 initrd=debian-installer/amd64/initrd.gz -- quiet

Note: If you want to add other Debian architectures repeat the above steps and replace label numbers and debian-installer/$architecture_name/ directory accordingly on PXE default menu configuration file.
8. Before testing the configuration on clients side, clean up Debian sources by issuing the following command.
# cd && rm -rf debian-installer/ netboot.tar.gz pxelinux.* version.info
9. Then network boot a client machine, choose Install Debian from PXE menu and proceed further with the installation as normally.
That’s all the steps required to add and install Ubuntu or Debian from a RHEL/CentOS 7 PXE Server onto your network client machines. On my next article I will discuss a more complicated method on how you can add and perform network installation for Windows 7 on client computers using RHEL/CentOS 7 PXE Network Boot Server.


I want to Network boot installation of Ubuntu Desktop Version (16.04.02). I know Ubuntu server is worked with very easily as a network boot.
Please provides steps and media creation steps.
Because i have trying above setting with Ubuntu Desktop ISO then It causes a Mirror error:
“The installer failed to download a file from the mirror. This may be a problem be with your network ot with mirror…”
@Pankaj,
I hope this article, will help you out in setting up PXE.
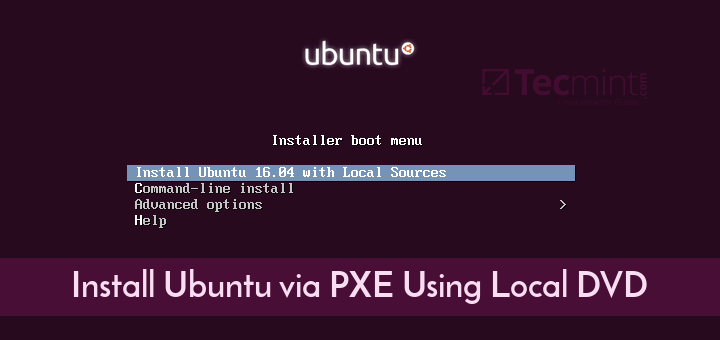
How to Install Ubuntu via PXE Using Local DVD Sources
Is there a way to put some Ubuntu distro and boot it from an ISO?
Thank you, really helped me out!
Thanks. Very nice instruction!
Hey Ravi thanks for the article.
I was going through it to install Ubuntu 14:04. Now I’m stuck, do we need internet connection on the server where I’m going to install Ubuntu through PXE?
Here in this procedure I was not able to see any configuration for pulling installation files (from ISO) to the installation server. (Normally we do using FTP/HTTP/NFS).
can you please clarify me?
Adding to above comment:
I’m already having PXE server running on CentOS 7, which is currently configured for RHEL7 and CentOS7 PXE boot through FTP.
@Ankur: It might be because your client machine doesn’t have a Internet connection so far. If you are behind a private IP address space, use NAT on your router to provide Internet connection to all internal clients and setup a DHCP server the same time to dynamically allocate IPs. If this in not the case try manually configure network interface on installation process with your Internet access type.
HI ,
i have one problem , i follow this document , and trying to install ubuntu 14.10 server , but when i reaching “chosse a mirror of the Ubuntu archive” window , i am not able to select any mirror can you have any idea ???
hi
what is the procedure fro installing Ubuntu 14.10 desktop and other distros via NFS with out internet using only the content of dvd ….
Is it possible to deploy the Windows 7 and Windows 8 using the same PXE server
@shankar,
the artilce is in progress about adding Windows 7 or 8 systems to PXE network boot…stay tuned for the updates.