Apt-Cacher-NG is a caching proxy server (or apt proxy) for Debian-based distributions such as Ubuntu, Kubuntu, Xubuntu, Edubuntu, Linux Mint, etc. It is used to cache the downloaded packages locally on your server.
Let’s say you have a small network with a few computers attached to it, and you want to install and update software packages on each system manually. Then, it would be a difficult and time-consuming task.
That’s why configuring an apt-cacher-ng on any system would be a great idea, as it caches all the downloaded packages from the internet on the apt-cache server, and the rest of the Debian and Ubuntu machines get them from an apt-cache server, which will save our precious time and internet bandwidth as well.
Here, I’m going to set up a cache server on Ubuntu 24.04. In our office, we use over 30 Ubuntu Desktop clients, 28 Ubuntu-Server VMs including versions 22.04 and 20.04, and 4 Linux Mint Desktops.
However, we use a single cache server running Ubuntu 24.04 LTS Server Edition, and so far, there haven’t been any conflicts with the packages. Now, let’s begin setting up the apt-cache server.
My Server Setup
Apt Cache Server OS   : Ubuntu 24.04 LTS Server
Apt Cache IP Address  : 192.168.0.125
Apt Cache Hostname    : aptcacher.tecmint.lan
Default Port	      : 3142
My Client Setup
Client OS             : Ubuntu 22.04 LTS
Client IP Address     : 192.168.0.3
Client Hostname       : client.tecmint.lan
Step 1: Installing Apt-Cacher-NG on the Ubuntu Server
First, log into the server to open a terminal using the’Ctr+Alt+T‘ and install apt-cacher-ng package using the following apt command.
sudo apt-get install apt-cacher-ng
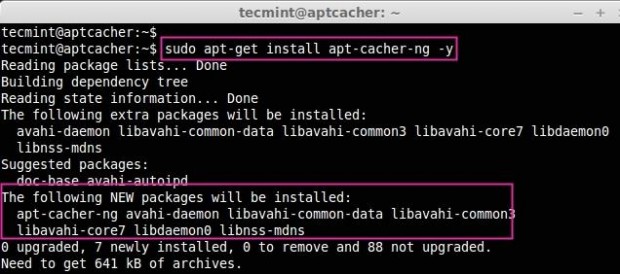
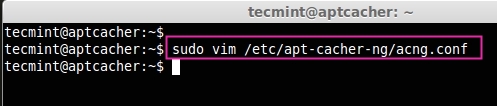
After installation is completed, the apt-cacher-ng will start automatically. Now open and edit the cache-ng configuration file located under the ‘/etc/apt-cacher-ng‘ directory.
sudo vim /etc/apt-cacher-ng/acng.conf
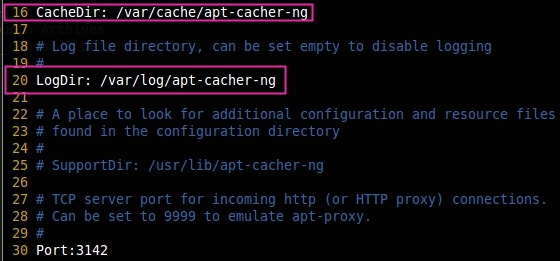
Next, we need to uncomment the following lines as suggested, if it is commented remove the ‘#‘ from the beginning. In this directory, all dpkg packages will be stored while installing or updating packages.
CacheDir: /var/cache/apt-cacher-ng
To enable the log we need to enable this line, By Default it will be enabled.
LogDir: /var/log/apt-cacher-ng
The apt-cacher will listen to port 3142, if you need to change the port, you can change the port.
Port:3142
Next, add the line ‘BindAddress: 0.0.0.0‘ entry below the line says:
# BindAddress: localhost 192.168.7.254 publicNameOnMainInterface
BindAddress: 0.0.0.0

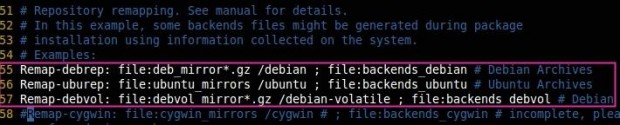
Here we can define the distributions such as Ubuntu and Debian, which all need to be cached.
Remap-debrep: file:deb_mirror*.gz /debian ; file:backends_debian # Debian Archives
Remap-uburep: file:ubuntu_mirrors /ubuntu ; file:backends_ubuntu # Ubuntu Archives
Remap-debvol: file:debvol_mirror*.gz /debian-volatile ; file:backends_debvol # Debian Volatile Archives
If we need to get the reports of apt-cache in the web interface, we need to enable the following line, but by default, this will be enabled.
ReportPage: acng-report.html

To get more information about ‘log‘, we have to uncomment the below line, If we set it to 0 Only the activity type, time, and size of our package transfer will be logged.
VerboseLog: 1

To run the apt-cacher service, we need to enable the pid file in the configuration.
PidFile: /var/run/apt-cacher-ng/pid

To remove the unreferenced files.
ExTreshold: 4

Finally, we’ve done with the configuration, save and close the file. Now we are all set to restart the apt-cacher-ng service using the following command.
$ sudo /etc/init.d/apt-cacher-ng restart

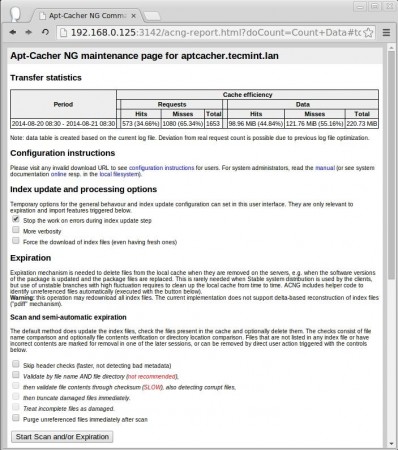
Access the report page of apt-cacher-ng in the web interface using the below URL.
http://192.168.0.125:3142/
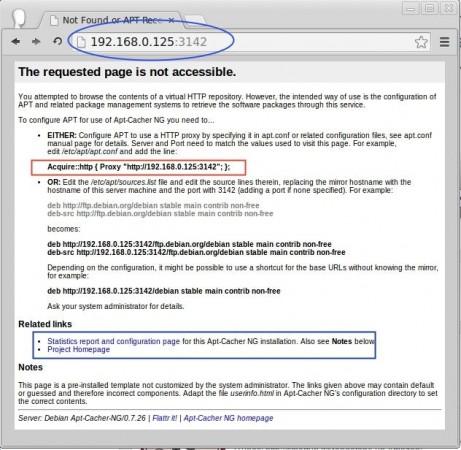
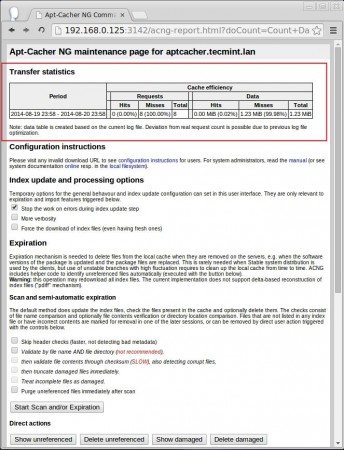
Here we can see the report page for apt-cacher-ng, click the static report and configuration page at the bottom of this page to get the Download hits and misses.
From the report home page we need to copy the Proxy URL for later use. We can even install packages in this server from apt-cache which can be configured locally, by just adding the below entry in /etc/apt/apt.conf.d/02proxy.
Acquire::http { Proxy "http://192.168.0.125:3142"; };
Step 2: Ubuntu Client Side Configuration
First login into the client machine (Ubuntu/Debian) and create a ‘02proxy‘ file under the ‘/etc/apt/apt.conf.d/‘ directory.
sudo vim /etc/apt/apt.conf.d/02proxy

Now copy the Acquire URL and append it to the 02proxy file. You will get the following URL from the apt-cacher-ng access report page at http://192.168.0.125:3142/.
Acquire::http { Proxy "http://192.168.0.125:3142"; };
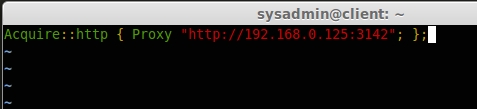
Save and exit using wq!. Hereon, if any packages are downloaded on the client machine will be cached to the apt-cache server.
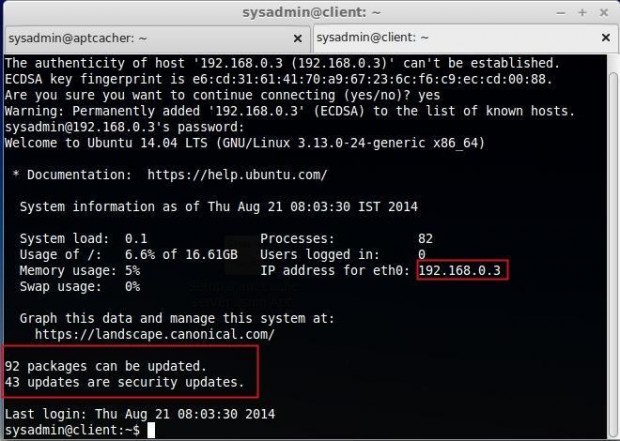
In my client machine, 92 packages can be updated, and 43 updates are available for security updates. We have already applied the same updates for the cache server. So, that the packages will now be cached in apt-cacher. If I’m updating this client machine it won’t take too much time to get packages from the internet.
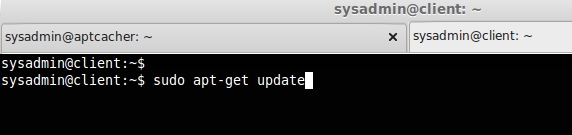
Now update the repository and upgrade the packages.
$ sudo apt-get update
$ sudo apt-get upgrade
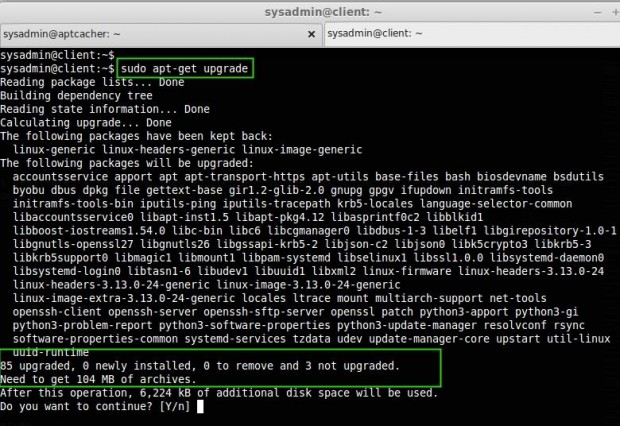
In the above screens, it shows that we need to update 85 packages and its size is 104MB, let us see how long it will take to fetch the package.
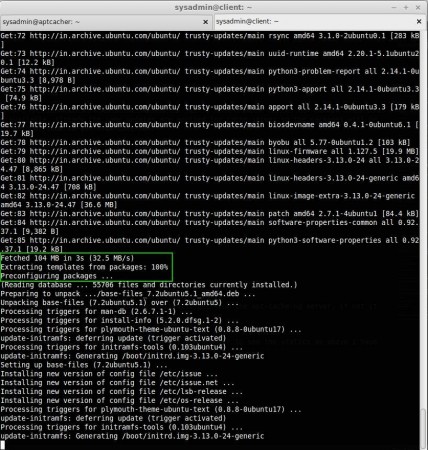
I’m not even in a data center, I’m just using a 256Kbps internet connection where the download speed will just be 50Kbps to 60Kbps. But see the below image of how it fetched 104MB in 3 Seconds. That’s because it is already cached in the apt-cacher-ng server.
If we need to see Cache Count data, which we have downloaded, we can access ip:port (192.168.0.125:3142) in any web browser to see the statistics, as I have explained above.
While we download any packages to install in any Debian/Ubuntu machines, If the package is available in apt-cache it will get from the apt-cache-ng server, if not it will fetched from the internet to the local repository for future use.
In this article, we have seen how to set up a local cache server for apt packages using apt-cacher-ng, many people want this setup to save their time and bandwidth. I hope this will help all those who use Debian/Ubuntu machines.


i want for my ISP will this work for my large network? my server specification will be 40tb hard-disk with 1tb ssd drive.
@Imran,
Go-ahead it will support, only think you need to configure all clients with proxy config.
Thanks & Regards,
BOBIN LONSTON
how can i configure Client with proxy???
@Imran,
Follow Step 2: Client Side Configuration
Thanks & Regards,
Bobin Lonston
What if i wanted to fetch the package from another mirror which isn’t in the sources.list file of APT? Will APT-cacher-ng will cache that package too??
If not, is it possible to configure apt-cacher-ng to cache exterior repositories?
@Utkarsh,
Yes, you can add any repository URL to sources.list moreover even you are allowed to use PPA repo, the same PPA repo need to be installed in all clients.
Thanks & Regards,
Bobin Lonston
good article. Its very helpful to reduce bandwidth.
There is one question, if local server not connected it should get from internet. how we can resolve this issue.
Hi,
how a nice article.
I think this is very useful to install a cache machine and I’m researching the cache server recently,
May I cite this article to my academic research?
Hi,
Nice setup… Thanks a lot you saved bandwidth and time.
Cool, Happy to hear from you..
Great article. Thanks. I got it working in just a few minutes and verified caching. Cheers.
welcome most.. thanks for your positive feedback
add /etc/apt/apt.conf.d/02proxy
Acquire::https::Proxy “false”;
@Dtulyakov,
Could you please tell us clearly that where to add that suggested lines?
Good afternoon!
Congratulations on the excellent material available !
I take this opportunity to ask the noble friend , if there is an option to lock and / or release for some “hosts “.
I thank you attention!
Wow, what a day, wrong again… MAAS has a proxy configuration near the bottom of the settings page. LOL, this is what happens when you work on stuff too long. All is working now!
Oh wait, i just realized my mistake. I was thinking apt-cacher-ng was a caching mirror, when its essentially a proxy and thus needs to be in the proxy configuration. Of course MAAS doesnt have that.. sigh. Will have to see if my router can redirect clients instead.
I am trying to get this working for ubuntu 14.04 LTS installs. I am playing with MAAS and it has the ability to populate an archive server for installs. I setup a separate VM with just 14.04 and apt-cacher-ng and pointed the MAAS archive setting to it. The setup is working as it shows the proxy information when you go to the VM with the apt-cacher-ng installed. When tell MAAS to start a machine, it runs the PXE installer and starts the ubuntu server 14.04 LTS install. The installer stops at the archive part with bad archive mirror. I set the mirror to http://ipofaptcacherng:3142 and left the directory as “/” on the next screen and hit continue, but it fails again saying the mirror is bad.
I do lots of test installs at my house, so i thought i would save everyone some bandwidth with this setup. I use a mirror at the datacenter, but i didnt want to download 50GB to a machine i may or may not keep super long.
Did i miss something? I followed the instructions in this post to the letter….
@ Brent Have you read the article without loosing every line ?
//Note: This is not an Ubuntu or Debian Mirror, this is just a cache server for apt packages.// Here i have said clearly it’s not a Mirror it’s a cache.
Hello,
Nice Article.
How do you get updated missing in motd messages please ?
Just apt-get the “landscape-common” package.
@ alberto, Happy to hear from you, thanks for the feedback.
hi babin.
realy, this article is good, very good. no difficulty.
I implemented apt-cacher-ng in the company by your steps and I get sucess.
i’m using mint17 32 e 64 bits and I’m thinking about translate it for brazilian mint community (of course, with references to you).
tks.