This article is Part 3 of the LFCA series, here in this part, we will list 24 of the most widely used Linux system administration commands that are required for the LFCA certification exam.
Linux system provides a vast pool of commands that you can use to administer and manage your system and they are as follows.
1. uptime Command
The uptime command displays how long your system has been running since the last time it was turned on. Without any arguments, it displays a host of information such as the time the system has been running, users with running sessions, and load average.
$ uptime

11:14:58 up  1:54,  1 user,  load average: 0.82, 1.60, 1.56
To get the exact date and time since the system was turned on, use the -s flag.
$ uptime -s

2021-03-17 09:20:02
To get the exact duration in a more user-friendly format append the -p flag.
$ uptime -p

up 1 hour, 55 minutes
The output below shows that the system has been up for 1 hour, 55 minutes.
2. uname Command
The uname command prints out basic information regarding your operating system and underlying hardware. Without any arguments, the uname command only prints out the operating system – which in this case is Linux.
$ uname

Linux
Append the -a flag to reveal all the information such as the kernel name, version, release, machine, processor, and operating system.
$ uname -a

Linux ubuntu 5.4.0-65-generic #73-Ubuntu SMP Mon Jan 18 17:25:17 UTC 2021 x86_64 x86_64 x86_64 GNU/Linux
To display the kernel release append the -r flag.
$ uname -r

5.4.0-65-generic
To get the kernel version use the -v flag.
$ uname -v

#50~20.04.1-Ubuntu SMP Mon Jan 18 17:25:17 UTC 2021
To see the type of kernel you are using, use the -s flag.
$ uname -s

Linux
For more commands, check the help section as follows.
$ uname --help
3. whoami Command
The whoami command displays the currently logged-in user as shown below.
$ whoami

tecmint
4. w Command
The w command provides information about currently logged-in users.
$ w

11:24:37 up  2:04,  1 user,  load average: 2.04, 1.95, 1.74
USER     TTY      FROM             LOGIN@   IDLE   JCPU   PCPU WHAT
tecmint  tty7     :0               09:21    2:04m  7:52   0.52s xfce4-session
5. free Command
The free command gives information about the swap and main memory’s usage. It displays the total size, used up and available memory
$ free

              total        used        free      shared  buff/cache   available
Mem:        8041516     2806424     1918232      988216     3316860     3940216
Swap:      11534332           0    11534332
To display information in a more human-readable format, append the -h flag.
$ free -h

              total        used        free      shared  buff/cache   available
Mem:          7.7Gi       2.7Gi       1.9Gi       954Mi       3.2Gi       3.8Gi
Swap:          10Gi          0B        10Gi
6. top Command
This is among the useful tools in a Linux system. The top command gives a glimpse of the currently running processes and also provides a real-time overview of the system resource usage.
At the very top of the output, you get information about the uptime, running tasks, CPU, and memory usage.
$ top
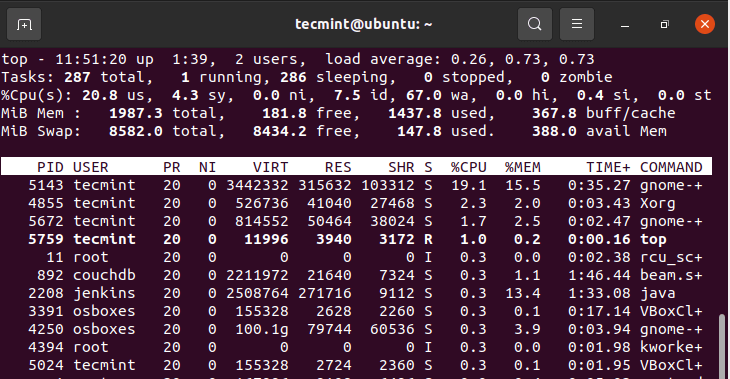
Let’s briefly break down what each column represents.
- PID – This is the process ID that a process is identified with.
- USER – This is the username of the user that initiated or spawned the process.
- PR – This is the scheduling priority of the task.
- NI – This is the nice value of the process or task.
- VIRT – This is the total virtual memory that is used up by a task.
- RES – The memory that is used by a process.
- SHR – The amount of memory used by a process that us shared by other processes.
- %CPU – This is the CPU usage of the process.
- %RAM – Percentage of RAM usage.
- TIME+ – Total CPU time used by a process since it started running.
- COMMAND – This is the process name.
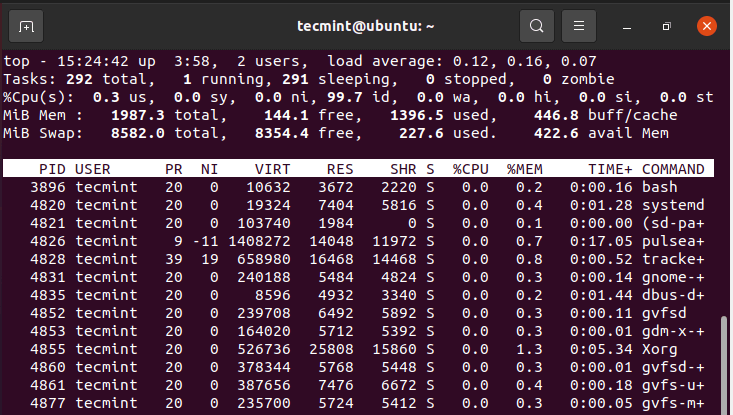
To display processes specific to one user, run the command
$ top -u tecmint
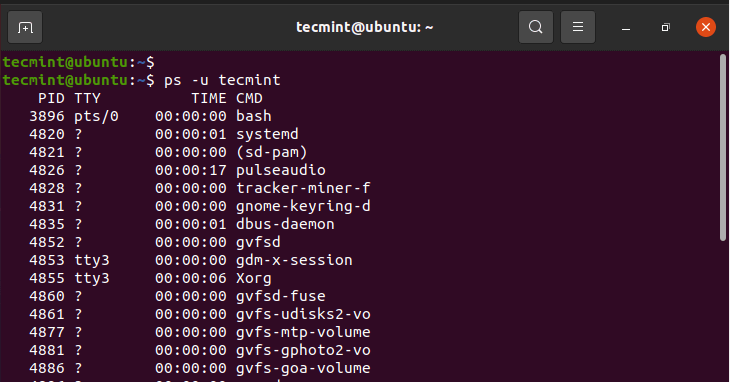
7. ps Command
The ps command lists the currently running process on the current shell alongside their PIDs.
$ ps

   PID TTY          TIME CMD
  10994 pts/0    00:00:00 bash
  12858 pts/0    00:00:00 ps
To display currently running process of user, use the -u option as shown.
$ ps -u tecmint
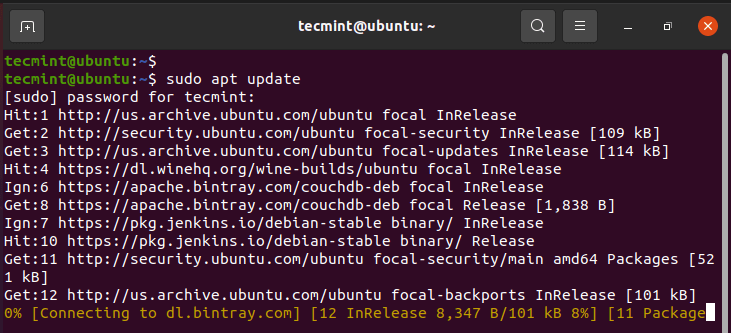
8. sudo Command
A portmanteau for Super User do, sudo is a command-line utility that grants a regular user ability to perform administrative or elevated tasks. Before using the command, ensure that the user is first added to the sudo group. Once added, begin the command with sudo first.
For example, to update the package lists, run the command:
$ sudo apt update
You will be prompted for the password upon which the task will be executed.
9. echo Command
The echo command does quite a number of things. First, it can print out the value of a string on the terminal as shown.
$ echo “Hey guys. Welcome to Linux”

“Hey guys. Welcome to Linux”
You can also save a string to a file using the ( > ) redirection operator. If the file does not exist, it will be created.
$ echo “Hey guys. Welcome to Linux” > file1.txt
$ cat file1.txt

“Hey guys. Welcome to Linux”
Kindly note that this overwrites a file. To add or append information use the double greater than operator ( >> ).
$ echo “We hope you will enjoy the ride” >> file1.txt
$ cat file1.txt

“Hey guys. Welcome to Linux”
We hope you will enjoy the ride
Additionally, an echo command can be used to display environment variables. For example, to display the currently logged in user run:
$ echo $USER

tecmint
To display path to the home directory run:
$ echo $HOME

/home/tecmint
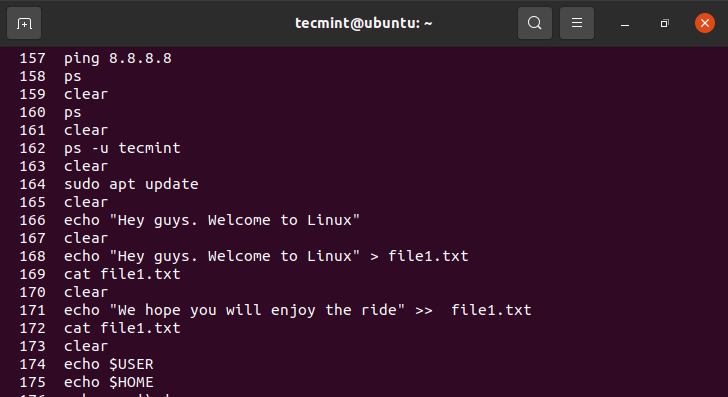
10. history Command
As the name suggests, the history command gives you a history of the commands that were last executed on the terminal.
$ history
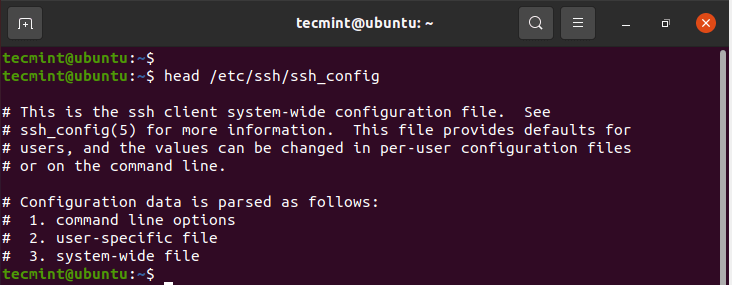
11. head Command
Sometimes, you might want to have a peek at the first few lines of a text file instead of viewing the entire file. A head command is a command-line tool that displays the first few lines in a file. By default, it displayed the first 10 lines.
$ head /etc/ssh/ssh_config
You can add the -n flag to specify the number of lines to be displayed. For example, to display 5 lines run the command as follows:
$ head -n 5 /etc/ssh/ssh_config
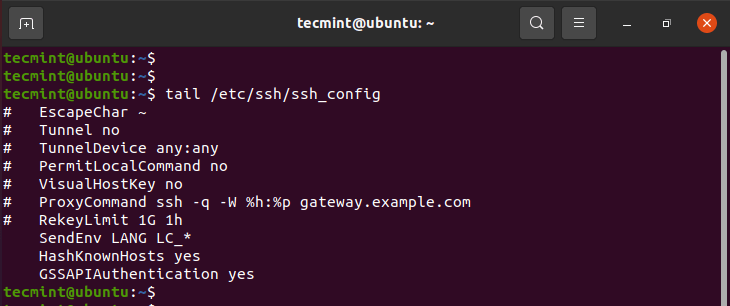
12. tail Command
The tail command is the exact opposite of the head command. It displays the last 10 lines of a file.
$ tail /etc/ssh/ssh_config
Just like the head command, you can define the number of lines to be displayed. For example, to view the last 5 lines of a file, run:
$ tail -n 5 /etc/ssh/ssh_config
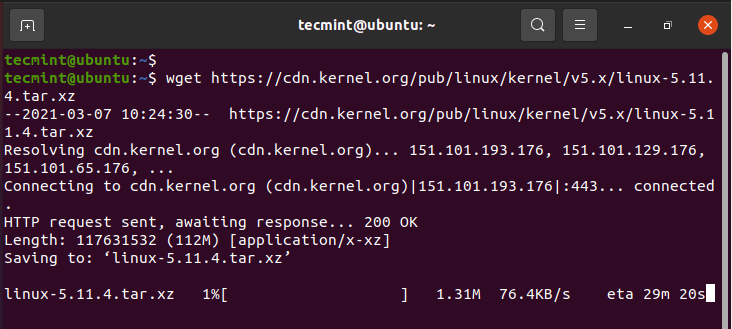
13. wget Command
The wget command is a command-line tool used for downloading files over the web. It supports multiple functionalities including downloading multiple files, limiting download bandwidth, downloading in the background and so much more.
In its basic form, it downloads a file from a given URL. In the command below, we are downloading the latest Linux kernel.
$ wget https://cdn.kernel.org/pub/linux/kernel/v5.x/linux-5.11.4.tar.xz
The command begins by first resolving the IP address of the URL, upon which it connects to the remote servers, and begins to download the file. The file is downloaded to the current directory.
To save a file to a different directory, use the -P flag followed by the path to the directory followed by the URL. For example, to download a file to the /opt directory, run the command.
$ wget -P /opt https://cdn.kernel.org/pub/linux/kernel/v5.x/linux-5.11.4.tar.xz
To download and save a file under a different name, use the -O flag followed by the desired file name.
$ wget -O latest.tar.xz https://cdn.kernel.org/pub/linux/kernel/v5.x/linux-5.11.4.tar.xz
14. finger Command
The finger command gives some brief information about the login user including the name, shell, home directory, and the time since the user has logged in.
$ finger tecmint

Login: tecmint        			Name: Tecmint
Directory: /home/tecmint            	Shell: /bin/bash
On since Wed Mar 17 09:21 (IST) on tty7 from :0
   2 hours 52 minutes idle
No mail.
No Plan.
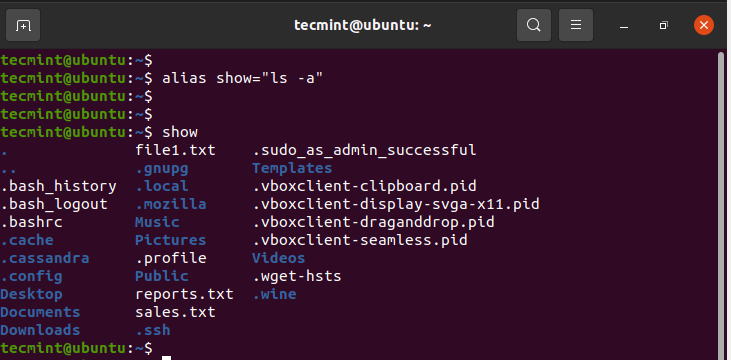
15. alias Command
The alias command allows you to assign your own name to a Linux command for purposes of convenience. For example to assign an alias called show to the command ls -a, run the alias command as shown.
$ alias show=ls -a
$ show
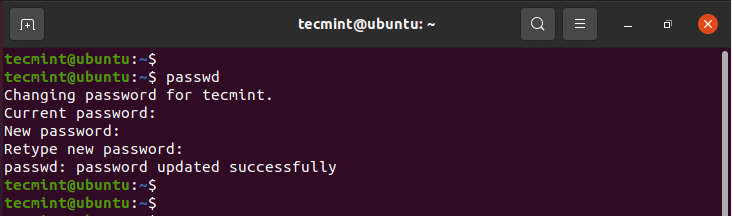
16. passwd Command
The passwd command allows you to change your password. Simply run the passwd command as shown.
$ passwd
You will be prompted for your current password, upon which you will provide a new password and later confirm it.
Additionally, you can change the password for another user simply by passing the username of the user as an argument.
$ sudo passwd username
17. groups Command
To check which groups a user belongs to run the groups command as follows:
$ groups
OR
$ groups tecmint

tecmint sudo
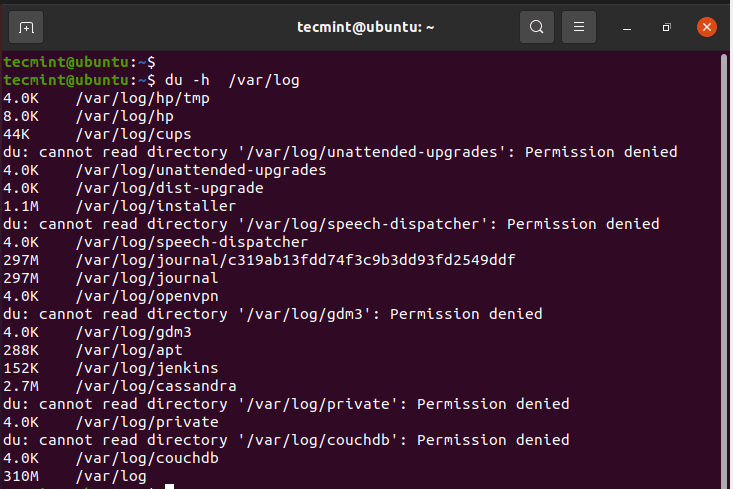
18. du Command
Want to keep an eye on the disk usage of your files and folders? The du command – short for disk usage – is the standard command for checking disk usage of files and directories.
The command follows a basic syntax as shown.
$ du OPTIONS FILE
For example, to view the disk usage in a human-readable in your current directory, execute the command:
$ du -h .
To check the disk usage in another directory, for example /var/log/ run the command:
$ du -h /var/log
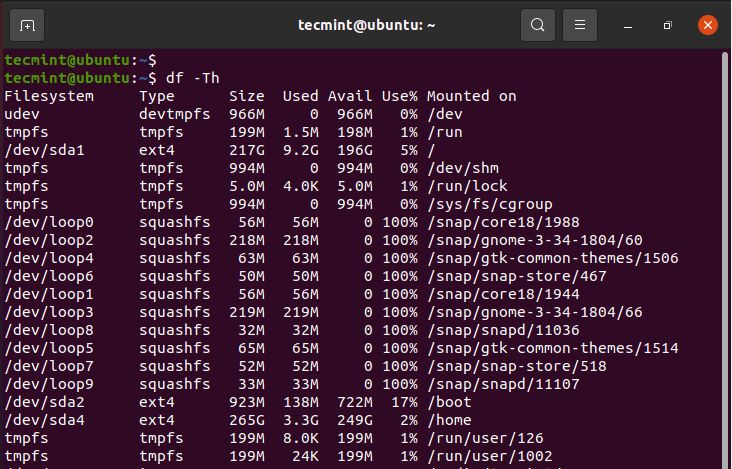
19. df Command
The df command – short for disk free – checks the total disk space, space being used and the available disk space in various file systems. It takes the syntax shown below:
$ df OPTIONS FILE
The most crucial options are -T and -h. The -T flag prints the file system type whilst the -h flag displays the output in a human-readable format.
The command below lists the free disk space in all the filesystems.
$ df -Th
20. chown Command
The chown command is used for altering the user and group ownership of files and directories. When you list the contents of a directory using the ls -l command, you will get an output similar to what we have here.
$ ls -l
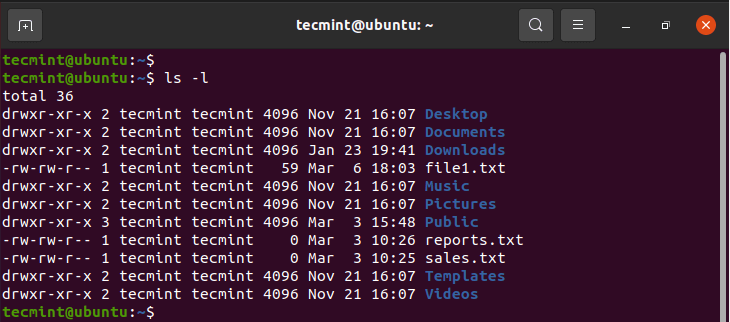
In columns 3 and 4, you can clearly see tecmint tecmint. The first of these points to the user and the second entry refers to the group, which is also tecmint. When a new user is created, they are assigned a new default group, of which they are the only member by default. This is an indicator that the file(s) or directories are not shared with anyone.
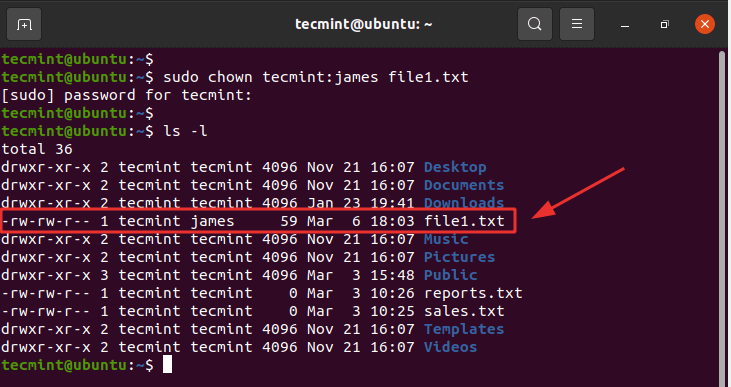
Using the chown command, you can change the file ownership quite easily. Simply provide the name of the owner followed by the group name, separated by a full colon ( : ) This is an elevated task and you will have to invoke the sudo command.
For example, to change the group of the file1.txt to james but retain the owner as tecmint run:
$ sudo chown tecmint:james  file1.txt
$ ls -l
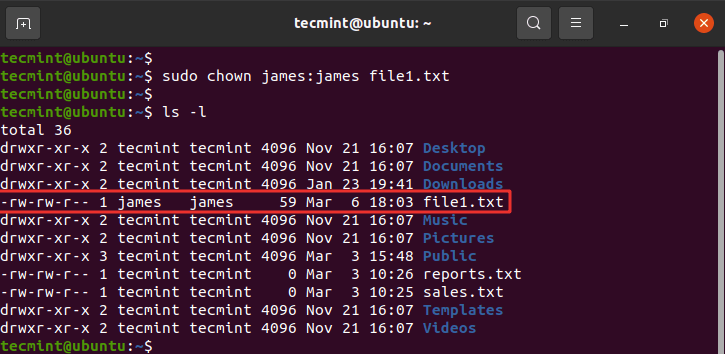
To change both the owner as well as the group, run the command:
$ sudo chown james:james  file1.txt
$ ls -l
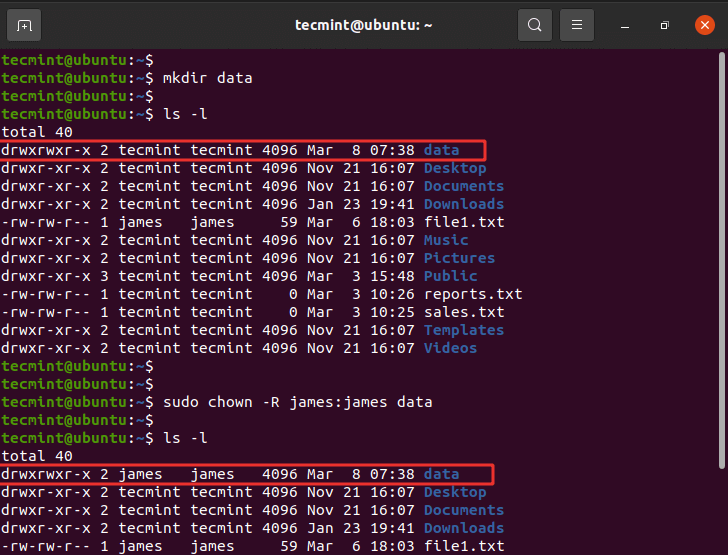
To change ownership of a directory use the -R flag for recursive. We have created a new directory called data and we shall change both the user and group to james.
$ sudo chown -R james:james data
$ ls -l
21. chmod Command
The chmod command is used to set or modify file or folder permissions. Back to the output of the ls -l command. The first column comprises of the following characters
drwxrwxrwx
The first character ( d ) indicates that this is a directory. A file is represented using a hyphen ( - ). The rest of the nine characters are divided into 3 sets of rwx (read, write, execute) flags. The first set represents the file owner (u), the second represents the group (g), and the last set represents all other users.
There are two ways of assigning file permissions: Numeric and symbolic (text) notation. For Numeric notation, each of the flags represents a value as shown.
r = 4

w = 2

x = 1

No permissions = 0
To get the file permissions of a file simply add the corresponding values in all the sets. For example:
drwxrwxr-x
- For the owner for the file (u) rwx = 4+2+1 = 7
- For the group (g) rwx = 4+2+1 = 7
- For other (o) r-x = 4+0+1 = 5
Finally, we arrive at the notation 775.
Let’s take another example of file 1.txt.
-rw-rw-r-- 1 james james 59 Mar 6 18:03 file1.txt
Here, we have rw-rw-r–.
Let’s add them up.
- For the owner for the file (u) rw- = 4+2+0 = 6
- For the group (g) rw- = 4+2+0 = 6
- For other (o) r– = 4+0+0 = 4
This comes to 664.
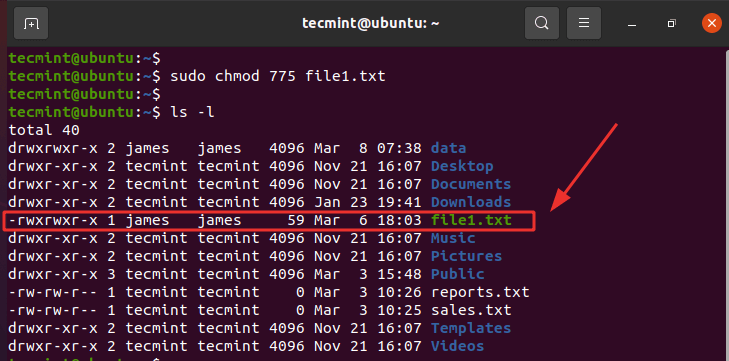
We will set this to 775. This gives the owner and group of the file all permissions – i.e rwx, and other users read and execute permissions only.
Run the command:
$ sudo chmod 775 file1.txt
The other way of assigning permissions is using symbolic notation. Using the symbolic notation, the following flags are used to either add or remove permissions
-– Removes the permissions.+– Adds specified permissions.=– Sets the current permissions to the specified permissions. If there are no permissions specified after the = symbol, then all permissions from the specified user class are removed.
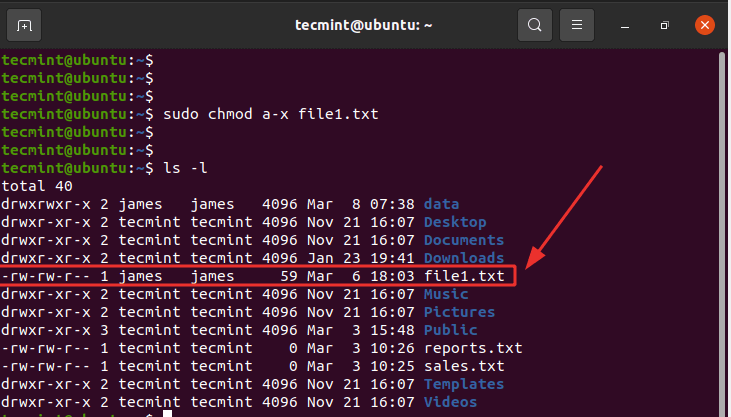
For example, to remove execute permissions from all sets – owner of the file, group members, and other users, run the command
$ sudo chmod a-x file1.txt
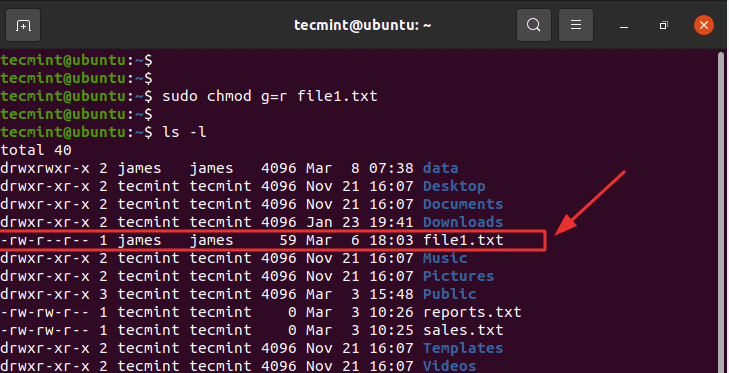
To assign group members read permissions only and not write and execute, run.
$ sudo chmod g=r file1.txt
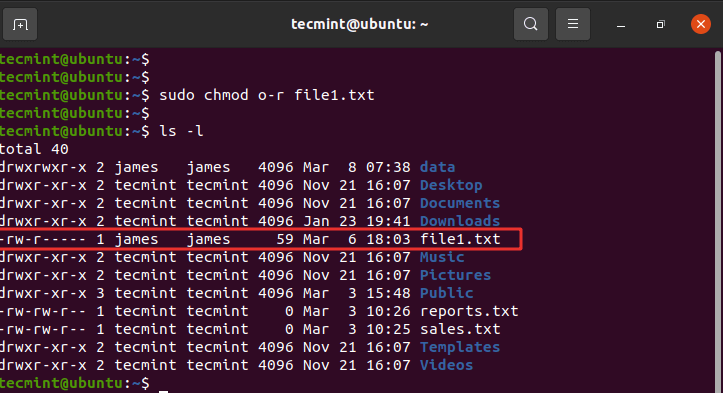
To remove write permissions from other users, run.
$ sudo chmod o-r file1.txt
To give the group members and other users read and write permissions, run:
$ sudo chmod og+rw file1.txt

To assign permissions to directories, use the -R flag for setting permissions recursively.
For example:
$ sudo chmod -R 755 /var/www/html
22. The poweroff / reboot Commands
The poweroff command, as the name suggests, shuts down your system.
$ poweroff
Another command that accomplishes the same task is the shutdown command as shown.
$ shutdown -h now
The -h flag stands for a halt, implying stopping the system. The second parameter is the time option which can also be specified in minutes and hours.
The command below displays a message to all logged-in users notifying them of the system shutdown that’s scheduled in 5 minutes.
$ shutdown -h +5 “System is shutting down shortly. Please save your work.”
To reboot the system, use the reboot command as shown.
$ reboot
Alternatively, you can reboot using the shutdown command with an -r option as shown.
$ shutdown -r now
23. exit Command
The exit command closes the terminal or exits the shell. If you have initiated an SSH session, the session is closed.
$ exit
24. man Command
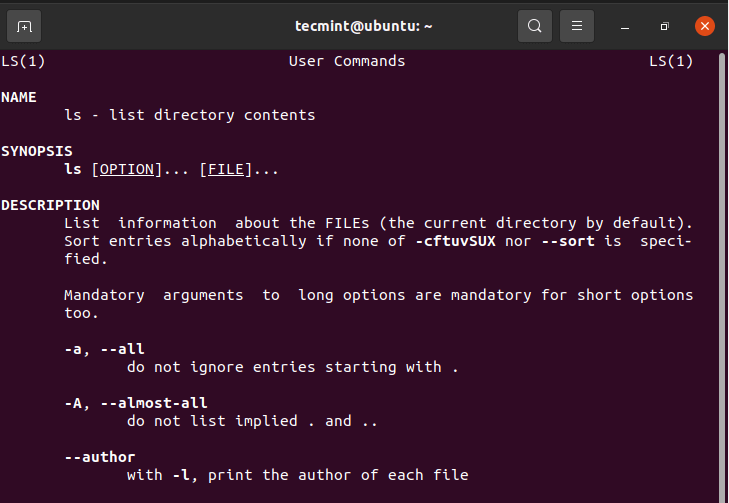
The man command, short for manual, displays the manual pages for any Linux command. It comes in handy when you want to see how a command is used. It gives a detailed description of the command including a brief synopsis, options, return statuses, and authors to mention a few.
For example, to view insights on the ls command, run:
$ man ls
Conclusion
That was a list of system commands that should help you get started in managing your system and gather various insights. As the saying goes, practice makes perfect. And it goes without saying that practicing these commands from time to time will help you get better and sharper with your system.


Hi, great article, I would just like to provide small feedback.
In the second example of setting file permission, you have a typo.
You say the numeric combination would be “644” while “664” should be the actual combination as the example refers to an access of “-rw-rw-r–“.
@Felipe,
Hello! Thank you for your feedback, and I appreciate you taking the time to point out the typo. You are absolutely correct. The accurate numeric combination for the second example of setting file permissions should indeed be ‘664‘, corresponding to the access ‘-rw-rw-r–‘.
“Additionally, you can change the password for another user simply by passing the username of the user as an argument.
Wouldn’t that require admin privileges, hence the use of the SUDO command?
@Dragonmouth,
Yes it required sudo privileges to execute passwd command, corrected in the article…
@James,
in 11. head Command
“You can pass the
-nflag to specify the number of lines(...)”Personally, I would try to reuse the exact same vocabulary used in the man files. So, I suggest
“You can add the
-noption to specify the number of lines(...)”– – – –
In 16. passwd Command
You most likely meant
Gérard
@Gerard,
Thanks, corrected the commands as suggested by you…
@James,
In the echo command section, the system will not print double quotation marks.
eg:
will return – test and not “test”
The first 3 echo command examples need a bit of tuning.
Gérard
Thank you for the tutorials. Waiting for Part 4 and beyond.
Hey Tshwarelo. Glad you are finding these tutorials helpful. Keep it Tecmint.