FreeBSD is a free, powerful, robust, flexible and stable Open Source operating system based on Unix which is designed with security and speed in mind.
FreeBSD can operate on a large variety of modern CPU architectures and can power servers, desktops and some kind of custom embedded systems, the most notable being Raspberry PI SBC. As in Linux case, FreeBSD comes with a large collection of pre-compiled software packages, more than 20,000 packages, that can be simply installed in the system from their repositories, called “Ports”.
Requirements:
This tutorial will guide you on how to install the latest version of FreeBSD on an amd64 machine. Typically this installation covers only the command line version of the operating system, which makes it best-suited for servers.
If you don’t require a custom installation, you can skip the installation process and download and run a pre-build Virtual Machine image for VMware, VirtualBox, QEMU-KVM or Hyper-V.
FreeBSD Installation Guide
1. First, get the latest FreeBSD DVD 1 ISO image released from FreeBSD download page and burn it to a CD.
Place the CD image into your machine CD/DVD drive and reboot the machine into BIOS/UEFI mode or boot menu sequence by pressing a special key (usually esc, F2, F11, F12) during the power-on sequence.
Instruct the BIOS/UEFI to use the CD/DVD appropriate drive to boot from and the first screen of the installation process should be displayed on your screen.
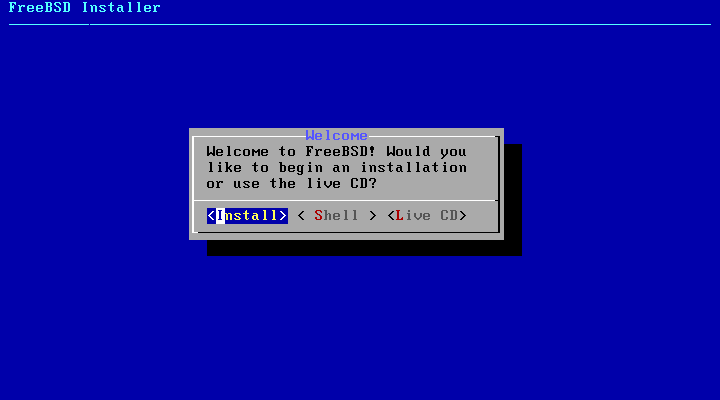
Press [Enter] key to start the installation process.

2. On the next screen select Install option and press [Enter] to continue.
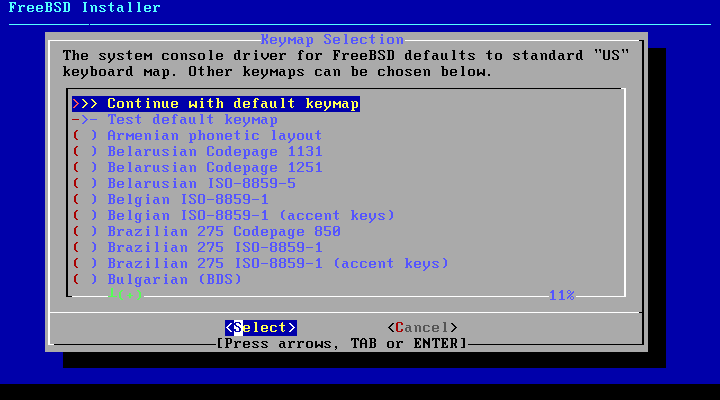
3. Select your keyboard layout from the list and press [Enter] to move forward with the installation process.
4. Next, type a descriptive name for your machine hostname and press [Enter] to continue.

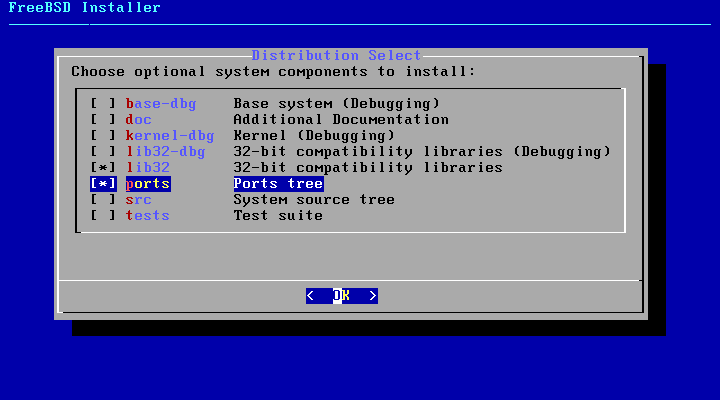
5. On the next screen select what components you want to install in the system by pressing the [space] key. For a production server it’s recommended you choose only lib32 compatibility libraries and Ports tree.
Press [enter] key after you’ve made your selections in order to continue.
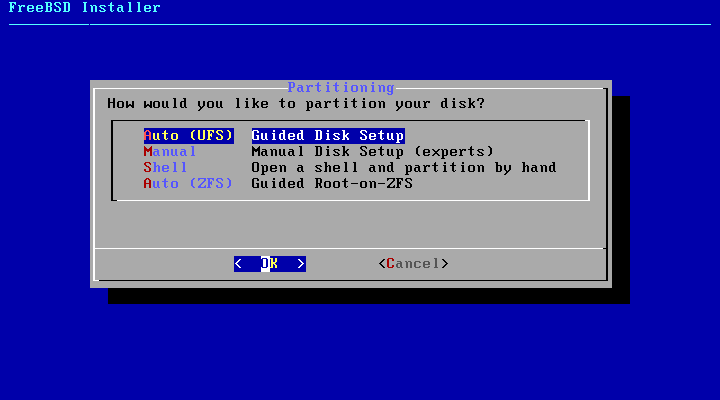
6. Next choose the method your hard disk will be partitioned. Select Auto – Unix File System – Guided Disk Setup and press [enter] key to move to the next screen.
In case you have more than one disk and need a resilient file system you should opt for ZFS method. However, this guide will only cover UFS file system.
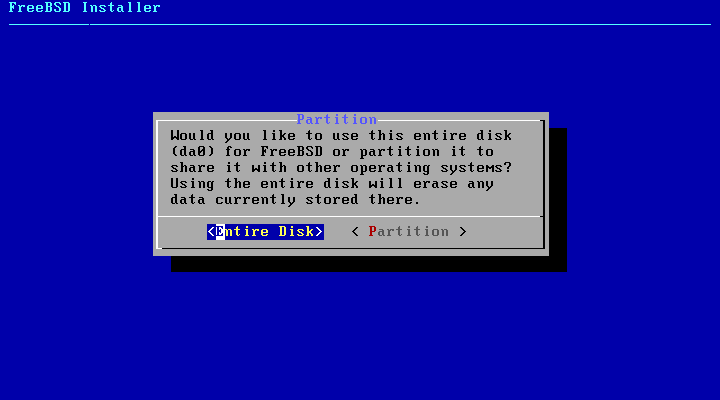
7. On the next screen select to perform FreeBSD OS installation on the entire disk and press [enter] key again to continue.
However, be aware that this option is destructive and will completely wipe-out all your disk data. If the disk holds data, you should make a backup before continuing further.
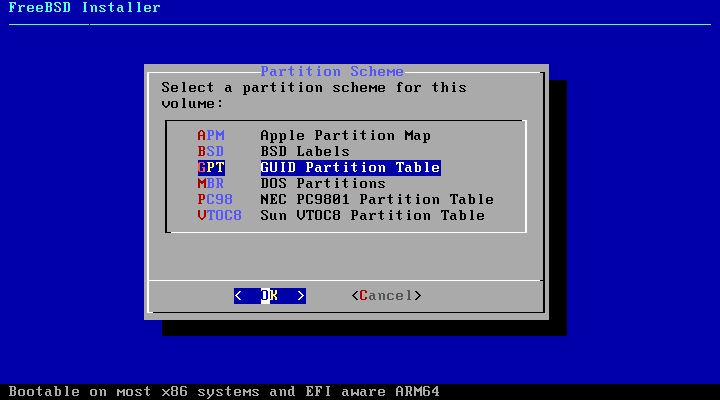
8. Next, select you hard disk partition layout. In case your machine is UEFI based and the installation is performed from UEFI mode (not CSM or Legacy mode) or the disk is larger than 2TB, you must use GPT partition table.
Also, it’s recommended to disable Secure Boot option from UEFI menu if the installation is performed in UEFI mode. In case of an older hardware you’re safe to partition the disk in MBR scheme.
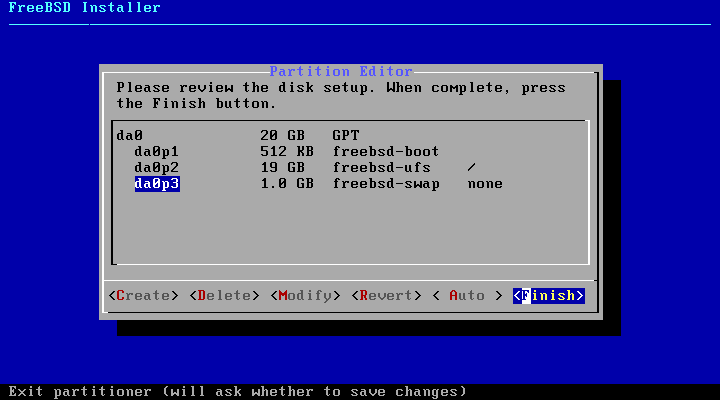
9. In the next screen review the automatically created partition table of your system and navigate to Finish using [tab] key to accept the changes.
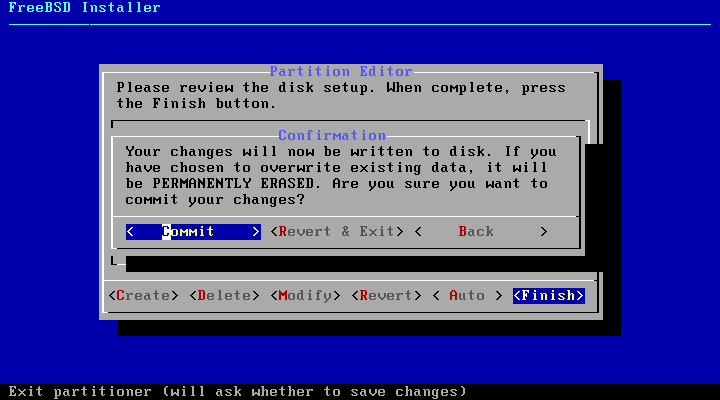
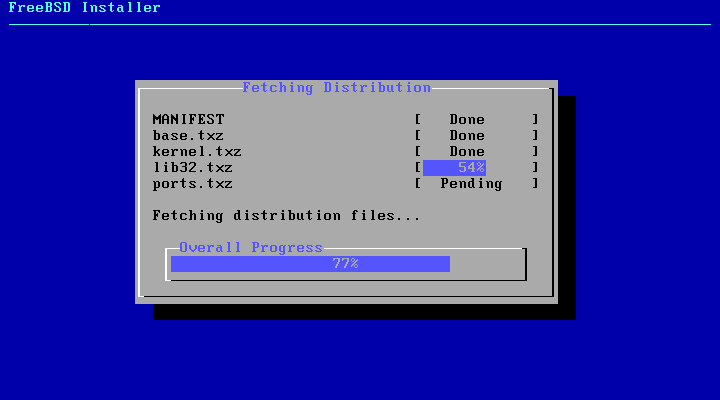
Press [enter] to continue and on the new pop-up screen select Commit to start the effective installation process. The installation process can take up from 10 to 30 minutes depending on your machine resources and HDD speed.
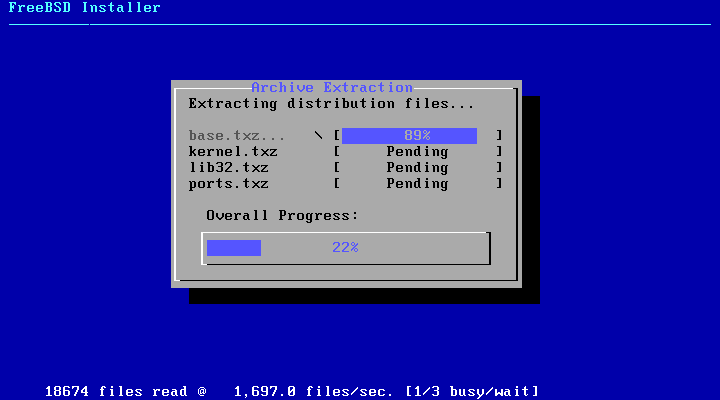
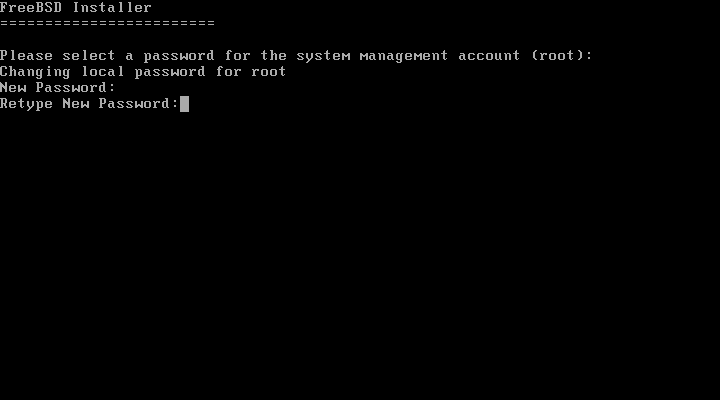
10. After the installer extracts and writes the operating system data to your machine drive, you will be prompted to specify the password for the root account.
Choose a strong password for root account and press [enter] to continue. The password won’t be echoed on the screen.
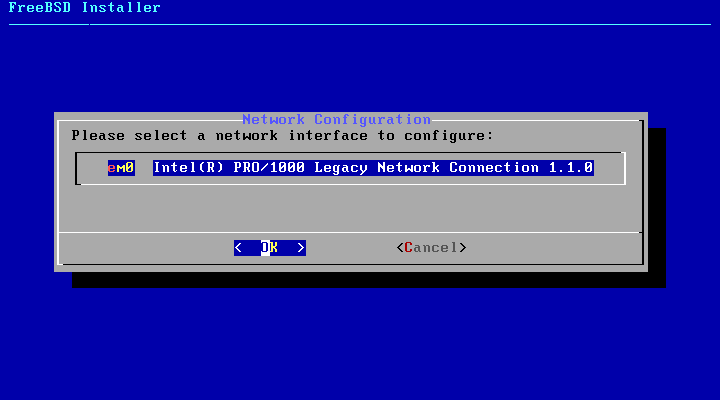
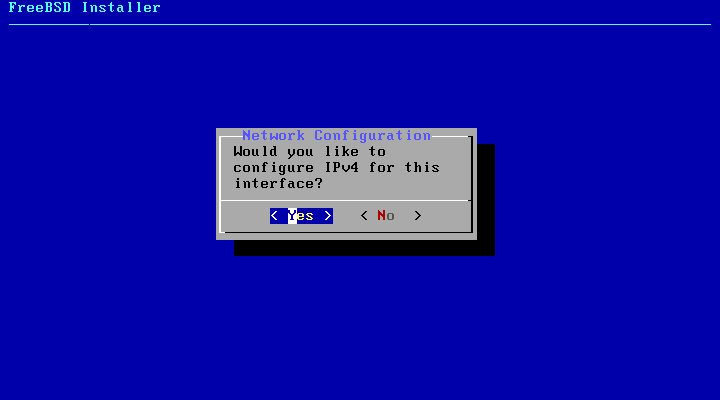
11. On the next step, select the network interface you want to configure and press [enter] to setup the NIC.
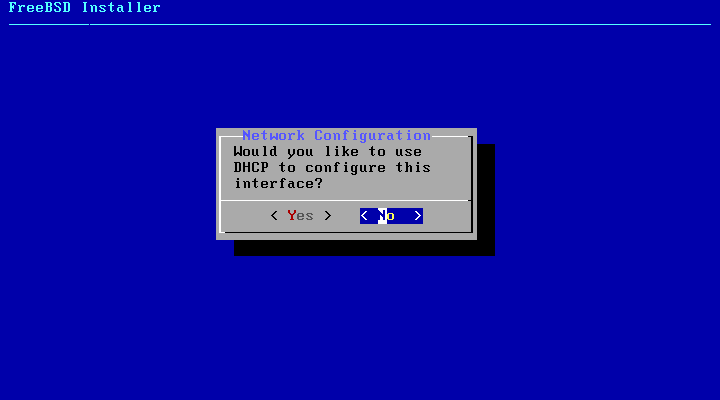
12. Choose to use IPv4 protocol for your NIC and select to configure the network interface manually with a static IP address by negating the DHCP protocol as illustrated in the below screenshots.
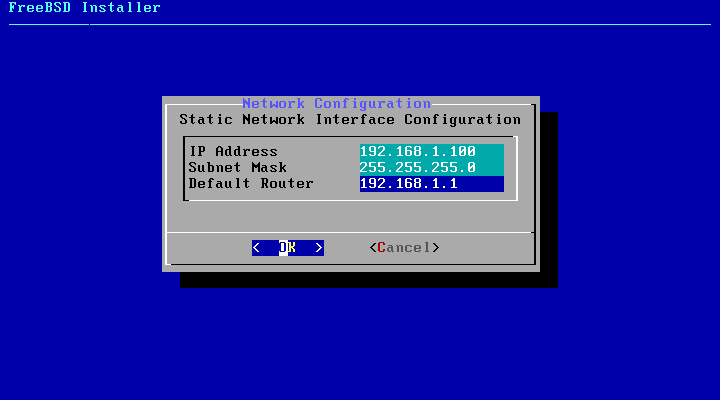
13. Next, add your static network IP configurations (IP address, netmask and gateway) for this interface and press [enter] key to continue.
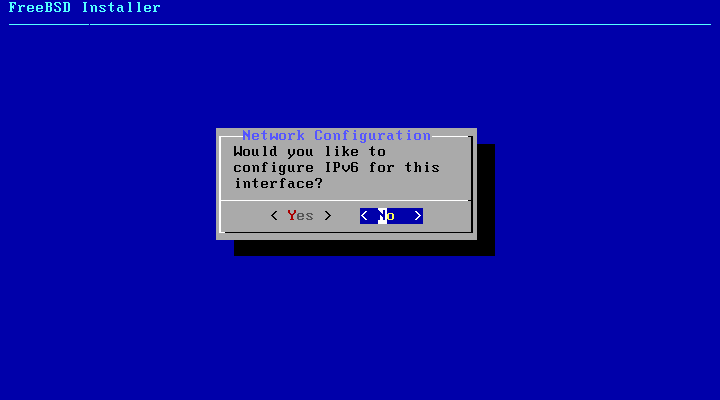
14. If the network equipment at your premises (switches, routers, servers, firewalls etc) is IPv4 based then is no point on configuring IPv6 protocol for this NIC. Choose No from the IPv6 prompt to continue.
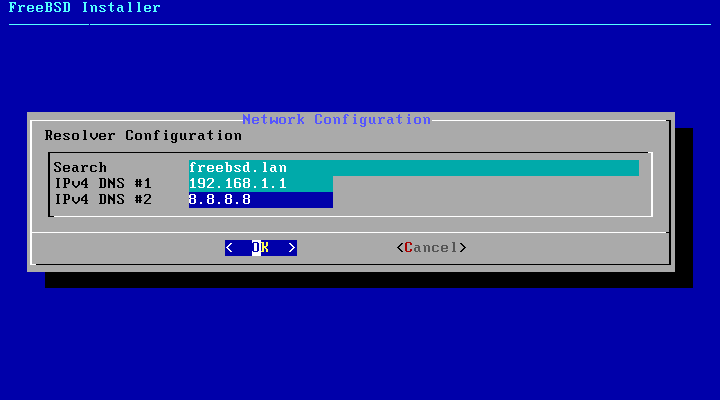
15. The final network configuration for your machine involves setting-up the DNS resolver. Add your domain name for local resolving, if that’s the case, and the IP addresses of two DNS servers you run in your network, used for resolving domain names, or use the IP addresses of some public DNS caching servers. When you finish, press OK to save changes and move further.
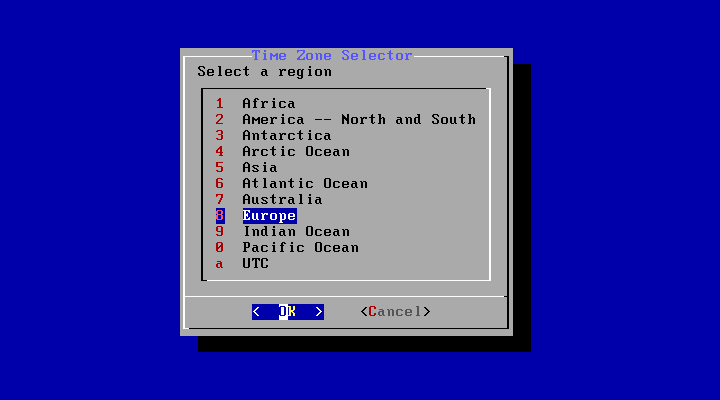
16. Next, from the time zone selector choose the physical region where your machine is located and hit OK.
17. Select your country from the list and accept the abbreviation for your time setting.

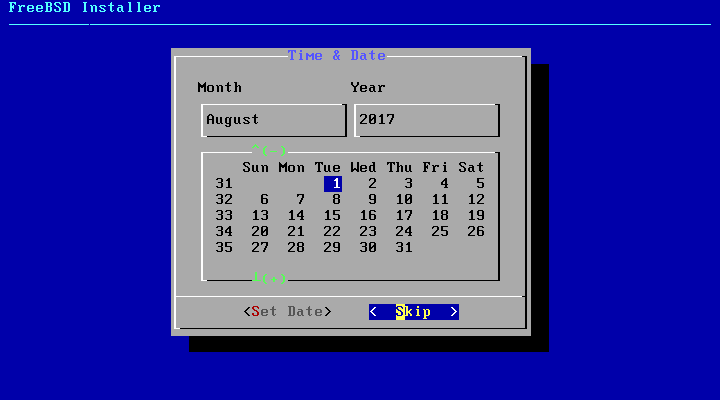
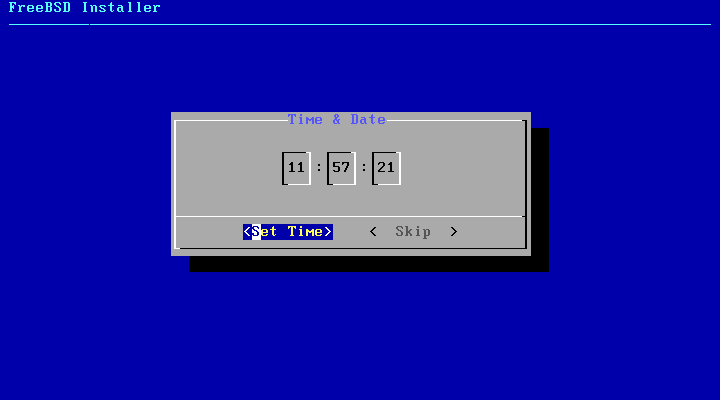
18. Next, adjust the date and time setting for your machine if that’s the case or choose to Skip the setting in case your system time is correctly configured.
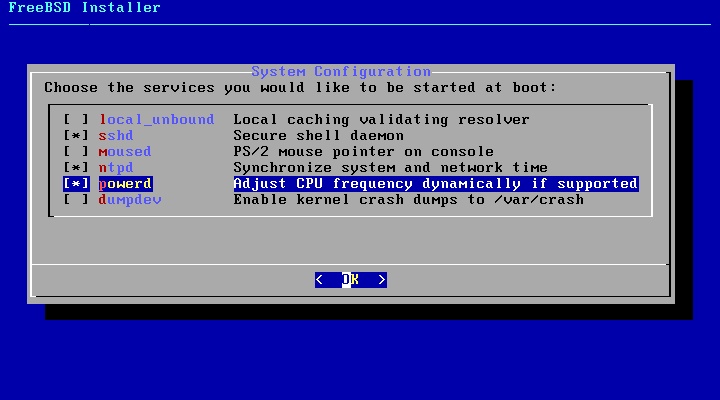
19. On the next step select by hitting the [space] key the following daemons to run system-wide: SSH, NTP and powerd.
Select powerd service in case your machine CPU supports adaptive power control. If FreeBSD is installed under a virtual machine you can skip powerd start-up service during the system boot initialization sequence.
Also, if you don’t connect into your machine remotely, you can skip SSH service automatic start-up during system boot. When you finish press OK to continue.
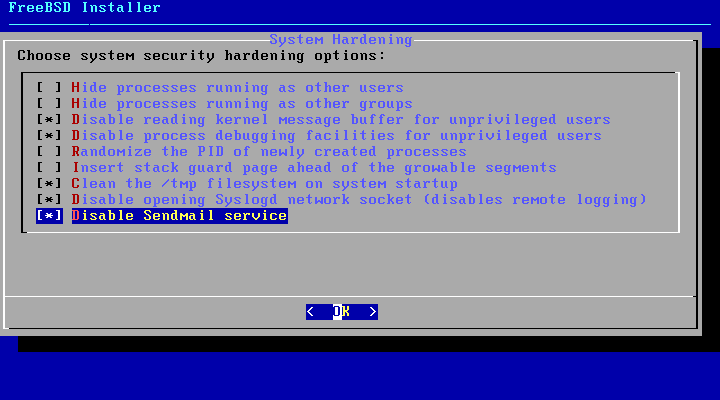
20. At the next screen, check the following options in order to minimally harden your system security: Disable reading kernel message buffer for unprivileged users, Disable process debugging facilities for unprivileged users, Clean /tmp filesystem on startup, Disable Syslogd network socket and Sendmail service in case you’re not planning to run a mail server.
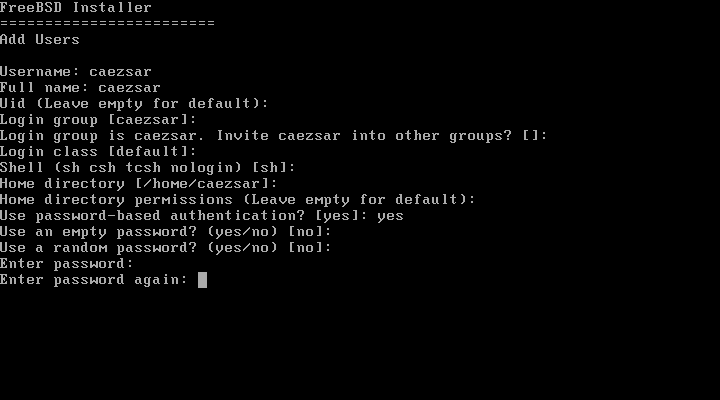
21. Next, the installer will ask you whether you will like to add a new system user. Choose yes and follow the prompt in order to add the user information. It’s safe to leave the default settings for the user by pressing [enter] key.
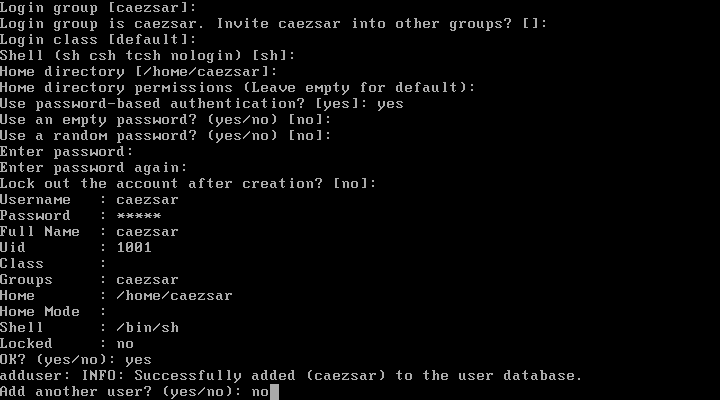
You can select Bourne shell (sh) or C improved shell (tcsh) as the default shell for your user. When you finish, answer yes at the final question to create the user.
The prompt will ask you if you want to add another user in your system. If that’s not the case, answer with no in order to continue with the final stage of the installation process.

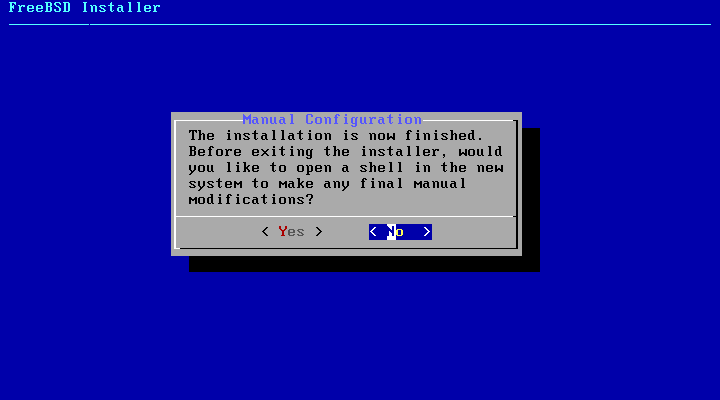
22. Finally, a new screen will provide a list of options you can choose in order to modify your system configuration. If you have nothing else to modify on your system, select the Exit option in order to complete the installation and answer with no to not open a new shell in the system and hit on Reboot to restart the machine.

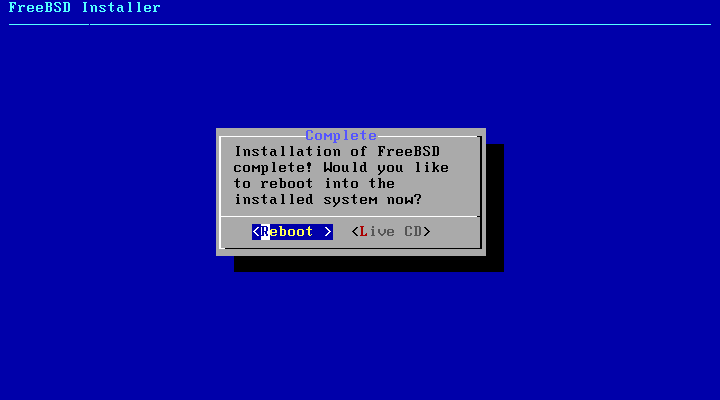
23. Remove the CD image from the machine drive and press [enter] at the first prompt to start the system and logon into the console.

Congratulations! You’ve just installed FreeBSD operating system in your machine. In the next tutorial we’ll discuss some initial configurations of FreeBSD and how to manage the system further from command line.


There’s a bit of confusion in the comments here I can hopefully help with.
ESXi does not have the data integrity checks and consistency guarantees of ZFS.
Running it at a lower level is certainly preferable, but ZFS can still detect and report consistency problems even when running in disk images, or over multiple layers. Colin Percival, the maintainer of the Amazon EC2 FreeBSD images, is working on a ZFSonRoot version, and OrionVM FreeBSD images use it by default.
ZFS is the easiest file system to administer because it handles volume management, partitioning, formatting, integrity checking, RAID-like features for multiple drives, and inline encryption in the latest OpenZFS versions. If the OS won’t boot, you can boot a helper VM or FreeBSD installer, drop to a shell, and import your ZFS pools. I can’t quantify “solidness”, but it’s the only file system I trust.
In the words of Allan Jude, one of the principle ZFS architects at FreeBSD and the author of several of the authoritative ZFS books: ZFS will use the resources you give it. Even ZFS in a constrained environment (low or limited resources, no ECC memory, etc) is a more robust and trustworthy system than anything else today.
ZFS hasn’t been limited to this use case on FreeBSD for years. In particular:
* The official Poudriere system for building ports in the new pkgng system uses ZFS to create isolated pools that are blown away once a port is built. Whenever you install a package on FreeBSD now, it’s been built this way. It’s also how you build custom ports now.
* It’s invaluable for laptops or consumer-grade desktops with flaky hardware, because it will always remain consistent even if a suspend/hibernation fails, or a battery dies. You can’t say the same for UFS (or ext4, or xfs, etc), even with journaling or softupdates enabled.
* iocage uses ZFS by default for creating jails, and it’s increasingly the preferred approach for ezjail and manual builds. Every other approach for using jails is at the very least tedious (I would know, unfortunately!)
* Allan Jude demonstrated at AsiaBSDCon 2019 the idea of using ZFS for in-place, atomic upgrades of the base system. This is the use case I’m most excited about, and would bring upgrades for FreeBSD closer to what Solaris has (or had, rest in peace).
Cheers
Hi, why did you install on ufs and not on zfs? One of the main and great features of FreeBSD is that you can install it on native zfs root filesystem.
I don’t know about him, but I only use UFS because I install on ESXi, which already has the features of ZFS and more, and easier and more solid to administer because it works even if the operating system will not boot. If I were bare metal, then I would use ZFS for its self-healing and robustness, but ZFS is also hard on resources on a heavily loaded server.
Yes, IT_Architect has correctly spotted the right answer. ZFS is mainly used to deploy filesystems on bare metal machines with multiple attached storage uints or HDDs. In virtual machines ther’s no point in using ZFS, because the underlying hard disk is nothing than a single file created on a already existing storage and filesystem.
Hi, why did you install on ufs and not on zfs? One of the main and great features of FreeBSD is that you can install it on native zfs root filesystem.