This tutorial will cover some initial configurations you need to perform on a fresh installed FreeBSD operating system and some basics on how to manage FreeBSD from command line.
Requirements
1. Update FreeBSD System
The first thing every system administrator should perform after a fresh installation of an operating system is to make sure the system is up-to-date with the latest security patches and the latest versions of the kernel, package manager and software packages.
In order to update FreeBSD, open a console in the system with root privileges and issue the following commands.
# freebsd-update fetch
# freebsd-update install
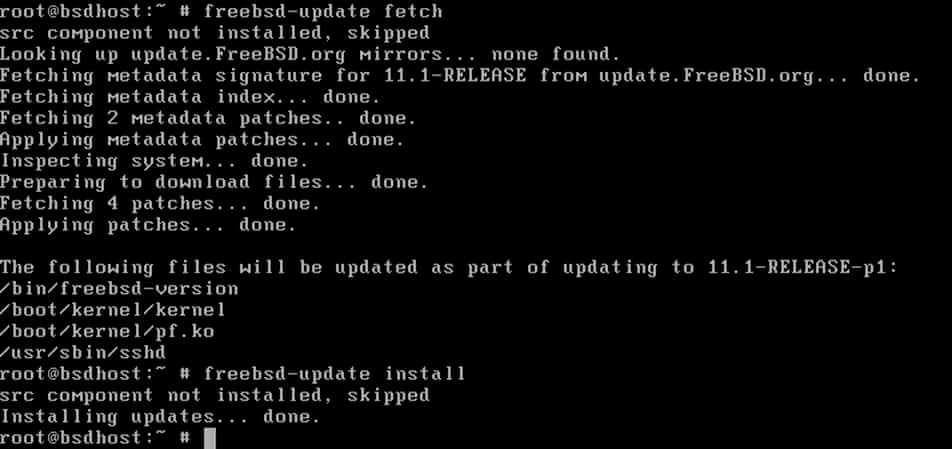
To update “Ports” package manager and installed software run the below command.
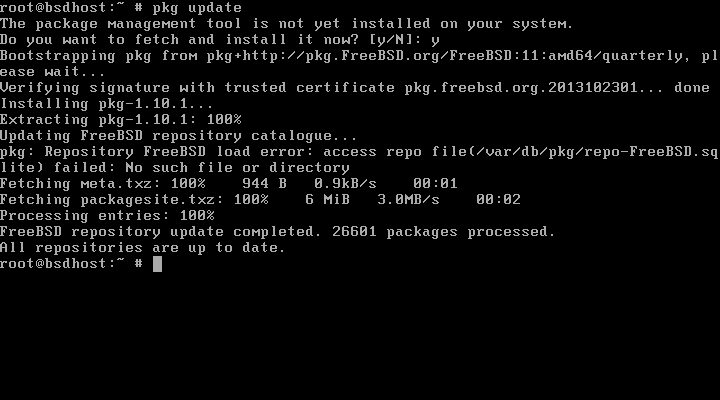
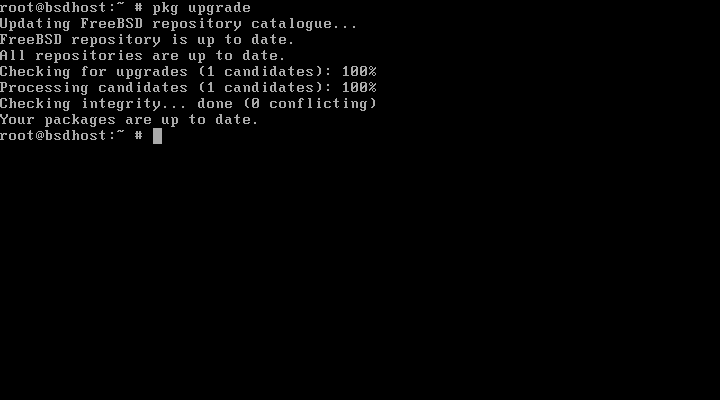
# pkg update
# pkg upgrade
2. Install Editors and Bash
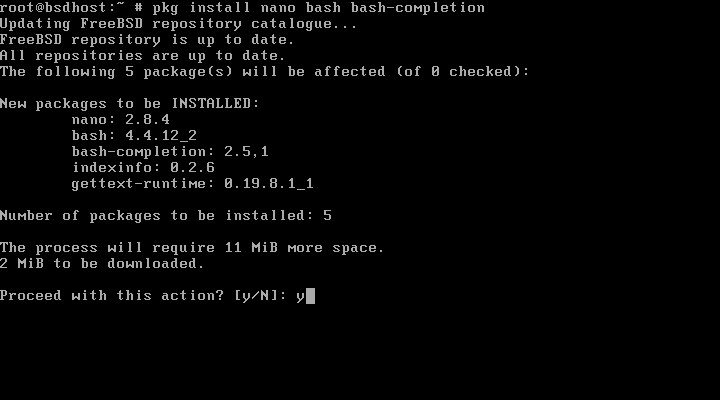
In order to ease the job managing the system from command line you should install the following packages:
- Nano text editor – ee is the default text editor in FreeBSD.
- Bourne Again Shell – if you want to make the transition from Linux to FreeBSD more smooth.
- Bash Completion – needed to autocomplete commands typed in console using the
[tab]key.
All the presented utilities can be installed by issuing the below command.
# pkg install nano bash bash-completion
3. Secure SSH on FreeBSD
By default, FreeBSD SSH service won’t allow the root account to perform remote logins automatically. Although, disallowing remote root logins via SSH measure is mainly designed to secure the service and your system, there are cases where sometimes you need to authenticate via SSH with root.
To change this behavior, open SSH main configuration file and update the line PermitRootLogin from no to yes as illustrated in the below screenshot.
# nano /etc/ssh/sshd_config
File excerpt:
PermitRootLogin yes
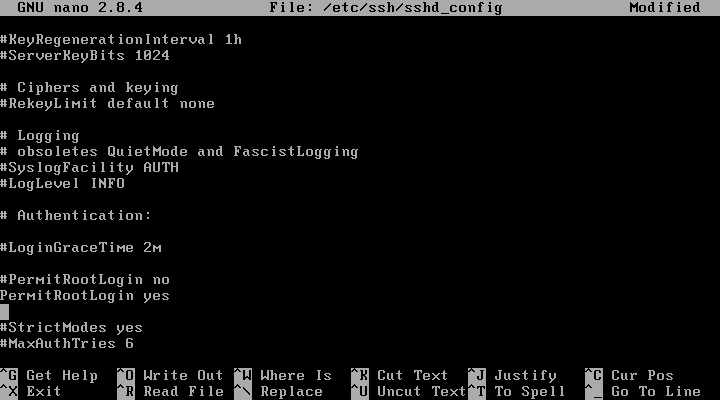
Afterwards, restart SSH daemon to apply changes.
# service sshd restart
To test the configuration you can login from Putty Terminal or from remote Linux maching using the following syntax.
# [email protected] [FreeBSD Server IP]
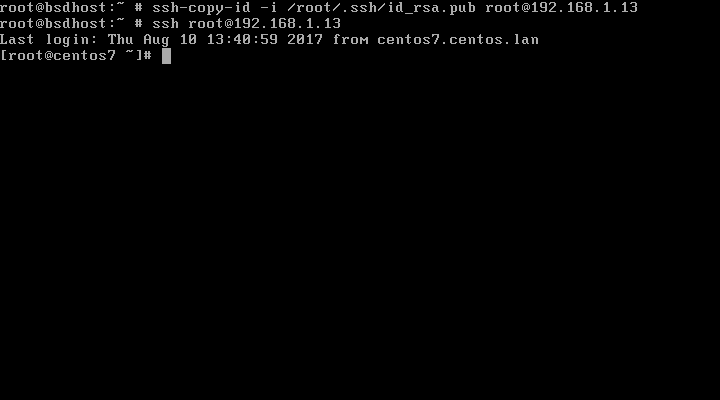
4. FreeBSD SSH Passwordless Login
To generate a new SSH key issue the following command. You can copy the public to another server instance and securely login to the remote server without a password.
# ssh-keygen –t RSA
# ssh-copy-id -i /root/.ssh/id_rsa.pub [email protected]
# ssh [email protected]

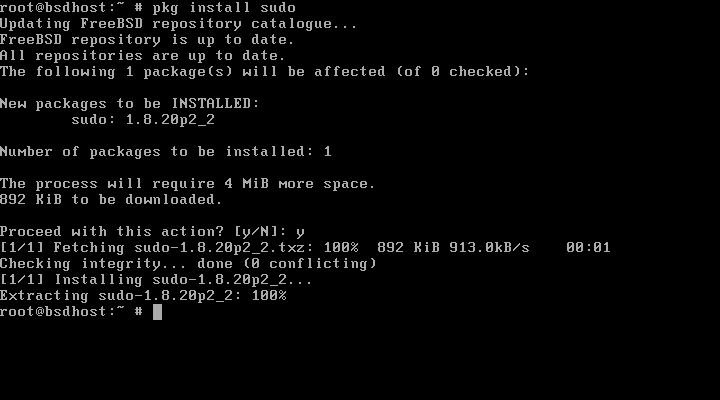
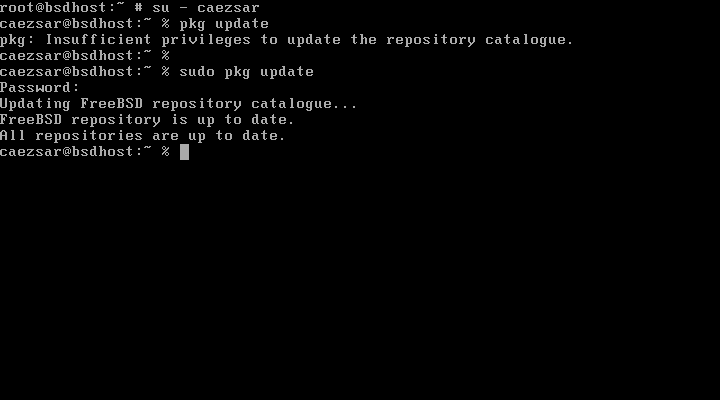
5. Install and Configure Sudo on FreeBSD
Sudo is a software which is designed to allow a common user to execute commands with the security privileges of the superuser account. Sudo utility is not installed by default in FreeBSD.
To install sudo in FreeBSD run the following command.
# pkg install sudo
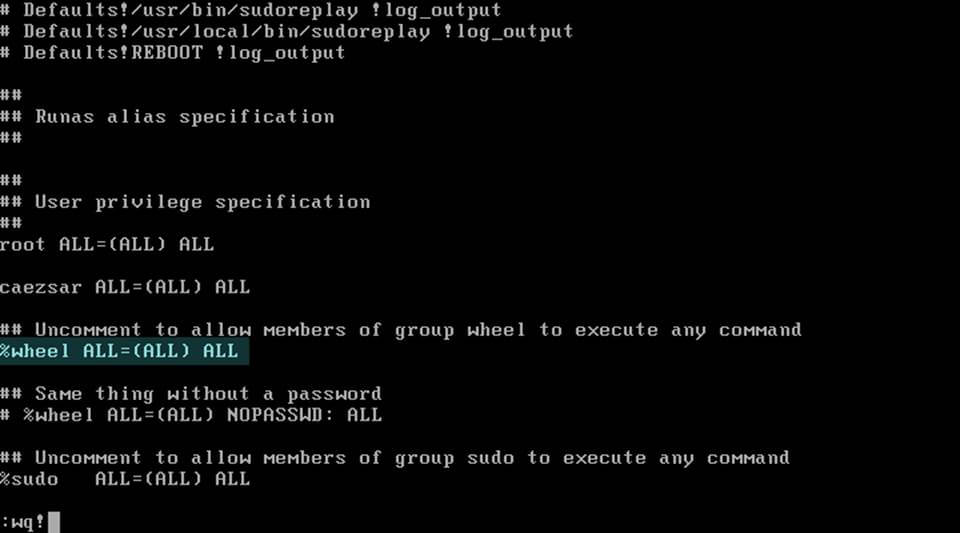
In order to allow a regular system account to run command with root privileges, open sudoers configuration file, located in /usr/local/etc/ directory, for editing by executing visudo command.
Navigate through the content of the file and add the following line, normally after the root line:
your_user ALL=(ALL) ALL
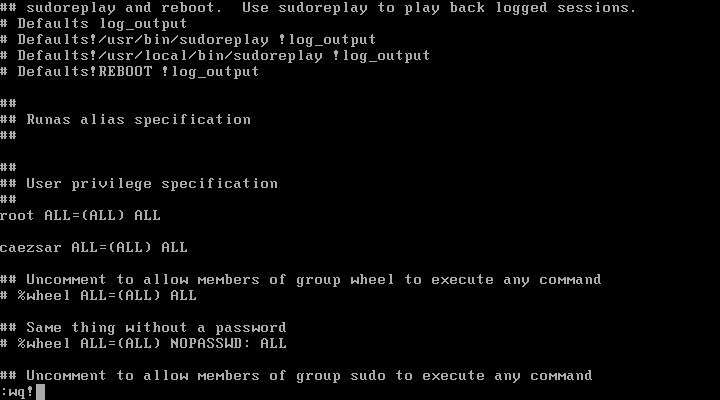
Always use visudo command in order to edit sudoers file. Visudo utility contains build-in capabilities to detect any error while editing this file.
Afterwards, save the file by pressing :wq! on your keyboard, login with the user who you’ve granted root privileges and execute an arbitrary command by appending sudo in front the command.
# su - yoursuer
$ sudo pkg update
Another method that can be used in order to allow a regular account with root powers, would be to add the regular user to system group called wheel and uncomment the wheel group from sudoers file by removing the # sign at the beginning of the line.
# pw groupmod wheel -M your_user
# visudo
Add the following line to /usr/local/etc/sudoers file.
%wheel ALL=(ALL=ALL) ALL
6. Managing Users on FreeBSD
The process of adding a new user is pretty straightforward. Just run adduser command and follow the interactive prompt in order to finalize the process.
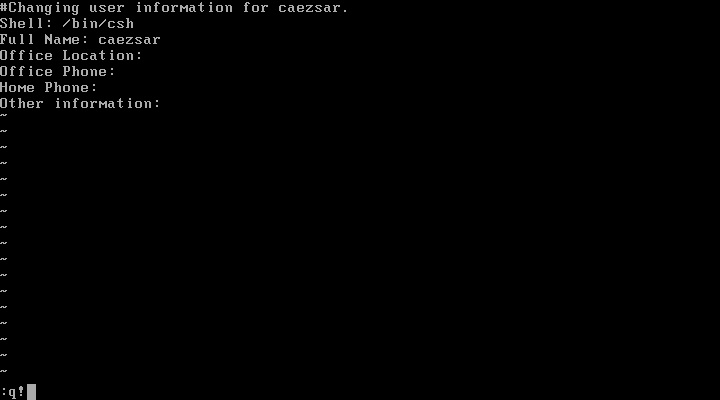
In order to modify the personal information of a user account, run the chpass command against a username and update the file. Save the file opened with vi editor by pressing :wq! keys.
# chpass your_user
To update a user password, run passwd command.
# passwd your_user
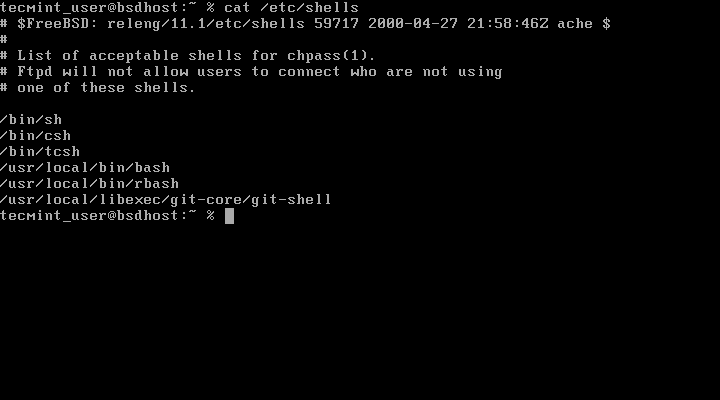
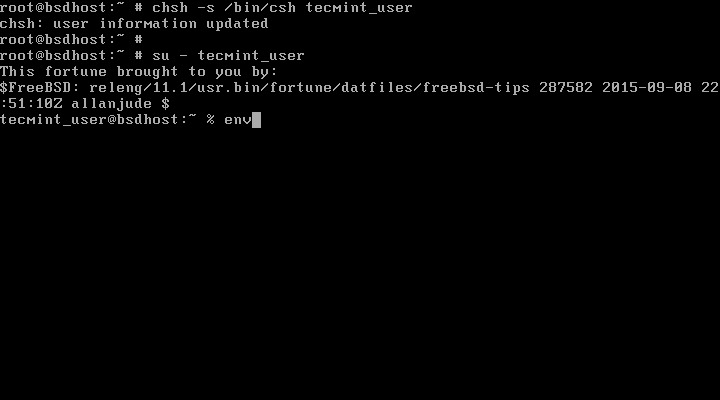
To change an account default shell, first list all present shells in your system and then execute chsh command as illustrated below.
# cat /etc/shells
# chsh -s /bin/csh your_user
# env  #List user environment variables
7. Configure FreeBSD Static IP
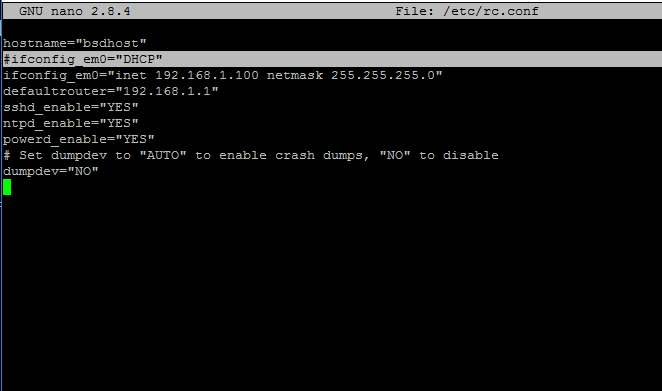
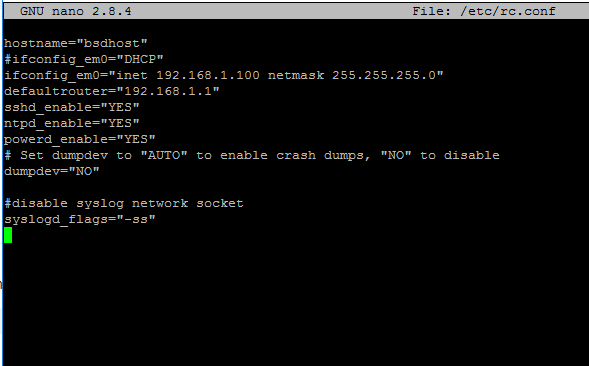
Regular FreeBSD permanent network settings can be manipulated by editing /etc/rc.conf file. In order to configure a network interface with static IP address on FreeBSD.
First run ifconfig -a command to display a list of all NICs and identify the name of the interface you want to edit.
Then, manually edit /etc/rc.conf file, comment the DHCP line and add your NIC’s IP settings as illustrated below.
#ifconfig_em0="DHCP"
ifconfig_em0="inet 192.168.1.100 netmask 255.255.255.0"
#Default Gateway
defaultrouter="192.168.1.1"
To apply the new network settings issue the following commands.
# service netif restart
# service routing restart
8. Configure FreeBSD DNS Network
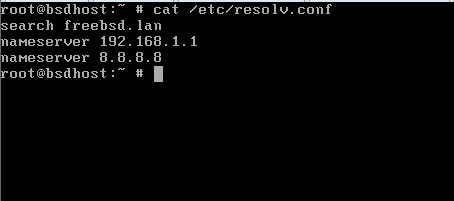
DNS nameserver resolvers can be manipulated via editing /etc/resolv.conf file as presented in the below example.
nameserver your_first_DNS_server_IP
nameserver your_second_DNS_server_IP
search your_local_domain
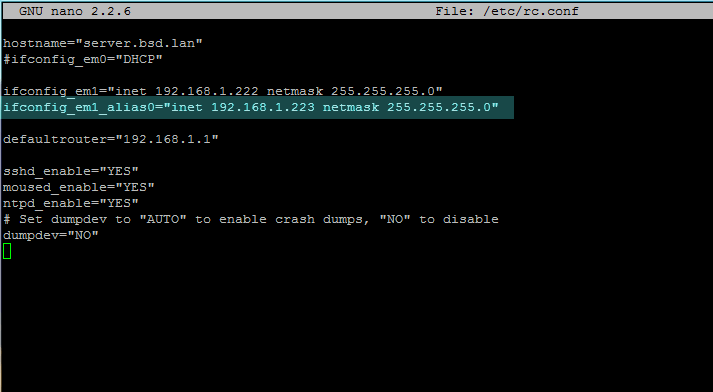
To change your machine name update the hostname variable from /etc/rc.conf file.
hostname=”freebsdhost”
To add multiple IP address for a network interface on FreeBSD add the below line in /etc/rc.conf file.
ifconfig_em0_alias0="192.168.1.5 netmask 255.255.255.255"
Afterwards, restart the network service to reflect changes.
# service netif restart
9. Manage FreeBSD Services
Services can be managed in FreeBSD via service command. To list all system-wide enabled services issue the following command.
# service -e
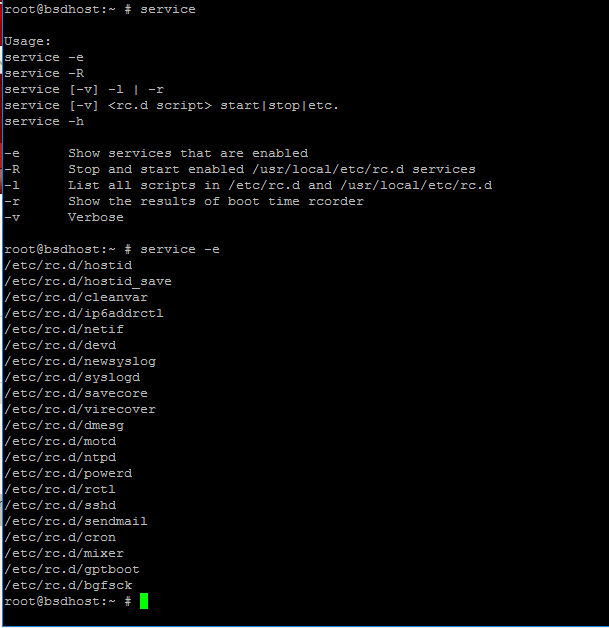
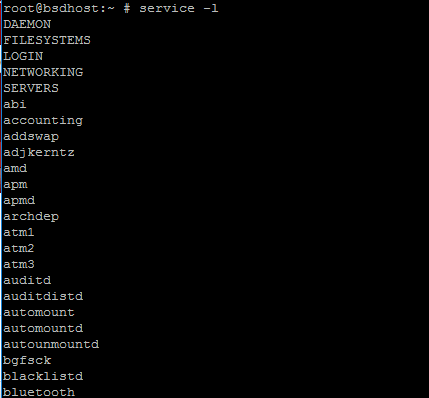
To list all services scripts located in /etc/rc.d/ system path run the below command.
# service -l
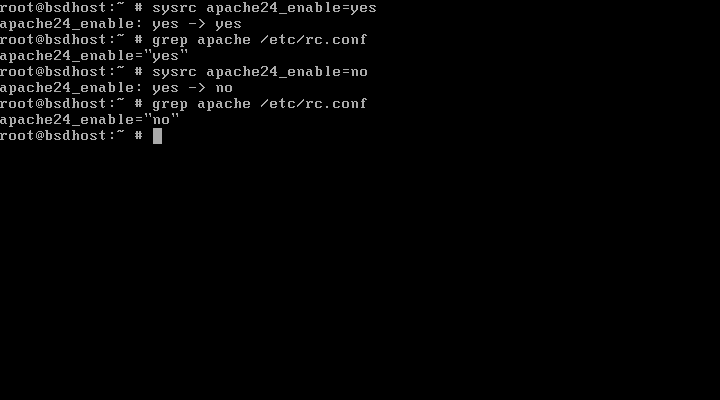
To enable or disable a FreeBSD daemon during boot initialization process, use sysrc command. Assuming that you want to enable SSH service, open /etc/rc.conf file and append the following line.
sshd_enable=”YES”
Or use sysrc command which does the same thing.
# sysrc sshd_enable=”YES”
To disable a service system-wide, append the NO flag for the disabled daemon as presented below. The daemons flags are case insensitive.
# sysrc apache24_enable=no
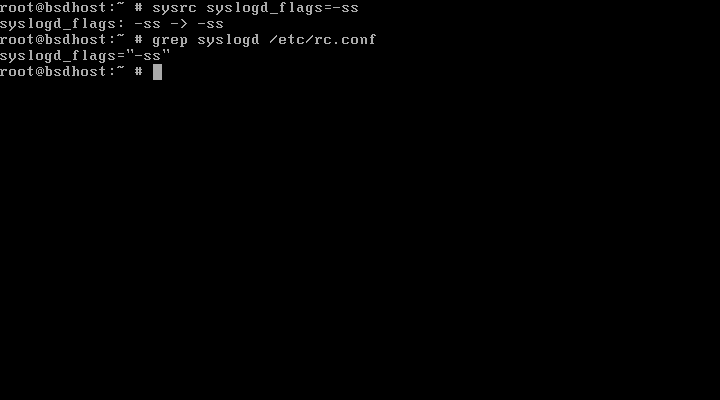
Is worth mentioning that some services on FreeBSD require special attention. For example, if you want to only disable Syslog daemon network socket, issue the following command.
# sysrc syslogd_flags="-ss"
Restart Syslog service to apply changes.
# service syslogd restart
To completely disable Sendmail service at system startup, execute the following commands or add them to /etc/rc.conf file:
sysrc sendmail_enable="NO"
sysrc sendmail_submint_enable="NO"
sysrc sendmail_outbound_enable="NO"
sysrc sendmail_msp_queue_enable="NO"
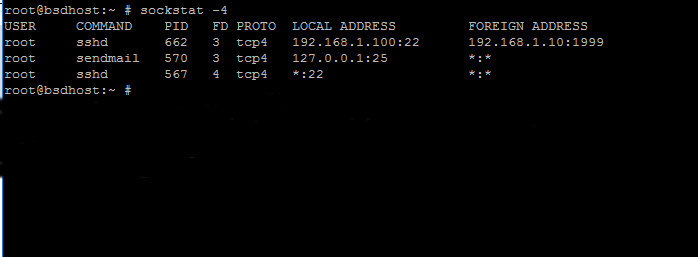
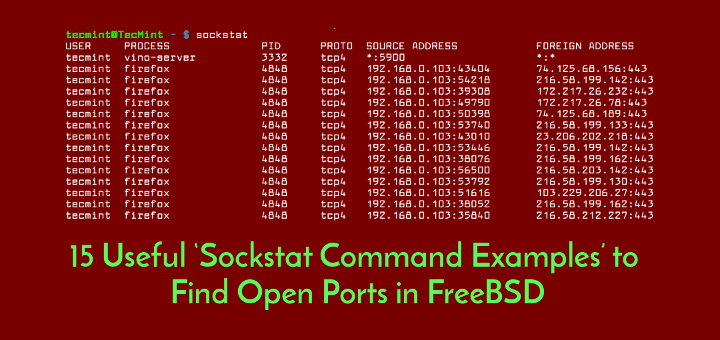
10. List Network Sockets
In order to display a list of open ports in FreeBSD use the sockstat command.
List all IPv4 network sockets on FreeBSD.
# sockstat -4
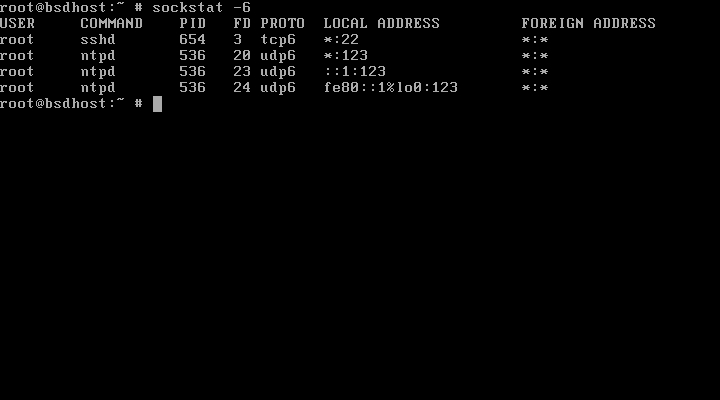
Display all IPv6 network sockets on FreeBSD.
# sockstat -6
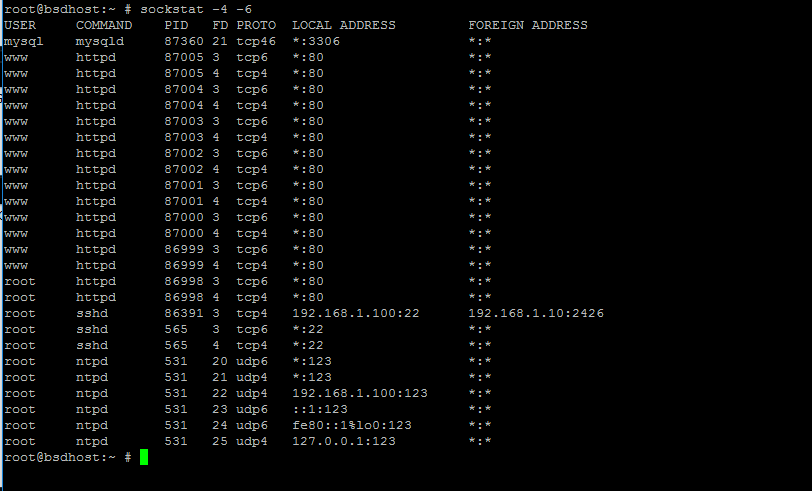
You can combine the two flags to display all network sockets as illustrated in the below screenshot.
# sockstat -4 -6
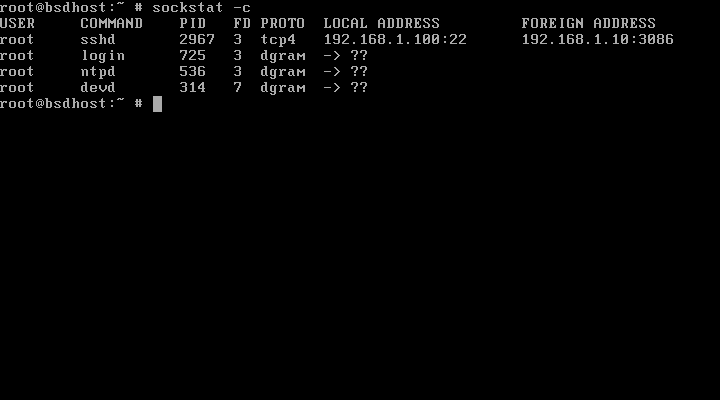
List all connected sockets on FreeBSD.
# sockstat -c
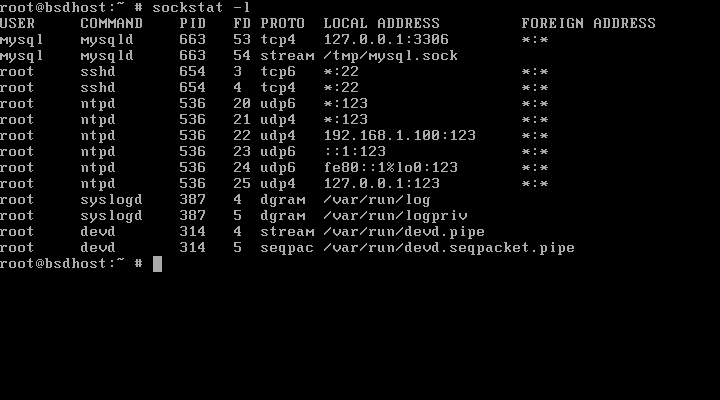
Display all network sockets in listening state and Unix domain sockets.
# sockstat -l
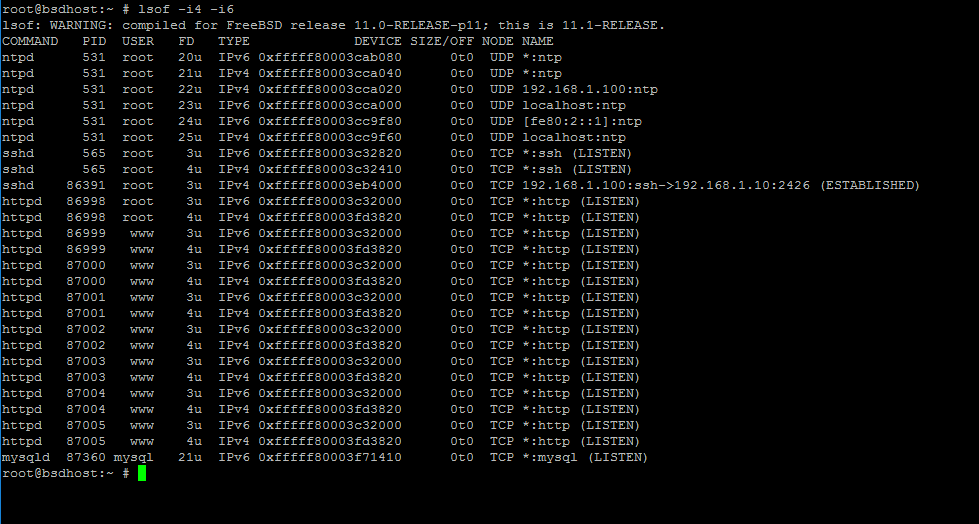
Other than sockstat utility, you can run netstat or lsof command to display system and network sockets as well.
lsof utility is not installed in FreeBSD by default. To install it from FreeBSD ports repositories issue the following command.
# pkg install lsof
To display all IPv4 and IPv6 network sockets with lsof command, append the following flags.
# lsof -i4 -i6
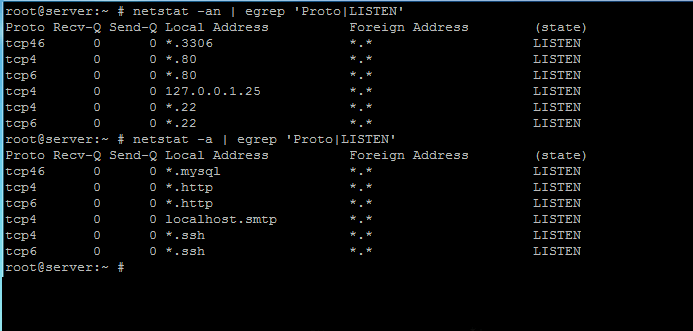
In order to display all network sockets in listening state on FreeBSD with netstat utility, issue the following command.
# netstat -an |egrep 'Proto|LISTEN'
Or run the command without -n flag in order to display the name of the opened sockets in listening state.
# netstat -a |egrep 'Proto|LISTEN'
These are just a few basic utilities and commands you need to know in order to manage a FreeBSD system on daily basis.


For fully disabling Sendmail, you can just use
sendmail_enable="NONE"instead of the 4 lines mentioned.As can be read in /etc/rc.d/sendmail:
case ${sendmail_enable} in [Nn][Oo][Nn][Ee]) sendmail_enable="NO" sendmail_submit_enable="NO" sendmail_outbound_enable="NO" sendmail_msp_queue_enable="NO" ;; esacSorry to do this again, but this is a truly useful article and I refer to it often!
Should read:
Thanks again!
“
pkg install nano bash bash_completion”…should read bash-completion, not bash_completion.
@Mike,
Corrected the command in the article…
Thanks
Can you use CD version to install FreeBSD then use internet/repo to install apps or is it necessary to use the DVD version?
When my nephew installed free-BDS for me it didn’t finish with a command prompt like a DOS box, it had Windows, a web browser, a mail program, 4 desktops; just like an openSUSE Linux and many other installations have. I’m trying to learn how to do that and you guys only seem to get to first base.
I’m not a FreeBSD user, just merely installed the basics, but these are NOT things I would be starting with!
I think the first things to start with, is update the ports, and then try to install basic programs.
If you install it on a laptop, a GUI, browser, and firewall would make sense.
Good golly, NO! There is NO good reason to enable root login over SSH. Leave that stuff turned off and use a non-privileged account to login.
You’re trying to turn a lovely BSD box into a raspi linuxbox — what with your bash and nano. >_<
Zsh (oh-my-zsh!) and new-kid-on-the-editor-block 'micro' helps keep GNU/Linus well distant (as much it can be). Otherwise, great article for new users to tie up loose ends. Cheers.
Found the Hipster.