Passwords are the primary criterion for system security in most systems. When it comes to Linux, knowing the root password gives you complete control over the machine. Passwords serve as a security measure for BIOS, login, disk, applications, and more.
Linux is considered to be one of the most secure operating systems against hacking or cracking, and it generally is. However, we will discuss some of the vulnerabilities and exploits of a Linux system.
We will be using RHEL Linux throughout the article as an example to test and crack our own machine’s security.
How to Access Linux Server Without Root Access
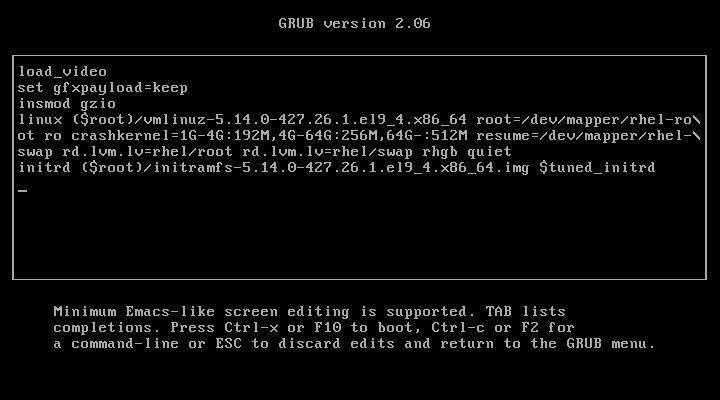
When the Linux machine starts, press any key to interrupt the boot process, and you will see the GRUB menu.
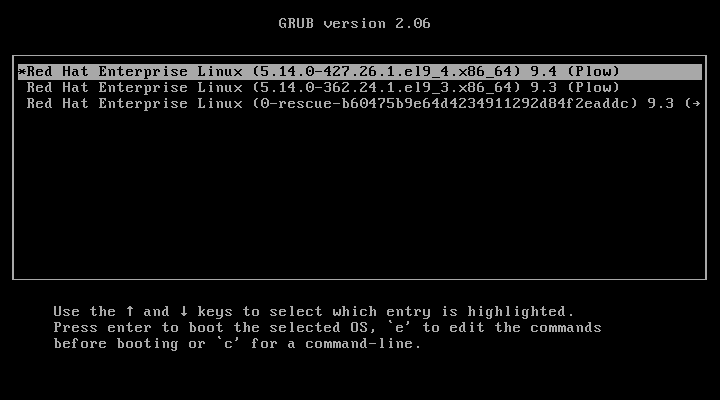
Press ‘e‘ to edit and go to the line starting with kernel and add ‘rd.break‘ at the end of the line (after the blank space) forcing it to start in emergency user mode and thus prohibiting it from entering the default run-level.
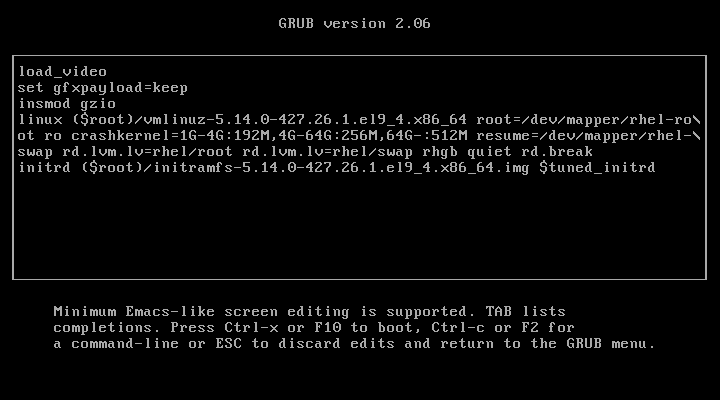
After adding ‘rd.break‘ at the end of the line, press Ctrl+X or F10 to boot with the modified kernel options into emergency user mode.
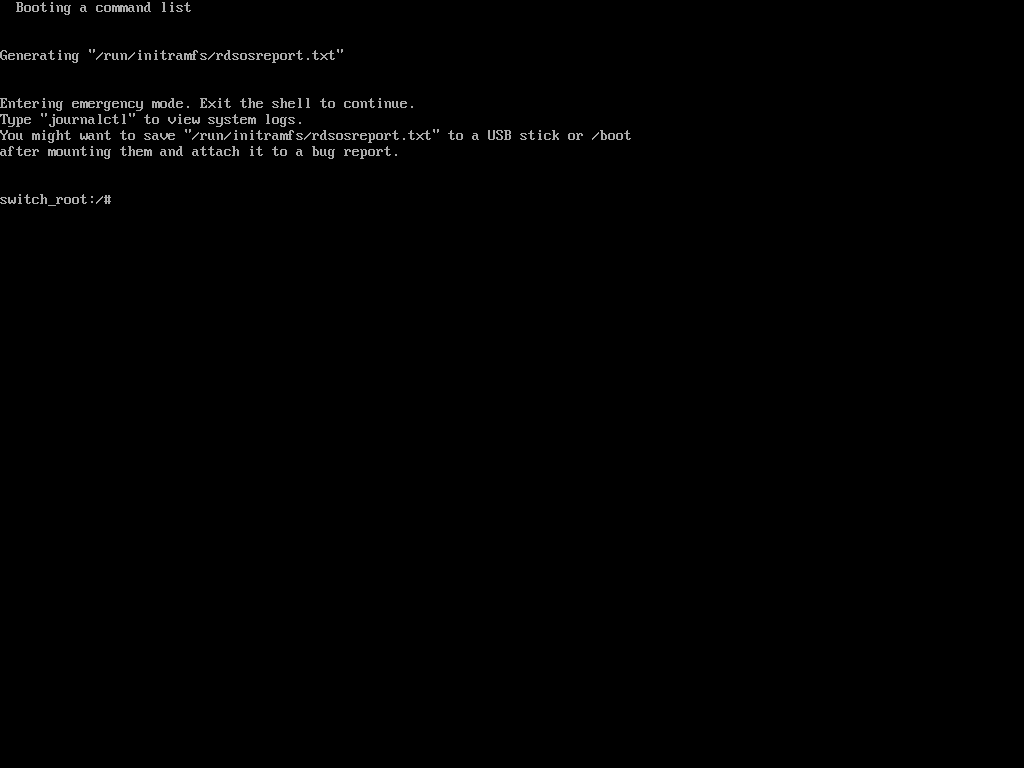
Once in emergency user mode, you’ll be dropped to a root shell prompt, where you need to remount the root filesystem in read-write mode and change into the sysroot environment.
mount -o remount,rw /sysroot
chroot /sysroot
Next, use the passwd command to reset and confirm the root password with the new one.
passwd

If the above ‘passwd‘ command doesn’t work for you and you don’t get any output, it means that your SELinux is in enforcing mode. You need to disable it first before proceeding further.
setenforce 0
Then run the ‘passwd‘ command to change the root password.
passwd
At this point, you have successfully reset your root user password. The only remaining part is to relabel all of the files with the accurate SELinux contexts.
touch /.autorelabel
Finally, type exit and then log out to start the SELinux relabelling process.
exit
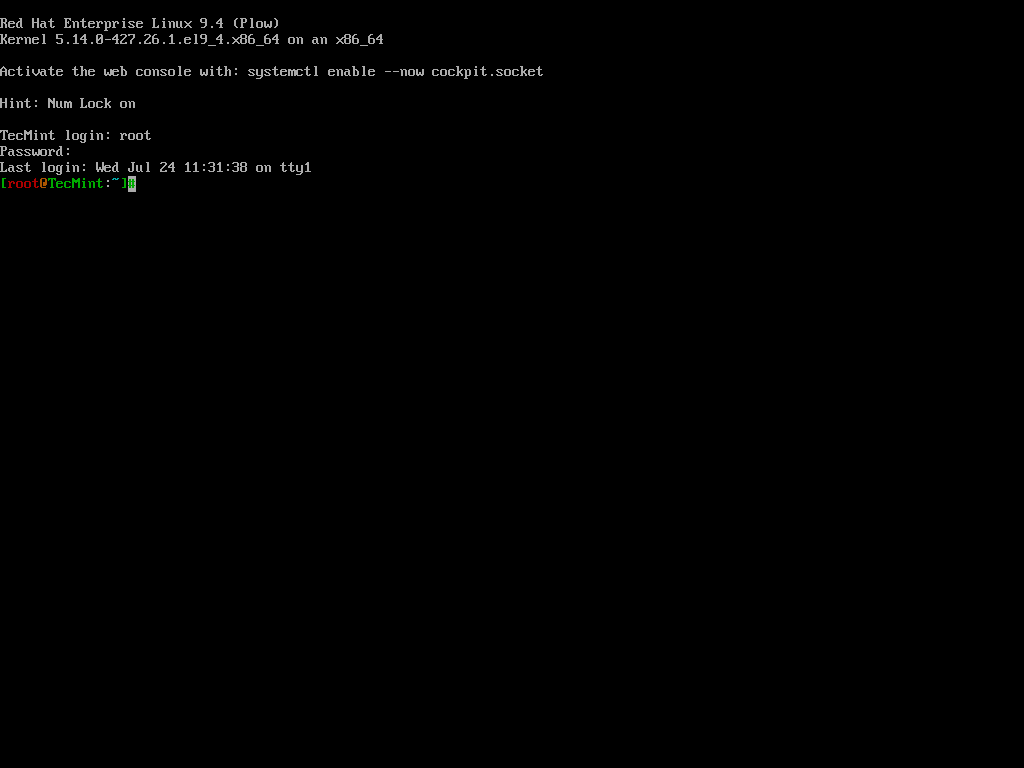
This generally takes a few minutes and once done, the system will reboot and prompt you to log in as the root user with the new password.
Hacking a Linux box was surprisingly easy, wasn’t it? Imagine the panic if someone did this to your server. Now, let’s learn how to protect our Linux machine from unauthorized modifications using single-user mode.
Password Protect Single User Mode in Linux
To password-protect Single User Mode, specific configurations need to be made to ensure that unauthorized access is prevented, which is particularly important for maintaining system security, as Single User Mode can provide unrestricted access to the root account.
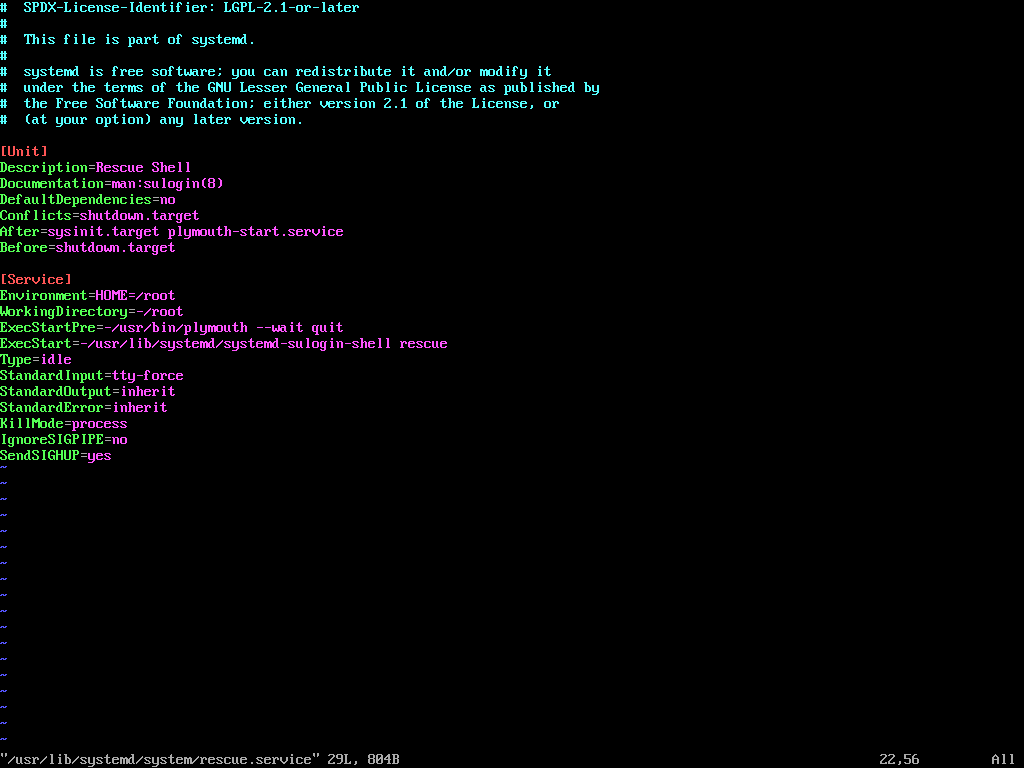
To enforce password protection in Single User Mode, you need to modify the rescue.service file.
sudo vi /usr/lib/systemd/system/rescue.service
Look for the line that starts with ExecStart. If it does not include the sulogin command, you will need to add or modify it to look like this.
ExecStart=-/usr/lib/systemd/systemd-sulogin-shell rescue
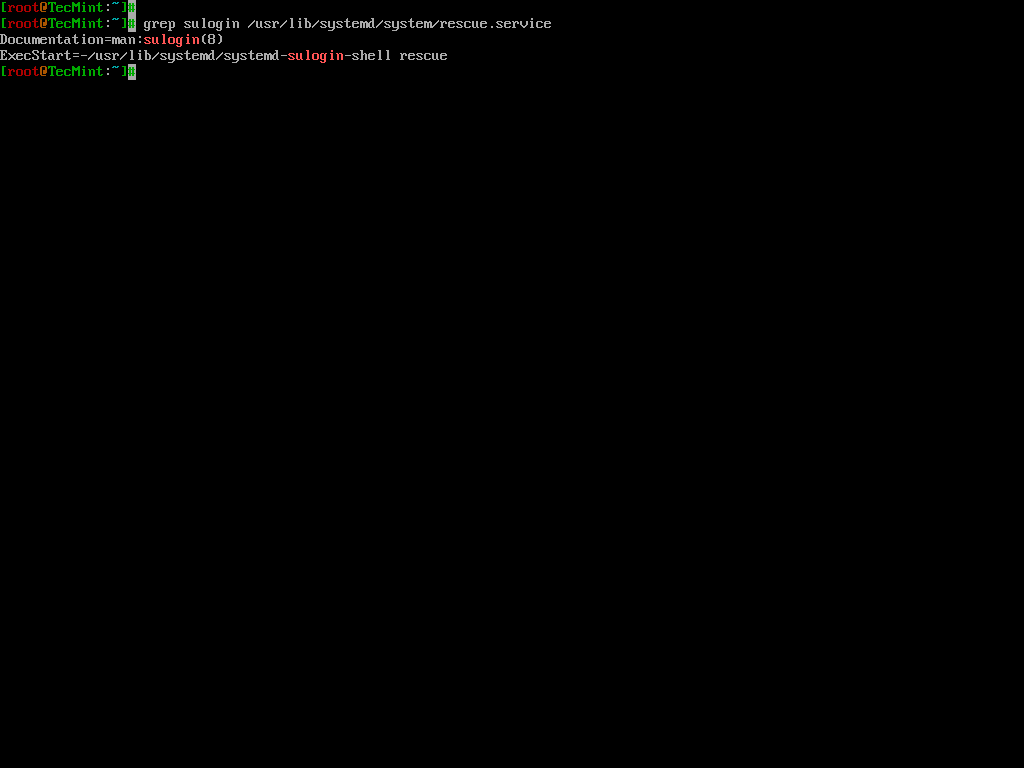
After making changes, it is essential to verify that the configuration is correctly set.
grep sulogin /usr/lib/systemd/system/rescue.service
The output should confirm that the sulogin command is present in the ExecStart line.
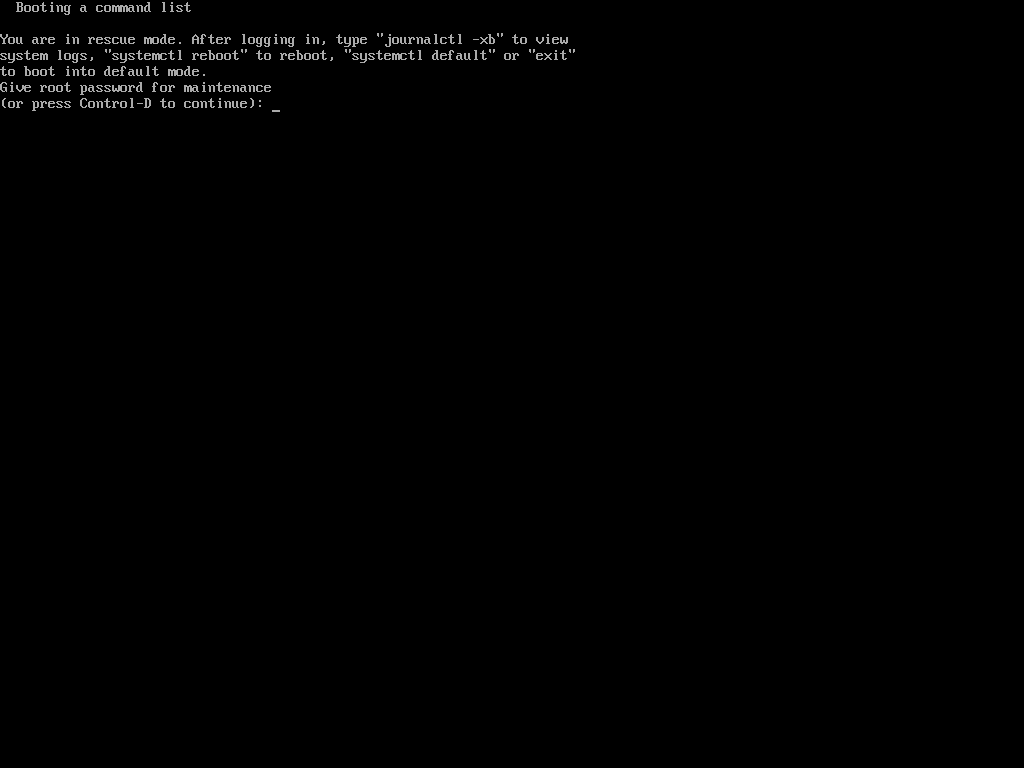
Once the configuration is complete, reboot the system to apply the changes. After rebooting, attempt to enter Single User Mode to confirm that the password prompt appears.
Hack Your Linux System Without Using Single User Mode
OK, so you might be feeling better knowing your system is secure. However, this is only partially true. While it’s true that your Linux box can’t be easily compromised using single-user mode, there are other ways it can still be hacked.
In the previous step, we modified the kernel to enter single-user mode. This time, we’ll be editing the kernel with a different parameter.
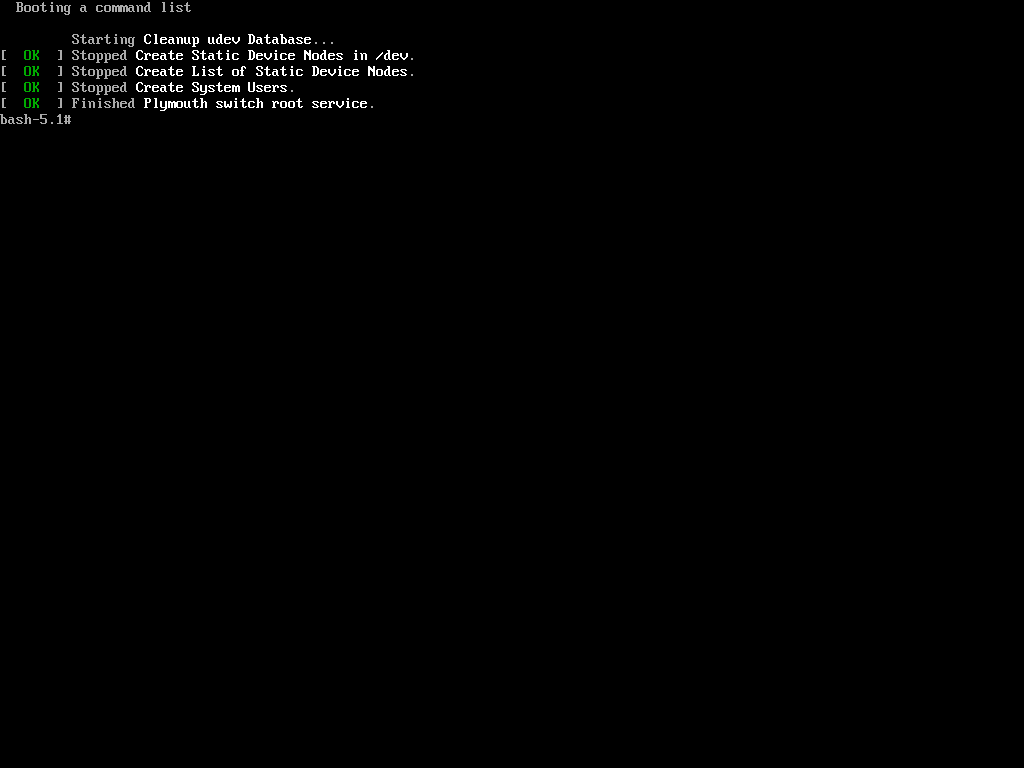
In the previous process, we added the parameter 1 to the kernel to enter single-user mode, but this time, we will add init=/bin/bash to boot into bash prompt directly.
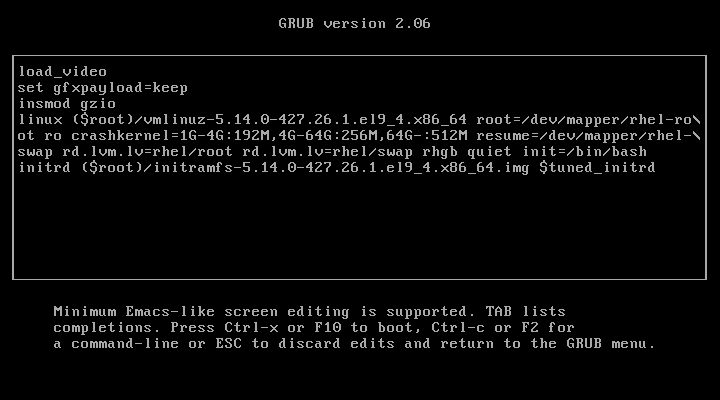
Once again, you’ve gained access to your system, the prompt confirms that the hack was successful.
Now, when trying to change the root password using the same process as in the first method with the ‘passwd‘ command, we encountered the following.
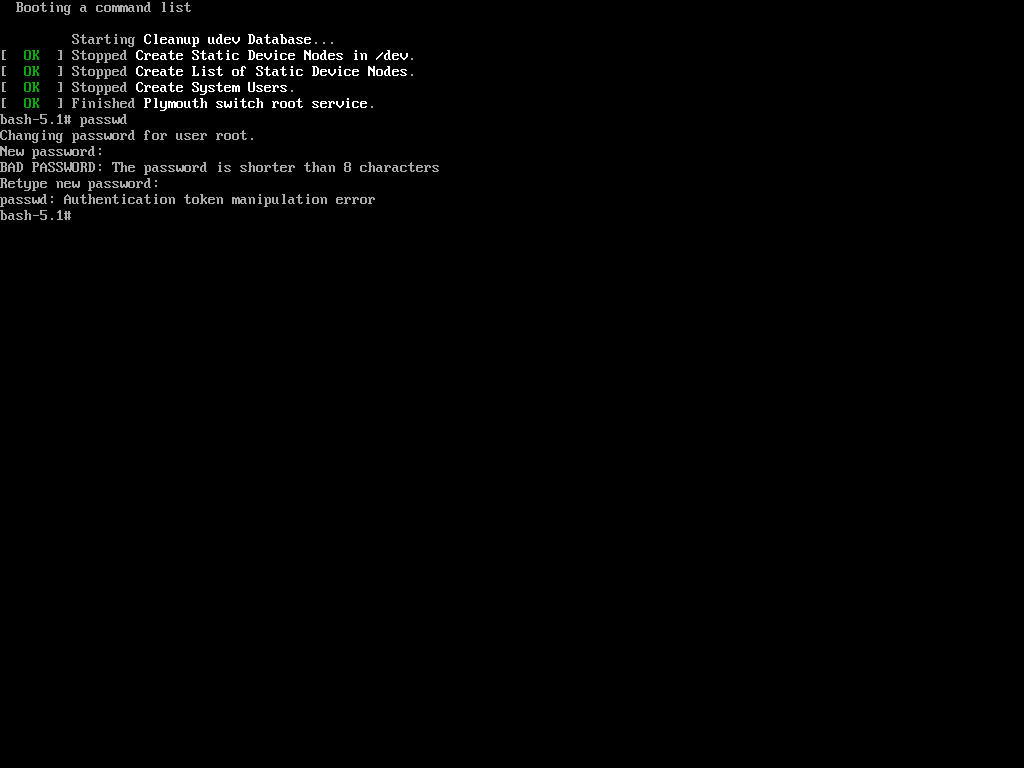
The reason is that the root (/) partition is mounted as read-only, so the password change could not be saved. The solution is to remount the root (/) partition with read-write permissions.
mount -o remount,rw /
passwd
Now again try to change the password of root using the ‘passwd‘ command.
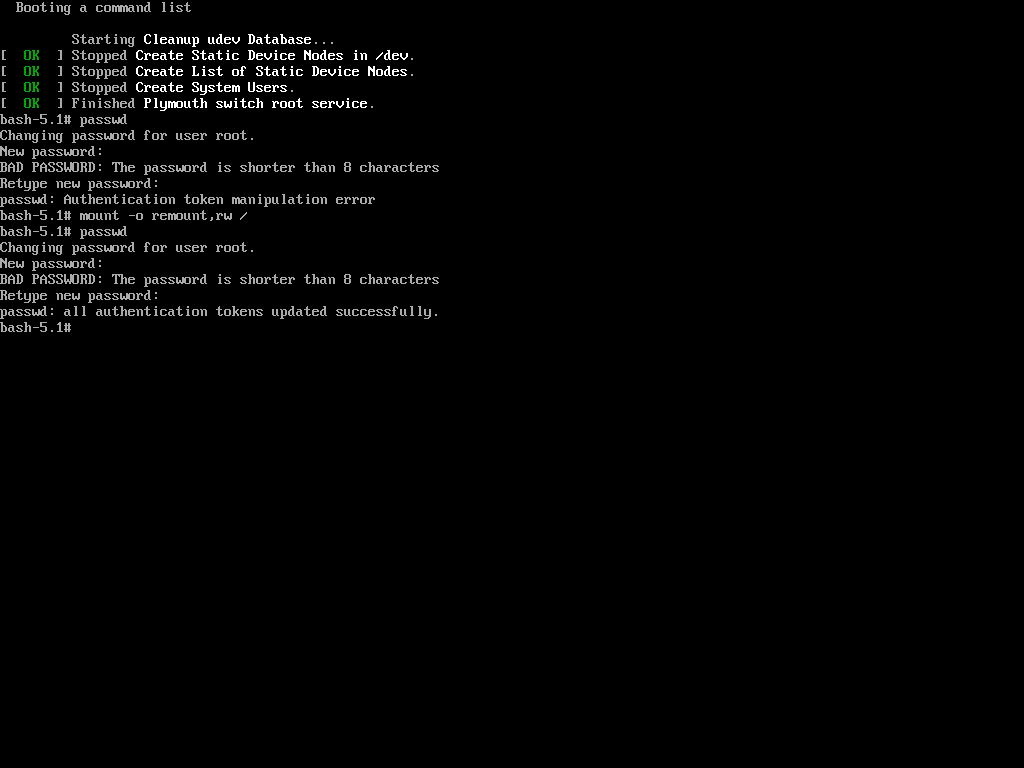
Hurrah! You’ve successfully accessed your Linux system once again. It might seem like the system is easy to exploit, but that’s not the case. The key is to properly configure your system to enhance its security.
Password Protecting the GRUB Bootloader
Both of the processes described involved tweaking and passing parameters to the kernel. To enhance the security of your Linux box and make it harder to compromise, you should prevent kernel modifications at boot.
This can be achieved by setting a password for the boot loader, specifically GRUB (note that LILO is another boot loader for Linux, but it will not be covered here).
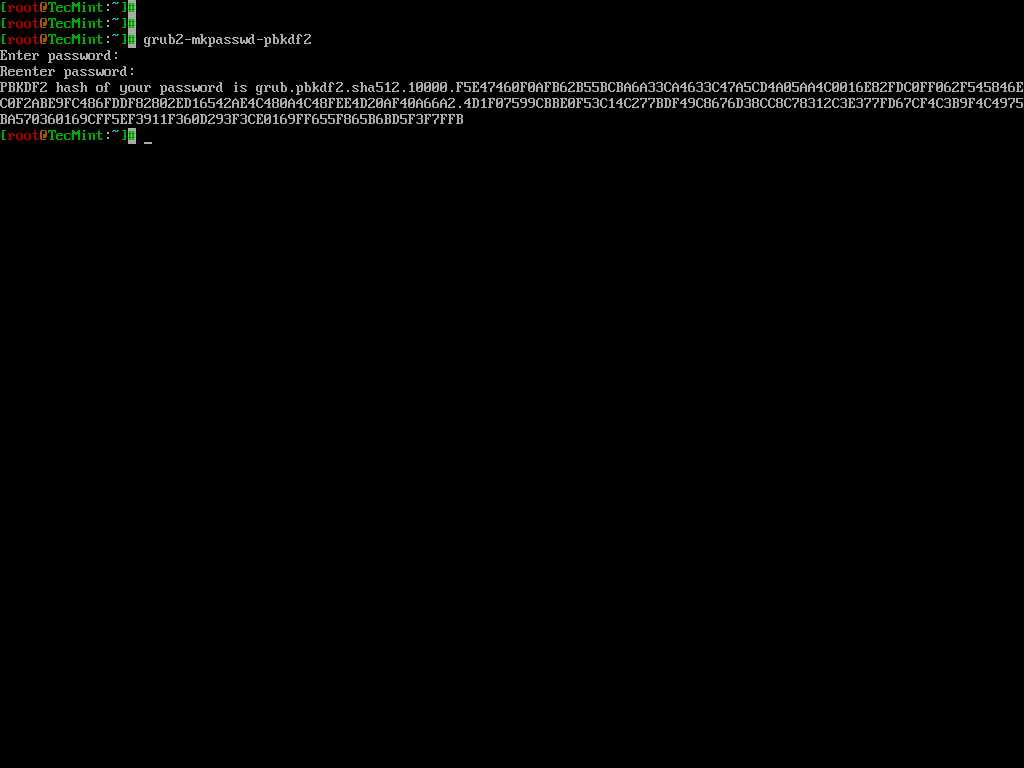
To password-protect the GRUB bootloader, you need to generate an encrypted password using the following command.
grub2-mkpasswd-pbkdf2
Next, edit the custom GRUB menu configuration file.
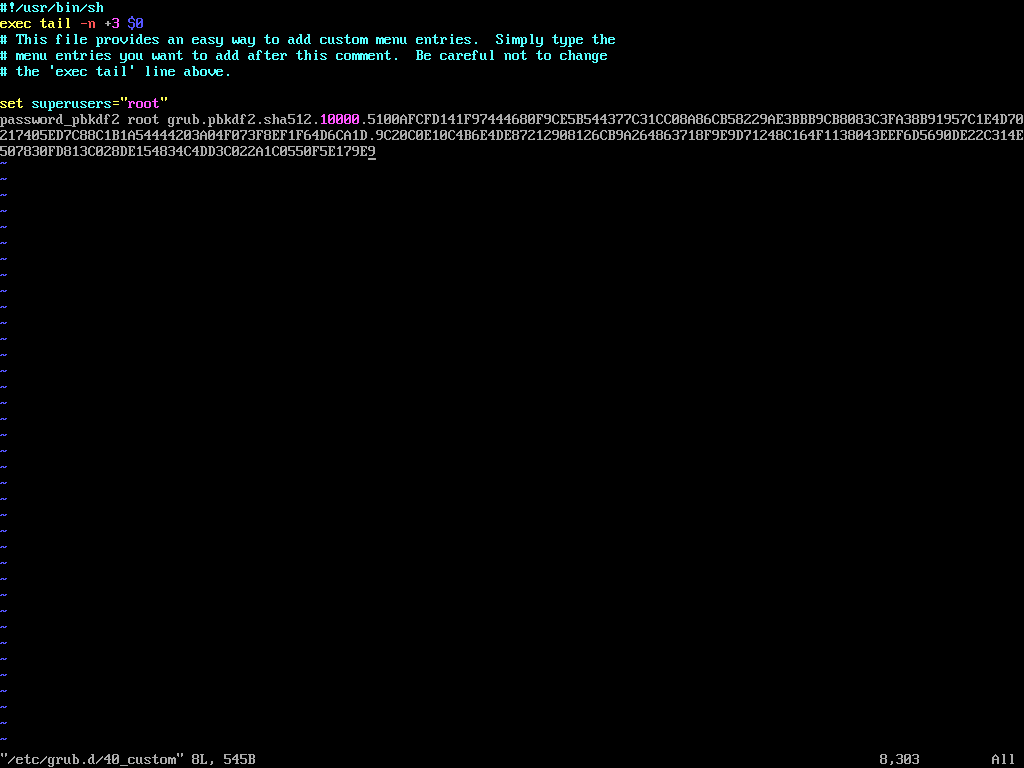
vi /etc/grub.d/40_custom
Add the following lines, replacing <encrypted_password> with the encrypted password generated in the previous step.
set superusers="root" password_pbkdf2 root <encrypted_password>
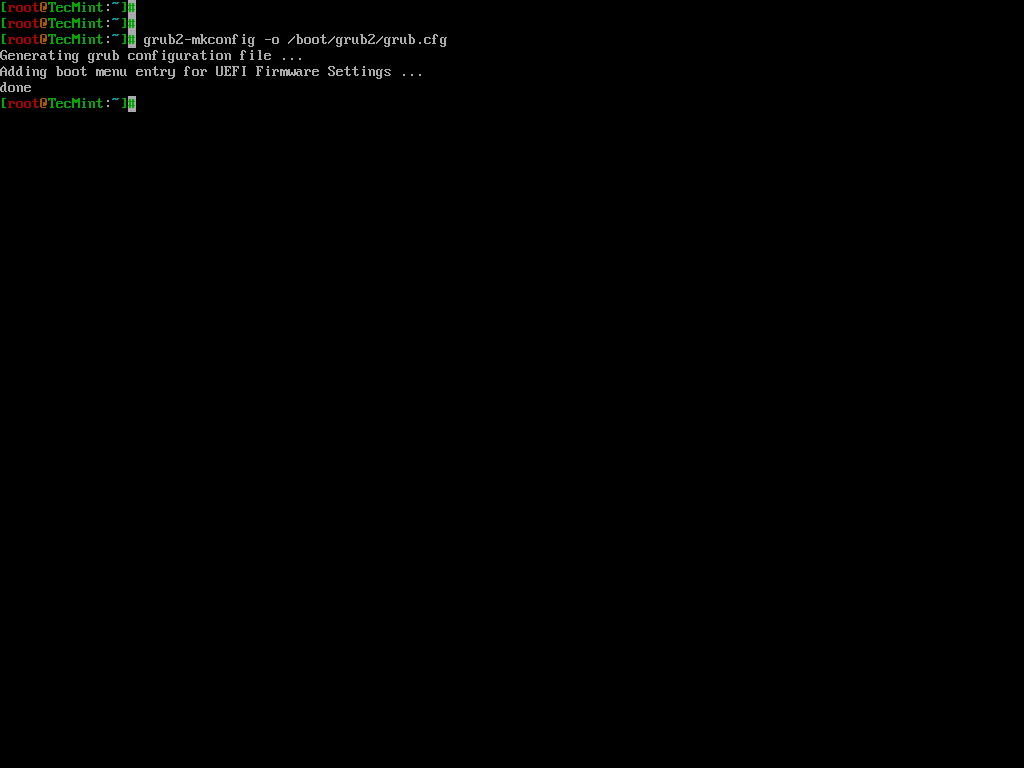
Update the GRUB configuration by running:
grub2-mkconfig -o /boot/grub2/grub.cfg
Reboot the system and, during the boot process, press 'e' to edit the GRUB menu. You will be prompted to enter the username (root) and the password you configured earlier.
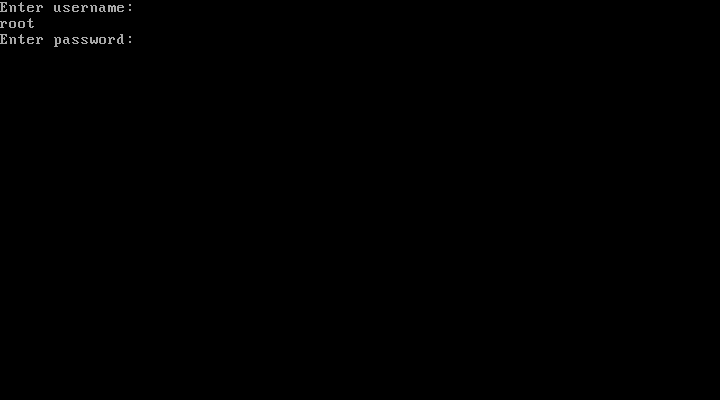
If you enter the correct password, you will be able to proceed with editing the GRUB parameters.
Now you would be breathing that your system is fully secure and not prone to hacking, however, still, the game is not over.
You better know that you can enforce rescue mode to remove and modify the password using a bootable image.
Just put your installation CD/DVD in your drive and select Rescue Installed System or use any other rescue image, you could even use a Live Linux Distro, mount the HDD and edit the ‘40_custom‘ file to remove the password line, reboot, and again you are logged in.
Conclusion
This guide was just to make you aware of facts and tell you how to secure your System. Tecmint.com and the writer of this article strongly discourage this guide as a base for exploiting other’s systems.
It is the sole responsibility of the reader if they engage in any such activity and for such kind of act neither the writer nor Tecmint.com will be responsible.
Your positive comments make us feel good and encourage us and that is always sought from you. Enjoy and Stay Tuned.


Going behind the curtain is a valuable skill to have. However, one wrong move could destroy everything. BE VERY CAREFUL.
It is a nice and useful article to hack a Linux system. Thanks for the good work.
This is all assuming that you have physical access to the system. Without physical access to the system most linux systems are secure. If you have physical access to the system all of these exploits are valid.
to the above file. This caused an outage and also blocked any access to the mode via root or any other user. Your post really helped me to log on and then correct the changes I made, then a reboot fixed everything and I was able to get back on.
Even if the boot order is HDD first and BIOS is locked, I can always unplug the HDD, plug in USB and boot, then plug in the HDD, right? How can one overcome this? I can think of one way.
In BIOS, do not put second boot preference at all…? But it doesn’t seem great. The HDD can be connected to a portal laptop or something like that and the password be removed.
Is it possible to encrypt these files in question? If this is possible, feels like the best way to secure the PC.
Best starting course in hacking and security world..
Very informative.
A very useful article to know how to hack a Linux system.
Here I guess It should be a /sbin/sulogin a little typo I guess
Well, even if we put a password for the bios, we can still crack it by resetting the CMOS, isn’t it?
What can be done for that?
You really saved me today. I am not a Linux admin, but was tasked with changing /nofile value to unlimited. I ran the ulimit -n unlimited, but ulimit -a still showed the value. It didn’t change. So I manually made changes to the /etc/security/limits.conf file by adding
to the above file. This caused an outage and also blocked any access the mode via root or any other user. Your post really helped me to log on and then correct the changes i made, then a reboot fixed everything and i was able to get back on.
I wish I had met you ages ago. Would have not facing TROUBLE and the Heart Burn I did. And saved me about US$1000/- REALLY…
Of course, physical access to a computer running ANY operating system is known to all security specialists to be a path to owning the machine. NOT NEWS.
[ask]
INIT: Id “x” respaawning too fase: desable for 5 minute
Awesome …Chains of Hacking tricks :)
Actually by passing the permission and re-setting the root password is a common practice, remember Linux is used to operate 24/7 as a server most of the time, hence no much of bios access.
But, if you own the machine you MUST encrypt it to protect your privacy (specially laptops), you have the encryption check-box when you install the system.
The bios is not our biggest problem but the external bootable device really.. solution is to encrypt.
I also encourage you to put a short Bios passcode, the idea of this short code is to know if someone accessed your machine, it is not a secret code, because you could easily reset it by cutting the current “the CMOS battery”.
are you saying that on a standard ubuntu install with boot luks encryption and home directory encryption options checked during the install process that you can still get into the system? can both the boot and home directory passwords be bypassed easily unless i make further changes?
I don’t think it will work with boot LUKS encryption and home directory encryption, though i have not checked it personally.
i am working on the operating system that acts the best possible window as per the req of user and used the resources as per the req of user and kill the extra things secondly its also have an other feature …. its run application automatically as user login with his articifial intelligence
Interesting article on resetting your own root-password.
You missed one boot command-line parm which I find exceptionally usefull. It is “?init-/bin/sh”. Excellent for getting into the pre-execution environment. This is usefull for examining the boot script(s).
See ./Documents/ .
Yeah pim!
Thanks for the concern
Have gone through the article and I must say that it is an eye-opener indeed.But , to be a hacker and really being able to break the root password would be to retrieve the root password itself and not resetting it.For example , there is a remote linux server somewhere around the world.I know the ip address of the server and so I want to compromise the server.In such a scenario , a real root password hacking would be being able to break the root password remotely and then owning the system.
So , is that possible ?
No! Simply not.
Avishek: KM: Yes, it is possible. Not in the same ways described by Avishek of course, but it is possible to remotely exploit some vulnerability on the server and gain root access.
I’m not able to get a GRUB menu, when I press any key to interrupt the boot.
why don’t you check log files?
There is something called a BIOS and grub password.
If you lock the machine and put a BIOS password and a grub password then you need to physically break the lock and the cover to access the machine.
We do this to show evidence of attempts to mess with the machine.
For users who do not know the root password and keep it that way, just put a lock on the box, BIOS and GRUB.
The installation usually asks if you want a grub password.
You are showing people how to change the root password after NOT putting a boot loader grub password.
— Khawar Nehal
Yeah! a process of learning. May be different point of view :)
This is an excellent article on hardening physical security.
Well done!
Thanks @ Marcel, For your valueable feedback.
I have a vmdk file which is password protected and bootloader also protected by Password.
My question is, Is there any way to login or crack the boot password.
Please any one reply this ASAP..
Thanks for your time.
can you do this remotely?
Not possible unless you have a Remote Code Execution vulnerability in the server and even if thats the case that vulnerability has to be in a process that has a root privilege
Hi Avishek,
Good post , look like you missed to include LUKS, its provides a better way protecting your machine from these simple dorks
can i change the boot image and splash screen of my fedora and centos ??
I have done the last option many times (dvd or usb booting) on some customers. Sysadmin leaves the company and they dont know root pass or sysadmin forgot root pass or sometimes they got hacked and root pass was changed…
I personally believe that the info in this article is very useful for sysadmins and security people. Really brilliant article.
When taking all this info to the practice in the real world, just make sure you guys are not doing something illegal. So just practice on your own systems or make sure that the ones asking you for help are the legitimate owners of the hacked system and it is indeed needed to be hacked.
Thanks for all this useful info on different ways to do useful things.
I then type the first letter of the password and I get immediately:
Quote:
Login incorrect
Give root password for maintenance
(or type Control-D to continue):
And so it goes on and on…. until i switch the machine off or reboot.
I think there is a bug here.
What is X Windows?
The X Window known as X or X11 is a computer application system and network protocol that gives GUI (Graphical User Interface) to users.
You can password protect your grub configuration.
The above methods still leave the system open to being accessed via a live CD, from which you can chroot to the installed system, circumventing the GRUB password. Or just re-install grub.
As others have stated 1) Physical access essentially allows any system to be owned and 2) Encrypting the drive is one of the best ways to prevent unauthorized access.
Y’all didn’t read everything do you?
* Password protect your BIOS.
* Change you Boot order to HDD first, followed by rest (cd/dvd, network, usb).
Now you can’t book from a cd… Nor can you change it to boot from cd.
*Password protect your BIOS…
If you have physical access to the machine, take a screwdriver, unplug the computer and open it (desktop or laptop). Then you locate the battery (flat battery) on the motherboard. You removed it for at least 10 seconds, it will reset the BIOS settings and hence forget the password protecting the BIOS. Enjoy… :D
@ Boomerang, Actually the Organisation, for this reason only puts a physical lock on the Machine.
As someone said, I feel it is an eye-opener. Of course, there always pros and cons of every activity. Thanks for the interesting article Avisek.
Keep up the good work!!
Cheers,
Raghavan alias Saravanan M
Jeddah | Kingdom of Saudi Arabia.
security starts with controlling access to the machine; without access to the console nobody could do the things you describe here
anyway, these are not hacks, I learned these when I got my rhce 10 years ago :))
and of course, these days I never install an operating system on a non-encrypted disk
cheers,
This has nothing to do with hacking, nor it shows how Linux is insecure. If someone has physical access to your server, the server is already theirs.
You could deny him access by encrypting your drive, but you would never encrypt a server, since you will have a performance penalty. This article should have probably been called how to change your root password if you forgot it.
If you were aiming for desktop security, than this is also insecure, since if someone took your hard drive they could still do whatever they want with it. The only way to secure a desktop PC is to encrypt the drive/partition.
Precisely what I thought.
These are ways provided within linux to get around the forgotten password issue and not loopholes as its discussed here..
Do you think linux developers are dumb not to fix these if they were loopholes?
These are some useful features left for admin’s use. Every linux admin would know this.
Not trying to bring down the article or something. But the way you are portraying the topic is not right. As Kustodian said, this is suppose to be tips on how to reset your password..
How is this not hacking? (Serious question)
IF someone has physical control of your box and can take it down, reboot, etc. they still own you. For example I can take a bootable cd, boot it, mount your partition and edit out all those changes. That’s why all the smart linux folks haven’t bothered to plug those holes. Encrypting your filesystems would make it much more difficult.
@ curt Wuollet, I agree encryption is better idea.
One of the main rules of information security: If the hacker has physical access to your machine – it’s no longer your machine.
yes! True @ Richard Steven Hack.
Haha, the `init` parameter hack is interesting! Anyway, the best way to protect your data is encrypt the disk, and use special mechanisms to prevent cold boot attack. This prevents the attackers who control your device physically, including installing your HDD on another computer and access the data.
Thanks @ ep0xcc, for your Valueable Feedback
good tutorial. There is a typo here:
passwor –md5 $1$t8JvC1$8buXiBsfANd79/X3elp9G1
password is missing the last “d”
Yeah! sorry @ [email protected],
going to fix it.
if you use full disk encryption then you can prevent these problems though the boot loader can be compromised for an evil maid attack if the attacker is determined so you may need to have that initial bootable partition an a portable stick that is always with you
@ x321x321, That’s a good idea but still system can be compromised and it happens daily.
This has been a very eye opening tutorial – I’ll have to test it out. Obviously the hacker would have to have access to my machine to run these exploits right? If the machine is secure then these hacks would be impossible to run over the network – or am I missing something. Great read – keep up the good work…
Chow
Tonto
Thanks @ Tonto for your feedback.
These aren’t exploits. These are password recovery methods.