MongoDB is a high-performance, highly scalable document-oriented NoSQL database that is designed to handle high traffic and huge volumes of data. Unlike in SQL databases where data is stored in rows and columns inside tables, in MongoDB, data is structured in JSON-like format inside records which are referred to as documents.
Thanks to its schema-less architecture, MongoDB is highly flexible, and provides both horizontal and vertical scaling highly scalable, and makes it possible to only store data that is required as required by an application. At its core.
MongoDB provides the following key features:
- Rich queries
- Indexing
- Replication & high availability
- Horizontal and vertical scaling
- Auto sharding
- Load balancing
MongoDB is a perfect choice in applications that handle high traffic and which need to scale to massive sizes within a short time span. It’s also ideal in iterative development where software development is broken down into smaller manageable chunks.
[ You might also like: 6 Useful Tools to Monitor MongoDB Performance ]
MongoDB is easy to install and is available both on private and public clouds such as AWS and Azure. In this guide, we will install MongoDB on Rocky Linux and AlmaLinux.
Step 1: Add the MongoDB Repository
From the start, we are going to create a repository for MongoDB, as this is because MongoDB packages are not available in Rocky Linux and AlmaLinux AppStream repositories.
So, create the MongoDB repository as follows.
$ sudo vim /etc/yum.repos.d/mongodb-org.repo
Then Paste the following configuration below. This will enable you to install the latest version which, at the time of publication, is MongoDB 4.4.
[mongodb-org-4.4]
name=MongoDB Repository
baseurl=https://repo.mongodb.org/yum/redhat/$releasever/mongodb-org/4.4/x86_64/
gpgcheck=1
enabled=1
gpgkey=https://www.mongodb.org/static/pgp/server-4.4.asc
Once you’ve added the repository, update the system repositories to sync the newly added MongoDB repository with the system.
$ sudo dnf update
Step 2: Install MongoDB on Rocky Linux
Moving on, we are now going to install MongoDB. To do so, we will run the command:
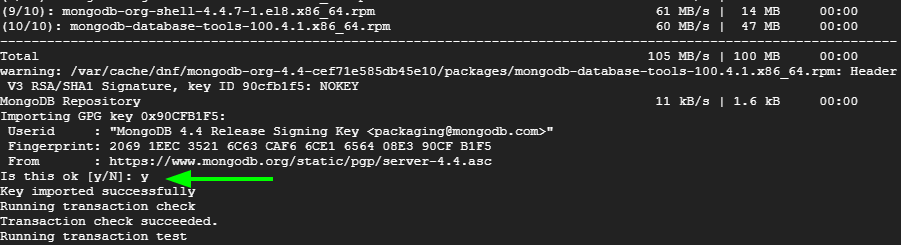
$ sudo dnf install mongodb-org

Press 'y' to import the MongoDB GPG key and hit ENTER.
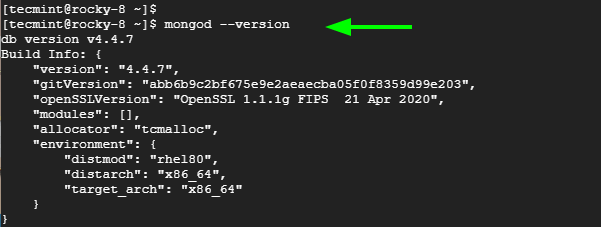
Once the installation of MongoDB is complete, verify the version installed as follows.
$ mongod --version
The command provides the version of MongoDB installed among other details such as OpenSSL version and Environment.
Step 3: Start and Enable MongoDB
The MongoDB daemon doesn’t start automatically upon installation. You can confirm this by running the command as follows.
$ sudo systemctl status mongod
Before anything else, we need to start the MongoDB daemon and enable it to automatically start on boot time. Therefore, run the commands below sequentially to start and enable MongoDB
$ sudo systemctl start mongod
$ sudo systemctl enable mongod
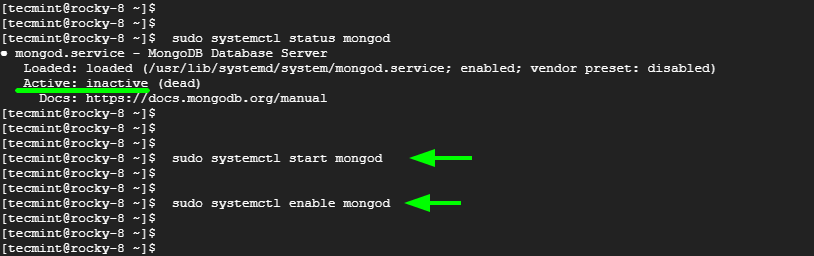
Once again, verify the status of MongoDB, and this time around, MongoDB will be up and running.
$ sudo systemctl status mongod

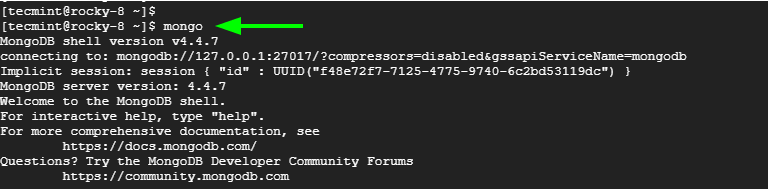
To log into the Mongo shell, run the command:
$ mongo
Step 4: Using MongoDB to Manage Databases
With MongoDB installed, let’s have a quick run-through of some of the operations on the shell.
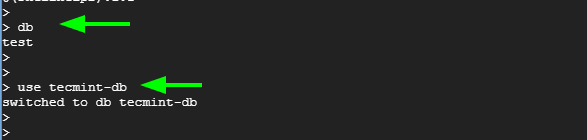
To view the databases currently in place, run the command shown. By default, MongoDB provides a test database called test.
> db
To create a database execute the use command followed by the non-existent database name. In this example, we are creating a database called tecmint-db.
> use tecmint-db
Now let’s add some data. As earlier discussed, MongoDB stores data in records called documents. The data is in a JSON-like format and entries exist as key-value pairs.
Here, we are have created a document called students and inserted some student data as follows. Paste this on your MongoDB prompt and hit ENTER.
db.students.insertOne(
   { "First Name" : "John",
     "Last_Name"  : "Doe",
     "City" : "Lisbon",
     "Id No." : 34569765,
     "Age" : 28
   }
)
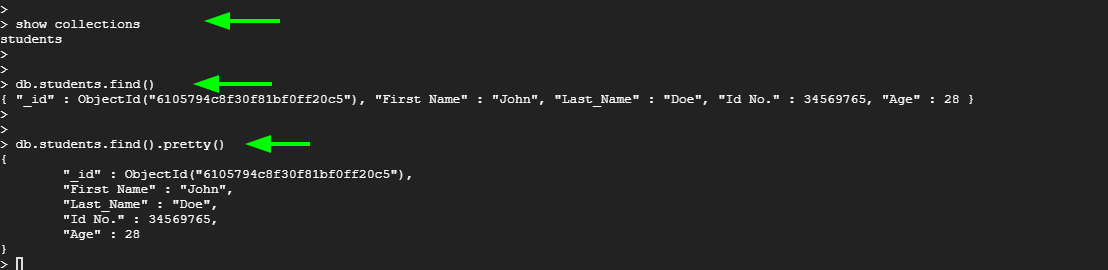
To view the documents in your database, run the command.
> show collections
To display the data stored in the documents run:
> db.students.find()
OR
> db.students.find().pretty()
To delete the document, the command will be:
> db.students.drop()
Conclusion
MongoDB is a highly scalable and flexible NoSQL database system that is increasingly being adopted by developers due to its versatility and flexible model. It is easy to learn and can be used with major programming languages such as Python and Java. In this guide, we walked you through the installation of MongoDB on Rocky Linux and AlmaLinux.


