This tutorial describes the installation process of the latest release of Ubuntu Desktop 20.04, codename Focal Fossa, on a dedicated machine or a virtual machine alongside a pre-installed Windows 10 Operating System. The installation process can be done via the Ubuntu Desktop DVD ISO image or via a bootable Ubuntu USB drive.
The Ubuntu OS will be installed on a UEFI motherboard with Legacy Mode or CSM (Compatibility Support Module) option disabled.
Requirements
- Download Ubuntu Desktop 20.04 ISO image for x86_64bit architecture.
- A direct or a proxy internet connection.
- Rufus utility in order to create an Ubuntu Desktop bootable USB drive compatible with UEFI motherboards.
Create Free Space on Windows for Ubuntu Install
On a pre-installed machine with a single Windows 10 partition, you need to create some free space in Windows partition in order to install Ubuntu 20.04.
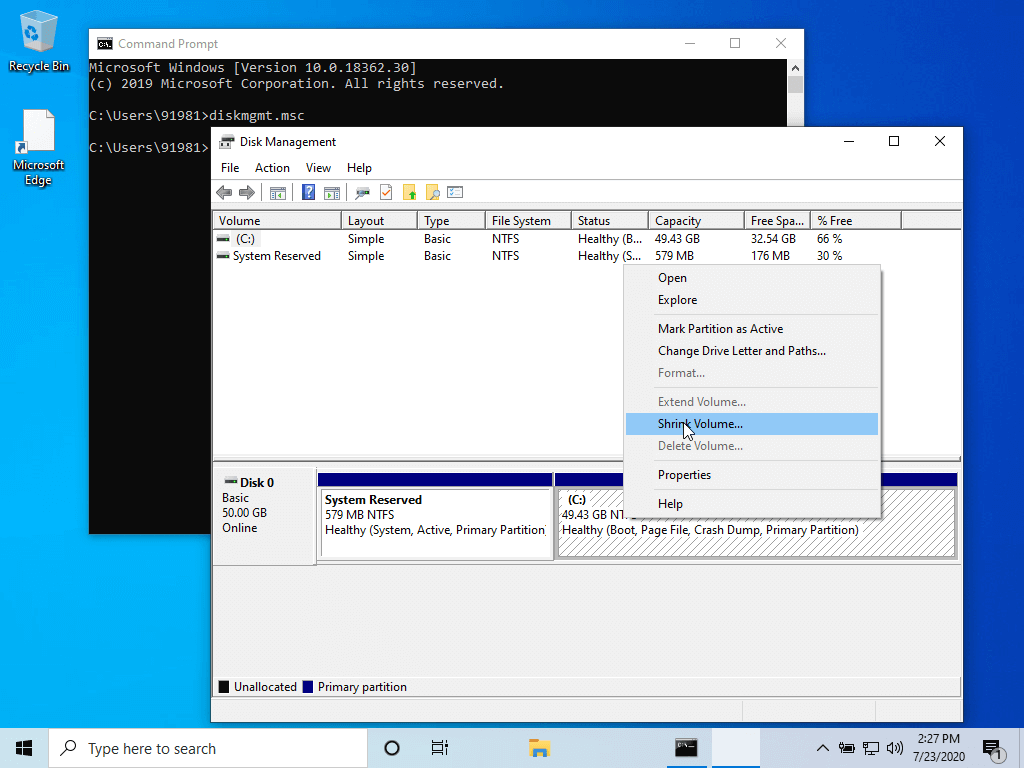
First login to the system using an account with administrator privileges, open a Command Prompt window with admin rights and execute diskmgmt.msc command to open Disk Management utility.
diskmgmt.msc
Select the Windows partition, usually C: volume, right-click on this partition and select Shrink Volume option in order to reduce the partition size.
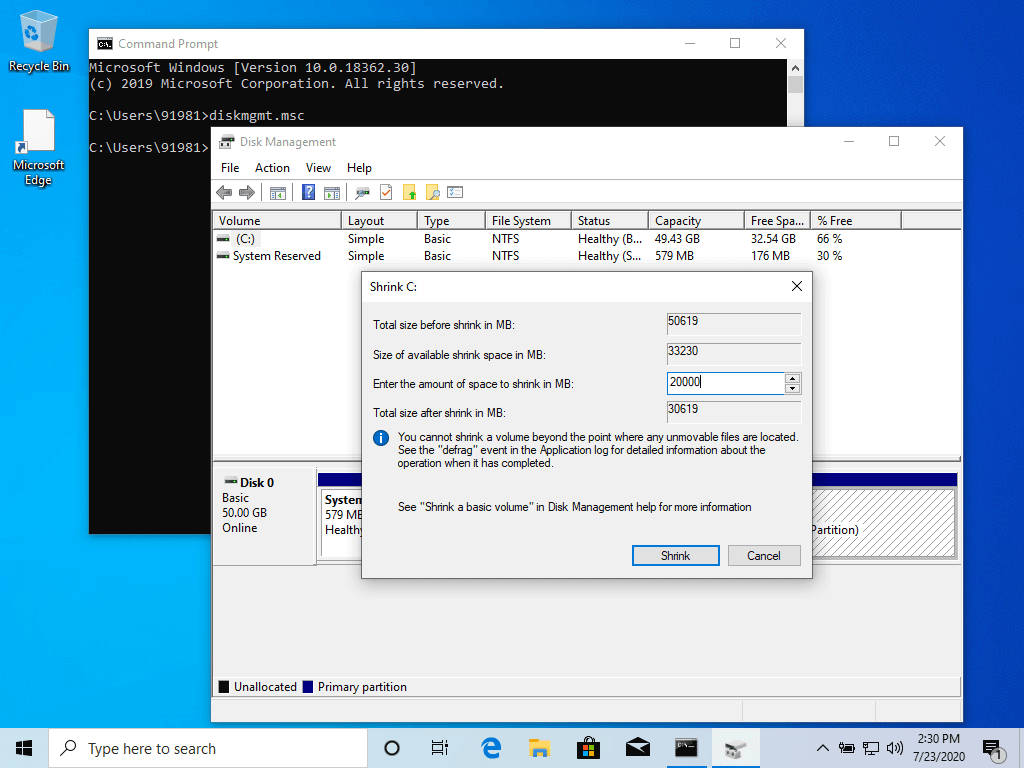
Wait for the system to collect partition size data, add the desired amount of space you want to shrink, and hit in the Shrink button.
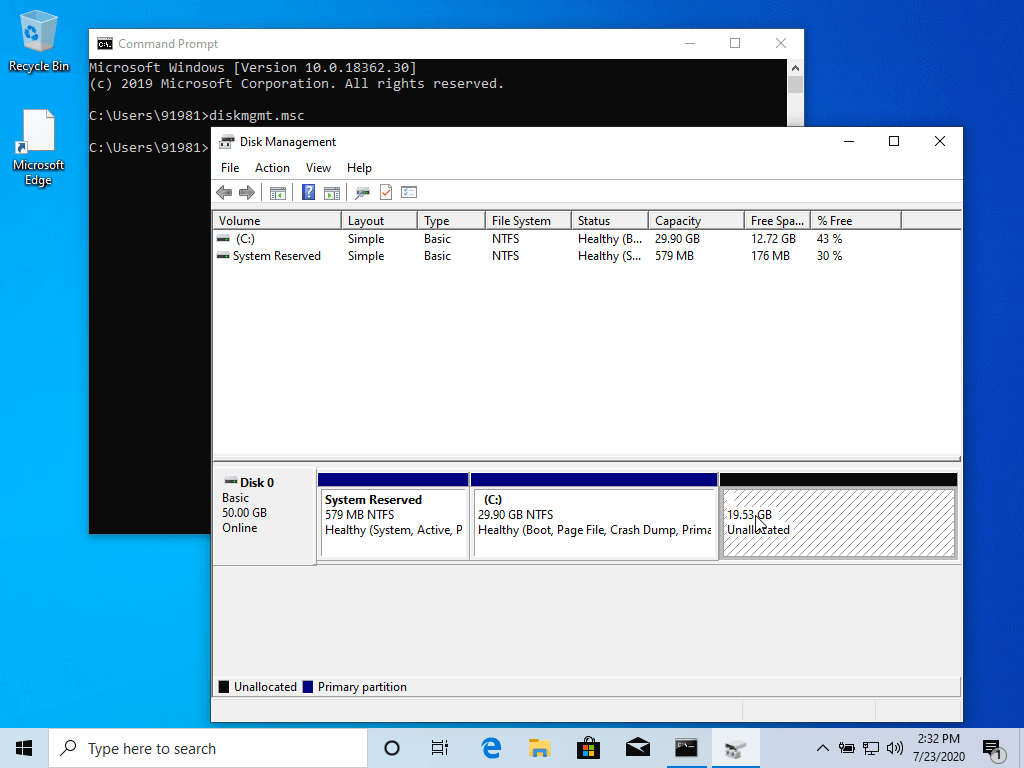
After the shrink process completes, a new unallocated space will be present in your drive. We’ll use this free space to install Ubuntu alongside Windows 10.
Install Ubuntu 20.04 Alongside with Windows
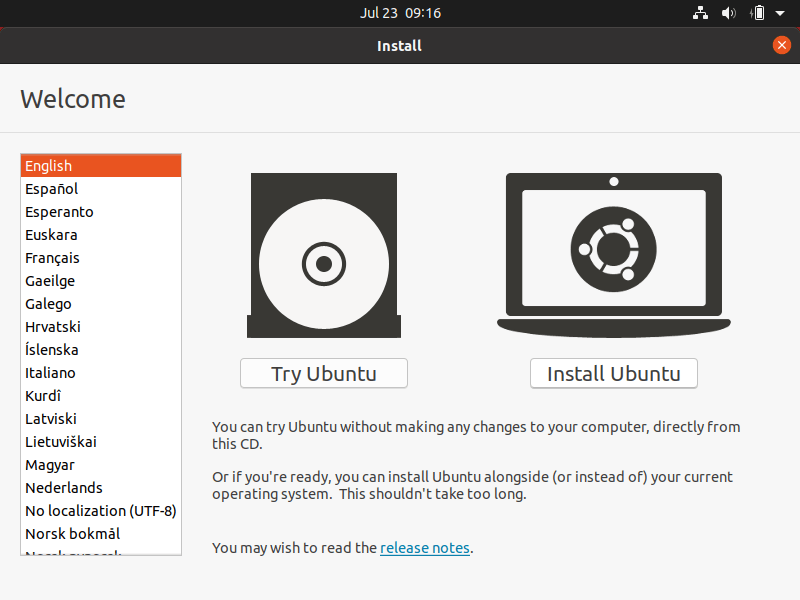
On the next step, place Ubuntu Desktop DVD ISO image or the bootable USB stick into the appropriate motherboard drive and, reboot the machine and hit the appropriate bootable key ((usually F12, F10 or F2) in order to boot the Ubuntu installer DVD or USB bootable image.
On the first installation, screen select Install Ubuntu and hit Enter key to start the installation process.
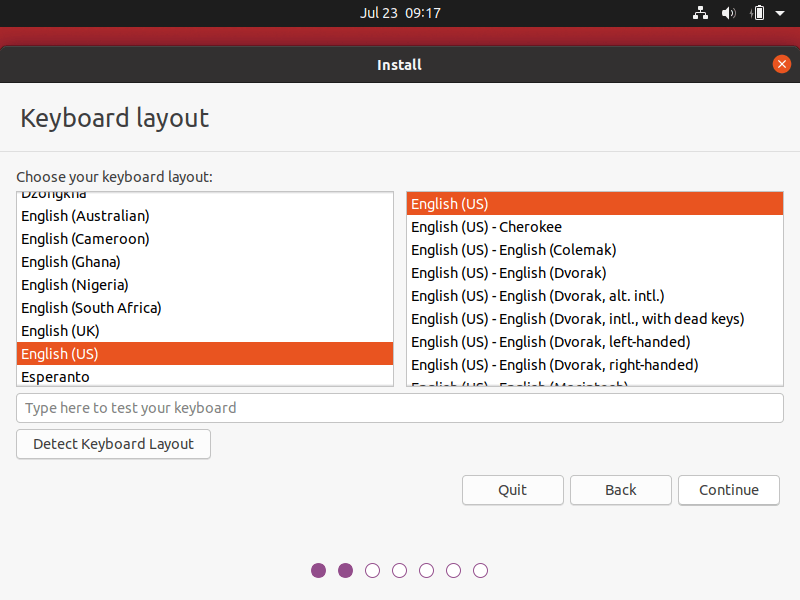
On the next screen, select the keyboard layout for your system and hit on the Continue button.
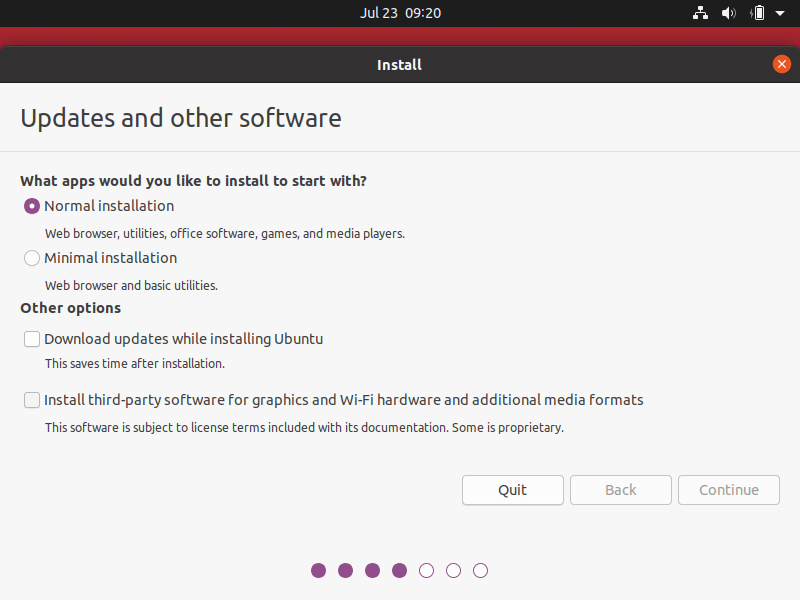
In the next installation screen, choose Normal installation and hit on the Continue button. In this screen, you also have the option to perform a Minimal installation of Ubuntu Desktop, which includes only some basic system utilities and a web browser.
You can also turn off Secure Boot option, if this option is enabled in motherboard UEFI settings in order to install third-party software for graphic card, Wi-Fi or additional media formats. Be aware that turning off Secure Boot option requires a password.
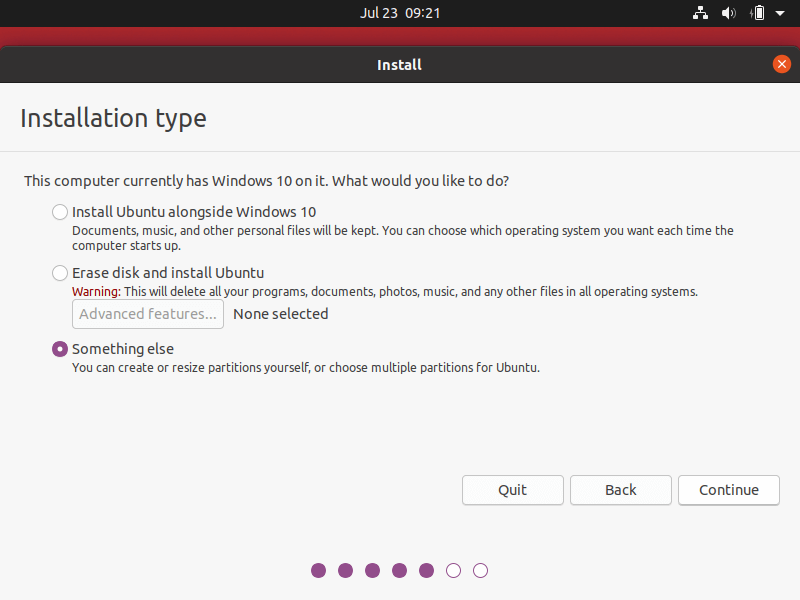
Next, In the Installation type menu, choose Something else option in order to manually partition the hard disk and hit on the Continue button.
In the hard disk partition table menu, select the hard drive free space and hit on + button in order to create the Ubuntu partition.
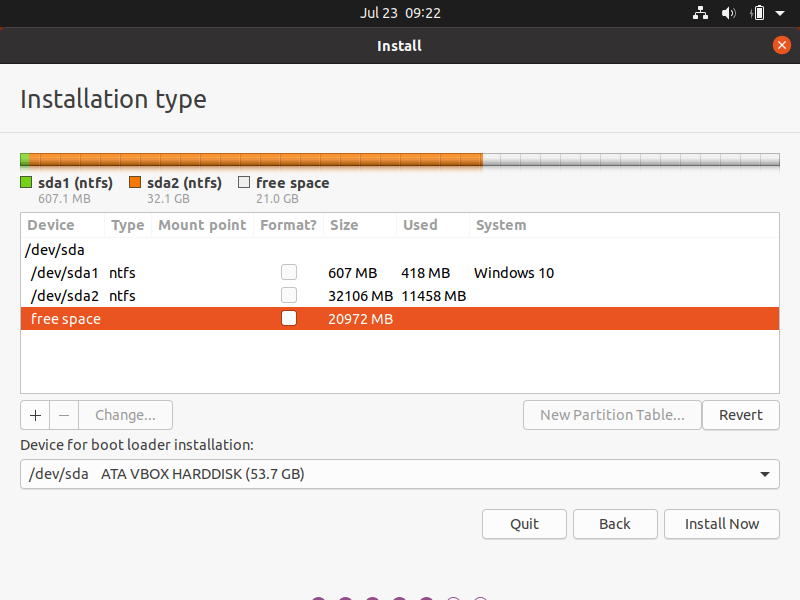
In the partition pop-up window, add the size of the partition in MB, choose the partition type as Primary, and the partition location at the beginning of this space.
Next, format this partition with ext4 filesystem and use / as a partition mount point. The /(root) partition summary is described below:
- Size = minimum 20000 MB recommended
- Type for the new partition = Primary
- Location for the new partition = Beginning of this space
- Use as = EXT4 journaling file system
- Mount point =
/
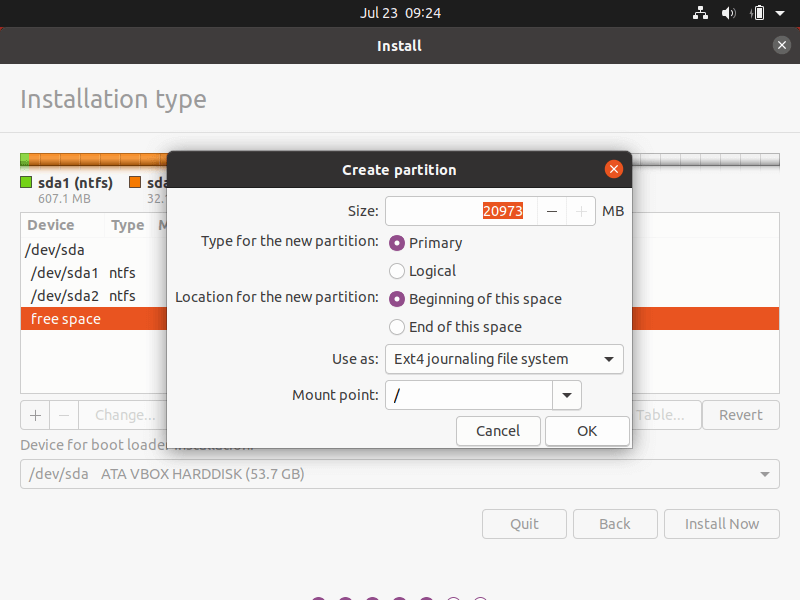
After completing this step, hit on the OK button to return to disk utility. Other partitions, such as /home or Swap are optional in Ubuntu Desktop and should be created only for special purposes.
However, if you still want to add a home partition, select free space, hit on + button and use the below scheme to create the partition.
- Size = size allocated as per your requirements, depending on the size of remaining disk free space
- Type for the new partition = Primary
- Location for the new partition = Beginning
- Use as = EXT4 journaling file system
- Mount point =
/home
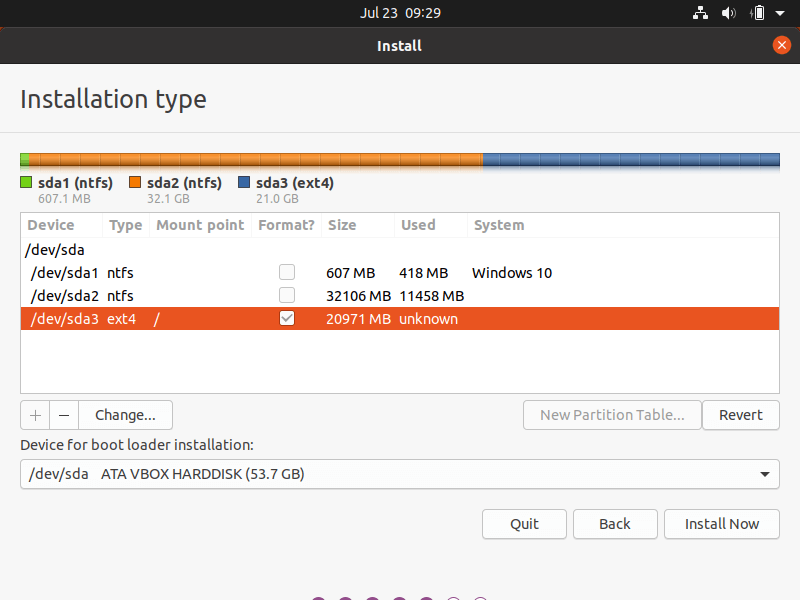
In this guide, we’ll install Ubuntu alongside Windows 10 with only the /(root) partition set. After you’ve created the required root partition on the disk, select Windows boot Manager as a device for the boot loader installation and hit on Install Now button.
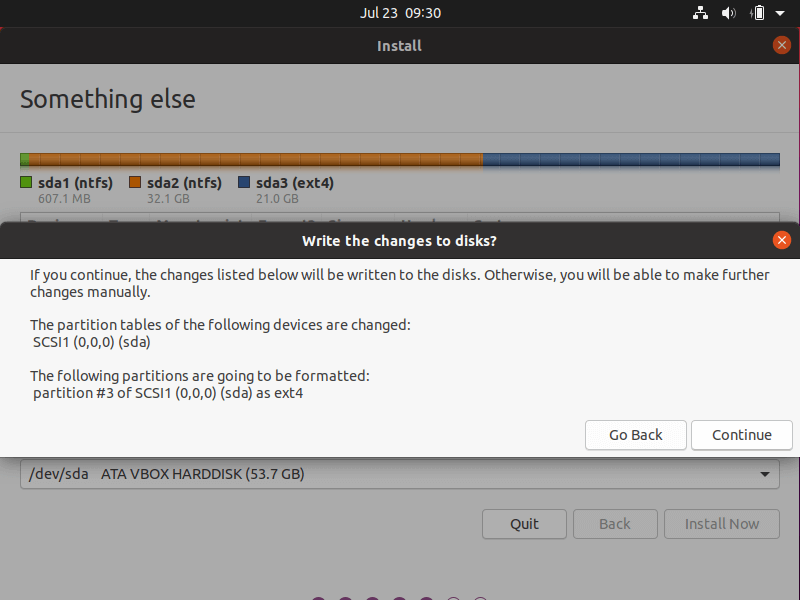
In the pop-up window, hit on the Continue button in order to commit the changes that will be written to disk and start the installation.
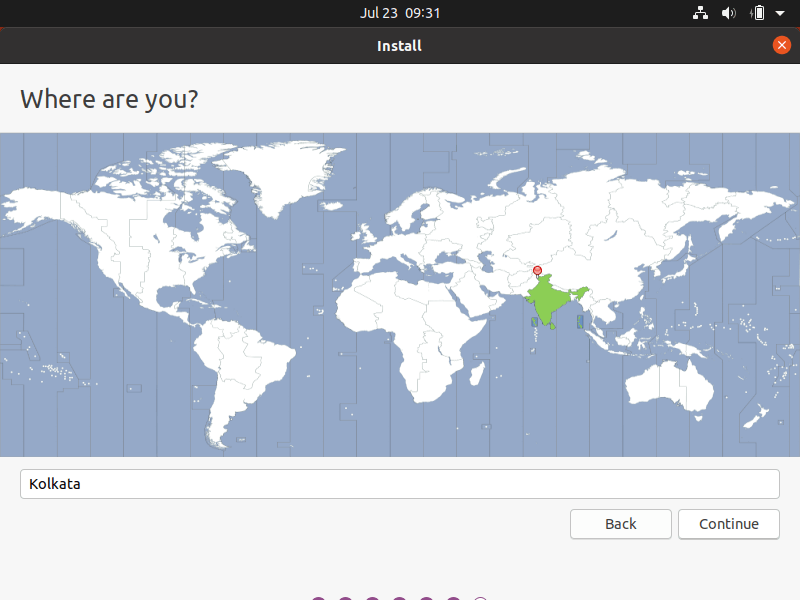
On the next screen, select your location from the provided map and hit on the Continue button.
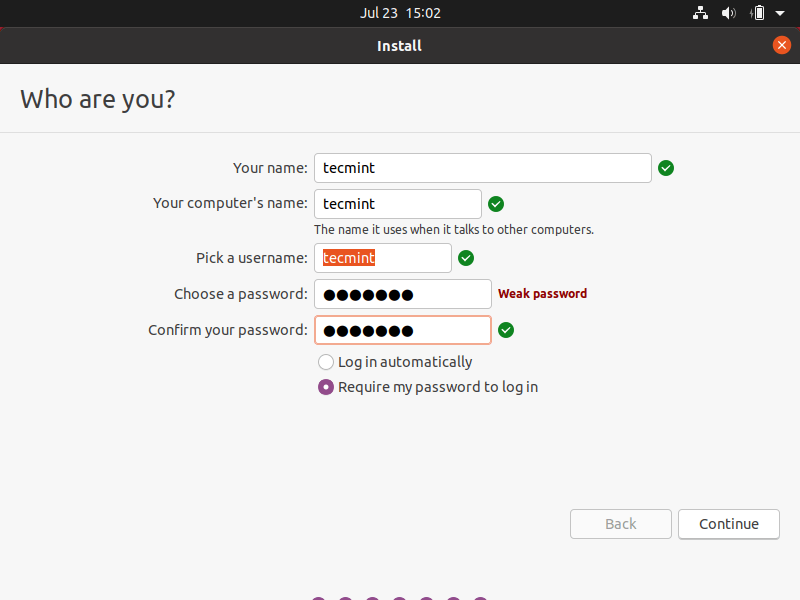
Next, insert your name, the name of your desktop, a username with a strong password, and choose the option with ‘Require my password to log in’. When you finish, hit on the Continue button and wait for the installation process to complete.
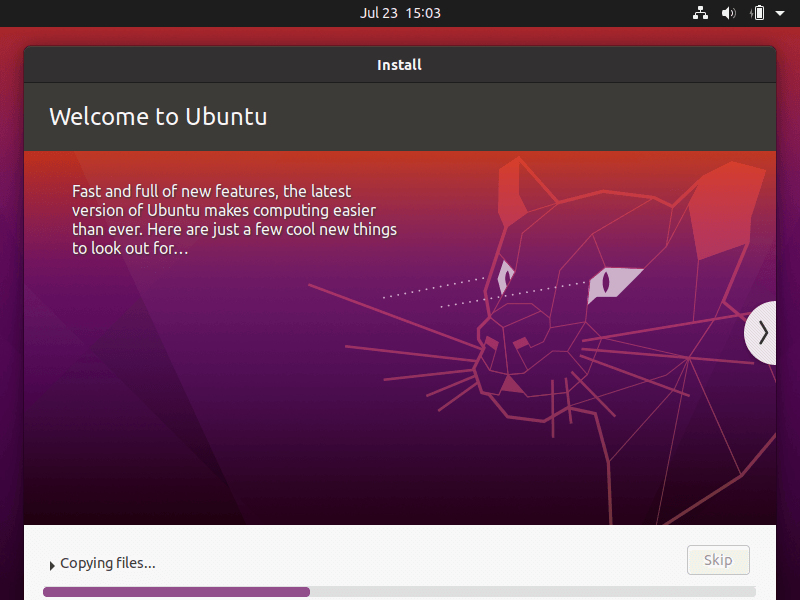
During the installation process, a series of screens that describe Ubuntu Desktop and the installation progress bar will be displayed on your screen. You cannot interfere with the installation process in this final stage.
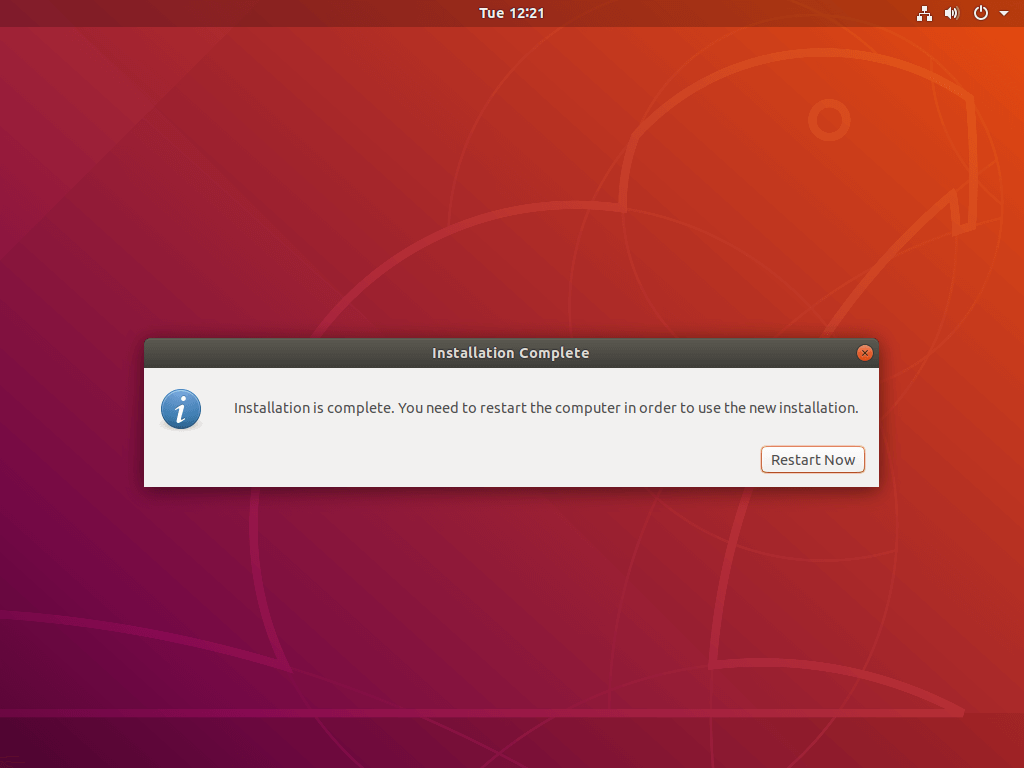
After the installation completes, eject the installation medium and hit on Restart now button in order to reboot the machine.
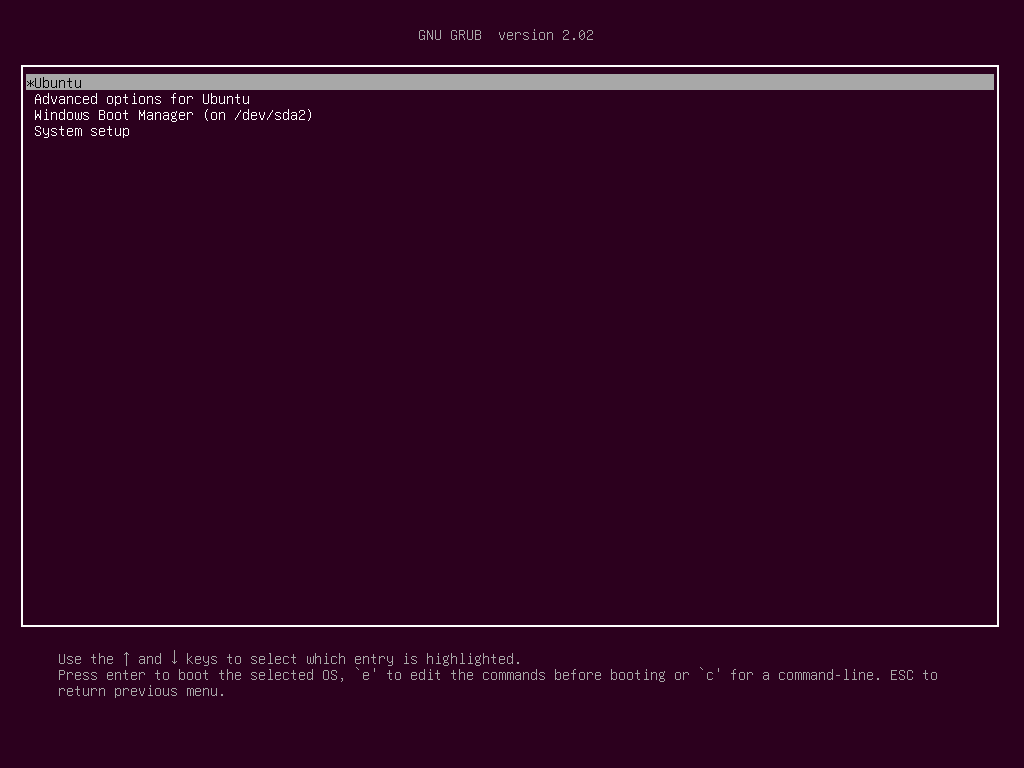
After reboot, the system should boot into the GNU GRUB menu. In case the GRUB menu is not displayed, restart the machine, go to motherboard UEFI settings and change boot order or Boot Options -> BBS priority.
The settings to enable the GRUB menu highly depend on your machine motherboard UEFI settings. You should consult motherboard documentation in order to identify the settings that need to be changed in order to display the GRUB menu.
Finally, log in to Ubuntu 20.04 Desktop with the credentials configured while installing the system and follow the initial Ubuntu welcome screen in order to start using Ubuntu Desktop.
Congratulations! You have successfully installed Ubuntu 20.04 Focal Fossa alongside Windows 10 on your machine.


Guys if you are not able to see the windows option in the os boot list, follow below link.
https://askubuntu.com/questions/694123/can-boot-to-ubuntu-or-windows-but-not-both/694130#694130
I follow every step as written, and install ubuntu, after restarting my system there is no option for windows, only ubuntu is visible in the list.
I need my windows back, please reply me steps to get it back.
Hi, I’m getting some errors after the Ubuntu 18.04 installation, like No server is specified, you need to load the kernel first and also I’m getting extra free space during partition, please suggest something to clear these errors
Thank you
Ok so I’m not really sure what went wrong here, I was following this tutorial everything was going smoothly until I reached the partition table menu in the Ubuntu installer (i installed using a live USB). In the screenshot from the tutorial there is a partition formatted in EFI and shows the system as Windows Boot Manager, this did not appear on my table.
I continued to follow the instructions, selecting the partition I wanted to format for ubuntu, setting it as primary and set the mount point as root. From there when I went to select install I got a popup saying that there was no EFI partition detected and that the system would likely fail to boot.
I selected to go back, and then stupidly I messed around with the other partitions thinking I just needed to change one of them to EFI. This is the point where I really have no clue what happened or what I did, I cannot progress any further in the Ubuntu installer and when I take out the live USB and try to boot windows it says that it cannot boot and be possibly damaged.
I wish I could provide any sort of logs or documentation but I’m not sure where or how to get those. Any help with this would be greatly appreciated. I gave up on installing ubuntu and wiped the live USB, I just want to get my windows working again.
@George,
Just create an EFI partition with 300MB size that’s it…
No grub is loaded, boots directly into Windows. Setting bcdedit /set {bootmgr} path \EFI\ubuntu\grubx64.efi then shows grub and I can boot into ubuntu. But I cannot then return to Windows.
I just had to faff around for 2 hours trying to recover my system, get back into windows and change \EFI\ubuntu… to \EFI\Microsoft\Boot\bootmgfw.efi in order to get things back.
This method is crap…
When I tried my install, it wasn’t able to find my Windows boot partition. I kept getting “Reboot and select proper Boot Device” when I installed. I had to go in with a Windows install image and mark my Windows volume as active again.
I have followed the steps but at the drives list window when we boot into Ubuntu for installation, my free space is showing as “unusable” and I am not able to create further partitions.
Someone please respond.
@Guatham
See the following:
Unusable Partition – https://ubuntuforums.org/showthread.php?t=1688349
I’d like to create an encrypted
/(root)partition, even without LVM (I don’t necessarily need LVM, do I?) You say, “select Windows boot Manager as device for the boot loader installation and hit on Install Now button.”My Windows 10 EFI partition is a mere 100 MBs on my machine which seems way too small for kernal updates. Could I/should I create an unencrypted
/boot, of 500 MBs or so, before encrypting the/(root)partition or could I/should I increase the size of the Windows EFI partition and name it/boot/efi(or whatever the proper naming path).I’m assuming the
/bootin your instructions is a part of the/(root)partition and is installed, of course, unencrypted on the/(root)partition along with/home, page file, etc, so it can be found by the boot loader and mounted and also be update with new kernals.I suppose almost all hope is lost in creating a UEFI encrypted external portable drive (I did see a complicated set of instruction for creating an external portable Ubuntu UEFI though). I’ve encrypted many machines in various ways over the years: Windows XP or Vista encrypted with TrueCrypt with Ubuntu encrypted native on my computers in dual boot with /boot sometimes installed on a removable USB.
If I can’t find a suitable solution I’m either going to have encrypt Win.10 with VeraCrypt or say, “bugger Windows” and install Ubuntu as my only and fully encrypted OS on this new computer.
Grub isn’t showing. You need to cover what to do when you can’t load Windows or Linux.
My Windows 10 loader doesn’t work, please help me..
I followed all steps but my PC not showing grub option to select OS to boot. I have windows 7 installed already and booting Windows 7 directly.
thank you…! Was such a relief to find out a page that had my query solved.
No partitions are showing up in “Other locations” in Ubuntu 18.04.
Please Help, only Computer (Ubuntu files) are showing
no partitions are visible in “Other locations” of ubuntu…please help
I want to configure Ubuntu to have
/homeon a separate partition. What size do I need to make the partition that will contain the root stuff (i.e mount point/)? I will have a total of 500GiB available space.@Barry,
Give 200GB to
/homepartition and rest assign to/(root) partition.Hey can you extend this guide to installation with encrypted LVM & dualboot?
@Carlos,
During installation, just select Encrypted LVM and follow on-screen instructions to setup LVM.
There was no option for that, i only saw options for encrypted physical volume.
Very elaborate. Working perfectly!