First released in 2003, WordPress has grown to become one of the leading CMS systems in the internet, accounting for over 30% of the market share. WordPress is a free and opensource CMS that is written using PHP and uses MySQL as its database.
In this tutorial, you will learn how to install WordPress on Debian 10 Buster.
Prerequisites
Before we begin, perform a flight check and ensure that you have the following installed.
Step 1: Creating a Database for WordPress
To start off, we shall begin by creating a MySQL database for WordPress, which comes with numerous files which require a database to accommodate them.
$ sudo mysql -u root -p
This prompts you to type the root Password that you specified when securing the MySQL database server during installation. Type the correct password and press ENTER to access the MySQL shell.
Next, we are going to create a database called wordpress_db. Feel free to play around with any name. To create the database run:
mysql> CREATE DATABASE wordpress_db;
Next, create a database user and grant him all the permissions to the database as follows.
mysql> GRANT ALL ON wordpress_db.* TO 'wordpress_user'@'localhost' IDENTIFIED BY 'password';
Remember to replace the ‘password‘ string with your own strong password. To save the changes, issue the command.
mysql> FLUSH PRIVILEGES;
Finally, exit MySQL by executing the command.
mysql> EXIT;
A summary of the command is as shown.

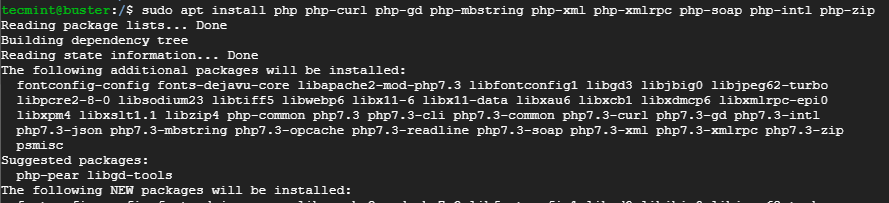
Step 2: Installing Additional PHP Extensions
WordPress requires a pack of additional plugins to function without any problems. With that in mind, proceed and install the extra PHP extensions as shown.
$ sudo apt update
$ sudo apt install php php-mysql php-curl php-gd php-mbstring php-xml php-xmlrpc php-soap php-intl php-zip
To effect the changes, restart the Apache web server as shown below.
$ sudo systemctl restart apache2
Step 3: Install WordPress on Debian 10
With the database fully configured, we are now going to download and install the WordPress on the Apache web root directory.
$ sudo cd /var/www/html/
Using curl command, proceed and download the WordPress tarball file.
$ sudo curl -O https://wordpress.org/latest.tar.gz

Next, proceed and extract the WordPress tarball file as shown.
$ sudo tar -xvf latest.tar.gz
This will yield a folder labelled wordpress. This folder contains all the WordPress configuration files. Once extracted, it is safe to delete the WordPress tarball file.
$ sudo rm latest.tar.gz
Step 4: Configure WordPress on Debian 10
In this step, we are going to modify the WordPress folder in the web root folder. But before we do so, we need to modify file ownership and permissions. We are going to assign file ownership to all the files in the wordpress directory using the command.
$ sudo chown -R www-data:www-data /var/www/html/wordpress
Next, assign the correct permissions as shown in the commands below.
$ sudo find /var/www/html/wordpress/ -type d -exec chmod 750 {} \;
$ sudo find /var/www/html/wordpress/ -type f -exec chmod 640 {} \;
Additionally, you also need to rename the sample configuration file in wordpress directory to a filename it can read from.
$ cd wordpress
$ sudo mv wp-config-sample.php wp-config.php
Next, using your favorite text editor, open the wp-config.php file. In this case, I will use the vim text editor.
$ sudo vim wp-config.php
Scroll down and locate the MySQL settings section and be sure to fill with the corresponding database details a specified when creating the WordPress database as shown below.
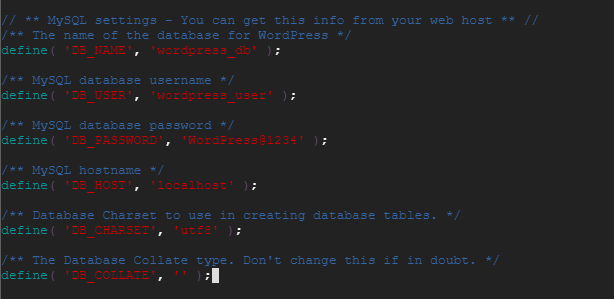
Save and exit the configuration file.
Step 5: Securing WordPress Installation on Debian 10
Moreover, we need to generate security keys to provide additional security to our WordPress installation. WordPress provides an automatic generator for these keys to eliminate the need of generating them by ourselves.
To generate these values from WordPress secret generator, run the command.
$ sudo curl -s https://api.wordpress.org/secret-key/1.1/salt/
The command generates output as shown. Note that in your case, this code will be different.
define('AUTH_KEY',         'fmY^b9+HF@oF;R|+=F P:+NZx@k{+,;dA3lOa>8x{nU29TWw5bP12-q><`/');
define('SECURE_AUTH_KEY',  'j5vk0)3K[G$%uXFv5-03/?E~[X01zeS3CR(nCs5|ocD_?DAURG?pWxn,w<04:J)p'); define('LOGGED_IN_KEY', 'KQZQd|T9d9~#/]7b(k^F|4/N2QR!hUkR[mg?ll^F4~l:FOBhiN_t)3nktX/J+{s['); define('NONCE_KEY', 'Pg8V&/}?D@OiTW_RZ><W3c6JFvad|0>R.i$42]-Wj-HH_?^[1t0@ZK?8U5<ec:q%'); define('AUTH_SALT', '*i>O[(Dc*8Pzi%E=,`kN$b>%?UTJR==YmGN4VUx7Ys:$tb<PiScNy{#@x0h*HZ[|'); define('SECURE_AUTH_SALT', '}=5l/6$d [s-NNXgjiQ*u!2Y7z+^Q^cHAW*_Z+}8SBWE$wcaZ+; 9a>W7w!^NN}d');
define('LOGGED_IN_SALT',   '%:brh7H5#od-^E5#?^[b<=lY#>I9-Tg-C45FdepyZ-UpJ-]yjMa{R(E`=2_:U+yP');
define('NONCE_SALT',       '-ZVuC_W[;ML;vUW-B-7i}sw@f~+JUW|o]-&k+D &+-@btd1n+ddGjr:~C_E^!od[');
Copy the output that you have generated.
Once again, open the WordPress configuration file wp-config.php.
$ sudo vim wp-config.php
Scroll and locate the section that contains the dummy values as shown below.
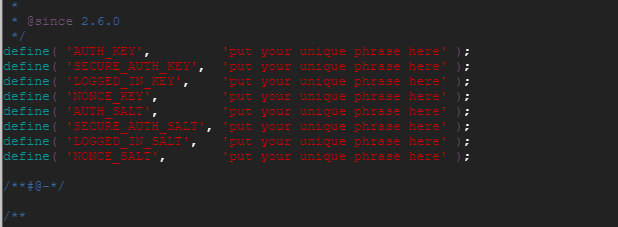
Delete those values and paste the values that you generated earlier on.

Save and exit the configuration file.
Step 6: Configure Apache for WordPress
Next, a few adjustments need to be made to the default Apache configuration file 000-default.conf located in the /etc/apache2/sites-available path.
Again, using your favorite text editor, open the default configuration file.
$ sudo vim /etc/apache2/sites-available/000-default.conf
Next, locate the DocumentRoot attribute and modify it from /var/www/html to /var/www/html/wordpress.
Still in the same file, copy and paste the following lines inside the Virtual Host block.
<Directory /var/www/html/wordpress/>
AllowOverride All
</Directory>
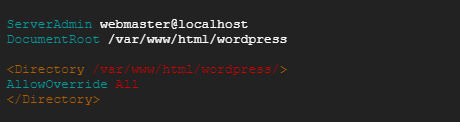
Save and exit the configuration file.
Next, enable the mod_rewrite so that we can use WordPress Permalink feature.
$ sudo a2enmod rewrite

To verify that all went well, issue the command.
$ sudo apache2ctl configtest

To implement the changes, restart Apache web server.
$ sudo systemctl restart apache2
Step 7: Run WordPress Installation Setup
At this point we are done with all the server configurations needed for WordPress installation. The final step is to complete the installation via a web browser.
To do this, launch your web browser and browser your server’s IP address or domain name
http://server_IP_address
OR
http://server_domain_name
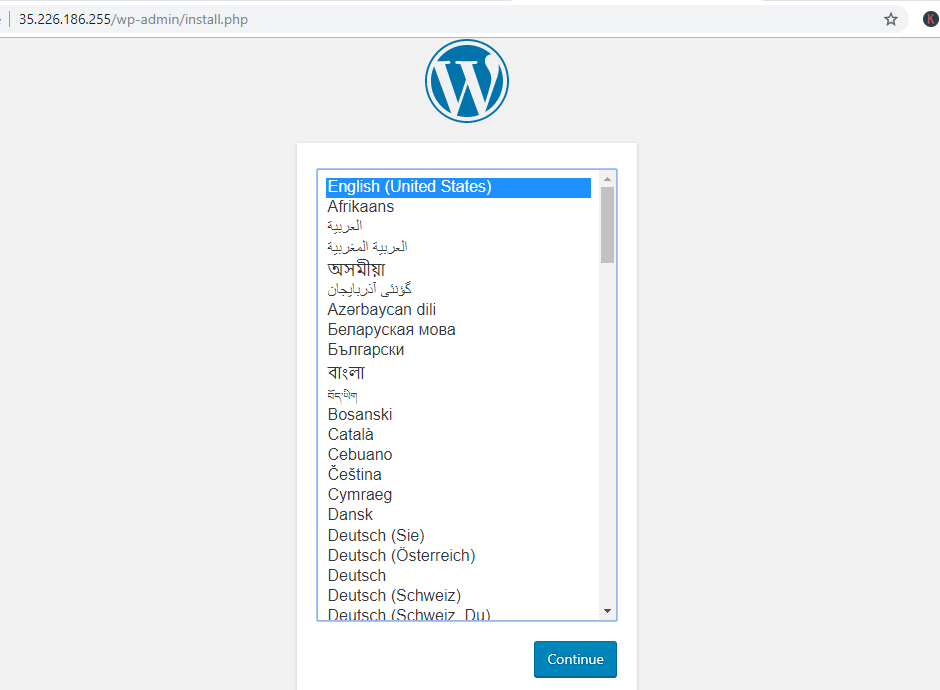
On the first page you will be required to select your preferred language. Click on your preferred Language and click on the ‘Continue‘ button.
In the next page, fill in the additional information required such as Site name, Username, Password, and Email address.
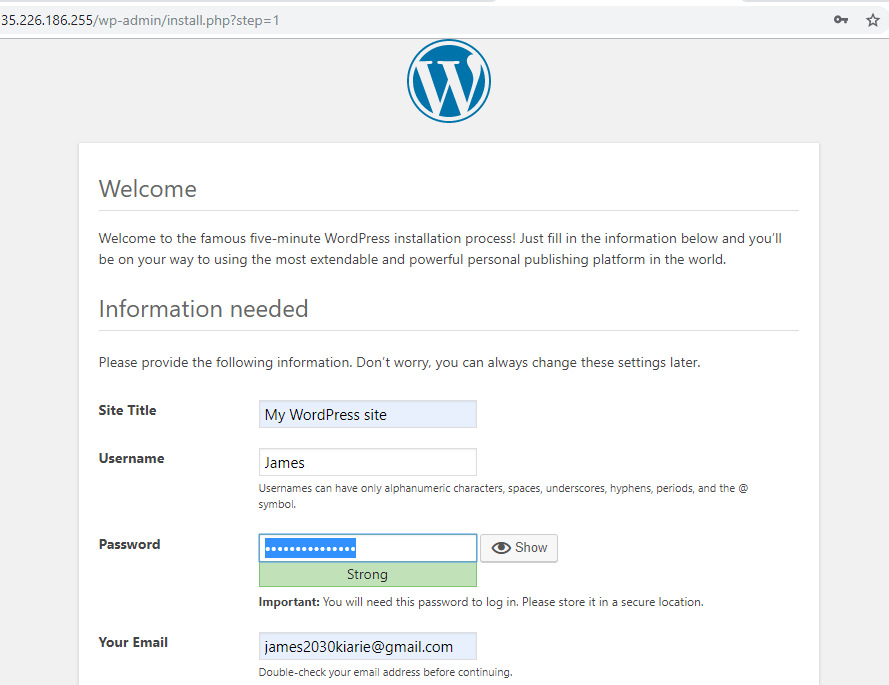
Once you have filled all the required fields, click on the ‘Install WordPress‘ button on the bottom left corner.

If all went well, you will get a ‘Success‘ confirmation.
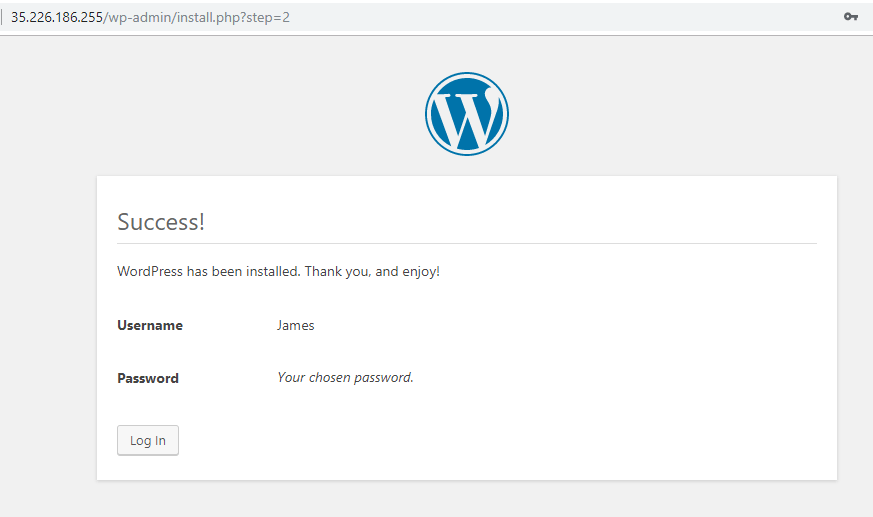
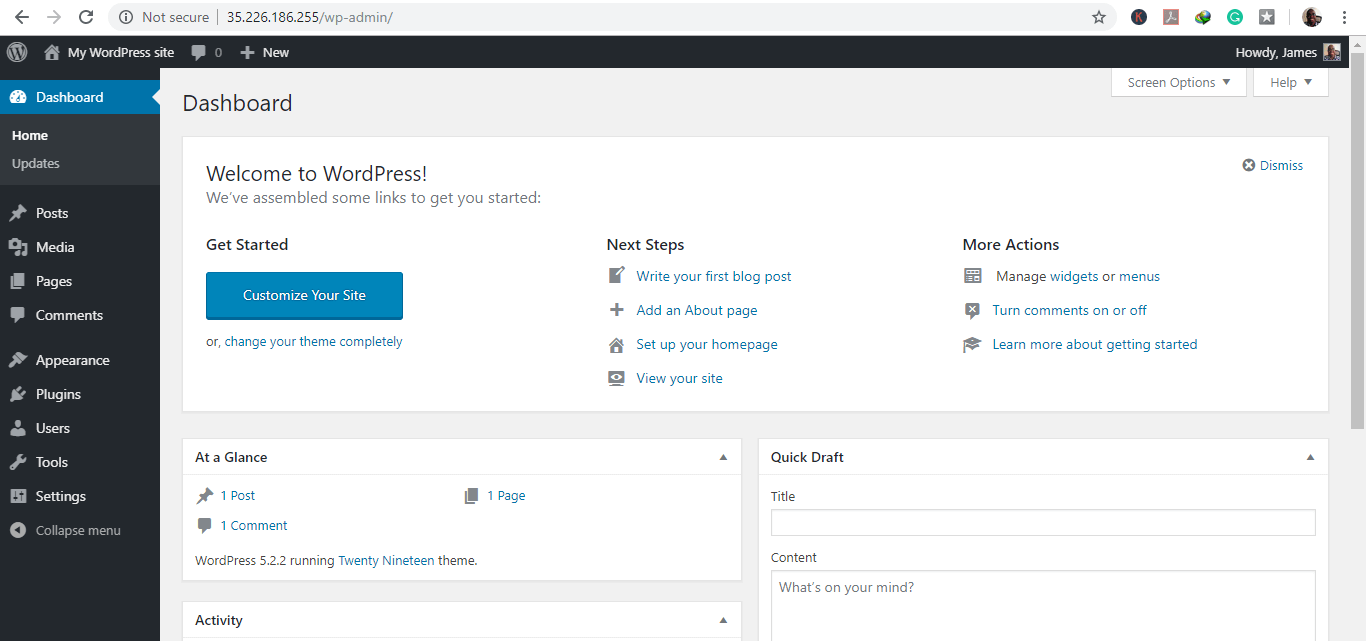
Now, to log in to your WordPress CMS, click on the ‘Log In‘ button.
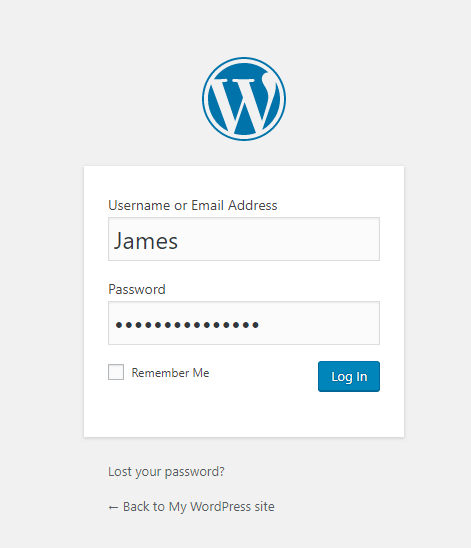
This will autofill the details you specified earlier. To access the dashboard, click on the ‘Log in‘ button
Congratulations! At this point you have successfully installed WordPress on Debian 10 buster Linux system. We have finally come to the end of this tutorial. We hope it was beneficial to you. Give it a shot and share your feedback. Thanks.


I have a small problem.
After I punched in a2ensite 000-default.conf, I was able to access my Website with my local IP address but it opens right on the IP, it doesn’t redirect me to
/wordpress, so I can’t access admin pages nor I see myself logged in. Also, other pages are 404.But if I type in a2dissite 000-default.conf and go directly to
192.168.0.1/worpdressin my browser, it works fine. But it doesn’t redirect me from plain address 192.168.0.1. It just shows the FTP index of the/htmlfolder.Okay. I’ve managed to make it work with a2ensite 000-default.conf, but still when I go to 192.168.0.72, I get to index of page /var/www/html/ folder where as my site is in /var/www/html/wordpress.
I need to type the full address manually to get it to work – http://192.168.0.72/wordpress/
How do I fix this? Do I make it redirect somehow from 192.168.0.1 to 192.168.0.1/worpdress?
Great article! The best one is available!
Two things appear to be missing:
– in apache2 configuration file, under Directory directive: Require all granted.
– enable new site with a2ensite.
Thanks! Keep up the good work.
Thanks, Geoffrey for that!
These instructions are great, thank you, but one slight issue for me is they install WordPress onto
mysite.com/wordpress, because thehttps://wordpress.org/latest.tar.gzis a zipped up folder, which is annoying. Ideally, I’d like the WordPress site to be in the root, as the site homepage. What’s the easiest way to do this, leave out the WordPress folder and just have the site directly in the public HTML folder?One other thing, using MySQL Monitor I had to create a user before I could grant all privileges, I’m pretty dumb so that stumped me for a good hour :D Here’s the command:
CREATE USER IF NOT EXISTS 'put_a_username_here'@'localhost' IDENTIFIED BY 'your password here';GRANT ALL ON database_name.* TO 'put_the_same_username_here'@'localhost';
The ‘if not exists probably’ isn’t necessary but if you have tried it a few times it might avoid confusion.
omg thank you so much, after 3 types of installations and like 10 hours of trying and ending in nothing… you did it for me thanks a lot
Hi,
After the terminal installation, I got blank page on the web browser for localhost and
localhost/wp-admininstall.phpboth.@Gerge,
It should be
localhost/wp-admin.Thanks, Ravi,
but it’s the same at
/wp-admin. :(Till that point, everything worked fine, but now I got only blank pages all three links.
Sorry, but I’m a beginner with Linux (but enthusiast). Earlier I’ve used WAMP with no problems.
Thanks again!
Finally, it turned out, that with the WP’s index.php has the problem. Could I check the proper database connection in the terminal view?
Solved: After checked the error log found that I’ve mistyped a character in wp-config.
Hi,
How can I change port in WordPress?
@Ayoub,
Run the following command to open HTTP and HTTPS port for WordPress.
Typo on line:
GRANT ALL ON wordpress.* TO 'wordpress_user'@'localhost' IDENTIFIED BY 'password';should be
GRANT ALL ON wordpress_db.* TO 'wordpress_user'@'localhost' IDENTIFIED BY 'password';@Niki,
Thanks for pointing of that typo, corrected in the article.