MySQL master-slave replication is a procedure that allows database files to be replicated or copied across one or more nodes in a network. This setup provides redundancy and fault tolerance such that in the event of a failure in the Master node, the databases can still be recovered in the Slave node. This gives users peace of mind that all will not be lost in any eventuality as a replica of the databases can still be retrieved from a different server.
In this guide, you are going to learn how to perform a MySQL database Master-slave replication on an Ubuntu 18.04 system.
Prerequisites
In the setup, we are going to have two servers running Ubuntu 18.04 with the following IP addresses.
Master server: 10.128.0.28
Slave server: 10.128.0.29
Let’s now dive in and see how we can configure the Master-slave replication setup on Ubuntu.
Step 1: Install MySQL on Master and Slave Nodes
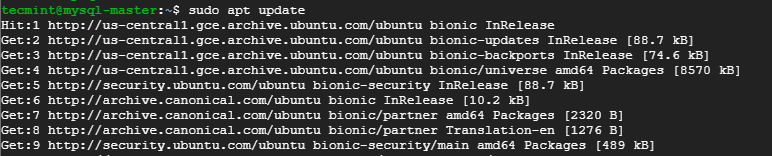
Ubuntu repositories contain version 5.7 of MySQL. To take advantage of any new features and avoid potential issues, you should install the latest MySQL version. But first, let’s update the two nodes using the following apt command.
$ sudo apt update
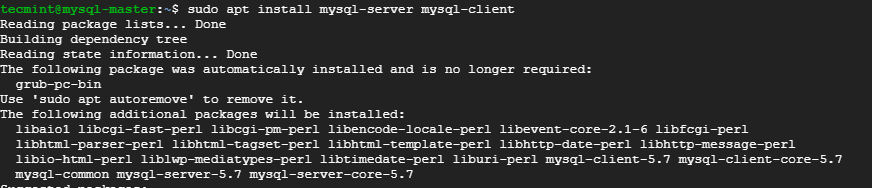
To install MySQL on both nodes, execute the command.
$ sudo apt install mysql-server mysql-client
Next, Open the mysql configuration file.
$ sudo vim /etc/mysql/mysql.conf.d/mysqld.cnf
On the Master node, scroll and locate the bind-address attribute as shown below.
bind-address =127.0.0.1
Change the loopback address to match the IP address of the Master node.
bind-address =10.128.0.28

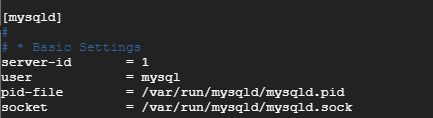
Next, specify a value for the server-id attribute in the [mysqld] section. The number you choose should not match any other server-id number. Let’s assign the value 1.
server-id =1
At the very end of the configuration file, copy and paste the lines below.
log_bin = /var/log/mysql/mysql-bin.log
log_bin_index =/var/log/mysql/mysql-bin.log.index
relay_log = /var/log/mysql/mysql-relay-bin
relay_log_index = /var/log/mysql/mysql-relay-bin.index
Exit the configuration file and restart MySQL service for the changes to take effect on Master node.
$ sudo systemctl restart mysql
To verify that MySQL server is running as expected, issue the command.
$ sudo systemctl status mysql

Perfect! MySQL server is running as expected!
Step 2: Create a New User for Replication on Master Node
In this section, we are going to create a replication user in the master node. To achieve this, log in to the MySQL server as shown.
$ sudo mysql -u root -p
Next, proceed and execute the queries below to create a replica user and grant access to the replication slave. Remember to use your IP address.
mysql> CREATE USER 'replication_user'@'10.128.0.29' IDENTIFIED BY 'replica_password';
mysql> GRANT REPLICATION SLAVE ON *.* TO 'replication_user '@'10.128.0.29';

Next, run the following command.
mysql> SHOW MASTER STATUS\G
The output should be similar to what you can see below.
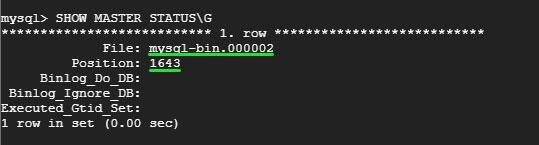
Be keen and note the mysql-bin.000002 value and the Position ID 1643. These values will be crucial when setting up the slave server.
Step 3: Configure the MySQL Slave Server
Head out to the slave server and like we did with the Master server, open the MySQL configuration file.
$ sudo vim /etc/mysql/mysql.conf.d/mysqld.cnf
Just like the master server, proceed to edit the following lines.
bind-address = 10.128.0.29

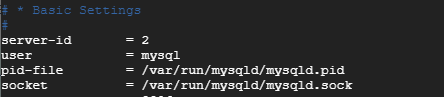
As before, specify a value for the server-id attribute in the [mysqld] section. This time select a different value. Let’s go with 2.
server-id =2
Again, paste the lines below at the very end of the configuration file.
log_bin = /var/log/mysql/mysql-bin.log
log_bin_index =/var/log/mysql/mysql-bin.log.index
relay_log = /var/log/mysql/mysql-relay-bin
relay_log_index = /var/log/mysql/mysql-relay-bin.index
Next restart MySQL server on slave node.
$ sudo systemctl restart mysql
Once done, save and exit the text editor
Next, log in to the MySQL shell as shown.
$ sudo mysql -u root -p
In this step, you will need to make some configuration that will allow the slave server to connect to the master server. But first, stop the slave threads as shown.
mysql> STOP SLAVE;
To allow the slave server to replicate the Master server, run the command.
mysql> CHANGE MASTER TO MASTER_HOST ='10.128.0.28', MASTER_USER ='replication_user', MASTER_PASSWORD ='Saturn@1234', MASTER_LOG_FILE = 'mysql-bin.000002', MASTER_LOG_POS = 1643;

If you are keen enough, you will observe that we’ve used the mysql-bin.00002 value and position ID 1643 earlier displayed after creating the slave replication user.
Additionally, the Master server’s IP address, replication user and password have been used.
Later, start the thread you had earlier stopped.
mysql> START SLAVE;
Step 4: Verify the MySQL Master-Slave Replication
To check if the setup is indeed working as expected, we are going to create a new database on the master and check to see if it has been replicated on the MySQL Slave server.
Log into MySQL in the Master server.
$ sudo mysql -u root -p
Let’s create a test database. In this case, we will create a database called replication_db.
mysql> CREATE DATABASE replication_db;
Now, log in to your MySQL instance in the slave server.
$ sudo mysql -u root -p
Now list the databases using the query.
mysql> SHOW DATABASES;
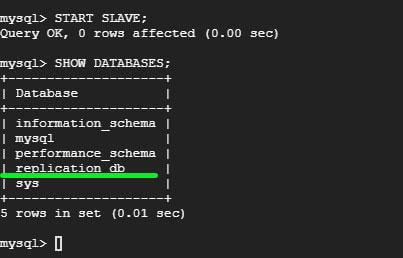
You will notice the database you created on the master has been replicated on slave. Awesome ! Your MySQL Master-slave replication is working as expected! You can now rest assured that in the event of any failure, copies of database files will be replicated to the slave server.
Conclusion
In this guide, you learned how to set up a MySQL Master-slave replication setup on Ubuntu 18.04.