Nagios is an open-source, industry-leading, and enterprise-grade monitoring tool that you can use to keep an eye on most if not all aspects of your IT infrastructure including networks, hosts (and their resources), services, as well as applications.
It is a powerful and feature-packed system that helps technical personnel in an organization to quickly identify and resolve IT infrastructure issues before they affect critical business processes.
Some of its key features are an extendable architecture – extensible using community offered or custom-built add-ons (made possible by the availability of powerful APIs), an alert engine for issue reporting, and advanced reporting (that provides records of alerts, notifications, outages, and alert response).
Nagios also offers event handlers that enable the automatic restart of failed applications and services, it supports thousands of plugins and supports multi-user access to a simple, easy-to-use web interface thus enabling various stakeholders to monitor IT infrastructure status, and so more.
In this guide, we will walk you through the steps to install Nagios Core on openSUSE 15.3. For this guide, we will install Nagios Core 4.4.7 (the latest version at the time of writing) and Nagios Plugins 2.3.3.
Installing Nagios Core in openSUSE
1. For this guide, we assume that SELinux is disabled or in permissive mode. By default, SELinux is disabled on openSUSE in the file /etc/selinux/config and you can confirm this by running the following commands:
$ ls -la /etc/selinux/config
$ cat /etc/selinux/config

2. Next, start by installing the required packages which include the C/C++ development libraries, openssl library, a web server software preferably apache2 (according to the official documentation), and PHP, as follows:
$ sudo zypper install -t pattern devel_C_C++
$ sudo zypper install libopenssl-devel perl wget unzip apache2 apache2-utils php7 apache2-mod_php7 gd gd-devel libopenssl-devel
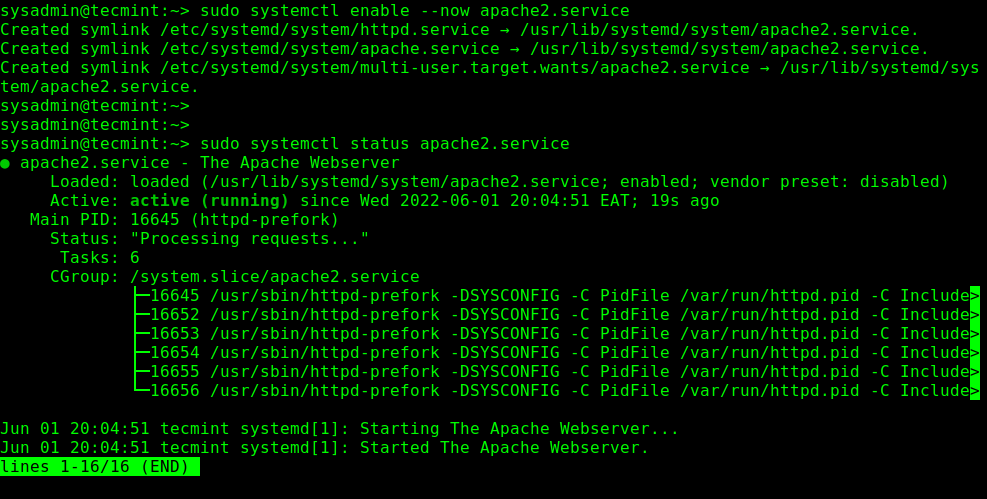
3. Next, start the apache2 service, and check if it’s up and running:
$ sudo systemctl enable --now apache2.service
$ sudo systemctl status apache2.service
4. Next, download the Nagios Core source package using the wget command and extract the archive file, like so:
$ wget -O nagioscore.tar.gz https://github.com/NagiosEnterprises/nagioscore/archive/nagios-4.4.7.tar.gz
$ tar xzf nagioscore.tar.gz
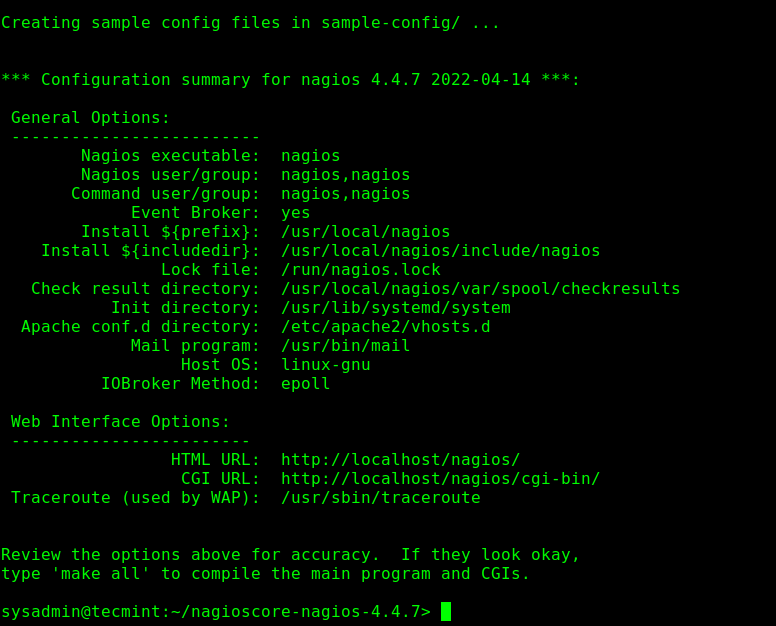
5. Now move into the extracted directory, and configure the build process as follows:
$ cd nagioscore-nagios-4.4.7
$ sudo ./configure  --with-httpd-conf=/etc/apache2/vhosts.d
If all is OK, you will see the configuration summary as shown in the following screenshot.
6. Next, run the following command to compile the main program and CGIs:
$ sudo make all
7. At this point, you need to create the Nagios user and group. Besides, add the apache user to the Nagios group as shown:
$ sudo make install-groups-users
$ sudo /usr/sbin/usermod -a -G nagios wwwrun
8. Now run the following command to install the main program, CGIs, as well as HTML files:
$ sudo make install
9. Once the install is complete/successful, install the service unit file and enable it to start at system startup time:
$ sudo make install-daemoninit
10. Next, install and configure the external command file.
$ sudo make install-commandmode
11. For Nagios to start, it requires some sample configuration and also, install apache configuration files and enabling required modules as shown:
$ sudo make install-config
$ sudo make install-webconf
$ sudo /usr/sbin/a2enmod rewrite
$ sudo /usr/sbin/a2enmod cgi
$ sudo /usr/sbin/a2enmod version
$ sudo /usr/sbin/a2enmod php7
12. Next, set up a Nagios administrative user account for basic HTTP authentication to be able to log into the Nagios web interface, by running the following command which will create a user called nagiosadmin. You will be prompted to set a password for the user account (ensure that it is a secure password).
$ sudo htpasswd2 -c /usr/local/nagios/etc/htpasswd.users nagiosadmin
Installing Nagios Plugins in openSUSE
13. Nagios plugins offer the functionality required for monitoring almost everything in your IT infrastructure–they enable Nagios to work properly. In this section, we will show how to download and install the Nagios plugins from the source package. But, first, install the prerequisite packages:
$ sudo zypper install autoconf gcc glibc libgcrypt-devel make libopenssl-devel wget gettext gettext-runtime automake net-snmp perl-Net-SNMP
14. Then download the Nagios plugins source package and extract the archive file using the following commands:
$ cd
$ wget --no-check-certificate -O nagios-plugins.tar.gz https://github.com/nagios-plugins/nagios-plugins/archive/release-2.3.3.tar.gz
$ tar zxf nagios-plugins.tar.gz
15. Next, move into the extracted directory, configure the sources, and compile and install the plugins like this:
$ cd nagios-plugins-release-2.3.3/
$ sudo ./tools/setup
$ sudo ./configure
$ sudo make
$ sudo make install
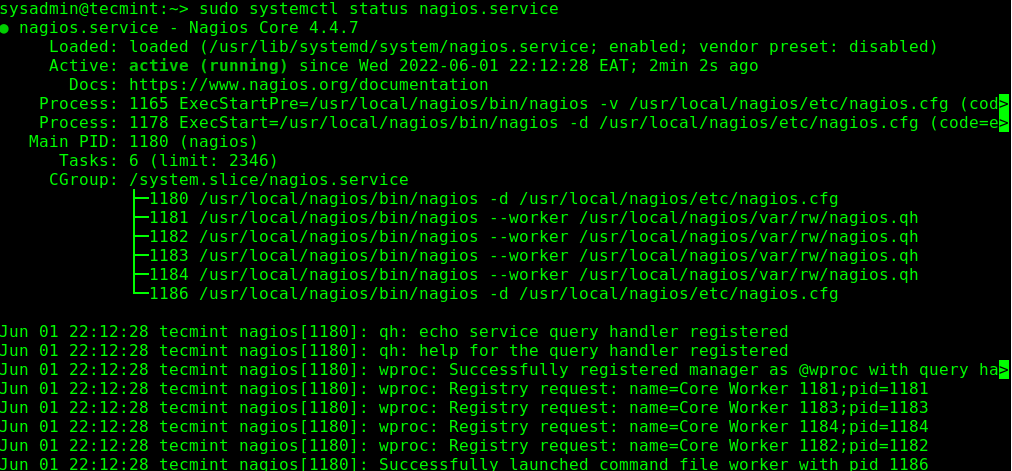
16. Now you are about to access and test the Nagios web interface but before that, start and enable the Nagios service and check its status to confirm that it is up and running, as follows:
$ sudo systemctl start nagios.service
$ sudo systemctl status nagios.service
Also, restart the apache2 service to apply the recent changes to its configuration like this:
$ sudo systemctl restart apach2.service
17. Additionally, the firewalld firewall service is enabled in oepnSUSE 15.3 by default, you need to open ports 80 and 443 in its configuration to allow HTTP and HTTPS traffic through to the Apache web server, as shown:
$ sudo firewall-cmd --zone=public --add-port=80/tcp  --permanent
$ sudo firewall-cmd --zone=public --add-port=443/tcp  --permanent
$ sudo firewall-cmd  --reload
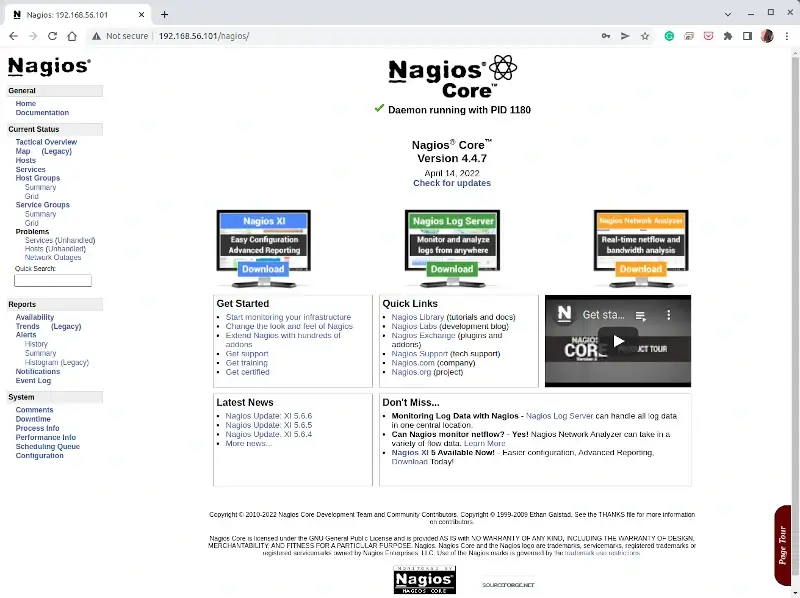
Accessing Nagios Web Interface from Browser
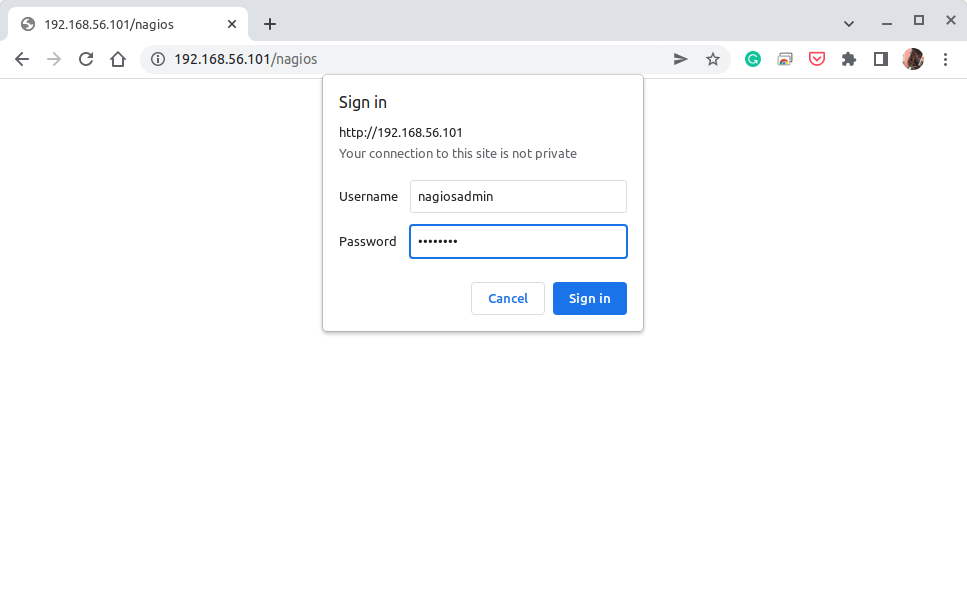
18. Now all is set! Open your web browser and use your server IP address to access the Nagios web interface as shown in the following screenshot.
http://SERVER_IP/nagios
Wait for the HTTP basic authentication login dialog box to pop up. Then enter the Nagios administrator user name I.e nagiosadmin and the password you set for the user as described earlier on. Then click Sign In.
19. After a successful login, you will gain access to the Nagios web interface as shown in the following screenshot.
That’s all we had for you about installing Nagios in openSUSE 15.3. The feedback form is down below, as always, use it to reach us for any comments or questions.
To start monitoring Linux and Windows hosts/servers, check out these guides:
- How to Add Linux Host to Nagios Monitoring Server
- How to Add Windows Host to Nagios Monitoring Server


Thanks Again.
Installed Nagios Core on opensuse 15.4 and Dell EMC OpenManage Plug-in Version 3.1 for Nagios Core.
Not 3.2.0 For Nagios XI.
Works very well
Thanks a lot – I was looking at how to install Nagios Core on opensuse for a while, and this worked flawlessly.
You have core v4.4.7 – latest is 4.4.13, so on step 4 – downloaded nagios-4.4.13.tar.gz and the plugin – latest is 2.4.5, so on step 14 – downloaded release-2.4.5.tar.gz
Also – Step 16
should be
Now to install Dell EMC OpenManage Plug-in Version 3.2.0 For Nagios XI.