If what you want is to build a collaborative workspace on your Linux server, the most evident options might be Nextcloud, ownCloud, and Seafile. These solutions let you store and share files in one place and offer file synchronization capabilities.
However, if you not only want to keep files but also need document collaboration functionality, it’s a good idea to turn your attention to ONLYOFFICE Workspace. This groupware platform is designed for both managing and co-editing documents online.
In this guide, you will learn how to install ONLYOFFICE Workspace and how this solution makes it easier to collaborate in real-time.
What is ONLYOFFICE Workspace?
ONLYOFFICE Workspace is an open-source collaborative platform that comes with an online office suite called ONLYOFFICE Docs for text documents, spreadsheets, fillable forms and presentations, and a bundle of various productivity apps.
The solution allows you to create a secure virtual environment where you can store all your files and collaborate on documents in real-time. Additionally, ONLYIOFFICE Workspace provides project management features, calendaring, customer relationships, email management, online communication, and social networking with blogs, forums, and news boards.
ONLYOFFICE Workspace is a self-hosted software tool that can be implemented on-premises. There is also a SaaS version with various tariff plans, including one for teams with no more than 5 people.
Recommended System Configuration
Before you start the installation process, make sure that your system complies with these requirements:
- CPU: dual-core 2 GHz processor or better.
- RAM: at least 6 GB.
- HDD: 40 GB of free space.
- Swap: at least 6 GB.
- OS: AMD64 Linux distribution with kernel v3.10 or later.
Installation of ONLYOFFICE Workspace Community Edition
In this guide, we are going to install ONLYOFFICE Workspace Community Edition, which is a free version of the software that is more than enough for regular use.
If you need professional technical support and access to the ONLYOFFICE mobile web editors, you can opt for a commercial version. Nevertheless, it’s up to you to make up your mind.
The installation process is quite simple and requires that you follow a series of steps. Let’s get started!
Step 1. Get ONLYOFFICE Installation Script
ONLYOFFICE Workspace is equipped with an installation script for Linux-based operating systems with Docker. The script automatically sets up the Docker containers with all the required components.
First things first, you need to download the script file by running the following wget command:
$ wget https://download.onlyoffice.com/install/workspace-install.sh
After getting the script, proceed to the installation process.
Step 2: Install ONLYOFFICE Workspace
All the installation actions below must be taken with root rights. To install all the required components of ONLYOFFICE Workspace, enter this:
$ bash workspace-install.sh -md "yourdomain.com"
Here “yourdomain.com” is your domain that will be used for the ONLYOFFICE Mail module. If you don’t want the Mail component to be installed, run this:
$ bash workspace-install.sh -ims false
The installation script will check the availability of Docker on your device and its version. If the Docker service is not present or its version doesn’t correspond to the minimal requirements, the script will automatically install or update it.
Check the list of all available parameters with this command:
$ bash workspace-install.sh -h
Step 3: Check If ONLYOFFICE Workspace Works Correctly
After installation, you need to make sure that all the components of ONLYOFFICE Workspace operate as expected. Open your web browser and enter the IP address of your computer in the local network. Don’t enter localhost or 127.0.0.1 in the address bar.
Congratulations! ONLYOFFICE Workspace must be running, which indicates a successful installation.
Keep All Your Files Together
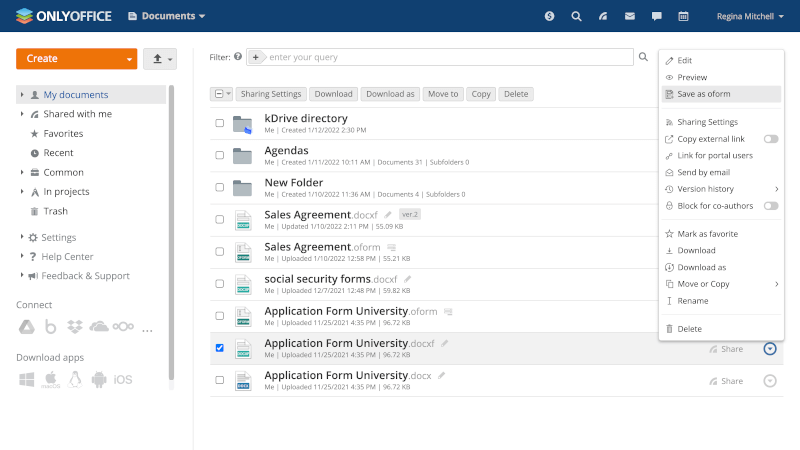
All your files are stored in the Documents module. You are allowed to create folders and subfolders for better document management, copy and move the files, change their names, mark them as favorites for easy access and even delete them.
For your convenience, you can connect third-party storage solutions, such as Nextcloud, ownCloud, OneDrive, Google Drive, kDrive, and others using the WebDAV protocol. This way, you can create a single environment for all your files.
ONLYOFFICE Workspace is equipped with a media player, so you can easily open and play almost any audio and video files due to the support of all popular formats, including MPG, and AVI, MPEG, MP3, WEBP, etc.
There is more than this. You can also store your photos and images in the Documents module because it supports BMP, JPG, JPEG, PNG, TIF, and GIF. Another useful feature is the ability to open and view PDF, DjVu, and XPS files.
The built-in viewer is easy to use and provides a navigation bar with page thumbnails. Moreover, you can even store electronic books, since the EPUB and FB2 formats are supported by the software.
Step 4: Share and Collaborate on Documents
When it comes to document collaboration, ONLYOFFICE Workspace makes it possible to share text documents, spreadsheets, fillable forms, and presentations with other users for real-time co-authoring.
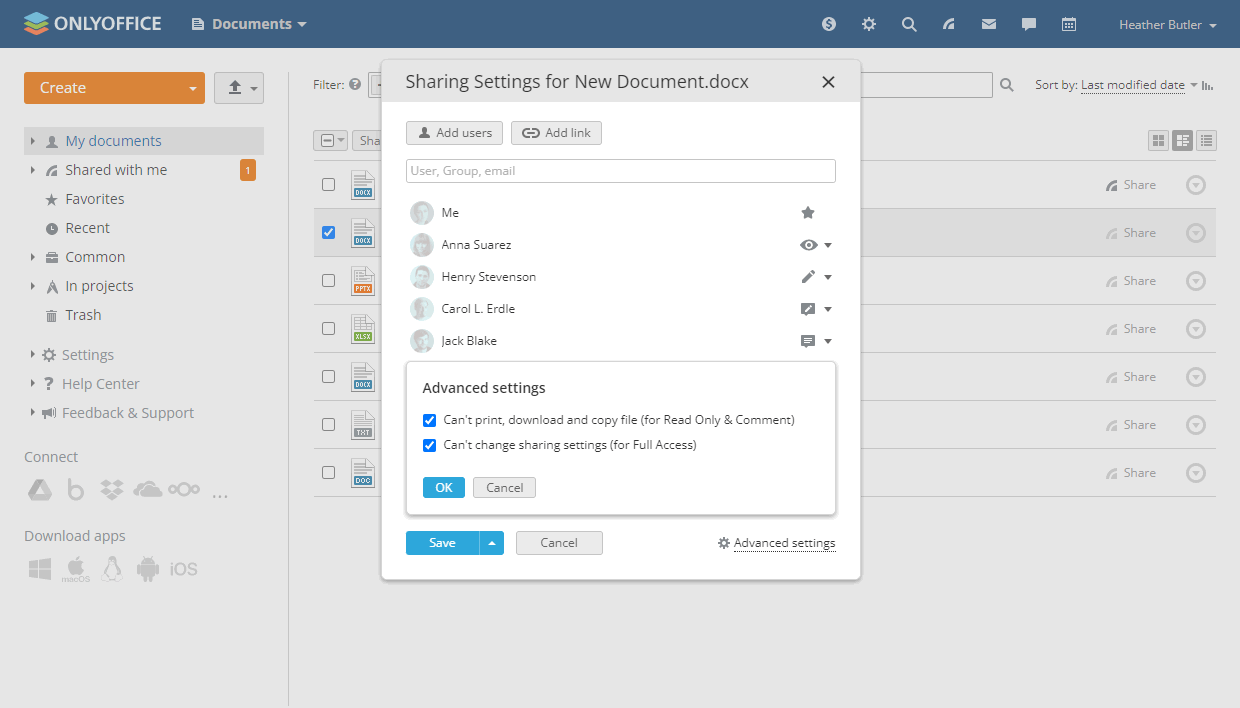
You can make your files available for the internal users of the ONLYOFFICE portal. There is also an option to share files externally, using a link.
When sharing something, you can choose the required access permission:
- Full Access
- Review
- Comment
- Read Only
- Deny Access
Additionally, there are special access permissions – Form Filling for fillable forms and Custom Filter for spreadsheets.
Starting from version 12.0, the ONLYOFFICE collaborative platform allows for more flexible sharing due to new advanced settings:
- Can’t print, download or copy files (for the Read-Only & Comment permissions).
- Can’t change the sharing settings (for the Full Access permission).
After sharing a file, you can start the collaboration process and enjoy the co-authoring functionality of ONLYOFFICE Workspace. For example, you can:
- Activate any of the two co-editing modes, Fast or Strict, with an option to switch between them at any time.
- Accept and reject changes made by others with the Track changes feature.
- Restore any version of the file using Version history.
- Reply to other users’ comments and leave your own ones.
- Draw the attention of a particular co-author by tagging them in comments.
- Compare different versions of the same document in real-time.
- Send text messages in the built-in chat.
- Chat with others via the Telegram plugin.
- Make high-quality audio and calls using the Jitsi plugin.
ONLYOFFICE Workspace v12.0 also lets you work with other users on remote web servers from WebDAV clients making it possible to co-edit documents and manage files.
Step 5: Work with Documents in other Modules
In ONLYOFFICE Workspace, the Documents module is closely integrated with other modules, which allows you to make things easier and boost your productivity.
If you work with projects in the Projects module, you can directly attach the required documents stored in the Documents module. You just create a task or a discussion in a project and add the documents you need for successful completion.
In case you set up the ONLYOFFICE Mail Server, you will have the opportunity to attach documents, spreadsheets, presentations, and fillable forms to your emails. Another useful feature is the ability to send files directly by email using the context menu in the Documents module, which is time-saving in some cases.
Apart from the Projects and Mail modules, the Documents module is also connected with the built-in CRM system where you can attach files to the customer profiles.
Conclusion
Using ONLYOFFICE Workspace, you can easily build a fully-functional collaborative office with document collaboration and document management features on your Linux server. The best news is that all this can be done at no cost, thanks to the availability of the free Community Edition.