Zabbix is a free, open-source, enterprise-grade, fully-featured, flexible, extensible and distributed monitoring software, which is used to monitor an entire IT infrastructure, services, applications, and server resources. Zabbix is one of the most popular open-source monitoring solutions on the globe, that monitors various parameters of a computer network and the health and integrity of servers.
It is widely used for features such as a flexible notification mechanism that allows users to configure e-mail based alerts for virtually any event; this allows for fast reaction to server problems. It also features an excellent reporting and data visualization tool based on the stored data.
Importantly, all reports and statistics collected by Zabbix, plus configuration parameters, are accessed through a web-based frontend. This means you can monitor your systems from any location.
Requirements
Before we start, make sure that the following requirements have been satisfied:
- RHEL 8 with Minimal Installation
- RHEL 8 with RedHat Subscription Enabled
- RHEL 8 with Static IP Address
This tutorial will focus on how to install latest version of Zabbix 4.2 Server on RHEL 8 with MySQL/MariaDB database to store data, PHP and Apache Web Server as the mainly web interface.
Step 1: Installing Apache and PHP Packages
1. To begin with, you need to enable the EPEL 8 repository which contains some of the dependencies for Zabbix. Then install the Apache web server which is provided by the HTTPD package, PHP interpreter, PHP-FPM (PHP FastCGI Process Manager) and other required modules as follows.
# dnf install https://dl.fedoraproject.org/pub/epel/epel-release-latest-8.noarch.rpm
# dnf install httpd php php-fpm php-mysqlnd php-ldap php-bcmath php-mbstring php-gd php-pdo php-xml
2. When the installation is complete, start the HTTPD and PHP-FPM services for now, then enable it to automatically start at system startup (after every reboot) and check if it is up and running as follows.
# systemctl start httpd
# systemctl enable httpd
# systemctl status httpd

# systemctl start php-fpm
# systemctl enable php-fpm
# systemctl status php-fpm
Step 2: Install MariaDB Database and Library
Zabbix uses a MySQL database to store its data. However, on RHEL 8, MariaDB database is supported by default, as a drop-in replacement for MySQL.
3. To install MariaDB server, client and library packages use the following command.
# dnf install mariadb mariadb-server mariadb-devel
4. Next, start the MariaDB service for now, then enable it to automatically start at system startup and make sure that it is up and running by checking its status as shown.
# systemctl start mariadb
# systemctl enable mariadb
# systemctl status mariadb
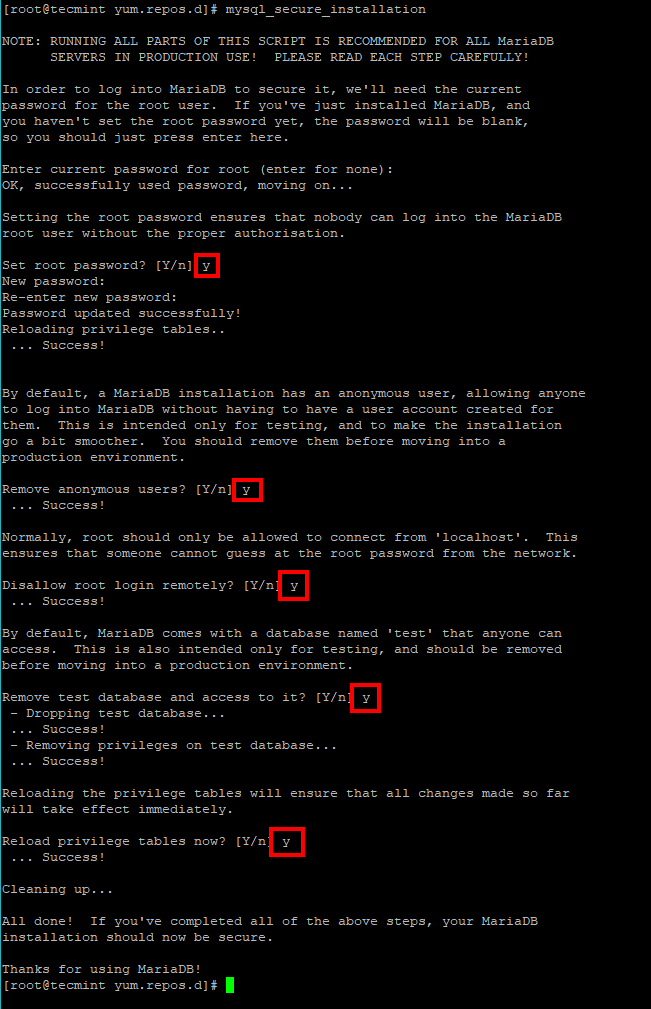
5. Once the MariaDB database server is up and running, you need to secure it by running the mysql_secure_installation script, which helps you to implement some useful security recommendations such as removing anonymous users, disabling root login remotely, removing test database and access to it, and applying all changes.
# mysql_secure_installation
Then you will be prompted to determine which actions to perform as shown in the following screenshot.
6. Now log in to the database to gain access to the MariaDB shell to create a database for Zabbix as shown.
# mysql -uroot -p
MariaDB [(none)]> create database zabbix character set utf8 collate utf8_bin;
MariaDB [(none)]> grant all privileges on zabbix.* to zabbix@localhost identified by 'password';
MariaDB [(none)]> quit;
Step 3: Installing and Configuring Zabbix Packages
7. Once everything installed, now its time to install the latest version of Zabbix packages from the Zabbix Official Repository as shown.
# rpm -Uvh https://repo.zabbix.com/zabbix/4.2/rhel/8/x86_64/zabbix-release-4.2-2.el8.noarch.rpm
# dnf clean all
8. Then install the Zabbix server, web frontend, agent packages with the following command.
# dnf -y install zabbix-server-mysql zabbix-web-mysql zabbix-agent
9. When the installation finishes, you need to import the initial schema and data into the Zabbix database which you created in the previous step (note that you will be prompted to enter the Zabbix database user’s password).
# zcat /usr/share/doc/zabbix-server-mysql*/create.sql.gz | mysql -u zabbix -p zabbix
10. Now configure the Zabbix server daemon to use the database you created for it by editing the file /etc/zabbix/zabbix_server.conf.
# vim /etc/zabbix/zabbix_server.conf
Search and update the values of the following configuration options to reflect your database settings (uncomment options that are commented out and set their correct values) as follows.
DBHost=localhost
DBName=zabbix
DBUser=zabbix
DBPassword=database-passwod-here
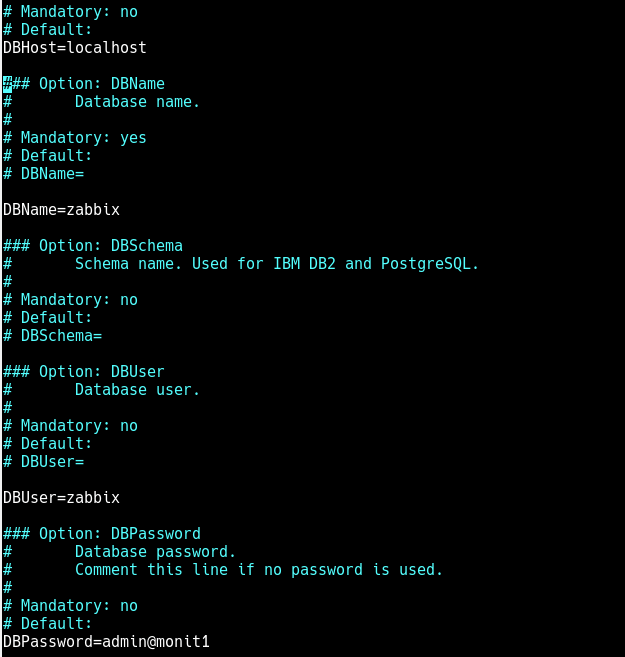
Save the changes in the file and close it.
11. Next, configure PHP for the Zabbix frontend by edtting the file /etc/php-fpm.d/zabbix.conf using your favorite text-based editor.
# vim /etc/php-fpm.d/zabbix.conf
Look for the following line and uncomment it (by removing the “;” character at the start of the line) to set the right timezone for your server.
php_value date.timezone Africa/Kampala
12. At this point you need to restart the HTTPD and PHP-FPM services to effect the recent changes before starting the Zabbix service.
# systemctl restart httpd php-fpm
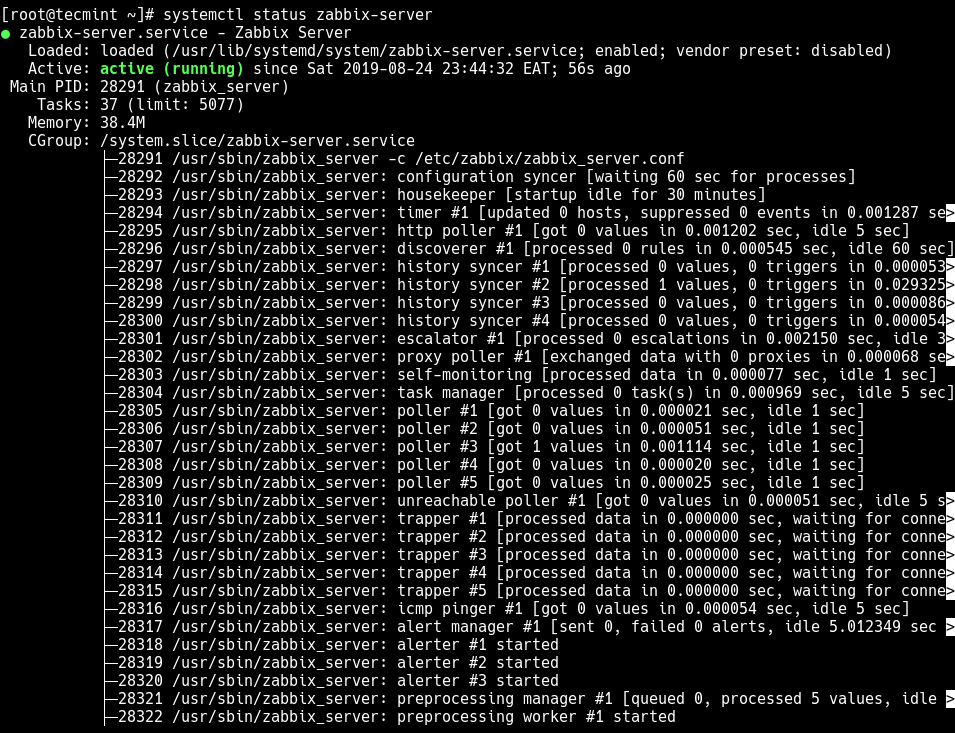
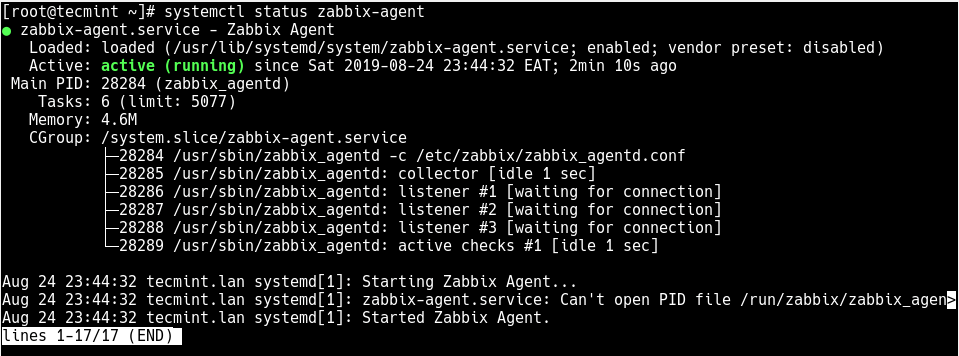
13. Then start the Zabbix server and agent processes and enable them to auto-start at system boot as follows. Note that this agent is used on the localhost. To monitor remote servers, you need to install agents on them and configure the server to query them.
# systemctl start zabbix-server zabbix-agent
# systemctl enable zabbix-server zabbix-agent
Besides, check if the Zabbix server is up and running fine using the following command.
# systemctl status zabbix-server
Also, ensure that the agent process is up and running.
# systemctl status zabbix-agent
Step 4: Installing and Configuring Zabbix Web Frontend
14. With the Zabbix server up and running, open a web browser and point it to the following URL to access the web frontend installer.
http://SERVER_FQDM/zabbix
OR
http://SERVER_IP/zabbix
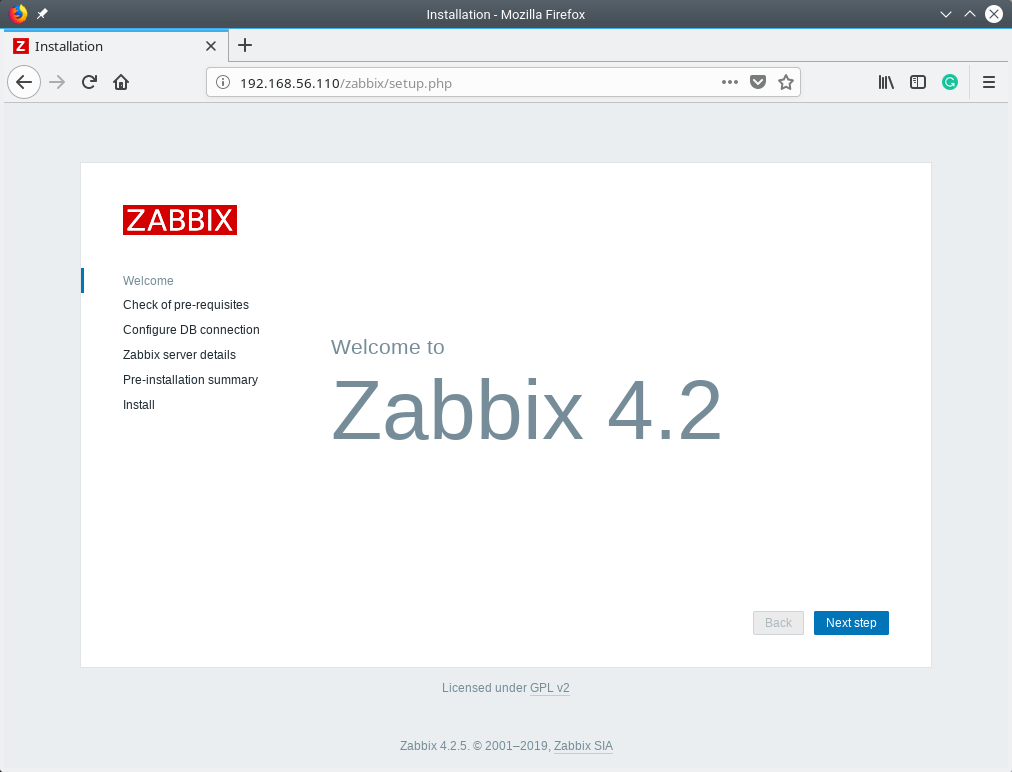
After pressing enter, you will be re-directed to the Welcome page as shown in the following screenshot. Click Next step to proceed.
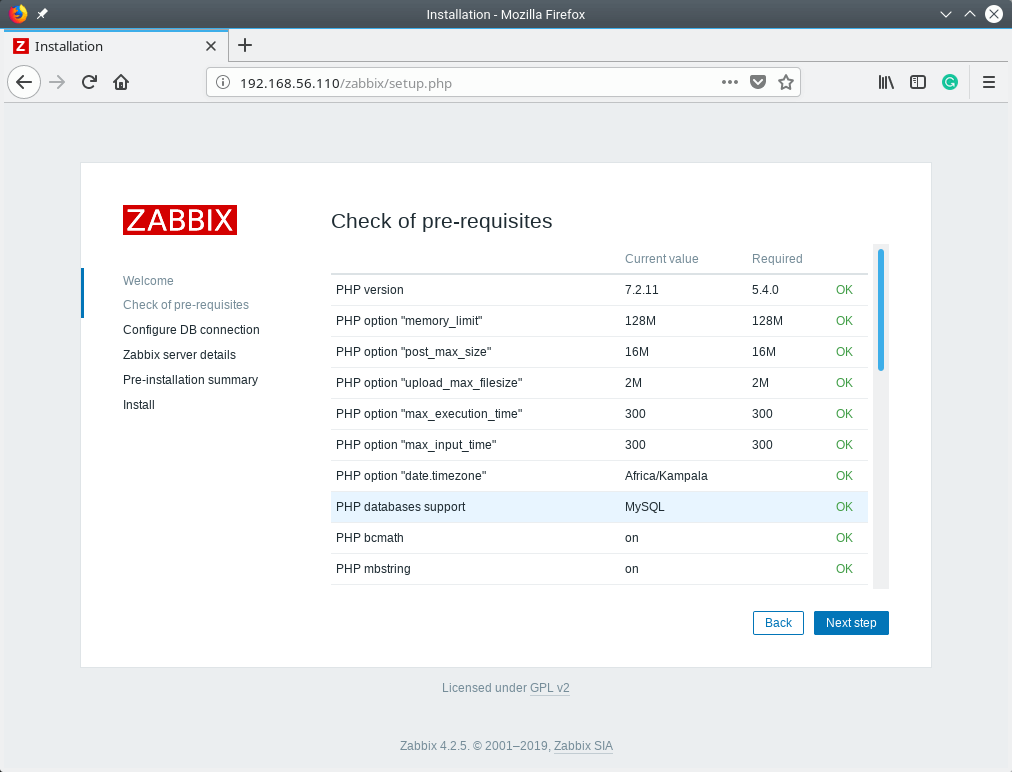
15. Next, the installer will check of pre-requisites. If everything is OK (scroll down to view more requirements), click Next step to proceed.
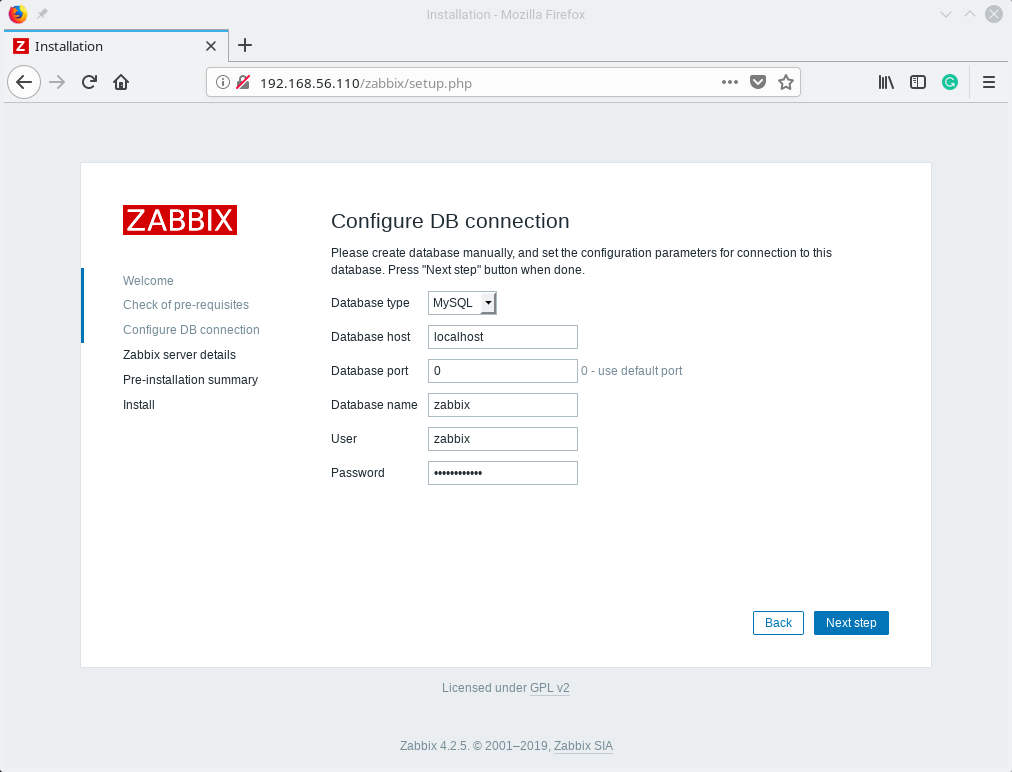
16. Then configure Zabbix database connection (note it is the database you created in Step 2 above). Select the database type, enter the database host, database port, database name and database user and the user’s password.
17. Next, provide the Zabbix server details (the hostname or host IP address and port number of the Zabbix server). You can also set a name for the installation which is optional. Click Next step to view the pre-installation summary.

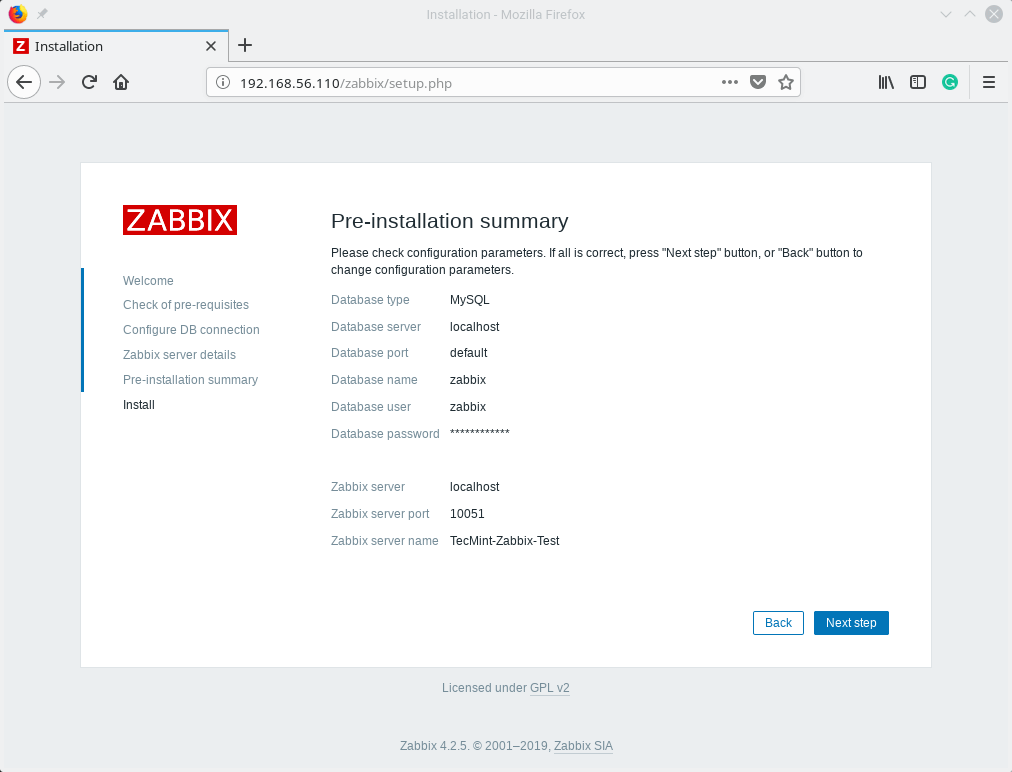
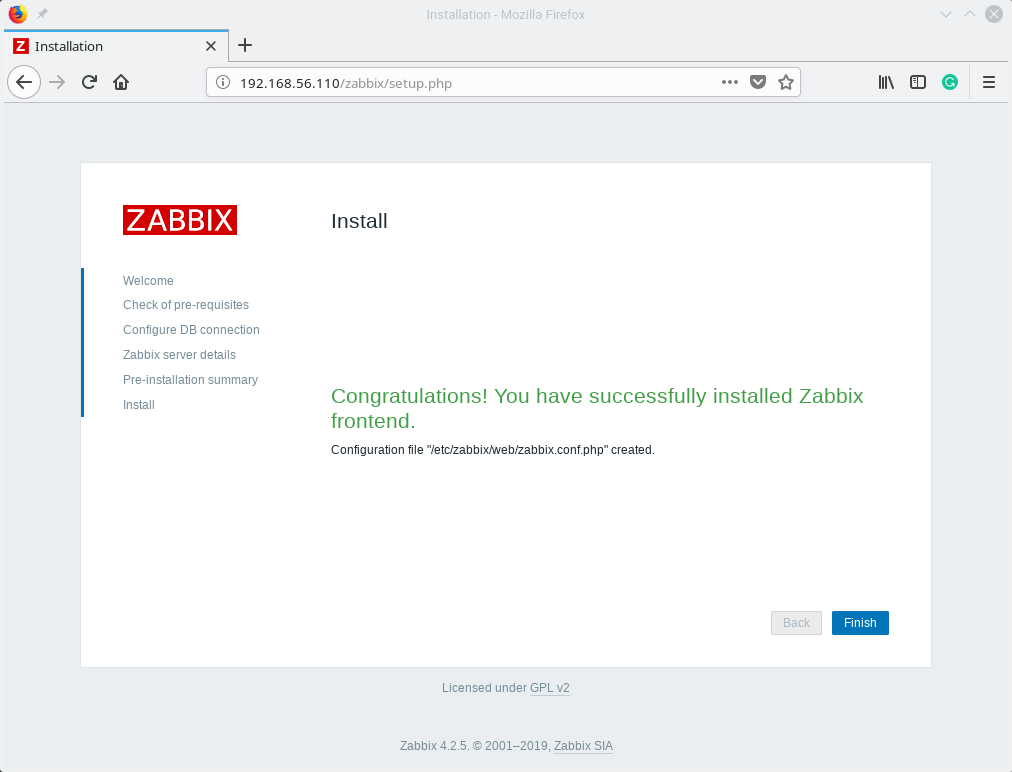
18. From the pre-installation summary page, click Next step to create the frontend configuration file, based on the information displayed.
19. To complete the configuration and installation of the Zabbix frontend interface, click Finish and the installer will then re-direct you to the login page as shown in the next screenshot.
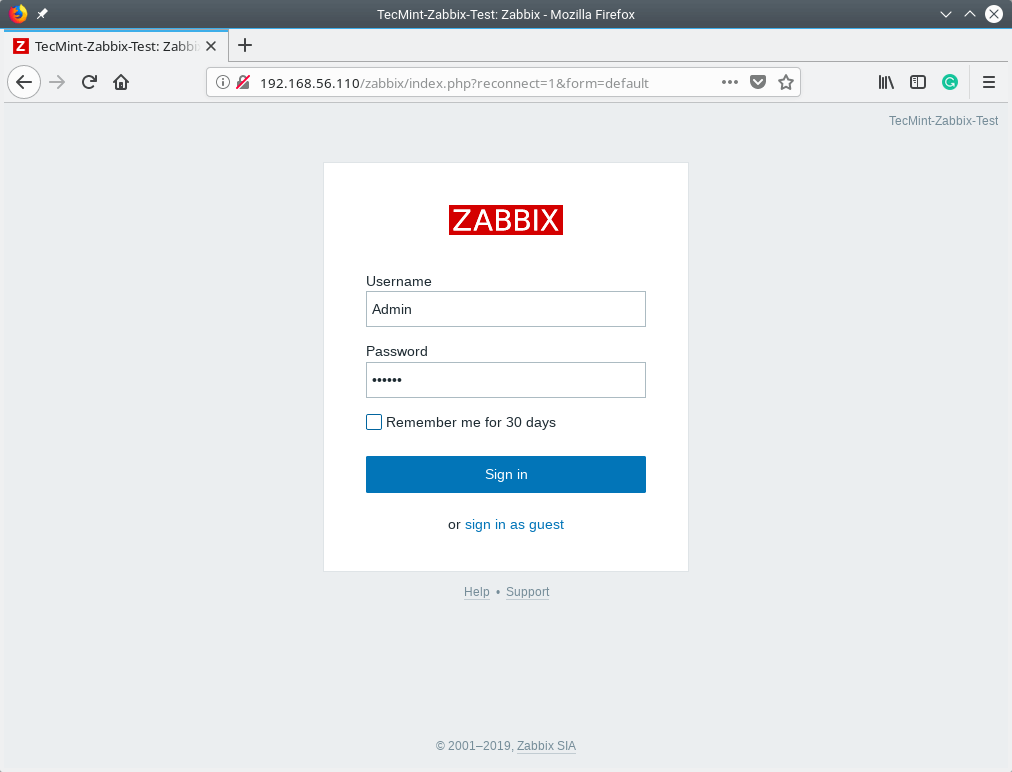
20. At the login page, use the username Admin and password zabbix to log in as shown in the following screenshot.
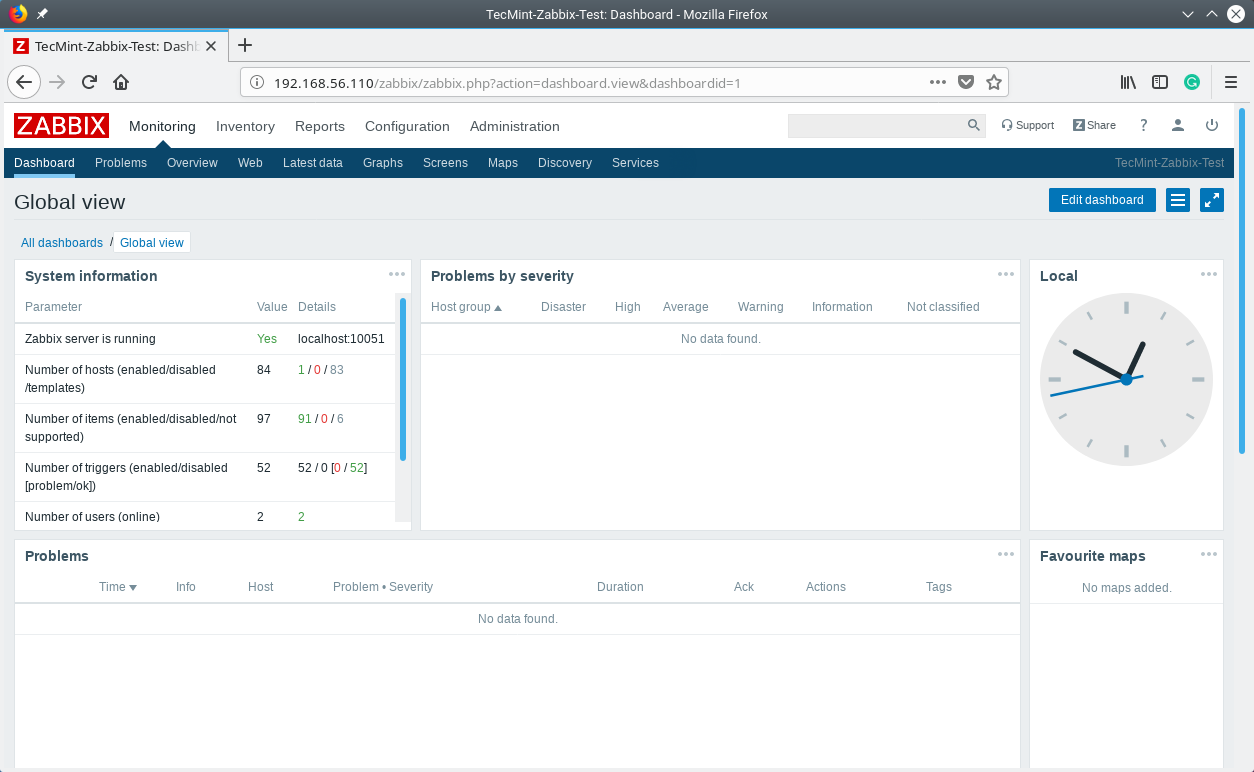
21. After a successful log on, you will land at the Zabbix web frontend’s Monitoring Dashboard’s Global view which shows a sample of System information, local time and more.
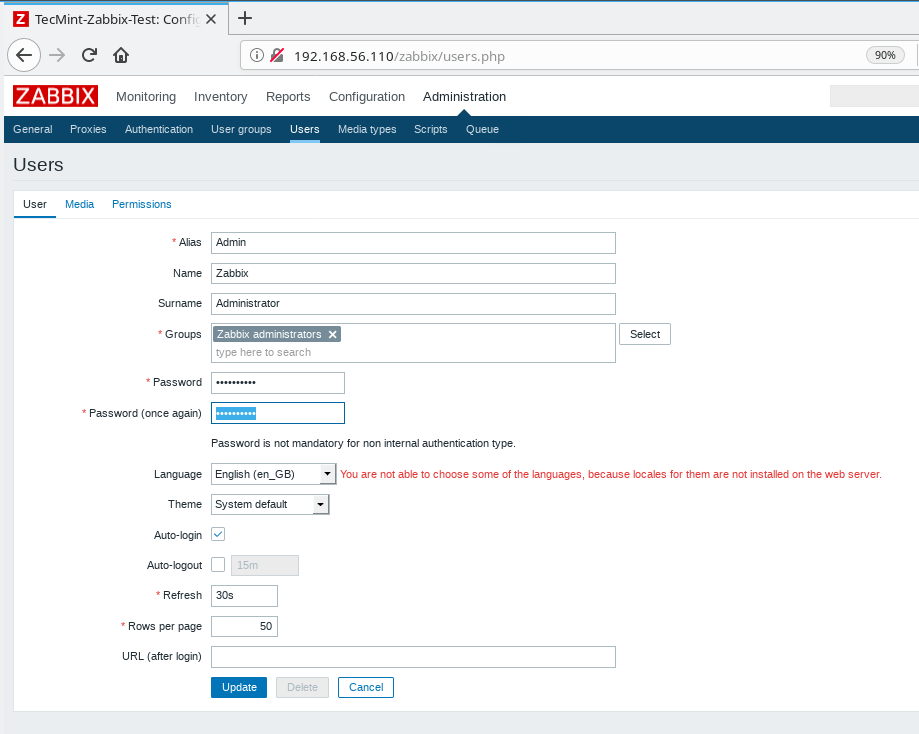
22. Last but not least, secure the Zabbix super administrator account by changing the default password. Go to Administration, then Users. In the list of users, under Alias, click on Admin to open the user’s details for editing.
Under the user details, look for the Password field and click Change password, enter a secure password and confirm it. Then click on Update to save the admin account new password.
Congratulations! You have successfully installed the latest version of Zabbix monitoring software on your RHEL 8 server. If you have any queries, reach us via the feedback form below and for more information, see the Zabbix documentation.


Step 3 Section 8 is incorrect. You have forgotten to install two items which are critical!
In particular the two modules zabbix-apache-conf and zabbix-sql-scripts.
So the next step will NOT work because there is no create.sql.gz file to upload to the database.