The tree is a tiny, cross-platform command-line program used to recursively list or display the content of a directory in a tree-like format. It outputs the directory paths and files in each sub-directory and a summary of a total number of sub-directories and files.
Read Also: dutree – A CLI Tool to Analyze Disk Usage in Coloured Output
The tree program is available in Unix and Unix-like systems such as Linux, as well as DOS, Windows, and many other operating systems. It features various options for output manipulation, from file options, sorting options, to graphics options, and support for output in XML, JSON and HTML formats.
In this short article, we will show how to use the tree command with examples to recursively list the contents of a directory on a Linux system.
Learn tree Command Usage Examples
The tree command is available on all if not most Linux distributions, however, if you do not have it installed by default, use your default package manager to install it as shown.
# yum install tree	 #RHEL/CentOS 7
# dnf install tree	 #Fedora 22+ and /RHEL/CentOS 8
$ sudo apt install tree	 #Ubuntu/Debian
# sudo zypper in tree 	 #openSUSE
Once installed, you can proceed further to learn the tree command usage with examples as shown below.
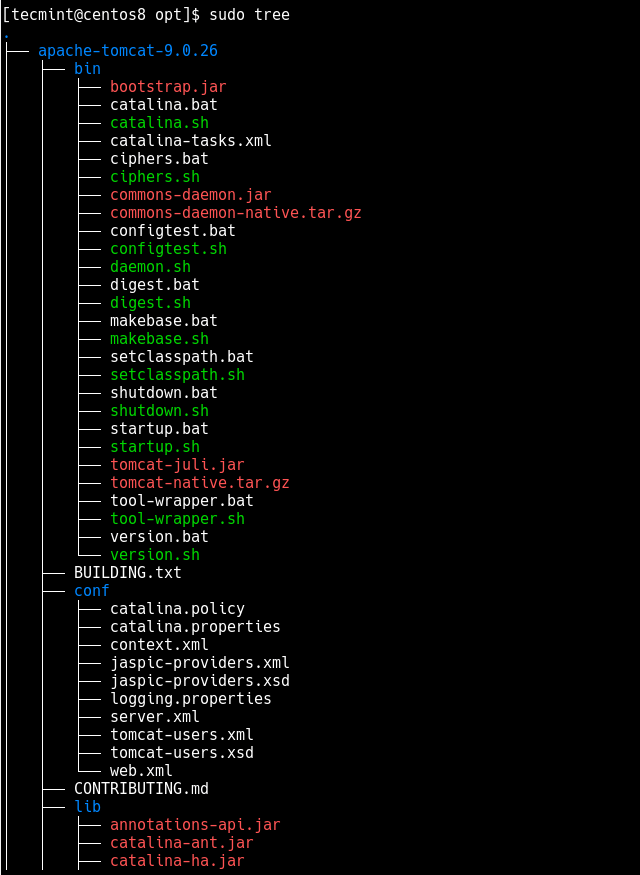
1. To list directory content in a tree-like format, navigate to the directory you want and run tree command without any options or arguments as follows. Remember to invoke sudo to run the tree in a directory that requires root user access permissions.
# tree
OR
$ sudo tree
It will display the contents of the working directory recursively showing sub-directories and files, and a summary of the total number of sub-directories and files. You can enable the printing of hidden files using the -a flag.
$ sudo tree -a
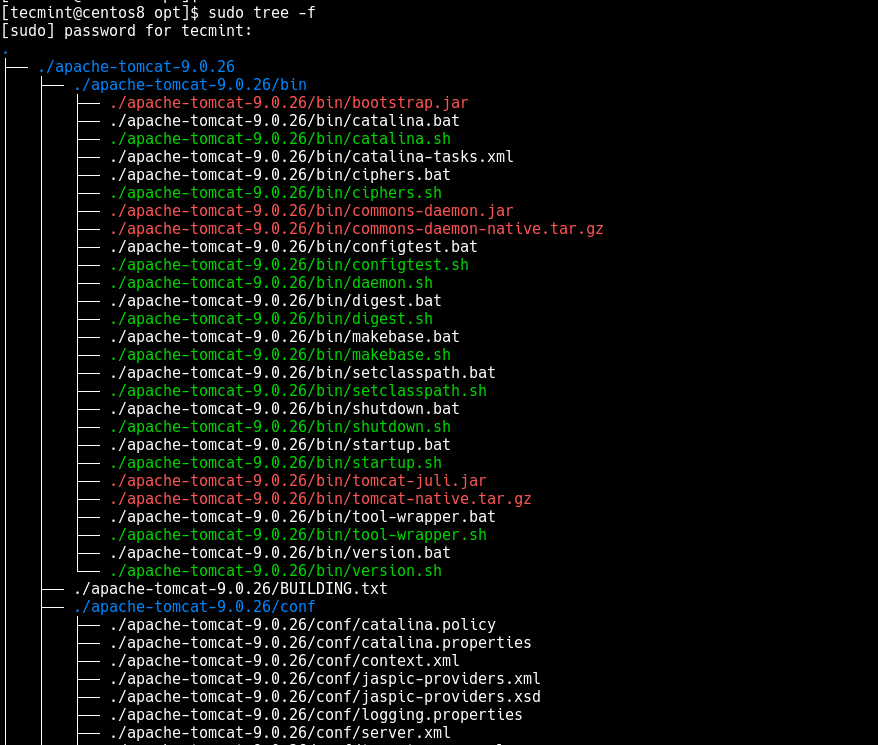
2. To list the directory contents with the full path prefix for each sub-directory and file, use the -f as shown.
$ sudo tree -f
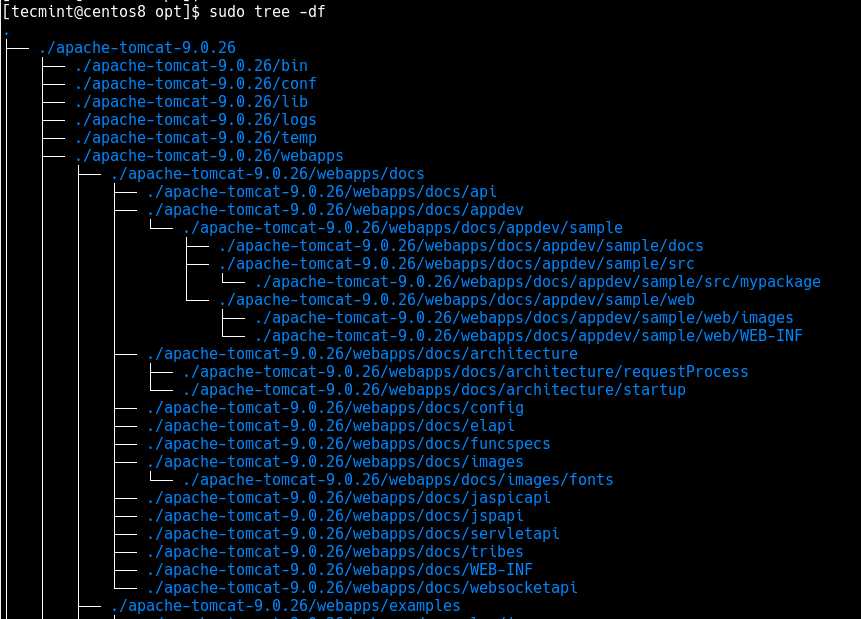
3. You can also instruct tree to only print the subdirectories minus the files in them using the -d option. If used together with the -f option, the tree will print the full directory path as shown.
$ sudo tree -d
OR
$ sudo tree -df
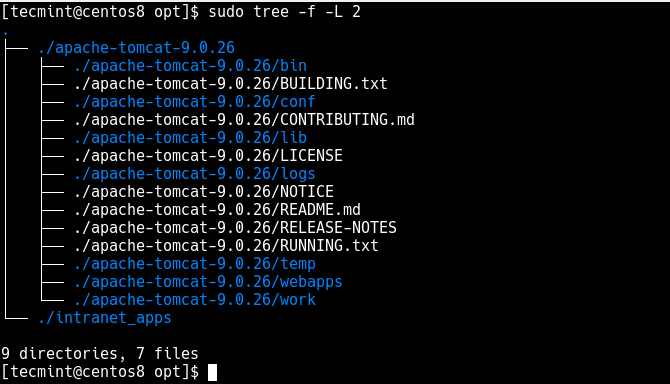
4. You can specify the maximum display depth of the directory tree using the -L option. For example, if you want a depth of 2, run the following command.
$ sudo tree -f -L 2

Here is another example about setting maximum display depth of the directory tree to 3.
$ sudo tree -f -L 3
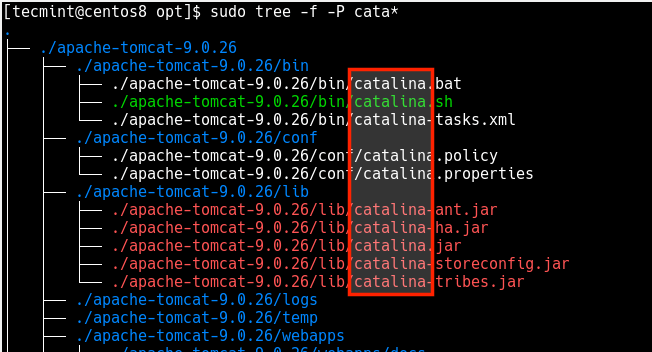
5. To display only those files that match the wild-card pattern, use the -P flag and specify your pattern. In this example, the command will only list files that match cata*, so files such as Catalina.sh, catalina.bat, etc. will be listed.
$ sudo tree -f -P cata*
6. You can also tell the tree to prune empty directories from the output by adding the --prune option, as shown.
$ sudo tree -f --prune
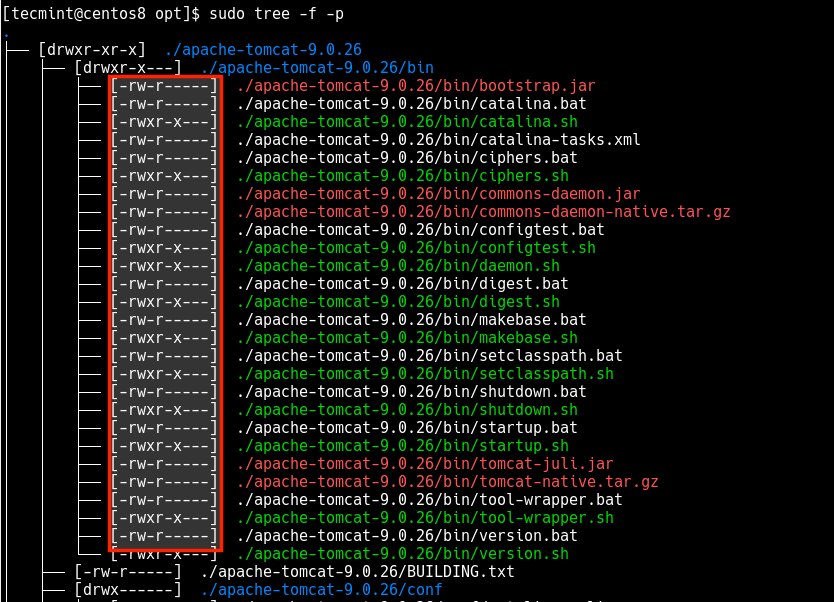
7. There are also some useful file options supported by tree such as -p which prints the file type and permissions for each file in a similar way as the ls -l command.
$ sudo tree -f -p
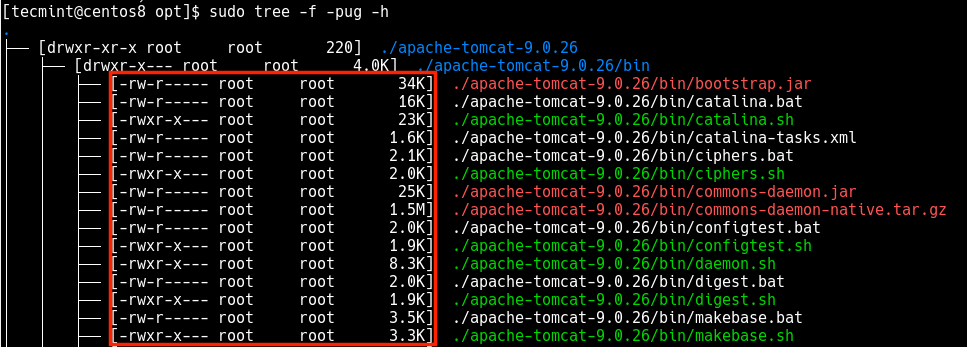
8. Besides, to print the username (or UID if no username is available), of each file, use the -u option, and the -g option prints the group name (or GID if no group name is available). You can combine the -p, -u and -g options to do a long listing similar to ls -l command.
$ sudo tree -f -pug

9. You can also print the size of each file in bytes along with the name using the -s option. To print the size of each file but in a more human-readable format, use the -h flag and specify a size letter for kilobytes (K), megabytes (M), gigabytes (G), terabytes (T), etc..
$ sudo tree -f -s
OR
$ sudo tree -f -h
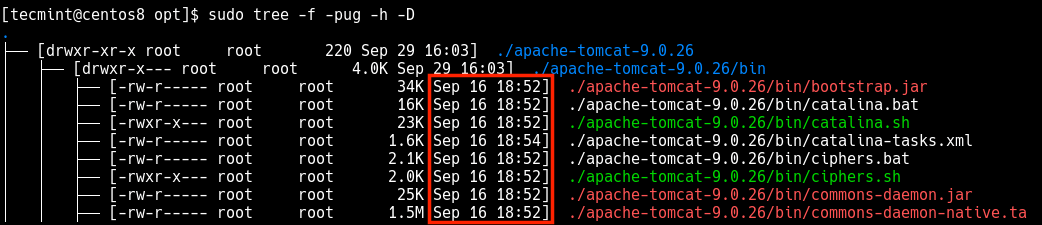
10. To display the date of the last modification time for each sub-directory or file, use the -D options as follows.
$ sudo tree -f -pug -h -D
11. Another useful option is --du, which reports the size of each sub-directory as the accumulation of sizes of all its files and subdirectories (and their files, and so on).
$ sudo tree -f --du
12. Last but not least, you can send or redirect the tree’s output to filename for later analysis using the -o option.
$ sudo tree -o direc_tree.txt
That’s all with the tree command, run man tree to know more usage and options. If you have any questions or thoughts to share, use the feedback form below to reach us.


Hi,
Thanks for the article.
Examples for “tree -f -L X” are mixed. The output of “tree -f -L 3” is the one of “tree -f -L 2“.
Regards,
Aaron, the tree command will not run on Centos 7, can you confirm what distro/version of Linux you’re using?
All good now after rerunning the ‘
yum install tree‘ command.@Daniel
Ok, it’s good that you discovered how to get it working on CentOS. Thanks for the feedback.
In openSUSE command for install is:
@Gustavo,
Thanks, corrected the command in the article..