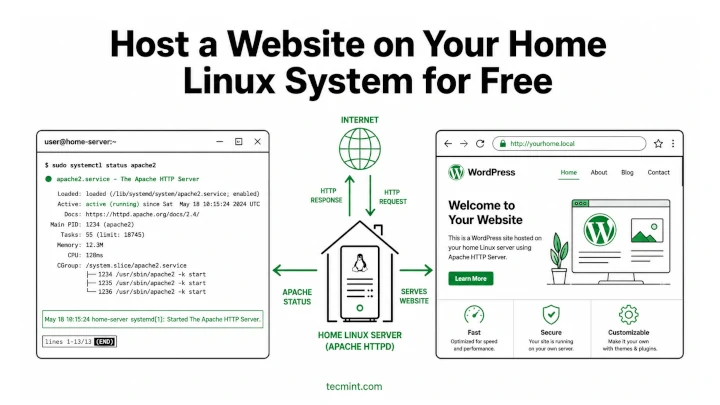
In this article, you’ll learn how to monitor your Apache web server’s load and track requests using the mod_status module, compatible with all modern Linux distributions such as RHEL, Fedora, and Ubuntu.
What is mod_status?
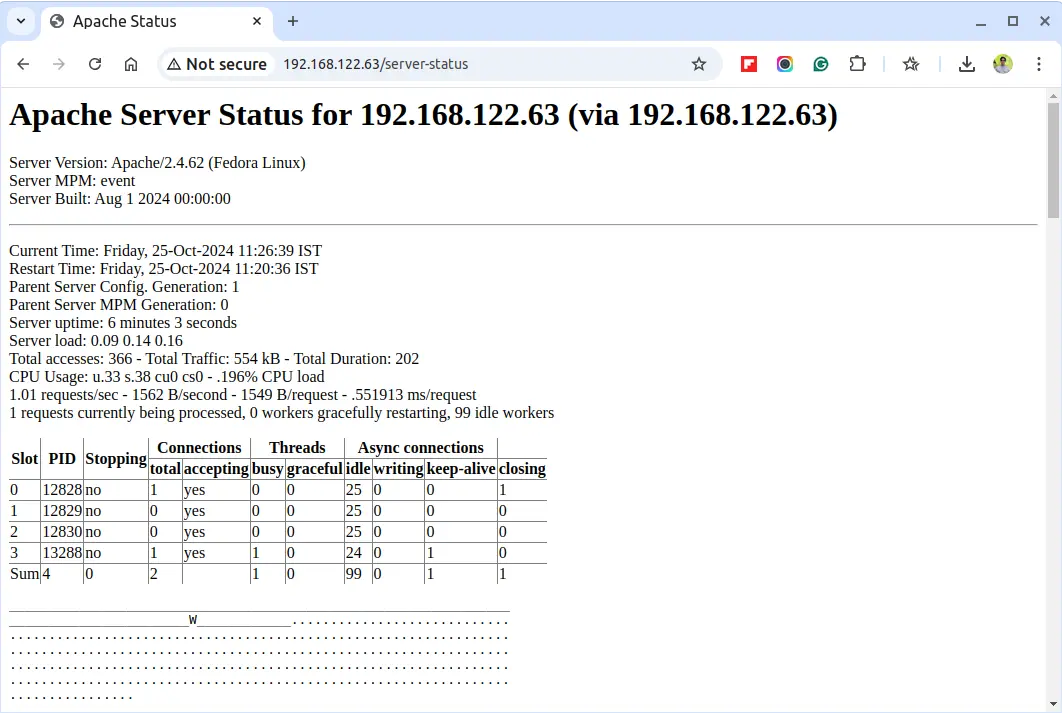
mod_status is an Apache module that provides real-time information on web server load and current connections, accessible through an HTML interface that can be viewed in a browser.
This interface displays server statistics, including:
- Total number of requests received
- Total bytes served
- CPU usage
- Server load and uptime
- Traffic stats
- Active vs. idle workers
- Process IDs of connected clients and much more.
For a live example, check out the official Apache status page at Apache Project Status Page.
Testing Environment
The steps here use the following configuration:
- Operating System: Ubuntu 22.04 / RHEL 9
- Application: Apache HTTP Server
- Document Root: /var/www/html
- Apache Config File:
/etc/apache2/apache2.conf(Debian/Ubuntu) or/etc/httpd/conf/httpd.conf(CentOS/RHEL) - Default HTTP Port: 80 TCP
Ensure Apache is installed and running on your system. If needed, refer to our guide on setting up an Apache server.
Enabling mod_status in Apache
For most modern distributions, mod_status is enabled by default and you can confirm this by running the following command.
ls /etc/httpd/modules | grep mod_status      # RHEL-based
apachectl -M | grep status                   # Debian-based
Next, open the Apache configuration file.
sudo vi /etc/httpd/conf/httpd.conf    # RHEL-based
sudo nano /etc/apache2/apache2.conf   # Debian-based
To access the server status, add or modify the following section in your Apache config file:
<Location /server-status>
    SetHandler server-status
    Require local
    Require ip YOUR_IP_ADDRESS
</Location>
To allow remote access, replace YOUR_IP_ADDRESS with your actual IP address.
If you’re using virtual hosts, repeat this configuration within each relevant <VirtualHost> section.
<VirtualHost *:80>
    DocumentRoot /var/www/html
    ServerName example.com
    <Location /server-status>
        SetHandler server-status
        Require ip YOUR_IP_ADDRESS
    </Location>
</VirtualHost>
To get more detailed metrics such as CPU load and requests per second, you can enable ExtendedStatus by adding this line in your config file.
ExtendedStatus On
After making changes, restart the Apache service to apply them:
sudo apachectl configtest
sudo systemctl restart httpd    # RHEL-based
sudo systemctl restart apache2  # Debian-based
You can now access your server’s status page by navigating to:
http://YOUR_SERVER_IP/server-status
To have it refresh automatically every few seconds, append ?refresh=5 (or any number of seconds) to the URL:
http://YOUR_SERVER_IP/server-status?refresh=5
Check Apache Server Status from Command-line
To check the Apache server status from the command line, you can use the lynx – a text-based web browser.
sudo yum install lynx     # RHEL-based
sudo apt install lynx     # Debian-based
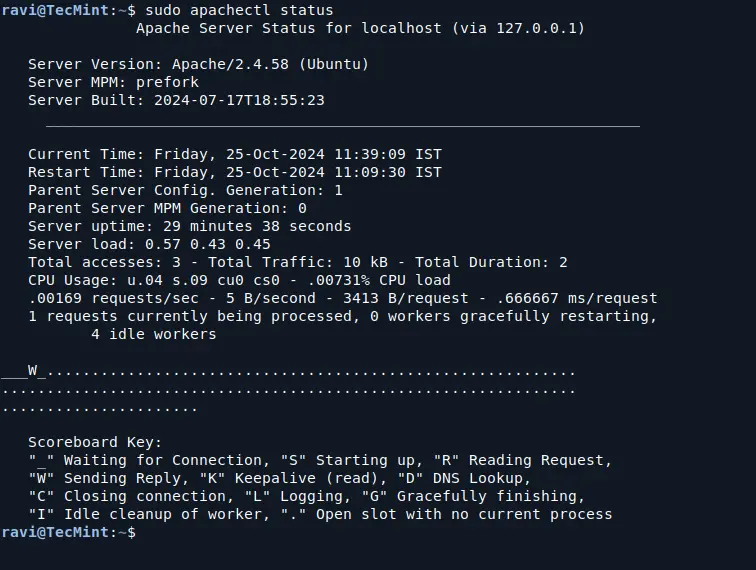
After installing, try running the apachectl command to check the Apache server status:
sudo apachectl status
This will provide a brief overview of the server’s status, including the number of requests processed, server uptime, and other important metrics.
For a more detailed view, you can use the fullstatus option:
sudo apachectl fullstatus
Conclusion
The mod_status module in Apache is a powerful, easy-to-use monitoring tool for understanding your server’s load and performance in real-time. This helps you proactively troubleshoot issues and keep your server optimized.